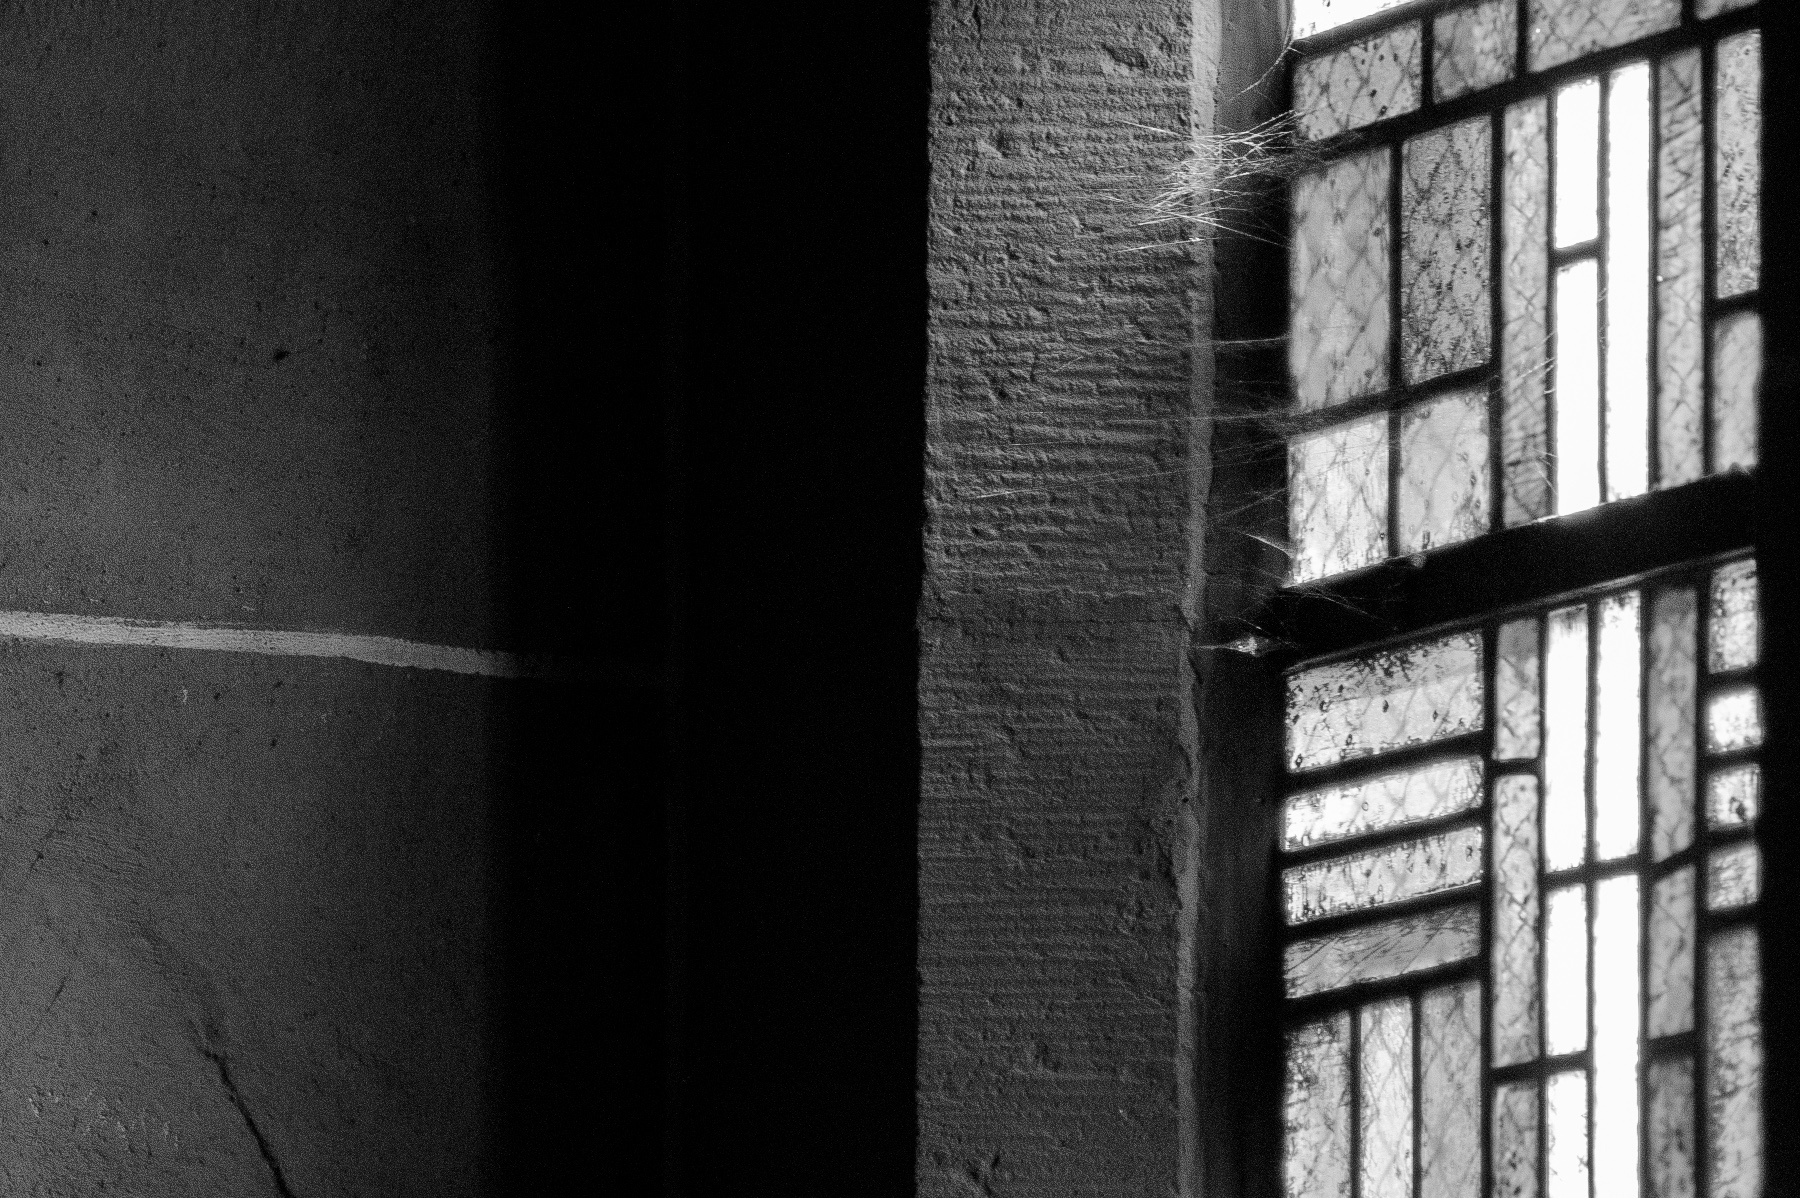
When I heard the rumors about a B&W-only digital M camera body a few months ago, I was a bit skeptical. Who would want such a thing when it is so easy to convert M9 images to B&W in a matter of seconds with LR, Silver Efex or (insert favorite image processing software here)? I chalked it up to just being one of those far-fetched rumors that never materializes into a real product. As May 10 approached, the rumors were still going strong for this B&W M9. Leica’s none-too-subtle hints tended to support it as well – the name of the event, Das Wesentliche (translation: The Essentials), the B&W image promoting the event, the avant-garde location of Berlin. But, I resisted drawing any conclusion until the actual announcement.
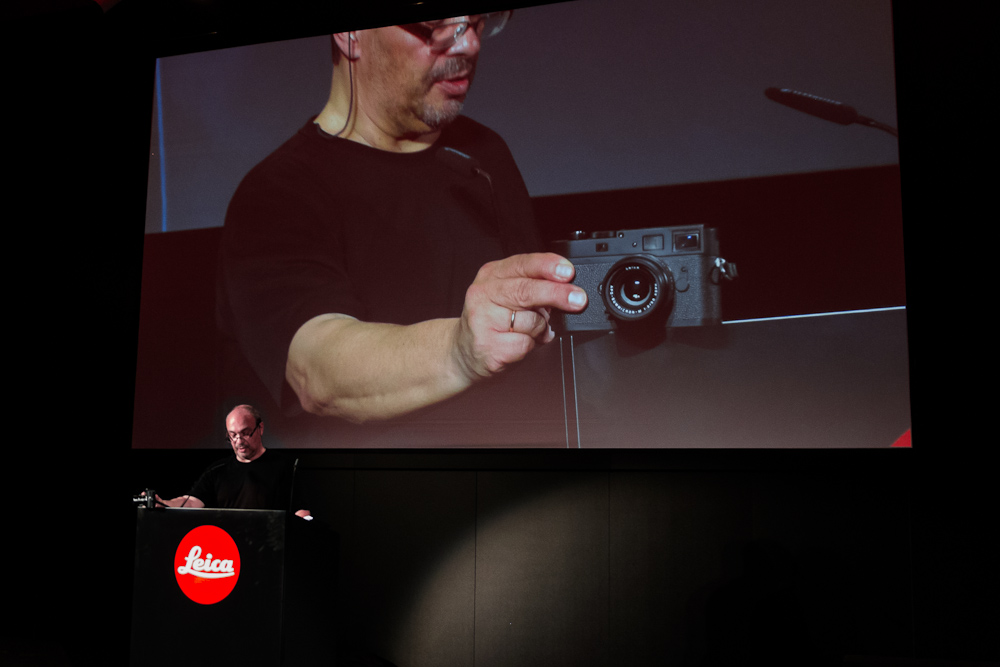
Dr. Kaufmann announcing the M Monochrom in Berlin
Fast forward to a couple weeks ago. So, there I was, standing amongst a sea of people in C/O Berlin as Dr. Kaufmann proudly presented the newest member of the M family: the Leica M Monochrom. I guess it wasn’t a rumor after all, and I think quite a lot of other people held the same sentiment at that moment.
Becoming a believer
As the presentation rolled on and more details were revealed, a B&W M camera started to make more sense to me. After speaking with M product manager Jesko von Oeynhausen at the event, I’d go so far to say that it was beginning to sound like a great idea. The enormous prints on the walls were from the M Monochrom and they looked unbelievably good. Visceral, emotional and dripping with detail and nuance. In a word, they were “real” B&W images, not a reasonable facsimile. And that, especially in a digital age, is saying something. Of course, it didn’t hurt that they were taken by noted Magnum photographer Jacob Aue Sobol.
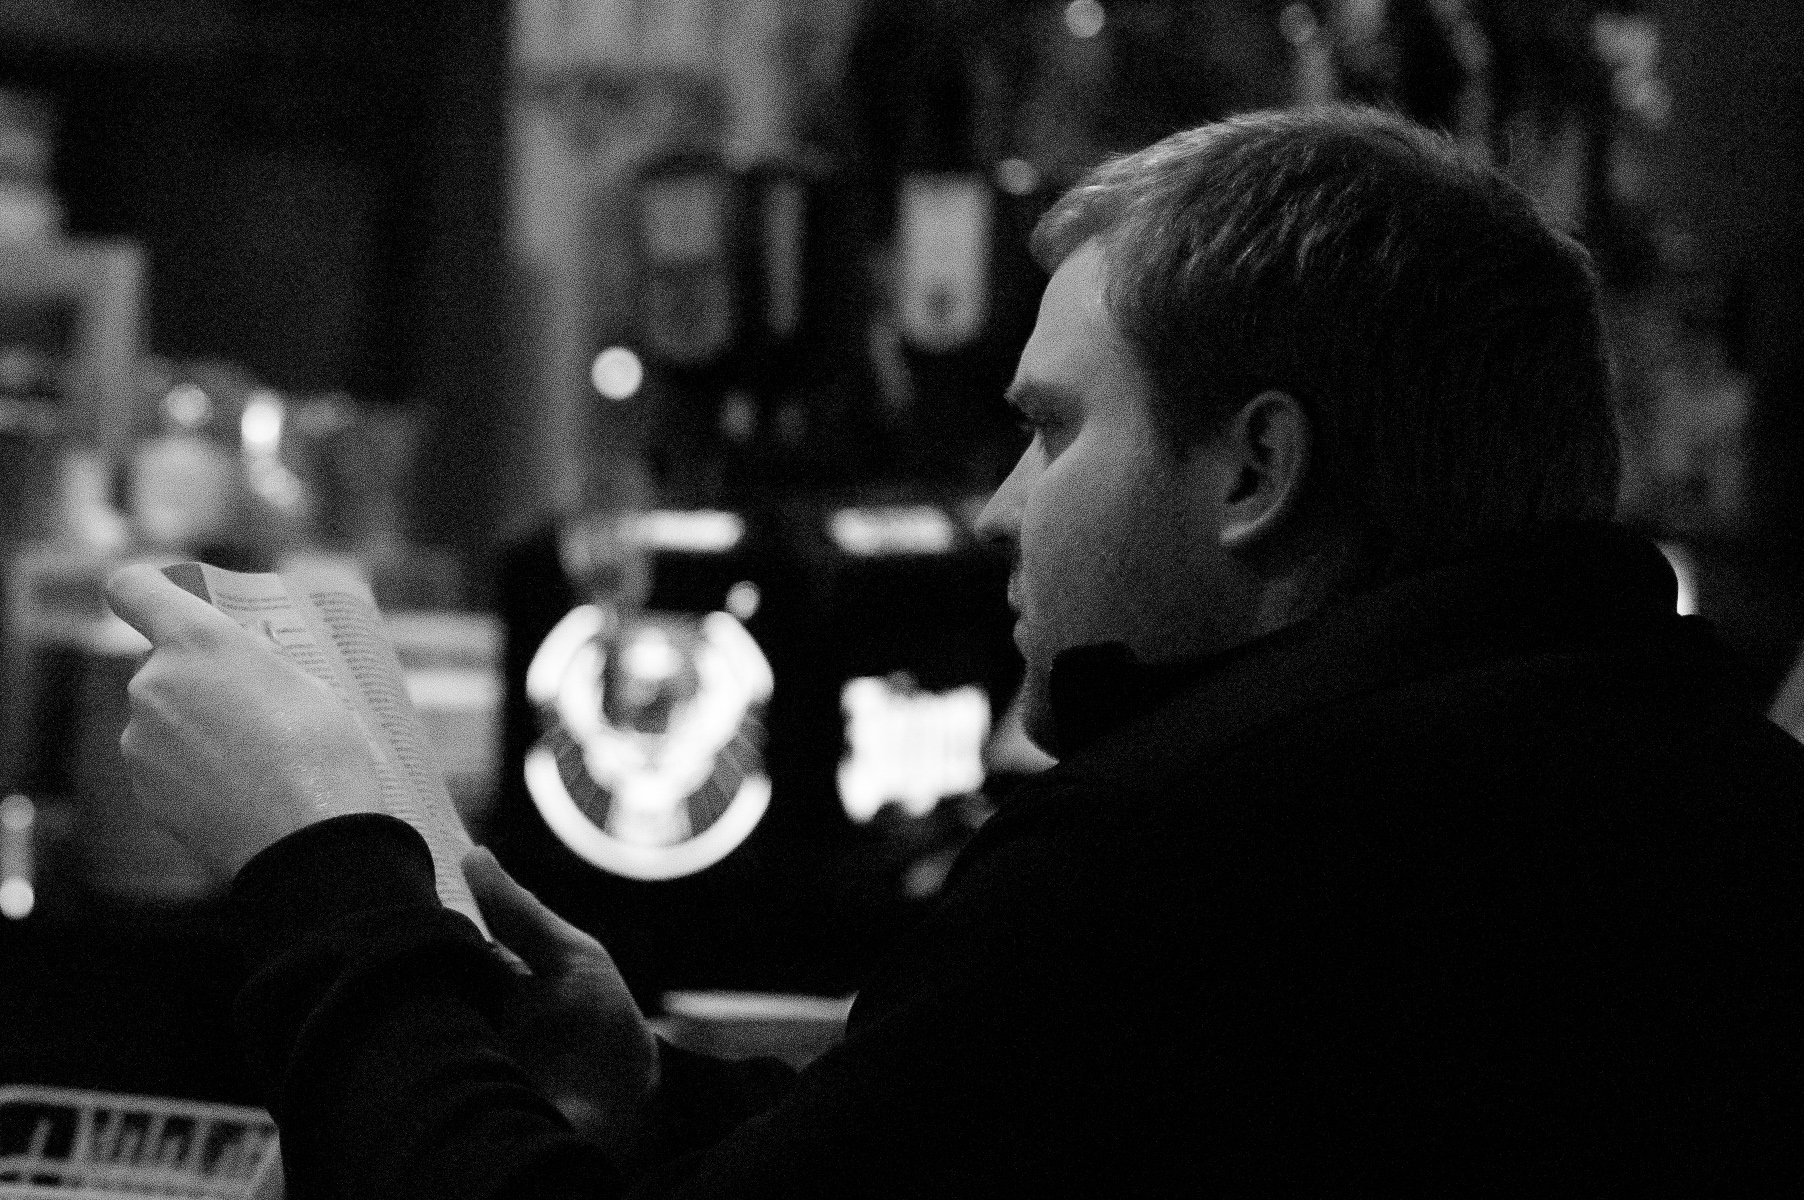
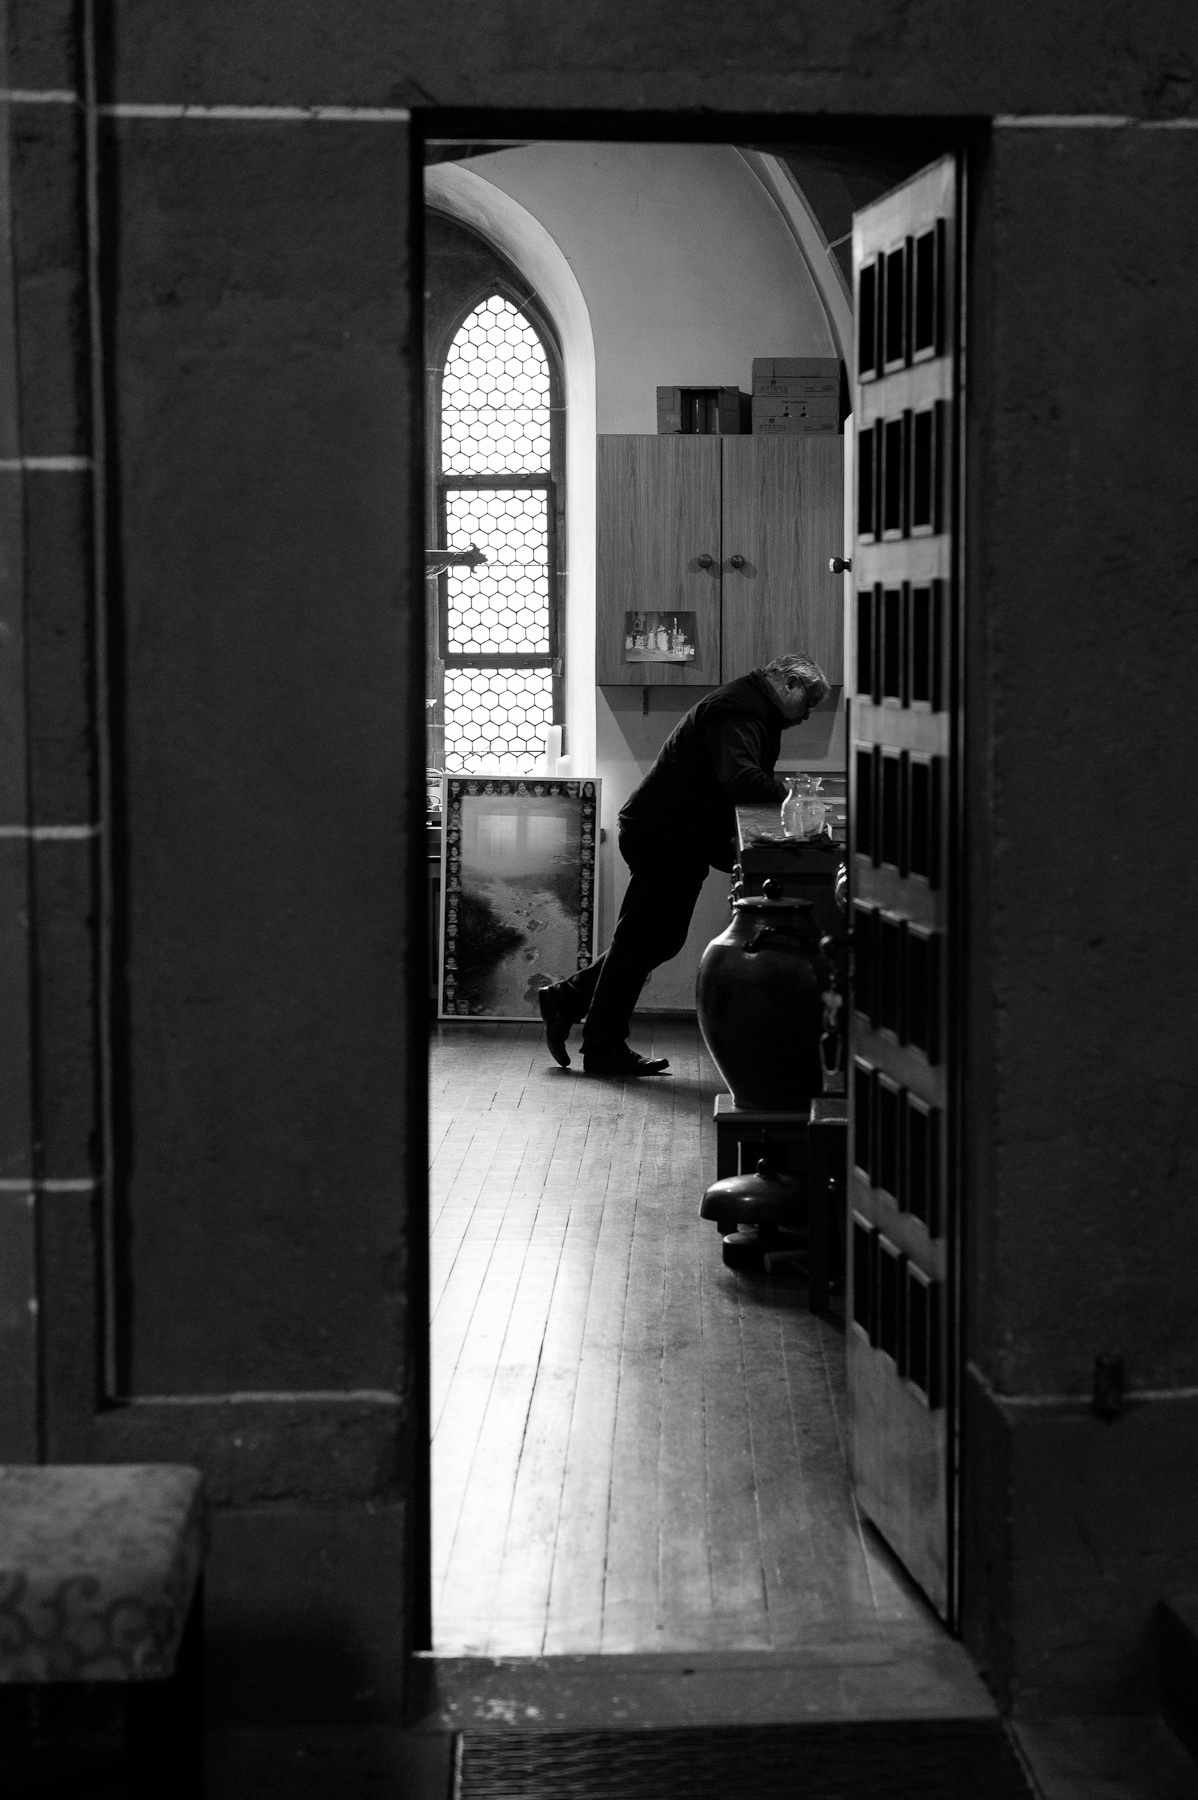
Meeting with Jesko von Oeynhausen
The morning following the big May 10 event, I had a one-on-one interview with Jesko in a much quieter setting. I had already gotten a lot of good information from him the night before, but this was a perfect opportunity to explore a few other details.
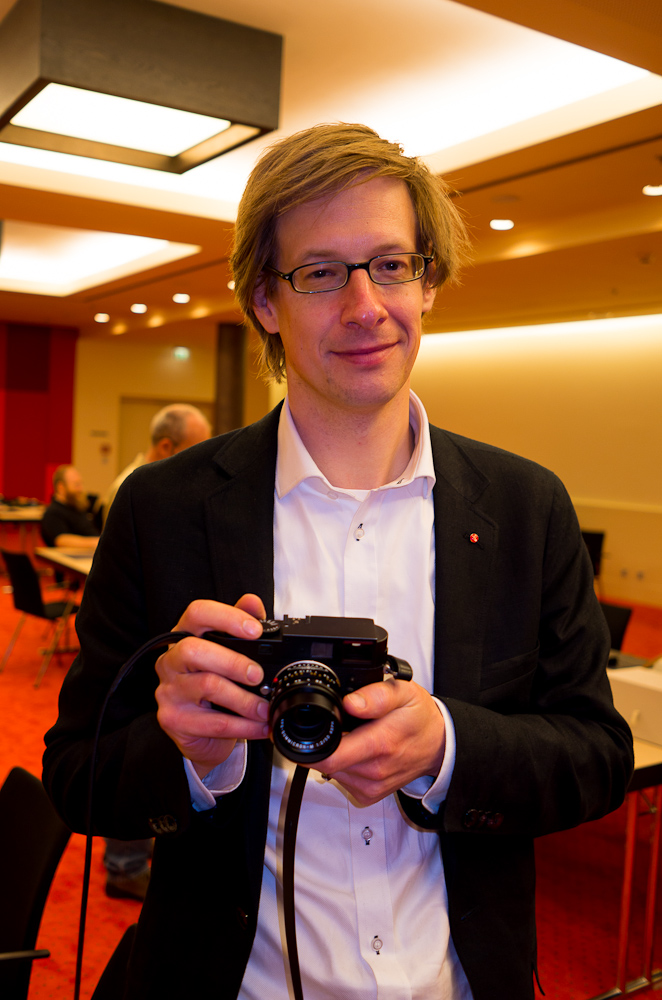
M Product Manager Jesko von Oeynhausen
It was obvious that he was excited about the M Monochrom, codenamed “Henri” after legendary Leica photographer Henri Cartier-Bresson, and appeared to be quite pleased with the previous night’s unveiling. Jesko showed me a few comparison images on his laptop, which frankly blew me away. First, I was shown a B&W conversion from an M9 file along with a 100% crop, which was what you’d expect – excellent. Then, he advanced to a file and crop from the M Monochrom. Wow! I asked to see it again. Okay, just one more time. I honestly didn’t expect so much of a difference. The increase in detail was astonishing, especially the crispness of the in-focus areas. There was more shadow detail, more texture, no softness or jaggedness around any edges. If I wasn’t convinced before, I was then. Let’s just say I was anxious to try the M Monochrom for myself.
A quick test over dinner
Later that night I got my chance. I was able to shoot a handful of images with the M Monochrom thanks to Sean Reid who lent me his review sample. Before our dinner arrived I played a little bit with higher ISOs. What I found upon quick inspection later that night was that ISO 2500 was virtually noise free with just a hint of tightly patterned monochrome (gee, what a surprise there) noise in the darker tones. I’d venture to say it looked like ISO 320 on the M9, while ISO 1600 looked like ISO 160 on the M9 – perfect. ISO 6400 definitely had some more noticeable shadow noise , but nothing that took away from the image – similar to ISO 1250 on the M9.
Trying out higher ISO settings
Basically, the pattern that was emerging was that the M Monochrom had about 2.5 – 3 stops better ISO performance, which I thought was pretty interesting. I expected the M Monochrom to have better light transmission without the CFA (color filter array) in front of the sensor. Shoot through a red filter for B&W and you’ll know exactly what I mean as it absorbs anywhere from one to three stops of light (depending on the filter strength). With more light falling on the sensor, there is a greater SNR (signal to noise ratio), which results in less noise and more dynamic range. But, the CFA only accounts for one stop more light getting to the sensor. This is why the base ISO is 320 on the M Monochrom, rather than 160 on the M9. So, where was the additional performance coming from?
Getting to the bottom of the ISO (lack of) noise mystery
A traditional (read: color) digital camera sensor is inherently a monochrome device. By placing red, green and blue color filters in front of individual pixels in what is known as a Bayer pattern, all the colors can be interpolated even though the sensor is technically only recording 1/3 of the total color information.
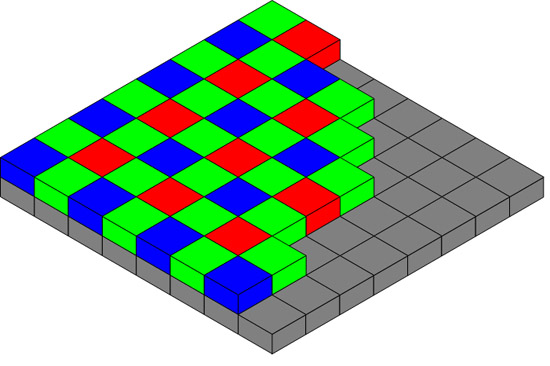
Interpolation is when a pixel ‘s color is calculated by looking at the surrounding pixels and filling in the missing information. The process of interpolating full color data for a digital camera image is called demosaicing. Jesko explained that because no interpolation is needed on the M Monochrom, there is no blurring or noise propagation in the resulting image. On a color sensor, if one pixel is displaying noise, it will be spread to surrounding pixels by the nature of the algorithm, effectively blurring the noise and making it appear more chunky. On the M Monochrom, per-pixel noise is well-controlled and doesn’t spread or blur, making for a much sharper look even at pretty high ISO levels. In fact, the noise pattern might even serve to increase the apparent sharpness of the images. In the early days of digital SLRs (2005), I used to add monochromatic noise to my Canon and Nikon files as they looked too plastic and smooth, especially on skin tones. I found this method far more effective than USM or other sharpening techniques as the sharpening algorithms only increased the contrast of edges, not areas of smooth color.
Capturing B&W in camera or converting
The question will inevitably arise whether one can achieve the same quality by converting a color image to B&W using Photoshop, Lightroom, C1, etc. I posed this question to Jesko, who seemed to take great pleasure in exploring this idea. According to him, the increase in resolution and dynamic range is a given when removing the CFA and going to a monochrome imaging pathway. The Bayer pattern calls for 50% green, 25% red and 25% blue pixels. Therefore, it stands to reason that the resolution of the red and blue channels are inherently less than the green channel.
I also posed this question later to Stephan Schulz who has a background in CCD sensor technology before he came to Leica. Stephan went a step further and pointed out that the blue and red channels on a CCD typically are quite noisy. Because the blue and red filtration are so much stronger than green, blue and red pixels on a CCD have to have more gain applied in order to match the luminosity of the green pixels. This concept seems so incredibly obvious, but I can’t recall ever reading or hearing about this. If you boost gain, you increase the amount of noise. The blue channel suffers the worst here, requiring the most gain and subsequently contains the most noise.
Besides having less SNR than the green channel, the red channel is also handicapped by the camera’s IR filter. Of course, as we all learned from the M8, an effective IR filter is integral to capturing accurate color and faithfully reproducing the visual spectrum. CCD sensors are sensitive beyond the humanly visually perceptible range, namely in near-infrared. If this wavelength range (700-1000nm) isn’t filtered out, the sensor will capture it and convey it as more red information. In the case of the M8, this meant that black objects reflecting IR would show as a brownish-magenta. Certainly not ideal, and this was a very, very small leakage of IR. As an after-the-fact fix, Leica provided UV/IR filters to be mounted on the lens, which worked to remove the bleed.
The issue was resolved permanently in the M9 by increasing the IR filter thickness from 0.5mm to 0.8mm and using glass with a higher absorptive capacity. So, what does this have do with the red channel? Filtering out wavelengths of light is not a totally precise endeavor. In order to completely filter out near-IR wavelengths, some visible red must be taken out as well. This creates further need to boost the gain of the red pixels.
This gets us back to the original question of why the M Monochrom will produce a sharper, more detailed result with greater DR given the same amount of pixels. On the M Monochrom, each and every pixel is capturing 14 bits of luminance information across the entire spectral range (panchromatic), yielding 16,384 shades of gray. B&W conversions from color images still have to go through the demosaicing process, and as such will never yield as much detail or tonality as the native monochrome images from the M Monochrom.
M Monochrom and M9
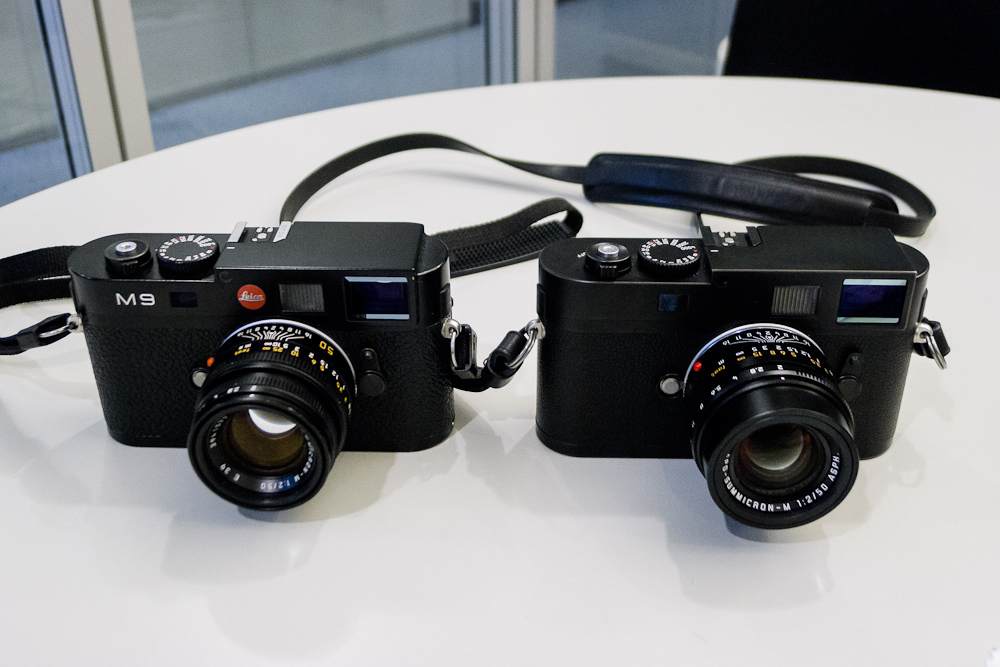
M9 with 50mm Summicron and M Monochrom with 50mm APO-Summicron
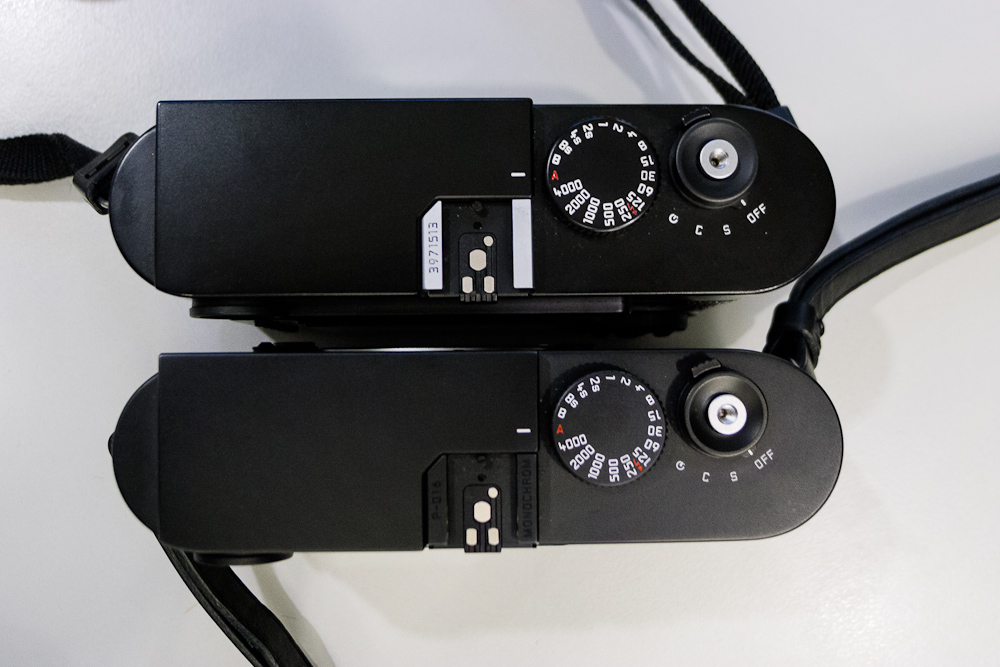
We talked about some of the changes in the M Monochrom from the M9. The first, and most important, is that the M Monochrom doesn’t shoot in color. Yes, it’s true. If you want color in a full-frame digital M, you’re going to want to hold onto your M9 or M9-P. As an obvious result, there is no WB selection in the SET menu anymore, nor are there any color saturation or color space selections in the menu for JPGs. A little less obvious is the glorious removal of the Snapshot mode. Introduced (and widely despised) in the M8.2, the snapshot mode was removed from the shutter speed dial and hidden as a user profile selection in the menu with the M9. In the M Monochrom, it is absent altogether.
No Snapshot mode!
Cosmetically, the M Monochrom looks very much like a cross between an M9-P and a black M8. There is no red dot or model marking on the front, nor is there any engraving on the top. Sure, there is the standard “Leica Camera – Made in Germany” inscription on the back, above the LCD, but the letters are not painted. The only model designation is a black-on-black engraving on the edge of the hot shoe, which reads simply: “MONOCHROM”. The camera has a flat black anodized finish (not paint), very much like the M8. Expect it to silver and patina around the edges with use. The leatherette covering is smooth, with a little bit of texture and not as shiny as the black M9. The M Monochrom also comes with a very handsome leather carrying strap instead of the standard nylon and rubber. All in all, a very subtle yet attractive package.
M9 and M Monochrom
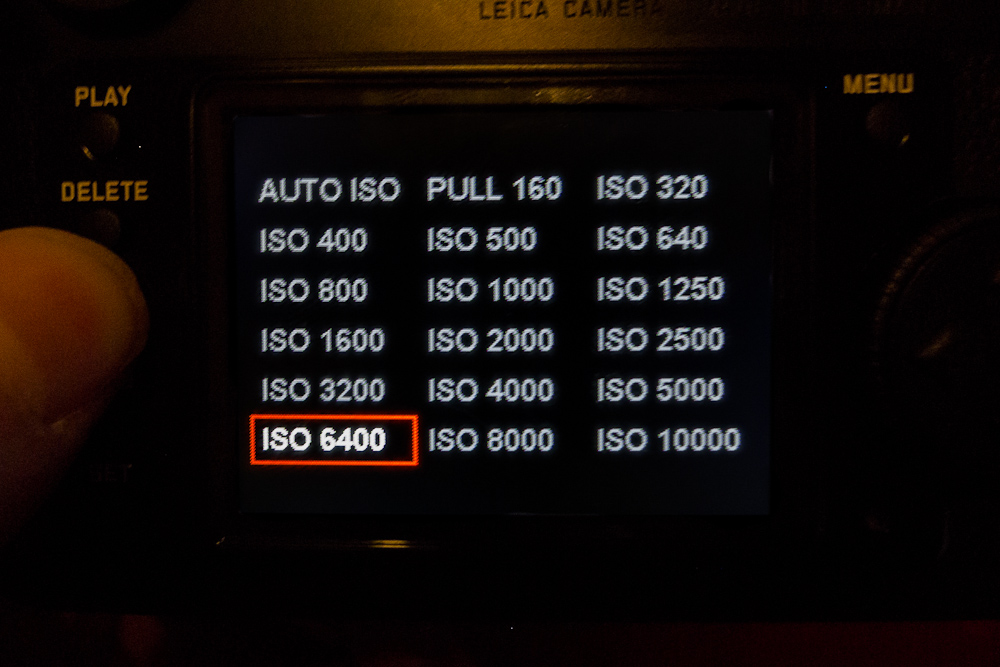
The M Monochrom features an ISO range from 320 to 10000 in 1/3 stop increments, with an Auto ISO option and a Pull 160 setting. Just like the Pull 80 setting on the M9, Pull 160 on the M Monochrom is actually worse quality that 320, resulting in a full stop less dynamic range. I’d recommend using an ND filter in bright shooting conditions rather than Pull 160.
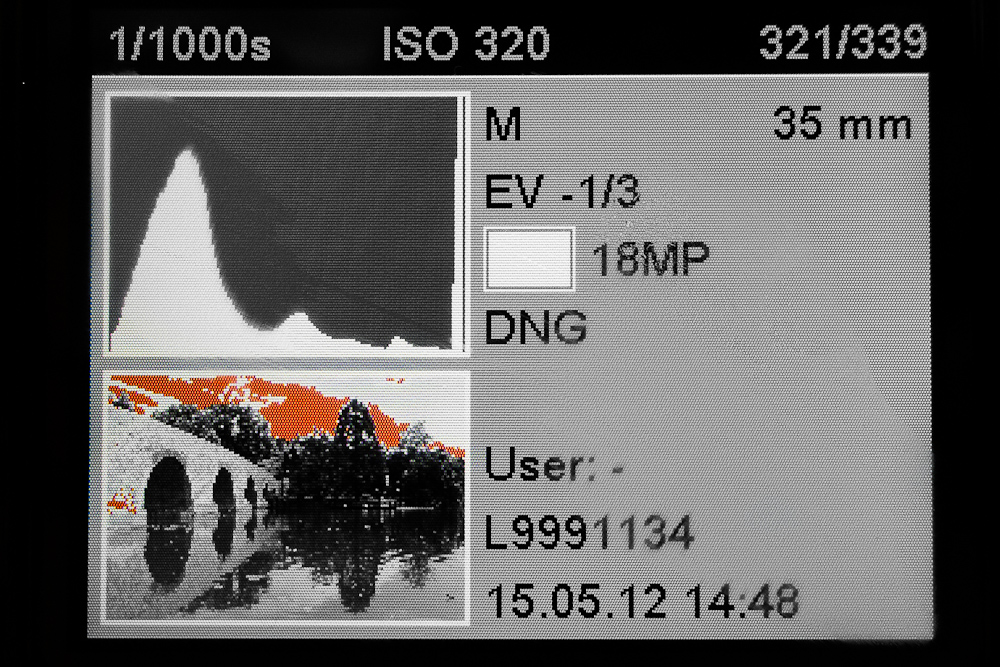
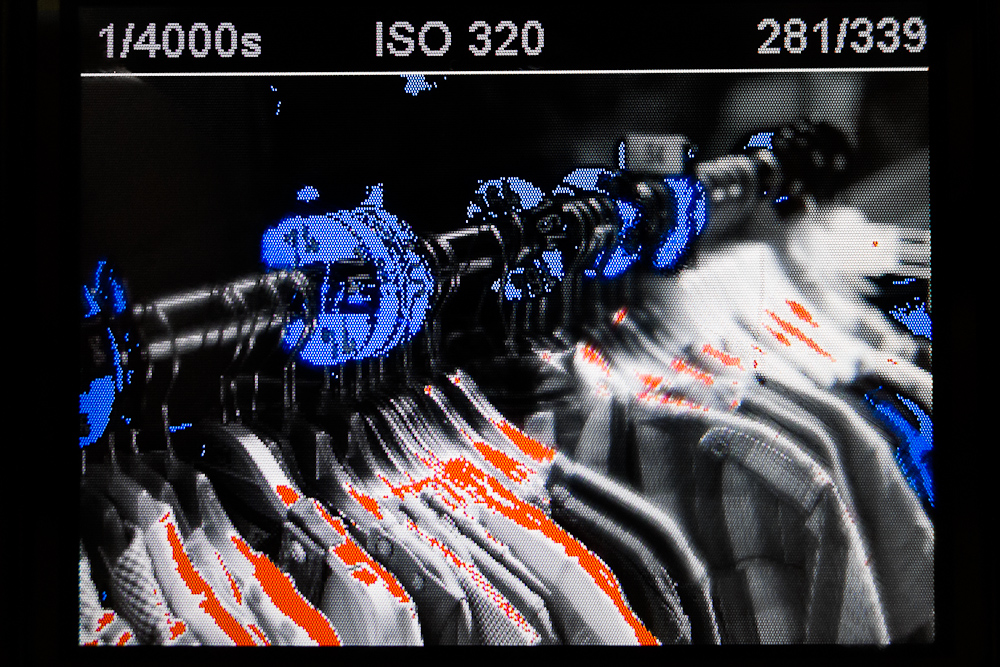
RAW Histogram
One of the most notable changes was the inclusion of a RAW histogram. This is a pretty big deal. No other 35mm digital camera has this capability. Now you can see a truly accurate tonal representation of your image capture. But, as we learned from Spider Man, with great power comes great responsibility. We are so used to our 8-bit JPG-derived histograms that it is very possible to misinterpret the RAW version. Because a standard histogram is an 8-bit representation of a 14-bit capture, there is more information than what you can see in the histogram. In a color RAW file, there is almost always headroom to bring up shadow information or tone down highlights, even in images with clipped histograms. This is even more evident in the new tone controls of LR4 which seems to perform magic on files, pulling in detail that just wasn’t there…except it was. The information is hiding, like a reserve fuel tank. So, even when the 8-bit histogram appears to be running on empty, there’s still a little something left. On the M Monochrom, with its 14-bit histogram, there is no reserve. What you see is what you get. If you clip any of the image either in shadow or highlight, it’s gone. Of course, you’re less likely to see clipping due to the increase in the representation of tonal information. The scale is simply broader.
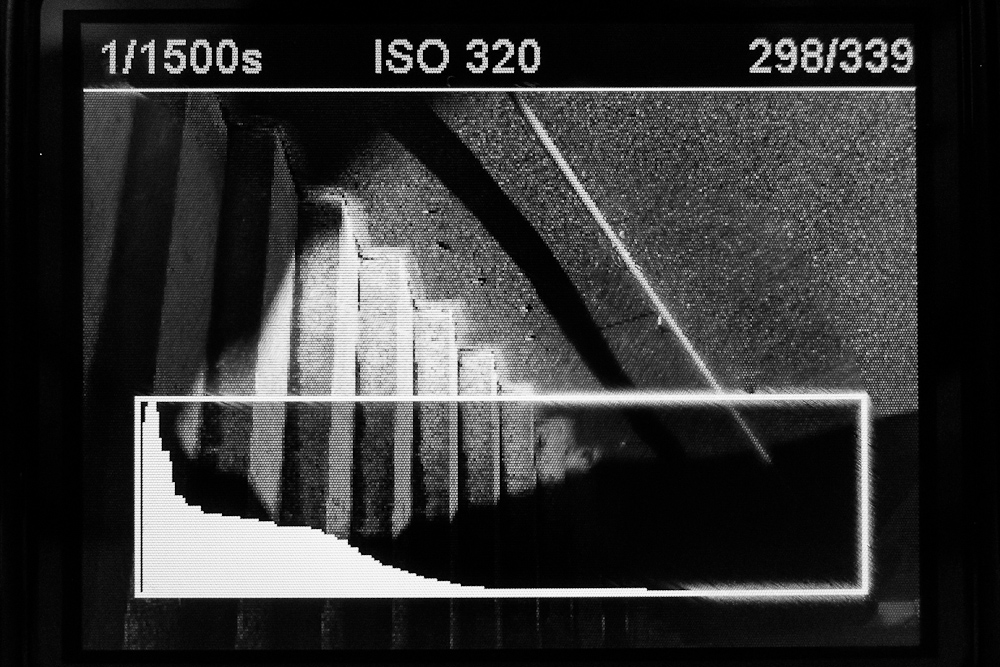
Image review with overlaid RAW histogram
Jesko also pointed out that the histogram has a gamma curve applied to it in order to make it more useful and readable. Without the curve, all the detail would be crammed into a very small area towards the left side as sensor data is linear. With the curve applied, a full tonal range can be visually represented and spread across the width of the histogram. Likewise, the clipping warnings, which are also new in the M Monochrom, are given in percentage of exposure, not in 0-255 luminance values like on the S2. The shadow warning is adjustable from 0-5%. Likewise, the highlight warning can be set independently from 95-100%. Or, the warnings can be turned off. When enabled, the shadow warning shows as solid blue and the highlight as solid red in clipped areas of the image. In a monochrome playback image, the color is impossible to miss. If you want a little leeway, set the warnings in the 2-5% and 95-98% range. If you want to live dangerously and push things as close to the edge as possible, set your warnings to 0-1% and 99-100%. If you see clipping in this range, it’s gone.
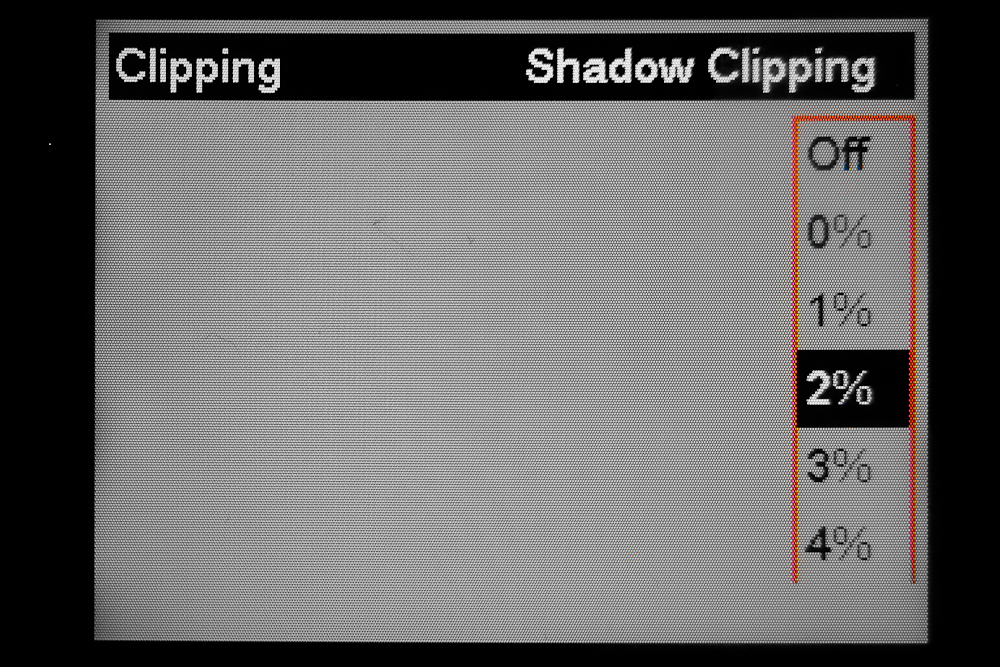
Setting histogram clipping definition
While not on the pre-release version, Jesko told me that Leica plans to have stop increments displayed on the histogram, which I think will make the information even more useful.
Expose to the left – trust me
Especially given the improved noise performance of the M Monochrom, I’d recommend exposing to the left. What this means is, when in doubt, underexpose. You’ll easily be able to pull up shadows that have gone a bit dark, but you won’t be able to recover a single blown highlight. Of course, this is B&W and you might be fine with spectral areas in your image. The other reason that the camera is a little less forgiving than its color-loving cousin is that it only has one channel, not three. Usually in a color capture, when one channel gets blown out, you might still have some residual detail in the other two channels from which you can recover. For example, if you enable the color histogram on your M9 and attempt to overexpose a bright red Ferrari, you’ll see that the red channel is clipped, while the green and blue channels are not.
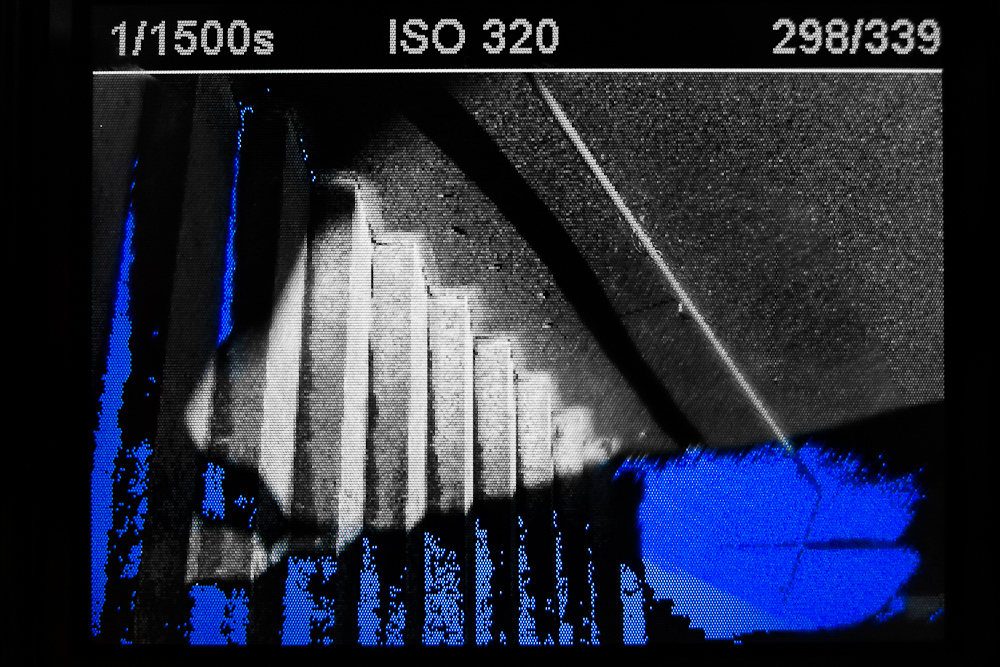
Shadow clipping warning – but there was still plenty of shadow detail
Info button
The functionality of the INFO button on the M Monochrom has been expanded. Now, when you are reviewing an image and press the INFO button, a nice, large overlaid histogram appears. On the M9, this histogram is only available immediately upon auto review, but not in playback. Press the INFO button again and the highlight and shadow warnings come up. Press once more and you get the traditional info display with a histogram, small image thumbnail and shot information displayed on the side which is unchanged from the M9. I really hope that Leica will add the INFO button functionality and the overlaid histogram to a future M9 firmware release.
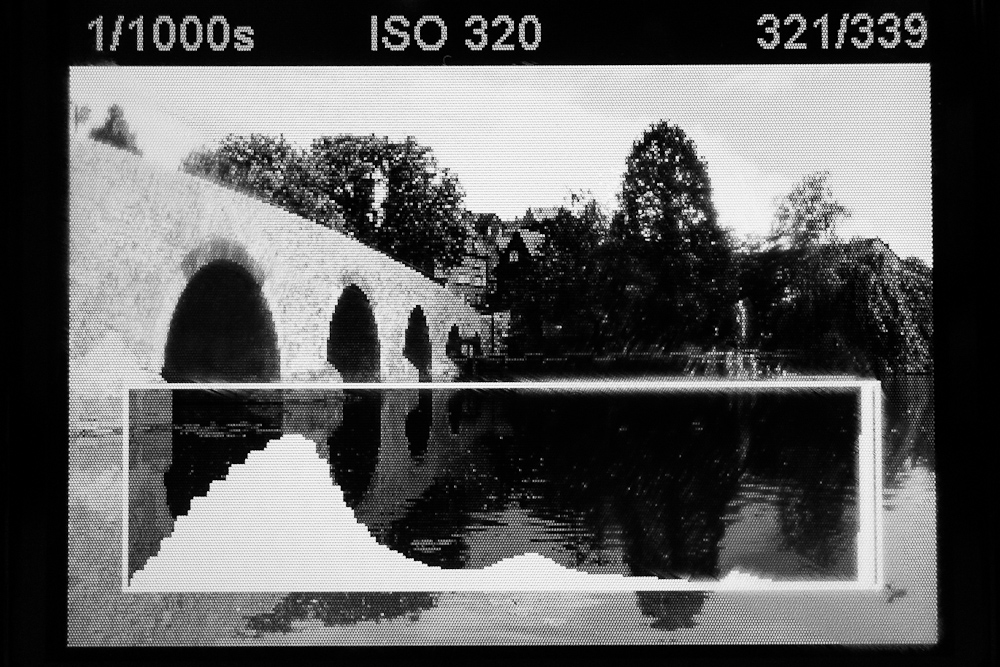
Image review with overlaid histogram
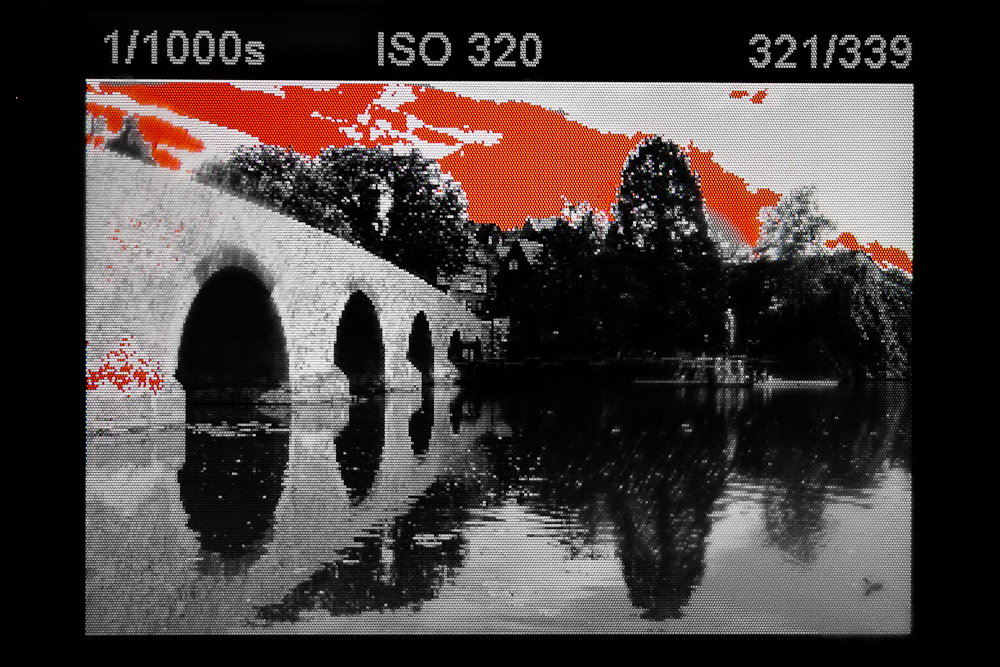
Image review with blown highlights
Standard Info view
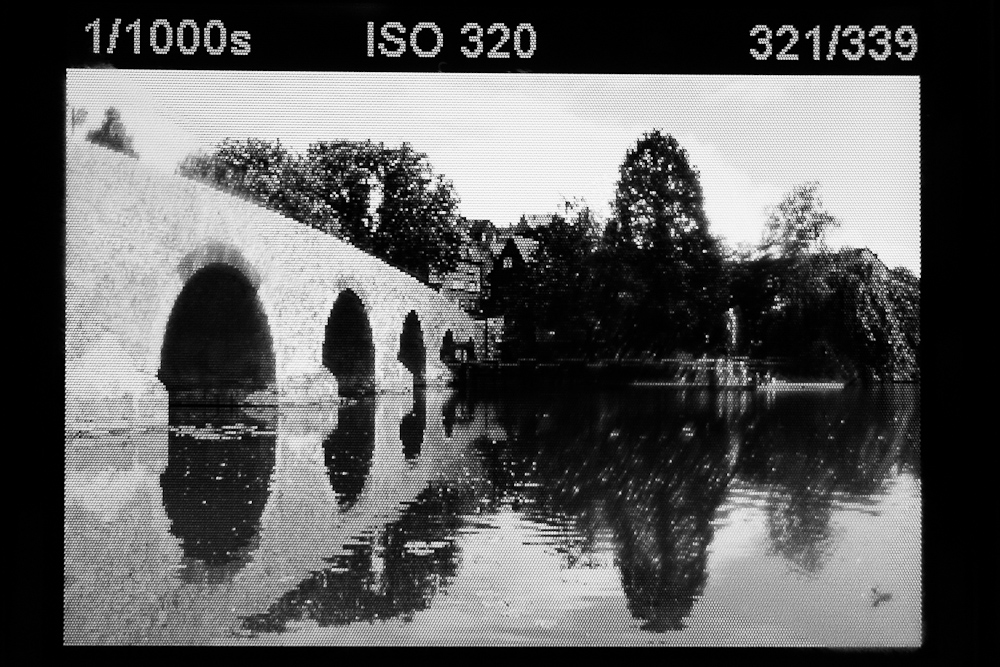
Image review with warnings turned off
File size and type
The file size of a DNG from the M Monochrom is identical to that of an uncompressed DNG from the M9. At first blush, this might seem a little wonky. The M9 has to represent chrominance information in addition to luminance values, while the M Monochrom has no chroma info. Again, remember that a color CCD is actually monochrome with color filters over the pixels in order to extrapolate color data. In other words, the same amount of information is being recorded, but in the color image, this information is tripled in post processing. No compressed option is offered with the M Monochrom.
The M Monochrom’s B&W DNG files are already supported in LR4. No, there is no color information in there at all as some have speculated. Adobe worked with Leica to develop a purely monochrome workflow.
The real test
After a weekend in Berlin testing another new Leica camera, I headed to Solms. I was there as a guest of head optics designer Peter Karbe, who invited me to have a discussion on sensor size as it relates to lenses (look for this article a little later). Also, since I was there and had a couple days available, it made sense to test the M Monochrom.
When I first went out shooting with the M Monochrom, things went a little different than my usual tests. Jesko had given me the camera while I was talking with Peter Karbe in his office pretty late on Monday afternoon. Peter and I had plans to go out to dinner that evening, but I was itching to use the M Monochrom and the 50mm APO-Summicron. Of course, Peter understood this, so when we got to the small village of Weilburg, Peter asked somewhat rhetorically (as only a photographer can), “Shall we eat first or walk around and shoot pictures for a while? The light is really nice.” And it was. And of course, we opted for the latter.
M Monochrom with 50mm APO-Summicron, 1/500th @ f/4.8, ISO 3200
Click here for 100% Crop
Interestingly, I had to remind myself that I was shooting only in B&W. The beautiful sunset sky with subtle shades of peach, purple and blue just looked like a boring gray mass. The wispy clouds weren’t enough to make it an interesting shot.
M Monochrom with 50mm APO-Summicron, 1/500th @ f/4, ISO 800 (boosted 1 stop in LR in order to expose for sky)
Click here for 100% Crop
So, I looked for other subjects to shoot. Considering that I am primarily a color photographer and pretty much always have been (except when I was just getting started and doing my own darkroom work), I consciously thought about making strong B&W compositions. I forced myself to look for textures, patterns and contrast, certainly more so than when I normally shoot.
M Monochrom with 50mm APO-Summicron, 1/180th @ f/2.8, ISO 3200
Click here for 100% Crop
Out and about with the M Monochrom, the 50 APO-Summicron ASPH and Peter Karbe
Of course, I realized just how surreal this situation was. Here I was taking a photo stroll with Leica’s best 50mm lens ever and its designer. I was a little nervous about not doing his lens justice. Peter had actually designed the 50mm APO-Summicron even before the 50mm Summilux ASPH. While working on the design team of the 35mm Summilux ASPH under chief optics designer Lothar Kölsch, he already was thinking of using the modified double gauss design with aspherical elements for a 50mm lens.
M Monochrom with 50mm APO-Summicron, 1/180th @ f/4, ISO 800 Click here for 100% Crop
Click here for 100% Crop
Obviously, this was his baby mounted on the front of the M Monochrom and I endeavored to make him proud. Every so often, Peter would glance over to the lens barrel and comment, “you should really use this lens wide-open…” or, “I see you are stopped down. Are you now testing the camera instead of the lens?” And so on. It certainly felt like he was being a slightly protective, and quite proud parent. So, what do you do in a situation like that? You listen, of course!
M Monochrom with 50mm APO-Summicron, 1/250th @ f/2, ISO 1600
Click here for 100% Crop
Upon review of my images, I was glad I did. At f/2 the 50mm APO-Summicron when mated to the M Monochrom is razor sharp. At all distances. As Peter continued to say, “You really should only stop down for depth of field. There is no need to stop down for performance.” I really couldn’t have said it better myself. And both Peter and Jesko agreed that the M Monochrom is the first M body that truly is able to take full advantage of the exceptional performance of the new lens. I proposed to both of them that the 50mm APO seemed to me to be a statement piece, an optic that shows just how good Leica can make lenses when cost is no longer a concern. They both nodded in agreement and smiled. “This is exactly right. We call it a statement lens and this was our whole concept,” Jekso stated with no hesitation. Just as the 50mm Noctilux 0.95 ASPH is a lens like no other, so is the new APO Summicron.
M Monochrom with 50mm APO-Summicron, 1/125th @ f/4, ISO 3200
When I pressed Peter which of his children he likes the best, or rather which is the best 50mm, he was actually torn between the Noctilux and the APO Cron. He merely stated that they offered photographers different looks and that the APO Cron was perhaps a bit more “perfect” and certainly much more compact. This was a point that he wished to bring home. The APO-Summicron is extremely small and yet still features a very complex optical system. As Peter explained, “Of all things, this was by far the biggest challenge when designing this lens.” He continued, “it is easy to make a high-performing lens when you can make it as large as you want. The S lenses and the Leica Cine lenses are both examples of this. But, to offer the performance that we have in the 50mm APO-Summicron in such a small size for the M system was really not an easy task.”
M Monochrom with 50mm APO-Summicron, 1/125th @ f/2, ISO 5000
Click here for 100% Crop
I had never been to Weilburg before. So, it was nice to take a casual stroll around while acquainting myself with the new camera. The air was cool and crisp. The architecture style was different than my more familiar haunts like Wetzlar and Braunfels. We were in the castle’s courtyard, when Peter quickly went towards a small passageway in the wall and motioned for me to come along. I followed him through and we ended up in the manicured gardens behind the castle, with a view of the valley beyond. He told me this was one of his favorite spots and that he was surprised that it was still open at this hour. We wandered around the gardens for a short while until the caretaker kindly told us it was time to leave and showed us the door (literally).
M Monochrom with 50mm APO-Summicron, 1/180th @ f/4, ISO 3200
Click here for 100% Crop
After a long day, and the sun fully set, dinner seemed like a good plan. Unfortunately, in a small town in Germany, Mondays are not a great day to find any restaurants open. Lucky for us, we found a lone American-style grill and bar which was serving. I mustered a couple shots of the bar then put the camera away and just enjoyed dinner with Peter.
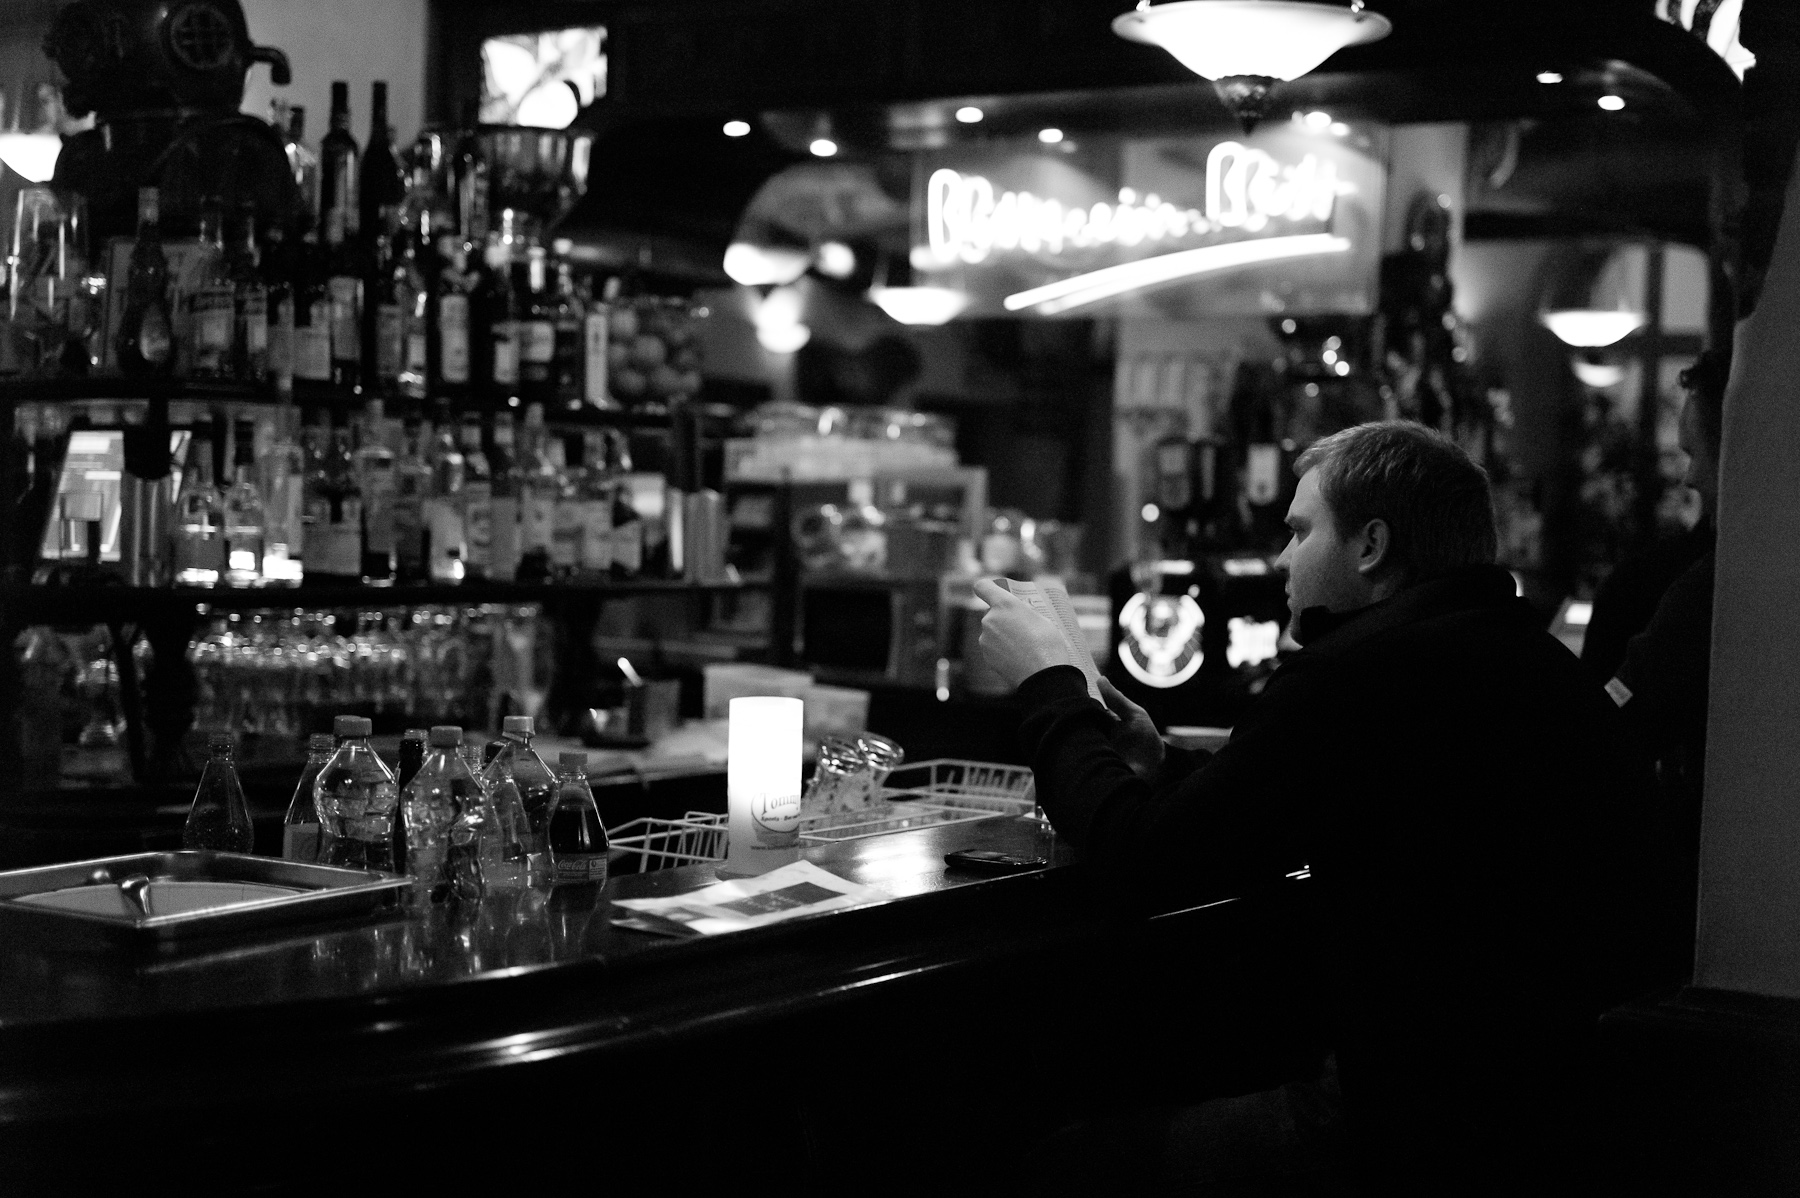
M Monochrom with 50mm APO-Summicron, 1/250th @ f/2, ISO 6400
Click here for 100% Crop

M Monochrom with 50mm APO-Summicron, 1/60th @ f/2, ISO 6400
Click here for 100% Crop
Time for some night photography
I got back to my hotel a little before midnight, downloaded the evening’s images to my laptop and changed into warmer clothes. The night was still young and I had to give the M Monochrom back to Jesko the next afternoon. This would be my only chance to shoot high ISO images in very low light.
M Monochrom with 50mm APO-Summicron, 1/90th @ f/2, ISO 6400
Click here for 100% Crop

M Monochrom with 50mm APO-Summicron, 1/90th @ f/2, ISO 5000
Click here for 100% Crop
With camera in hand, I ventured out onto the eerily empty streets of Wetzlar. For the next two hours, I didn’t see a single other soul. Perhaps it was just very late on a Monday. Or, maybe it was the near-freezing temperatures that kept people inside. Either way, it was an odd feeling to have the whole city to myself.
M Monochrom with 50mm APO-Summicron, 1/25th @ f/2, ISO 6400
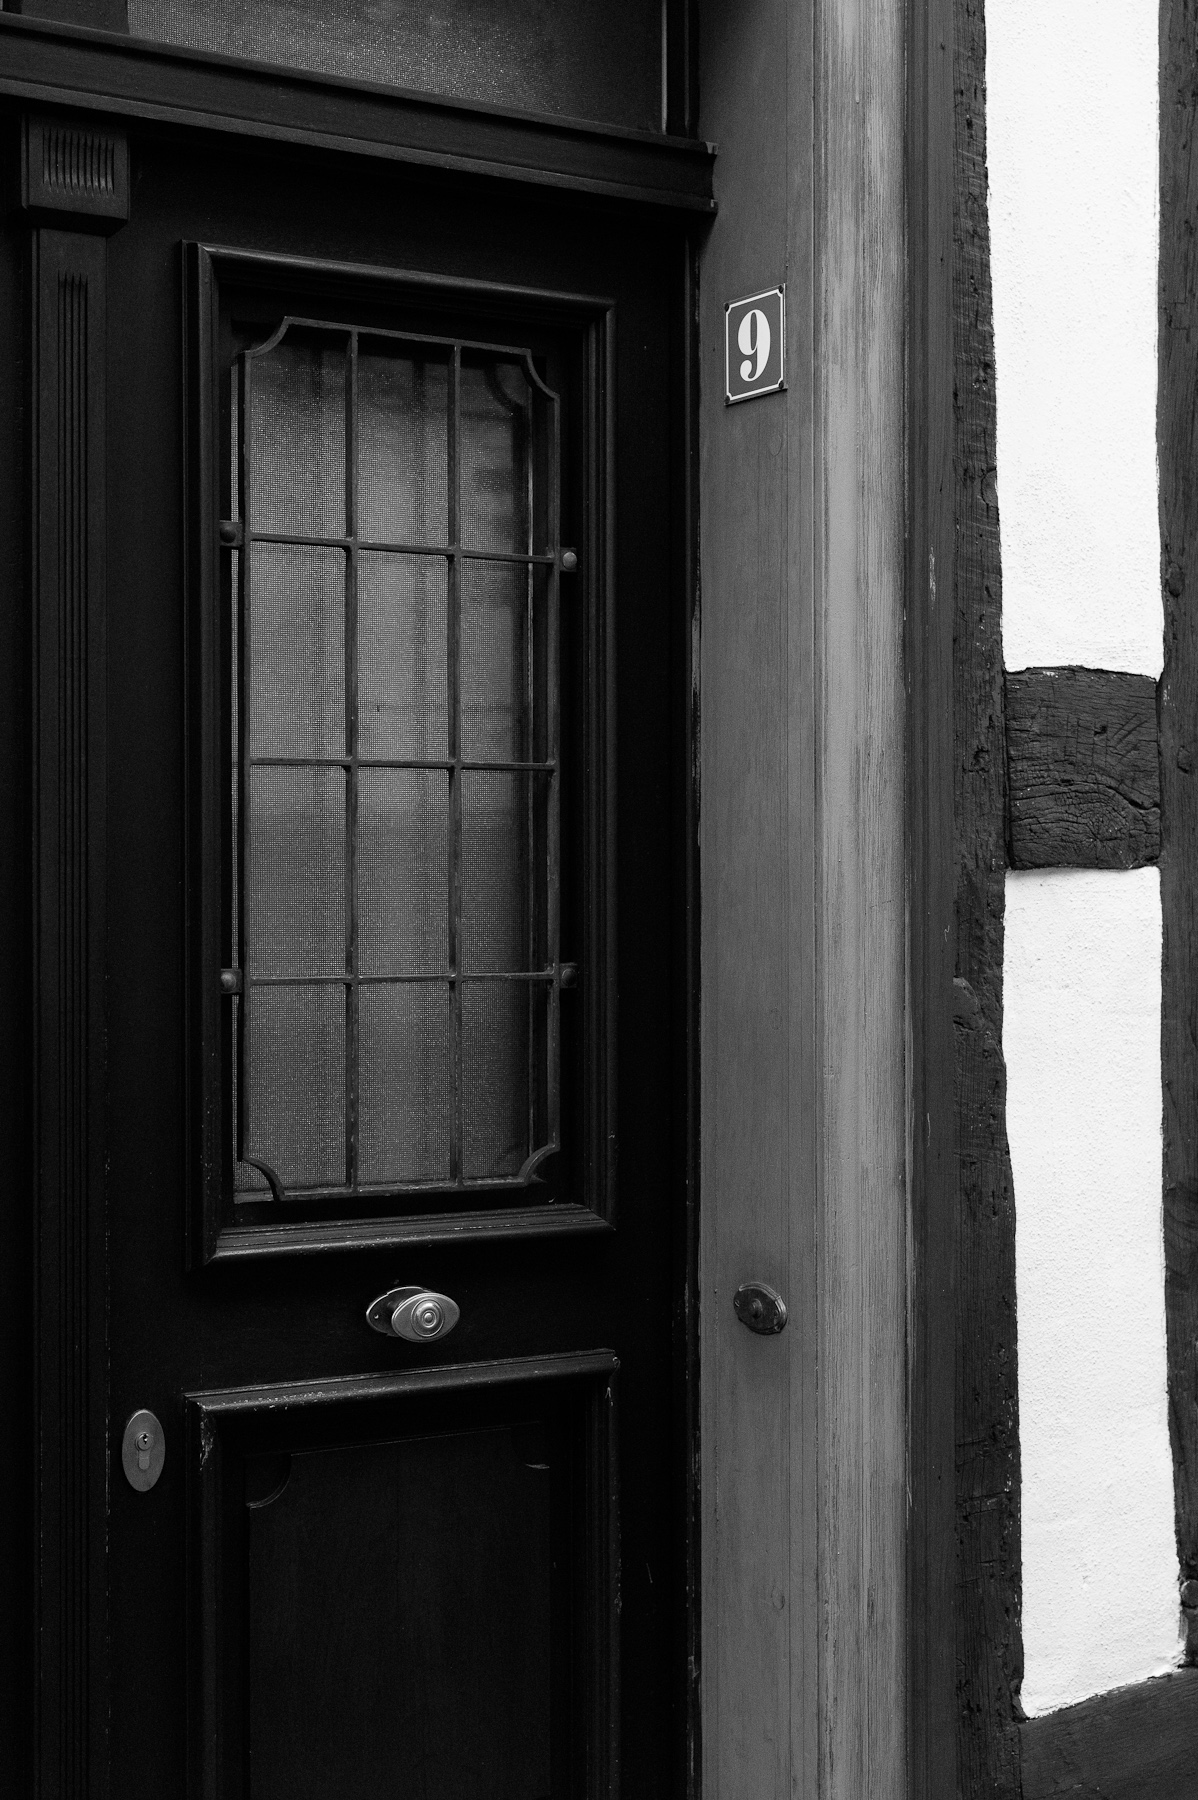
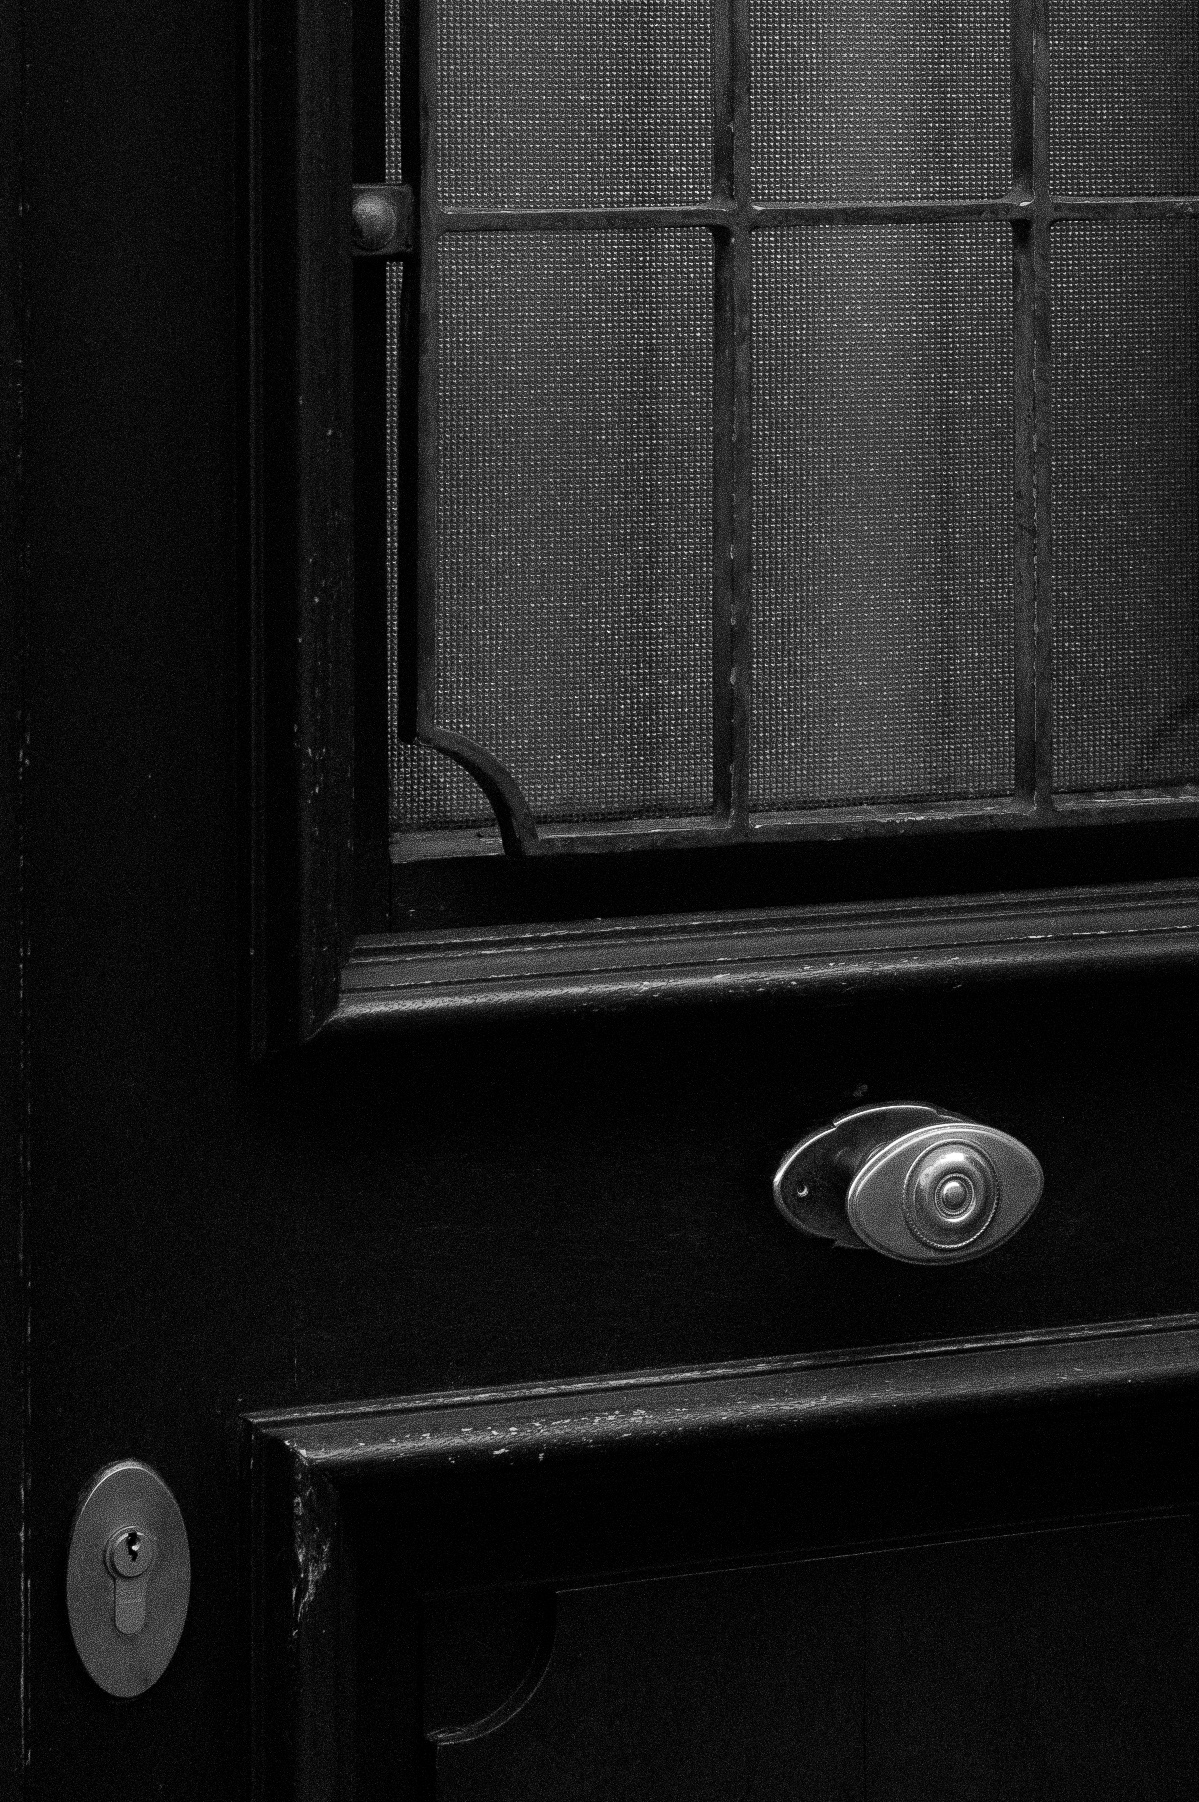
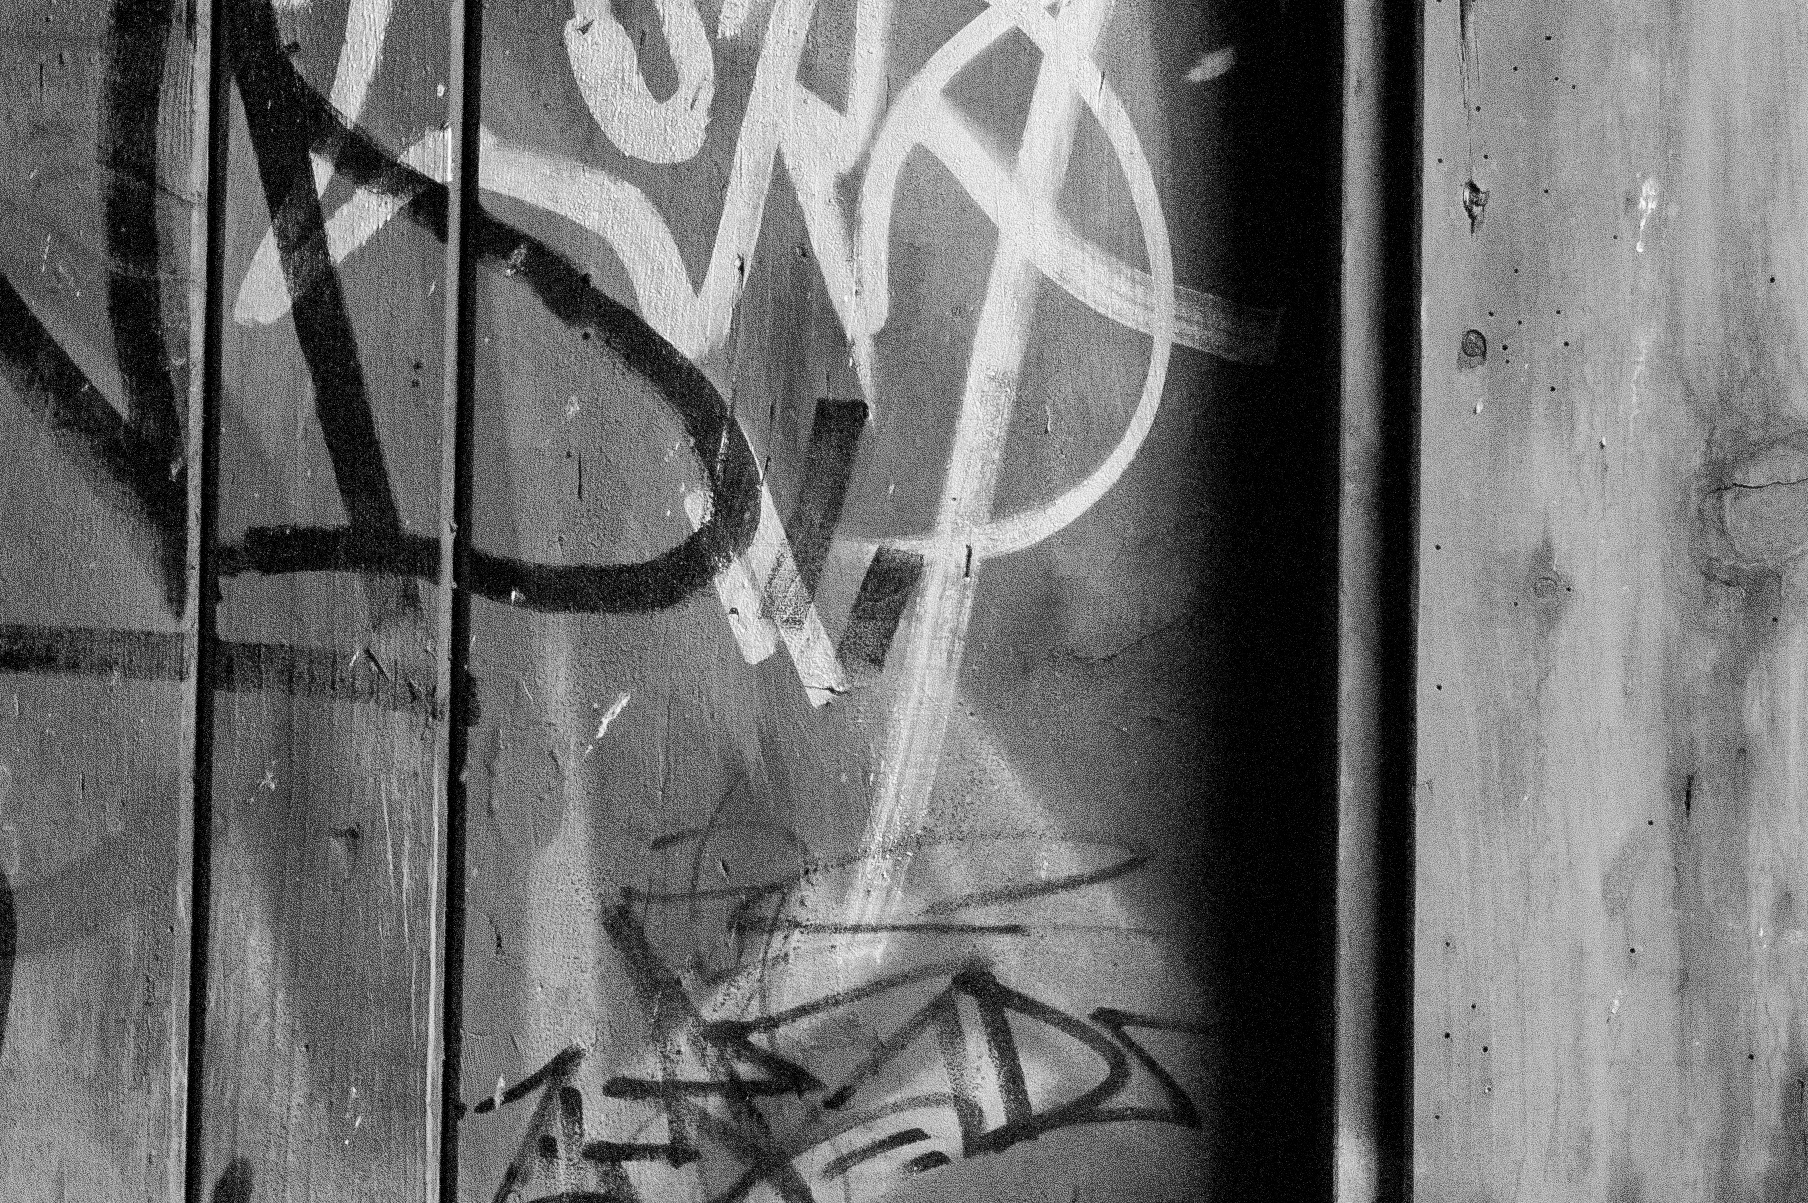
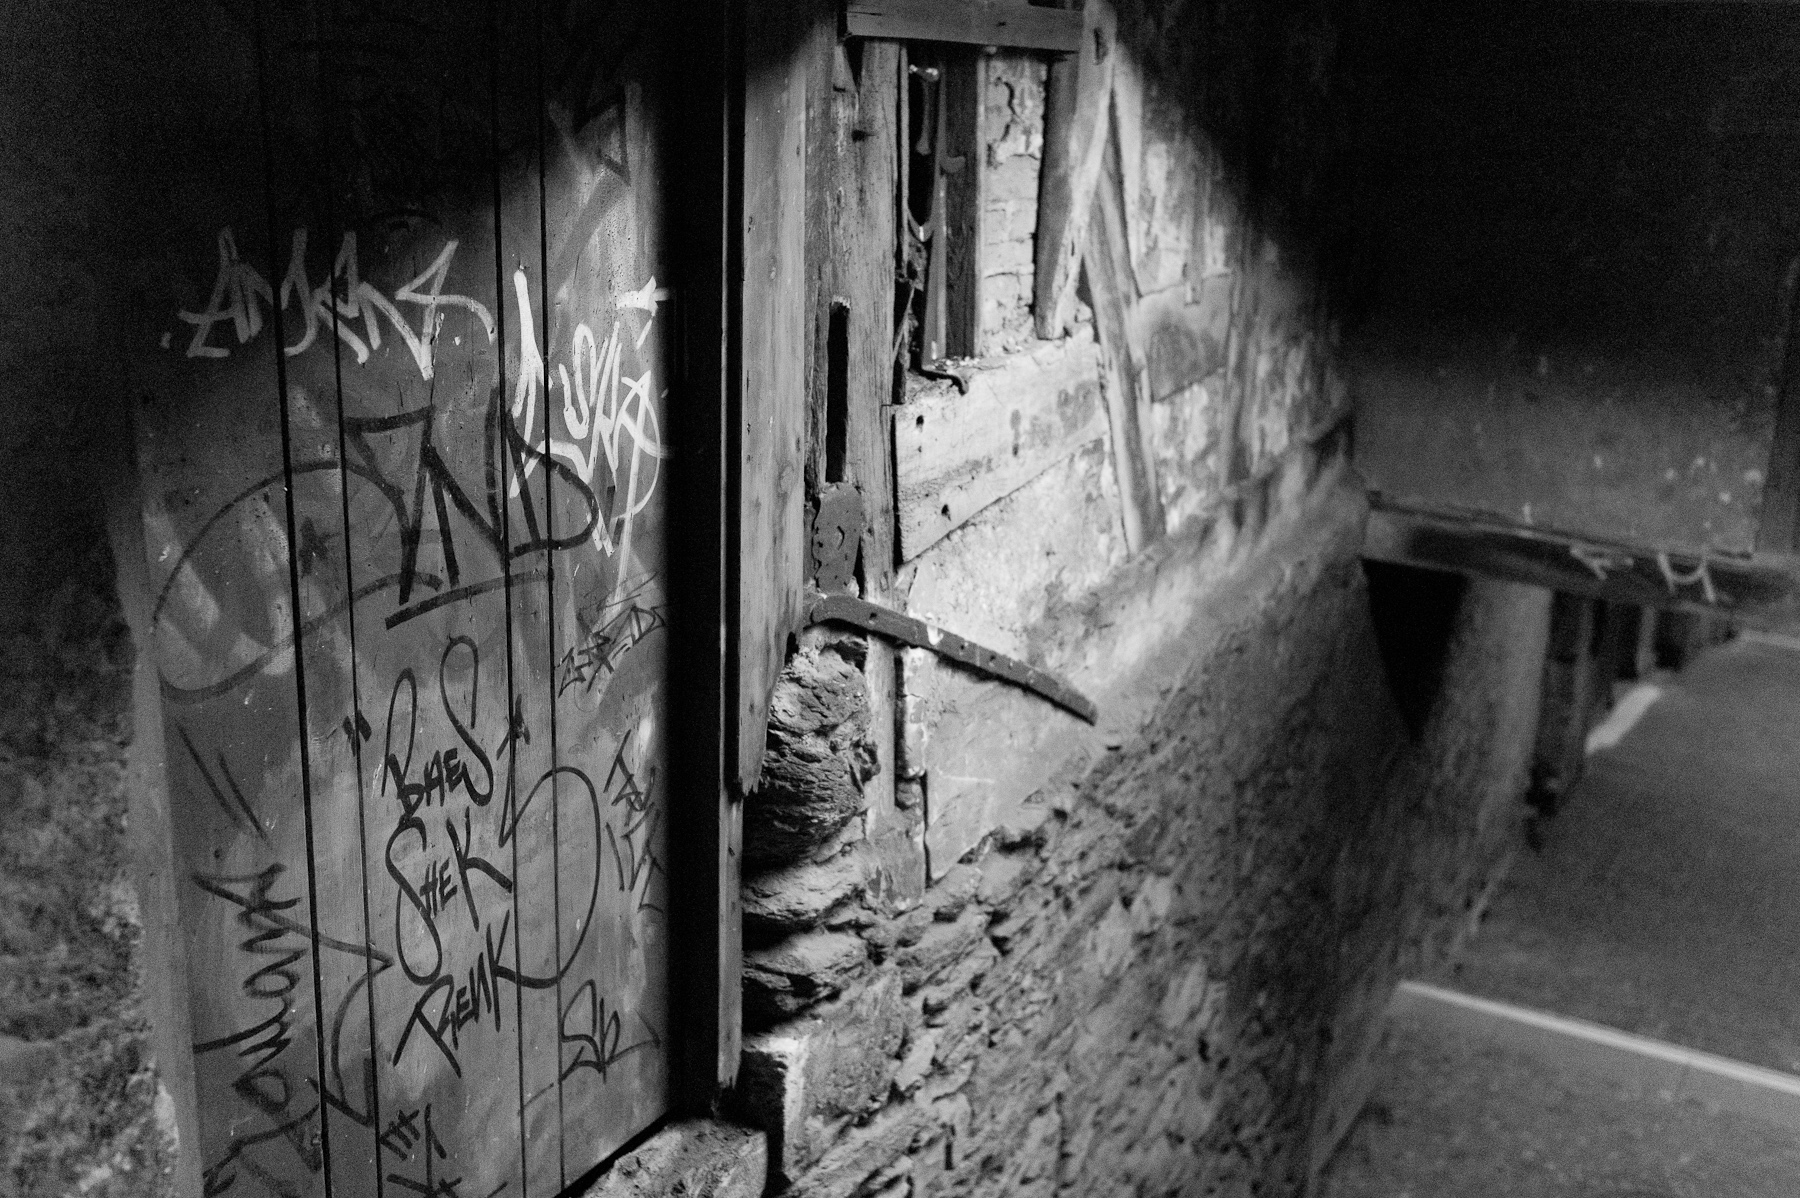
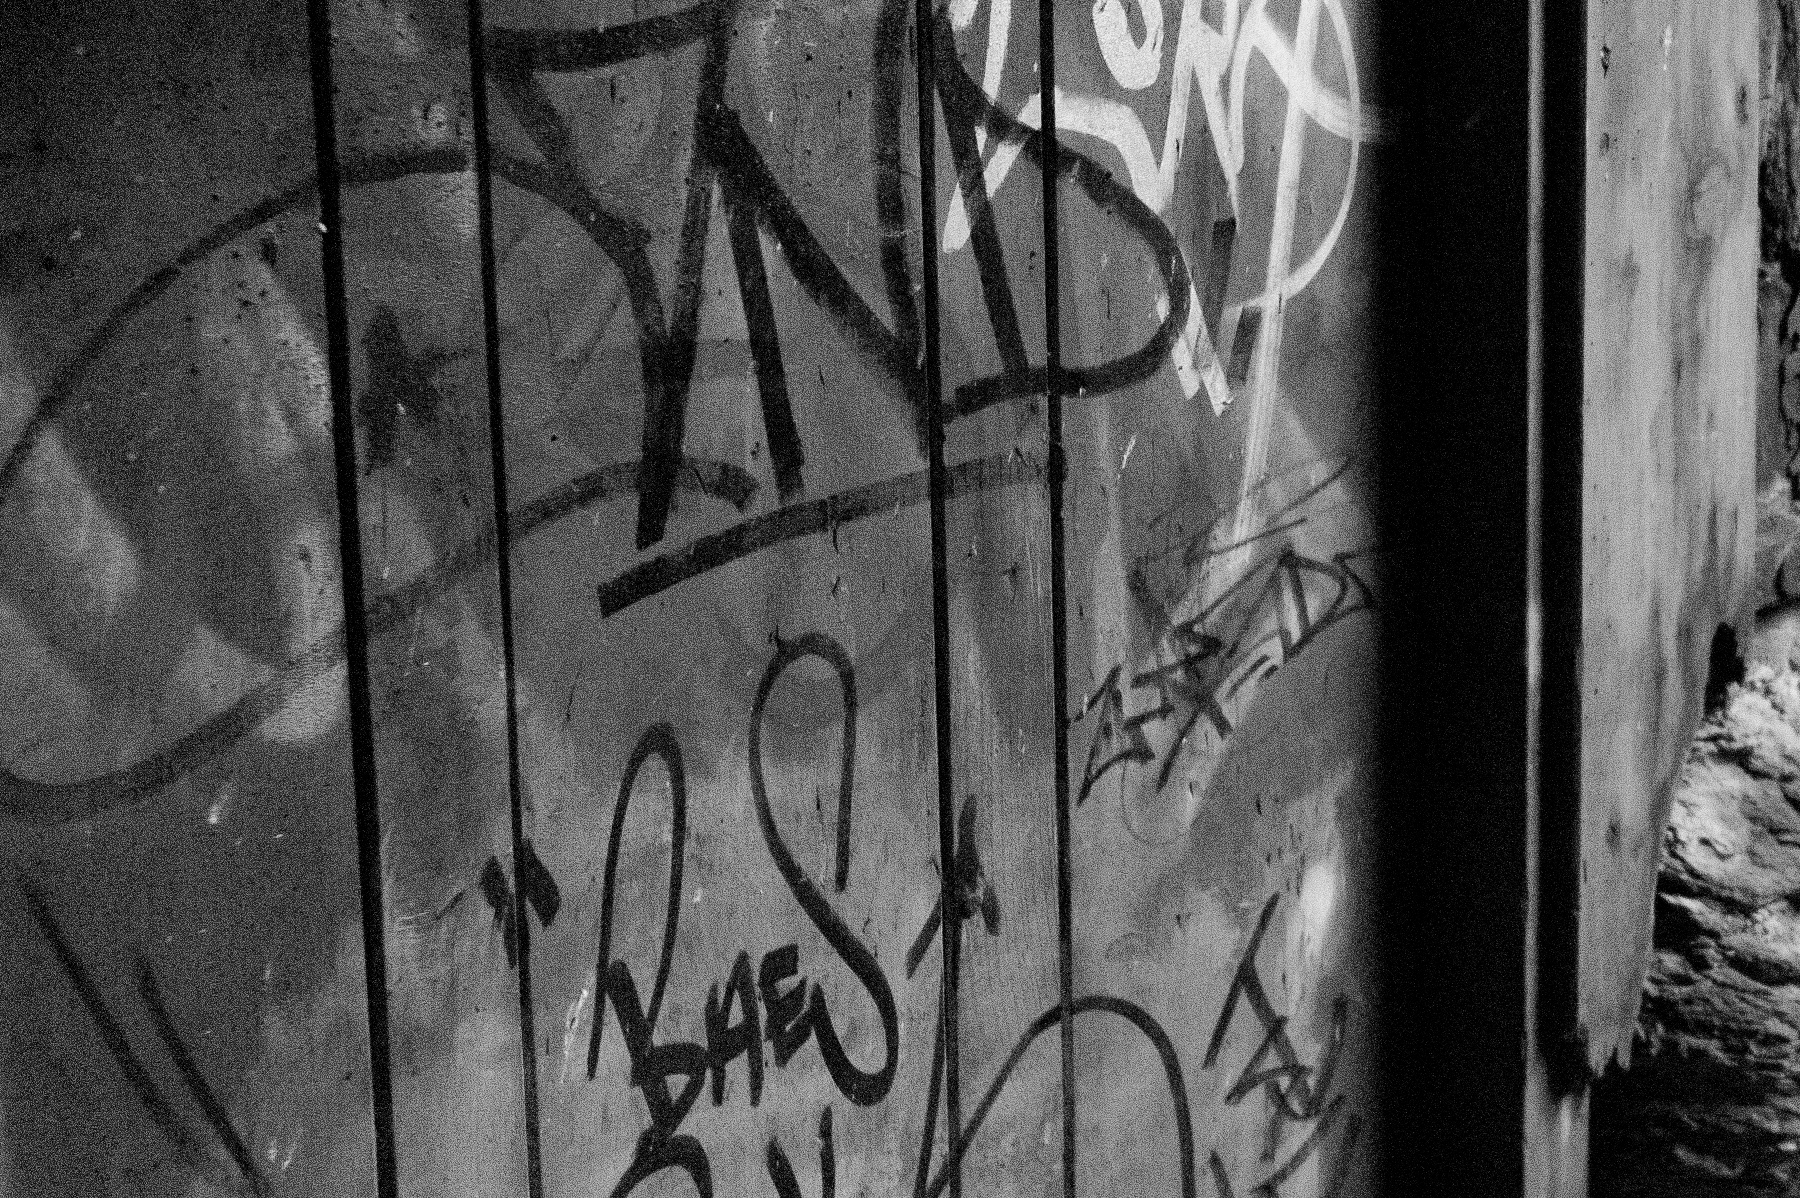
I zigged and zagged around, bypassing my usual routes down to the Lahn river, hoping to find some interesting alleyway yet undiscovered (by me at least). And discover I did. In the super-clean Wetzlar, the graffiti-laden door I found had been shuttered up and was an unusual sight, but it gave me a great opportunity to play around with texture and light.
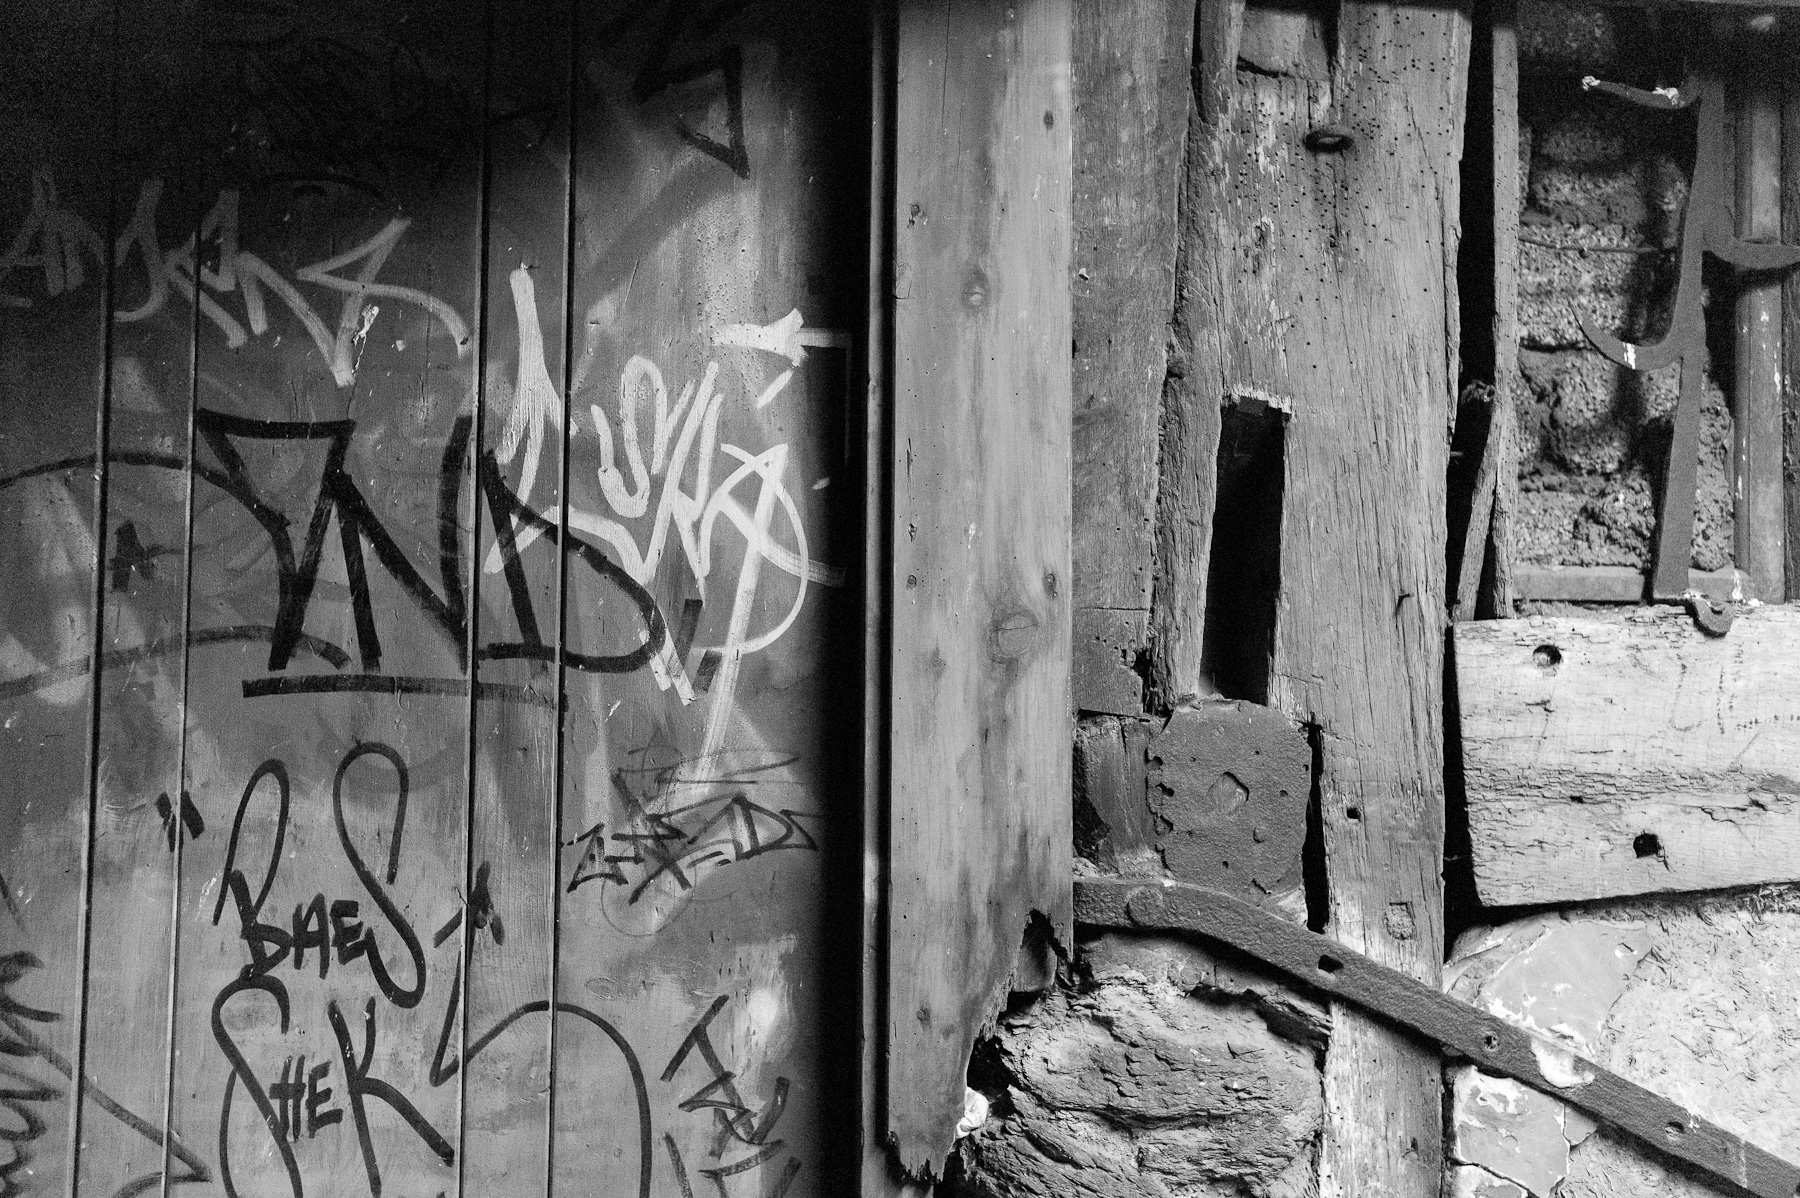
M Monochrom with 35mm Summicron ASPH, 1/90th @ f/2.8, ISO 10000
Click here for 100% Crop
M Monochrom with 35mm Summicron ASPH, 1/125th @ f/2, ISO 10000
Click here for 100% Crop
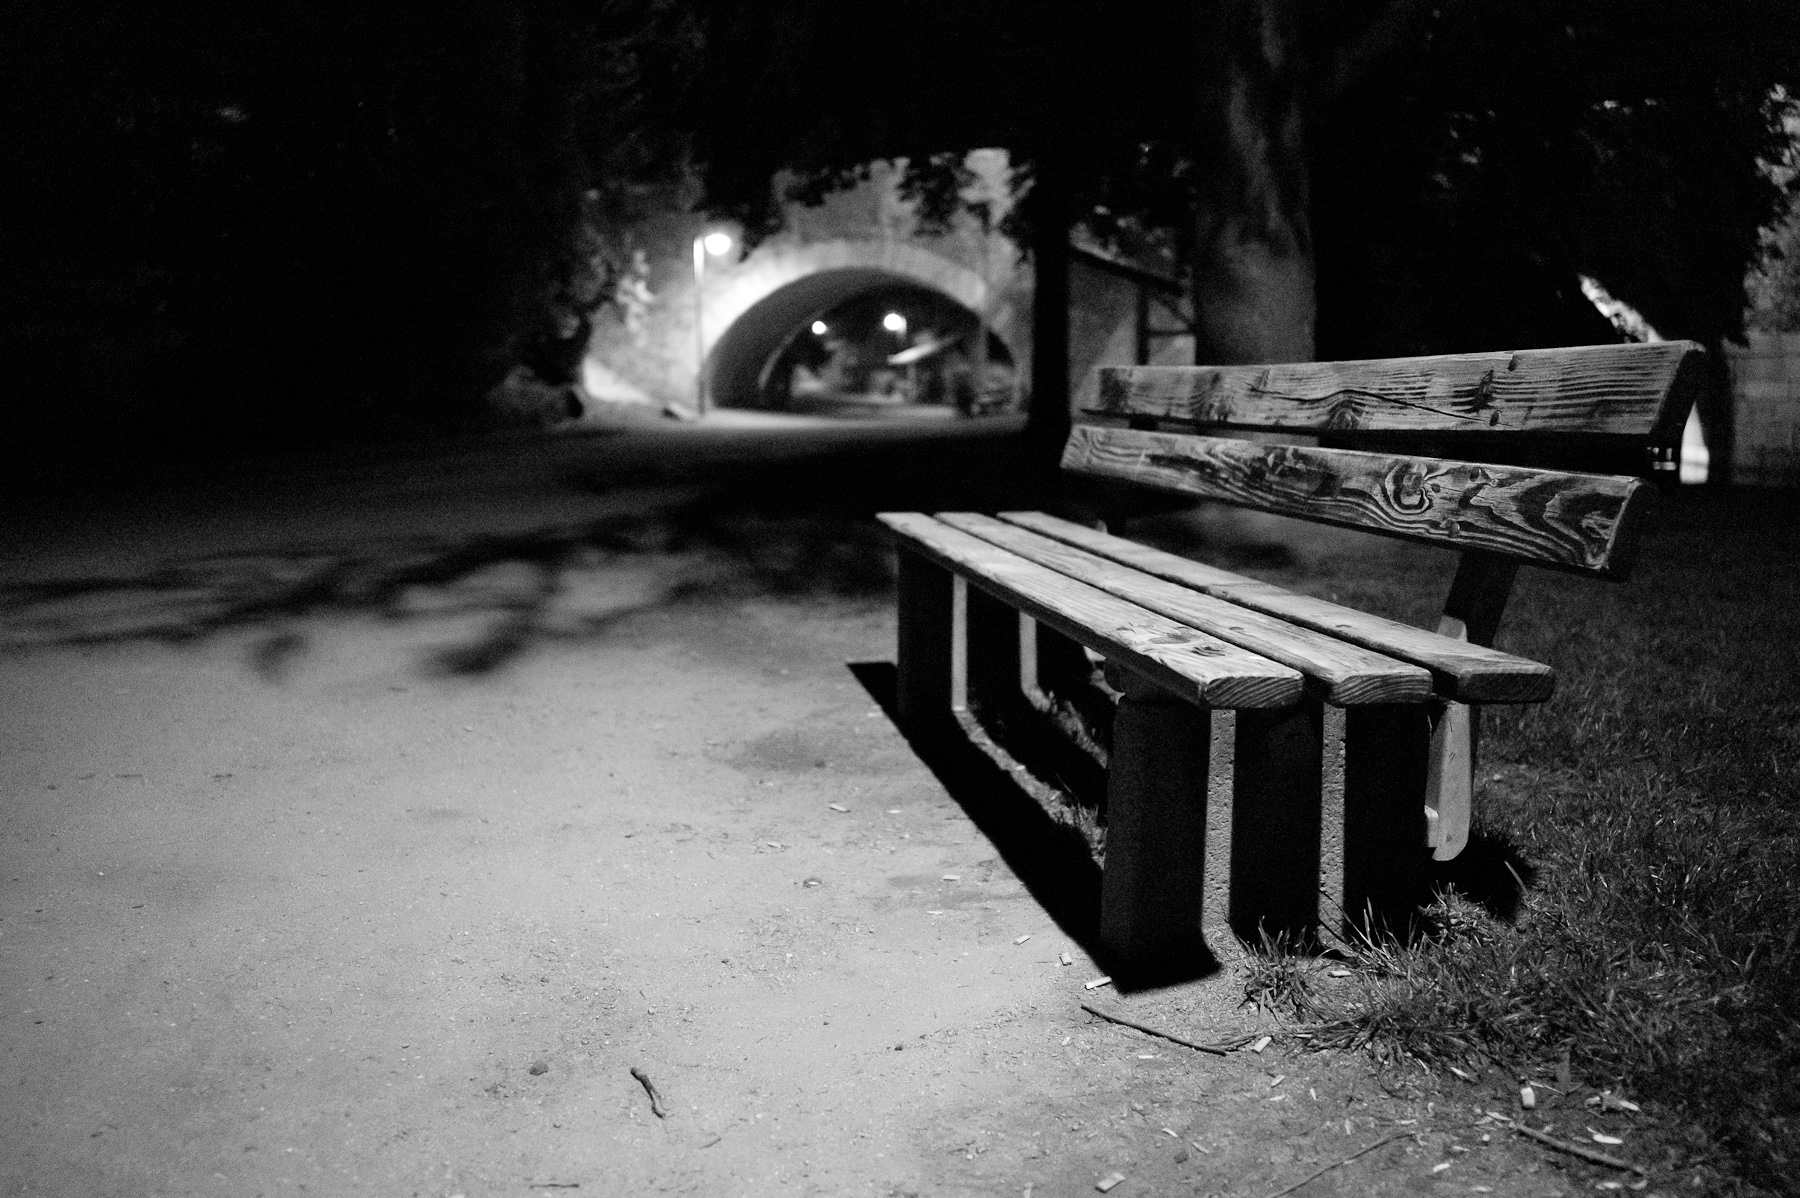
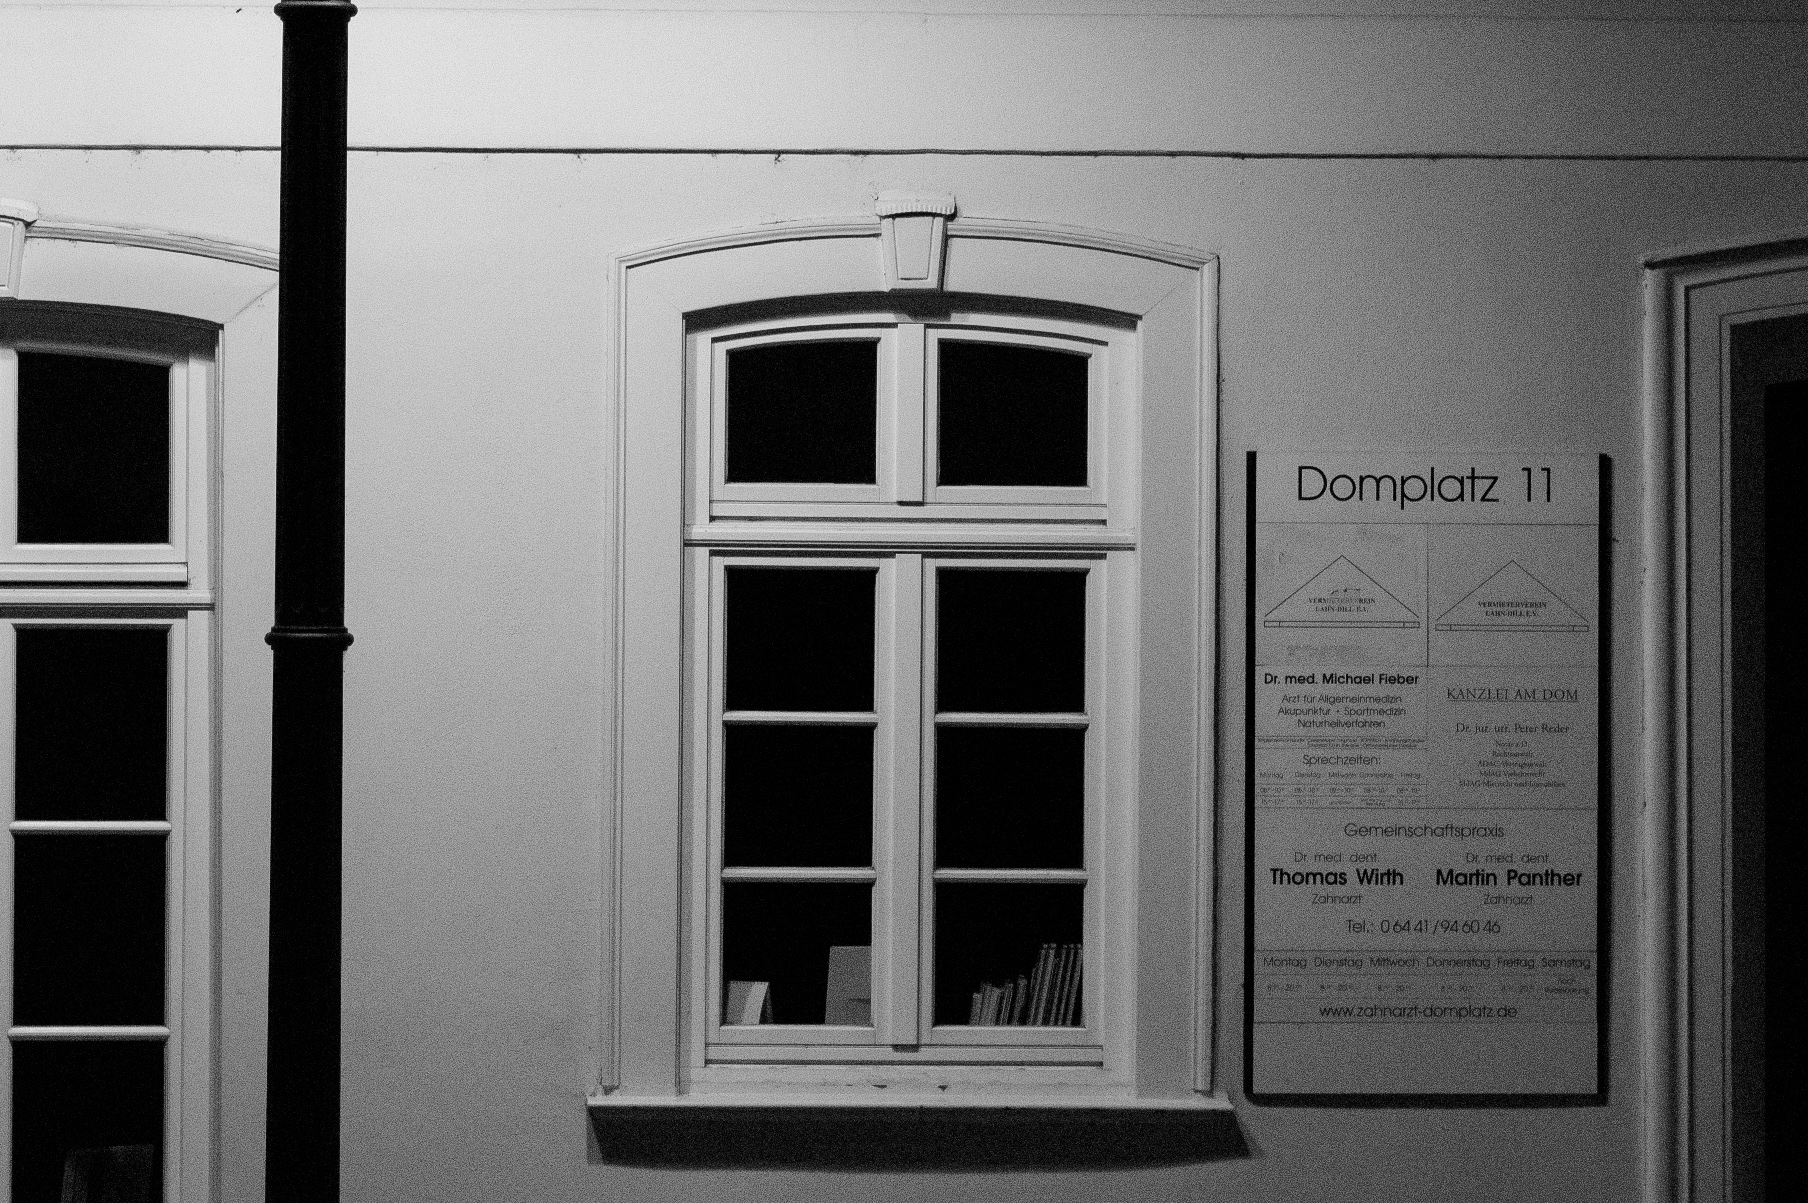
I made my way to the Domplatz, shot a little around there, then finally got down to the river. After wandering along the river for a little while shooting at 10,000 ISO, I decided to call it a night and get back to my warm room.
M Monochrom with 28mm Summicron ASPH, 1/25th @ f/2, ISO 10000
Click here for 100% Crop
M Monochrom with 28mm Summicron ASPH, 1/25th @ f4, ISO 10000
Click here for 100% Crop
Of course, even though it was nearly three o’clock in the morning, I had to see how the images looked at such incredibly high ISOs. I had shot up to 6,400 ISO in my dinner test, but walking around all night with the camera set to 10,000 ISO was another matter entirely. In spite of the fact that I hadn’t really honed in on my optimal image processing settings yet (I have now – see below), I was extremely impressed by my first attempts. The level of detail and the minimal amount of tightly-packed noise was even better than I expected, especially in the ridiculously low light I was shooting in. This test just reconfirmed what I had seen in my brief, across-the-dinner-table shots a few nights before.
M Monochrom with 50mm APO-Summicron, 1/180th @ f/2.8, ISO 10000
Click here for 100% Crop
Bad day for a test
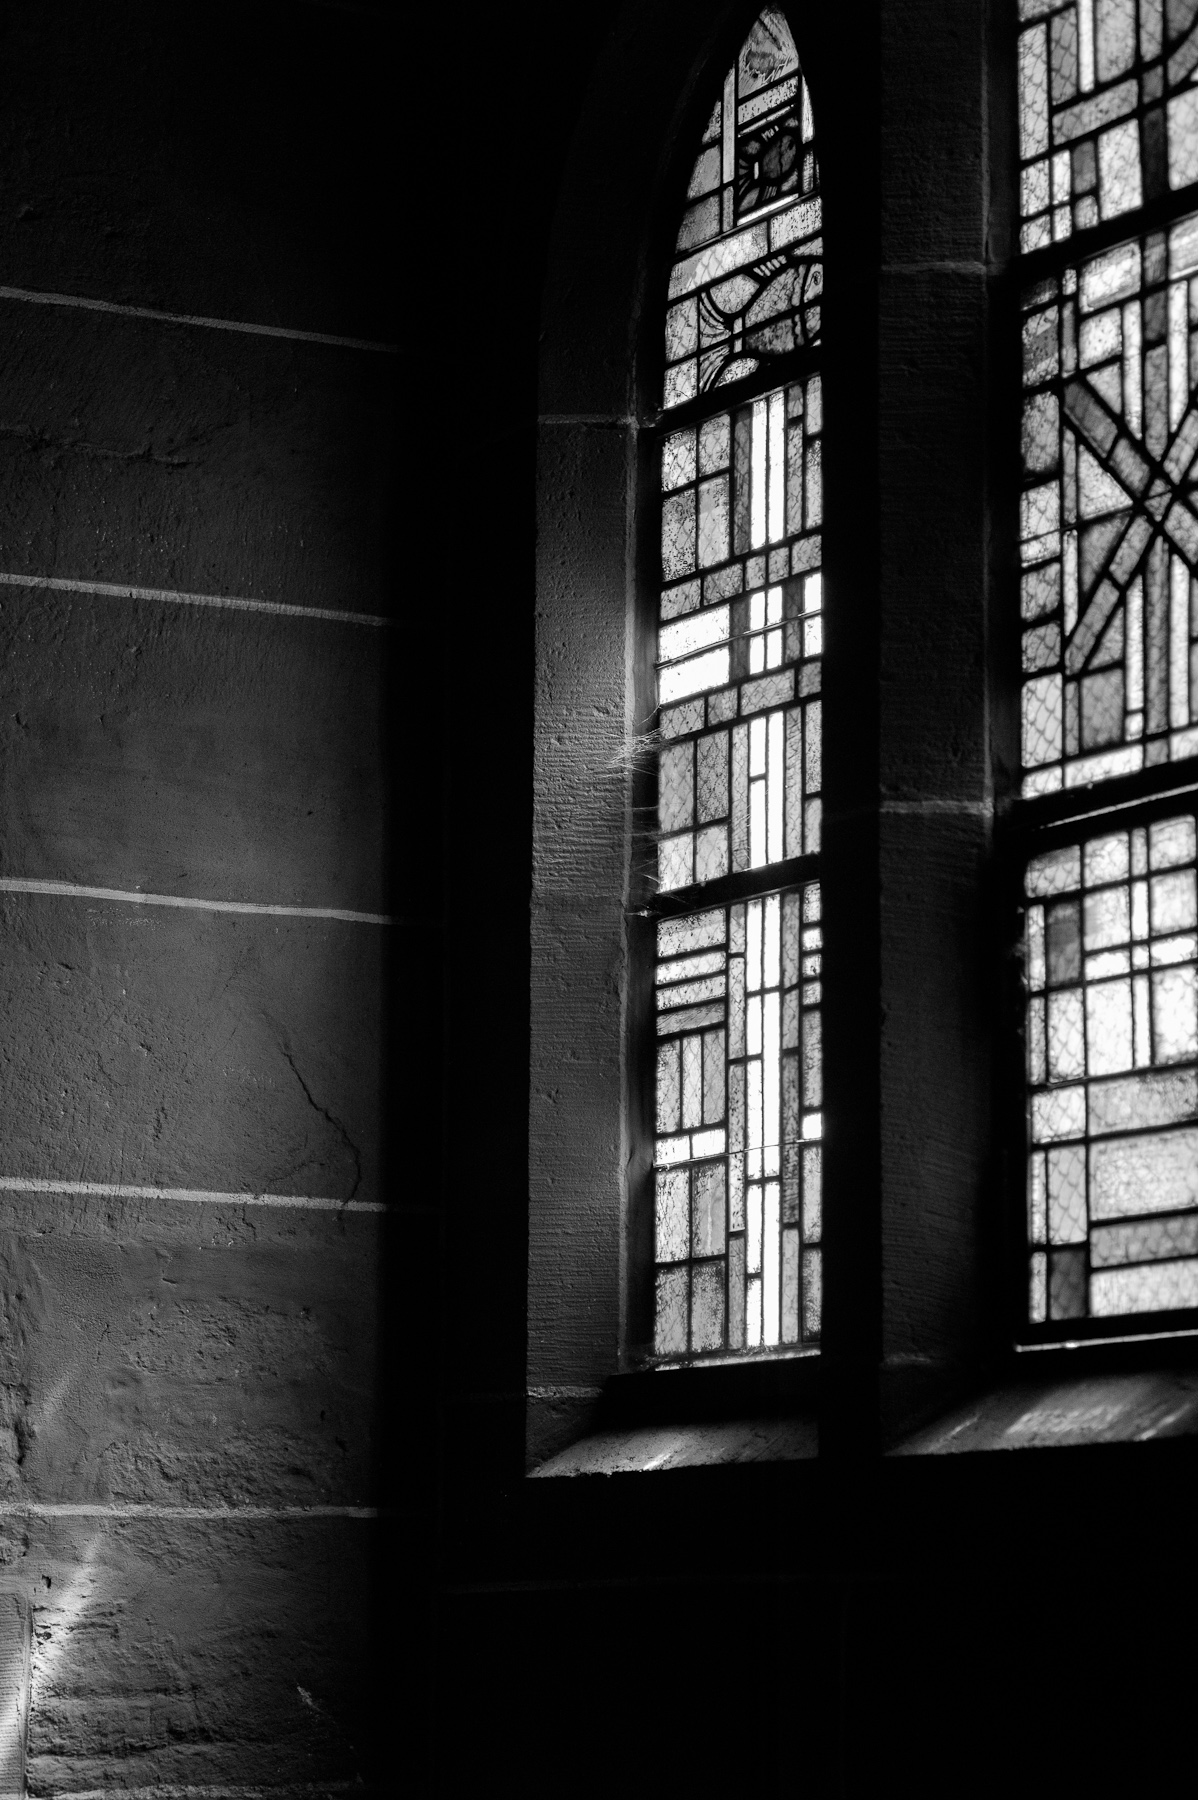
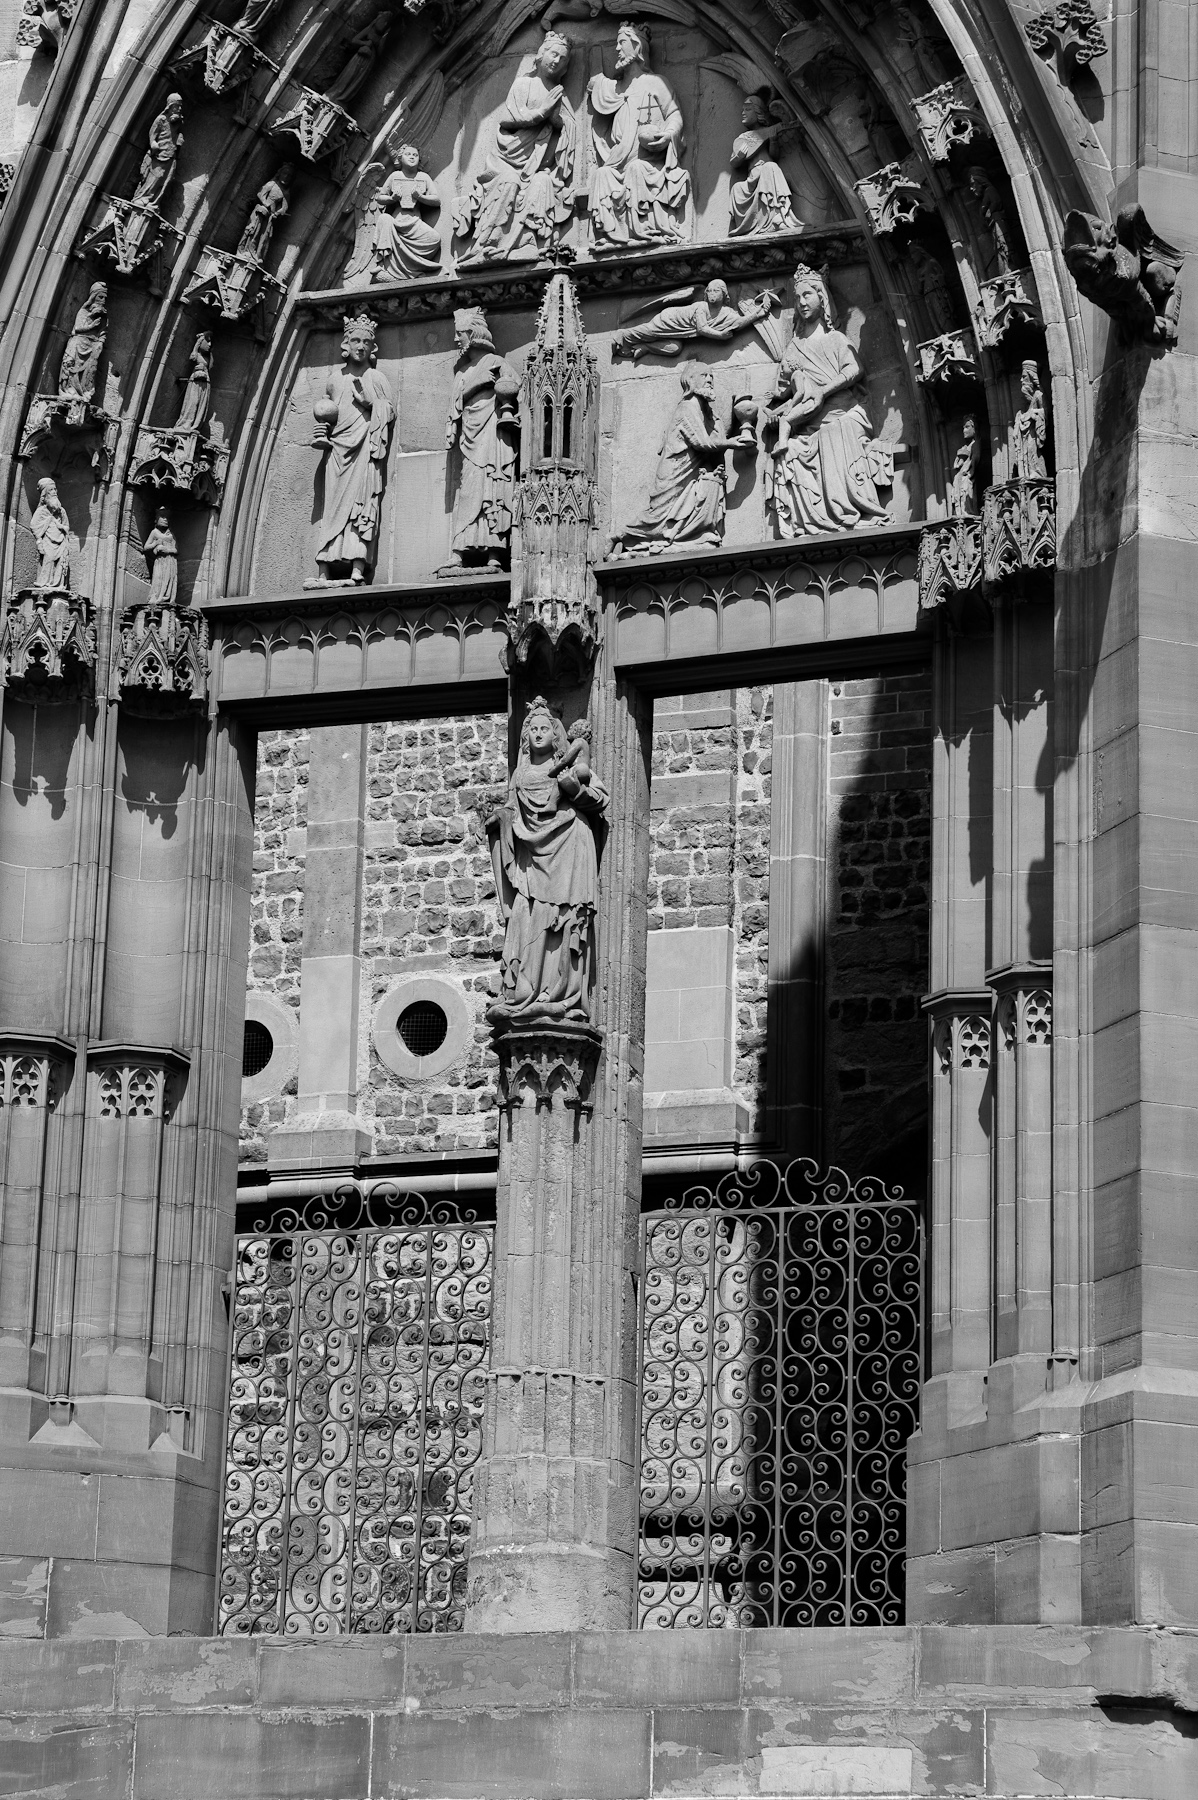
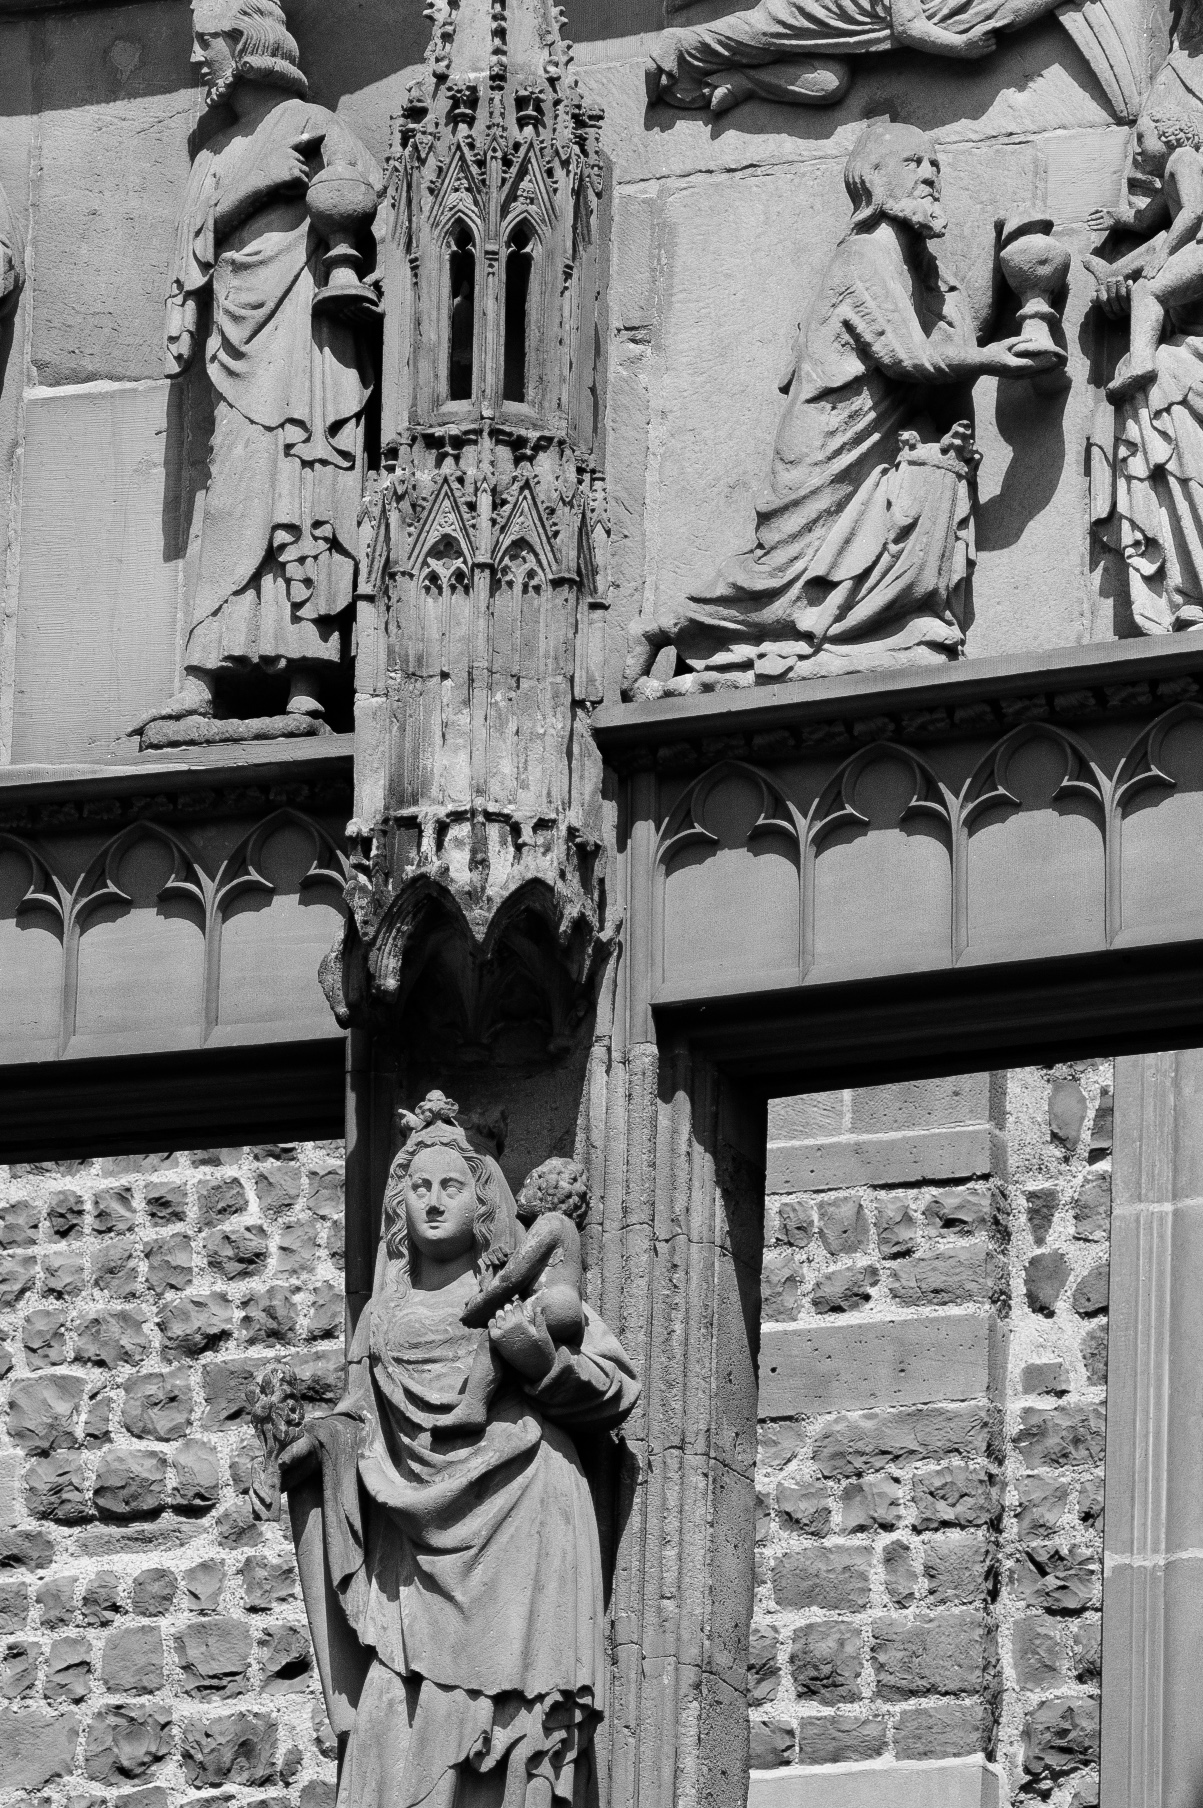
The next day was miserable. Not only was it still cold, it was pouring rain. With only hours left before I had to return my M Monochrom loaner, I was starting to worry. I decided to head to the one place I knew would be dry (and warm) – the Wetzlarer Dom (the big church).
M Monochrom with 28mm Summicron ASPH, 1/90th @ f/4, ISO 1250
Click here for 100% Crop
Luckily, my rental car was only a few feet away from the hotel entrance and the Dom usually has a decent amount of parking. Once inside, I set about trying my hand at some more subtle shots. The light coming through the church windows was nice and diffuse.
M Monochrom with 50mm APO-Summicron, 1/125th @ f/2, ISO 400
Click here for 100% Crop
Given the low light prowess of the M Monochrom, I was able to use my 90mm Elmarit for some close-up shots with no concern of camera shake. This was certainly one of the more liberating aspects of the M Monochrom. You never have to worry about noise. Just crank up the ISO and enjoy faster shutter speeds and the ability to shoot handheld in conditions that the M9 would cry at.
M Monochrom with 90mm Elmarit, 1/250th @ f/2.8, ISO 1250
Click here for 100% Crop
M Monochrom with 90mm Elmarit, 1/350th @ f/2.8, ISO 640
Click here for 100% Crop
Eventually, the rain cleared and the sun came out in full force. I was able to come out of hiding and shoot for a couple hours before I was scheduled to meet with Jesko in Solms and give back the monochromatic miracle camera.
M Monochrom with 90mm Elmarit, 1/2000th @ f/2.8, ISO 320
Click here for 100% Crop
In bright light, the M Monochrom performed flawlessly. I was constantly checking my exposure warnings on the LCD, especially for high contrast scenes and made sure to underexpose where necessary.
High contrast image with both highlight and shadow warnings – better to underexpose to preserve highlights
If you think you might want to shoot wide-open on the M Monochrom in broad daylight, you may want to invest in an ND filter or two. I prefer to shoot in A mode (no, that’s not a typo) and I constantly saw 1/4000 flashing in the viewfinder, indicating that I had run out of shutter speed. With a base ISO of 320 and a fast lens, this is really easy to do. So, either stop down (Peter would be disappointed), use a 3-stop ND filter, or use color filters for B&W photography. A red filter would knock that exposure down two or three stops and will give you very striking skies. The next time I go out shooting with the M Monochrom, I will be sure to try a variety of color filters and experiment.
M Monochrom with 50mm APO-Summicron, 1/4000th @ f/4, ISO 320
Click here for 100% Crop
Post processing insights in Lightroom 4
Files out of the M Monochrom look a little too flat and even for my taste. On my color images, I like good strong shadow contrast and on B&W even more so. I understand that this flies in the face of many photographers’ preference for tons of shadow detail, but personal taste is just that – personal. So, after much experimentation, I think I’ve found a preset that works very well on 90% of the images that I shot. Sure, some exposure tweaking and shadow/highlight recovery will be needed here and there, but overall, I’m very pleased with the resulting look. In the future, I’ll apply this preset upon import of any M Monochrom images I shoot.

M Monochrom with 90mm Elmarit, 1/750th @ f/2.8, ISO 320
As far as noise reduction goes, I’d recommend turning NR off completely (Luminance set to 0) for any files up to 3200 ISO. The files are so much more detailed without noise reduction and the little bit of tightly-patterned shadow noise probably won’t show even in large prints. At 5000 and 6400 ISO, I wouldn’t go beyond 10-15. And, at 10,000 ISO, I’d recommend a range of 15-25 depending on your tolerance of noise. If you value file smoothness and desire a total lack of noise at almost every ISO over absolute detail, then set the Luminance NR between 15-30, ramping up slightly as you increase ISO. Again, my personal preference is for more detail and texture, and the M Monochrom delivers this in spades at just about every ISO.
Edit (05-27-12): I've added a companion article showing an ISO comparison of the M Monochrom and the M9, as well as demonstrating the various noise reduction approaches for ISO 5000 and ISO 10000.

M Monochrom with 50mm APO-Summicron, 1/125th @ f/2.8, ISO 6400
Click here for 100% Crop
Sharpening is an easier story. I use exactly the same sharpening settings at every ISO regardless of subject matter. My sharpening settings are very similar to the S2: Amount: 49, Radius: 0.8, Detail: 50 and Masking: 0. These settings, combined with a little (+10) boost in Clarity really give the M Monochrom files good bite without artifacts.
M Monochrom with 90mm Elmarit, 1/1500th @ f/5.6, ISO 320
Click here for 100% Crop
Otherwise, my biggest change to the files is how much I chose to darken the shadows to achieve the richness of tone and contrast I’m looking for. By combining the new Tone control sliders with the Tone Curve, I was able to get rich dark tones without clipping the blacks too much. With Tone sliders only , way too much shadow information was getting lost. The nice thing about LR is that even with new tools, you can still mix and match to produce your desired outcome.
M Monochrom with 50mm APO-Summicron, 1/1500th @ f/5.6, ISO 320
Click here for 100% Crop
Pretty simple really. It just took me the better part of a week to settle on a somewhat universal correction. I usually have to distance myself from the tweaking for a day or two in-between sessions in order to keep a fresh perspective and retain some objectivity. Feel free to modify the preset to suit your own tastes.
You can download my preset here. If you're browser tries to open the file as text, right click on the link and select Save Link As… to download preset.
M Monochrom with 50mm APO-Summicron, 1/125th @ f/2, ISO 800
Click here for 100% Crop
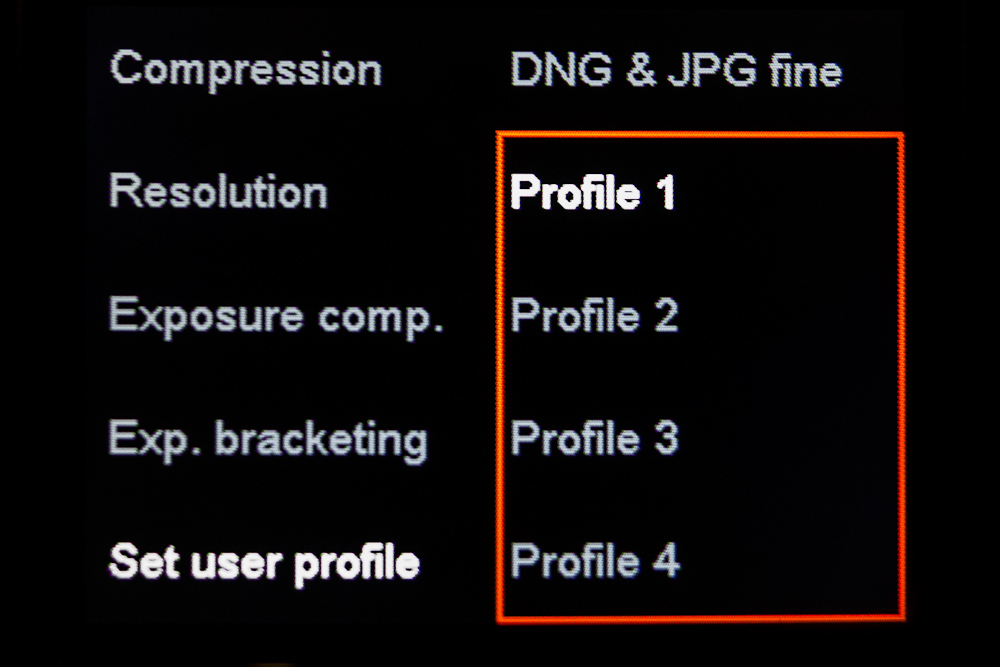
JPGs anyone?
It was only after I had shot all my tests that Jesko asked if I had shot JPG in camera and tried any of the toning settings. Unfortunately, I hadn’t. I’m very much a RAW-only shooter as I like to dial in exact corrections in LR and have never loved in-camera JPGs. Well, I was informed that because there is no in-camera demosaicing in the M Monochrom, there are also no artifacts. And, because Leica chose to use extremely low compression, the JPG quality is supposedly truly excellent. Had I considered these factors, I would have definitely shot DNG+JPG Fine and played around with the toning options (Sepia, Cold, Selenium). Perhaps next time.
M Monochrom with 90mm Elmarit, 1/4000th @ f/4, ISO 320
Click here for 100% Crop
Wrapping up with Jesko
The short drive back to Solms from Wetzlar was bittersweet. I greatly appreciated the opportunity to shoot with this fantastic camera, but I was sad not to be able to just keep using it. The M Monochrom handled just like my M9. The lenses behaved as I expected them to. Really, the only things I had to adjust for was to be slightly more mindful of exposure and to forget about trying to sacrifice shutter speed for lower ISO. On the M Monochrom, it was the exact opposite. After seeing the first high ISO test shots, I had the confidence to take advantage of the higher sensitivities. This enabled me to use my 90mm f/2.8 indoors and at night, something I hadn’t really been able to do off a tripod before.
M Monochrom with 50mm APO-Summicron, 1/60th @ f/2, ISO 6400
Click here for 100% Crop
I had the chance to sit down with Jesko for a final wrap-up session and we discussed the origin of the M Monochrom. Shortly after the M8 was released, Leica saw a fairly large number of requests for a B&W digital M camera. This continued after the M9 introduction as well. Given the unprecedented success of the M9, Leica had more resources and could take bigger risks, so they decided to answer the call for a B&W M camera. After about a year of development , collaborating with TrueSense on a sensor without a CFA, reworking in-camera algorithms, as well as getting Adobe to add support for monochrome DNG files in LR4, the M Monochrom was born.
M Monochrom with 90mm Elmarit, 1/500th @ f/4, ISO 320
Click here for 100% Crop
Even given my short time with the M Monochrom (less than 24 hours), and admittedly not being a hardcore B&W photographer, I had a blast.
M Monochrom with 35mm Summicron ASPH, 1/2000th @ f/5.6, ISO 320
Click here for 100% Crop
The image quality is on another level, even from the already excellent M9. At low ISO, the photographs have a natural and completely noise-free look. Jesko referred to this as hyper-realism and I think the term fits. Just stunning. At high ISO, new possibilities open up for the M photographer. The minimal noise and tight grain pattern make even 10,000 ISO totally useable. I made some sample 20×30 inch prints a few days ago and was blown away by the results at 10,000 ISO. The noise was almost invisible in print at this size and added a subtle texture to the image.
M Monochrom with 90mm Elmarit, 1/1500th @ f/5.6, ISO 320
Click here for 100% Crop
I don’t expect Leica will sell as many M Monochrom cameras as M9s, and neither do they. When I quipped that the M Monochrom could be an instant classic, Jesko corrected me and said, “No. The Monochrom is an iconic camera.” And, the more I think about it, and the more I look at my images, the more I agree. The M Monochrom will indeed be hailed as an Icon, a true testament to the essential nature of B&W photography.
If you think the Leica M Monochrom or 50mm APO-Summicron could be for you, consider placing a pre-order through Dale Photo & Digital. Dale Photo is one of the largest and most knowledgeable Leica dealers in the USA. No deposit or prepayment is necessary. Call 1-800-327-1776 with any questions, or email me at david@dalephotoanddigital.com.
Thanks David. This was a pretty entertaining read with lots of information. Cant wait to get my hands on Henry. 🙂
Terrific review, David. Both the camera and lens are mouth watering. Thank you. JB
Thanks, David, for the hands-on review. I look forward to you sending me the MM I ordered from you the day after it was announced! Since I shoot only B&W, it is the perfect M. How do you think it’s images will compare at 30″ print size to LR desaturized S2 images using the 70mm?
Best, Geoffrey
How do you think it’s images will compare at 30″ print size to LR desaturized S2 images using the 70mm?
Very interested in an answer to this question. Desaturating an S2/70mm file does allow very creative color control. Hard to give that up!
This is interesting. Currently, when we take a B&W photo on a color sensor, we always go through a color stage in our demosaicing. But if this step creates a less attractive noise pattern, then wouldn’t it be possible to have a different algorithm, either in the camera or in Lightroom (through the raw file), to make use of the intensity information from the different colored pixels, with the gain adjusted but without spreading the noise to adjacent pixels? Maybe we can even have a stronger noise filtering on the red and blue pixels, and use the fine details from the green channel to get a smoother output with higher overall sharpness?
I would consider paying for this “special edition” firmware for my M9, as long as it came in a nice box with red velvet inside 🙂
Robert
I think that’s an excellent question. And the honest answer is I don’t know because I didn’t test the M Monochrom against the S2. Of course, the S2 has a 100% pixel advantage (37.5 vs. 18), but the the M Monochrom significantly outperforms the S2 in two areas: 1) superior high ISO performance and 2) lower possible hand-held shutter speeds. I’d guess that at ISO 160 or 320, the S2 would offer better resolution and detail. But, past that and I’d probably give the nod to the M Monochrom. Of course, I’m just guessing….
Sounds like another test is in order.
David,
I had a chance to try the Monochrom at a Leica Akademie session in San Francisco last Friday. I did not think to ask if anyone has tried color B&W contrast filters (Yellow, Red, Green) with this sensor. Are you aware of any tests / reports on this topic?
Thanks.
Jack Ottaway
[…] Leica M Monochrom Review […]