Leica had a real challenge this time around. In just a little over a decade, the legendary German camera maker had progressed from its first rudimentary attempt at a digital rangefinder camera in the M8 to what I dubbed the quintessential digital M with the M10. And since its introduction in 2017, the M10 has gotten some significant updates – the M10-P with an ultra-quiet shutter, touchscreen and level gauge, then later the M10-R, which upped the sensor resolution from 24 megapixels all the way to 40. How could a digital M be improved much further?
The M10-R is already the same exact dimensions as an analog M7. The 0.73x optical rangefinder the finest ever put into an M body in 70 years. Plenty of resolution. Excellent low light ability and outstanding dynamic range. Optimized color filter array. Built like a tank. Quick and responsive. What could the engineers in Wetzlar really do to create meaningful upgrades for the next generation digital rangefinder, ones worthy of the M11 moniker?
And yet, the M11 is living proof that they were indeed able to craft a worthy successor to take the M mantle. Instantly recognizable, totally iconic, yet better in every meaningful way than the already exceptional M10-R. The M11 is everything M fans could have hoped for.
At the heart of the camera is a brand-new 60-megapixel BSI CMOS sensor with dual-gain architecture and Triple Resolution Technology. Paired with the latest Maestro III custom ASIC from Fujitsu, the same processor that drives the SL2, the camera feels quick and nimble, ready to handle just about any photographic challenge.
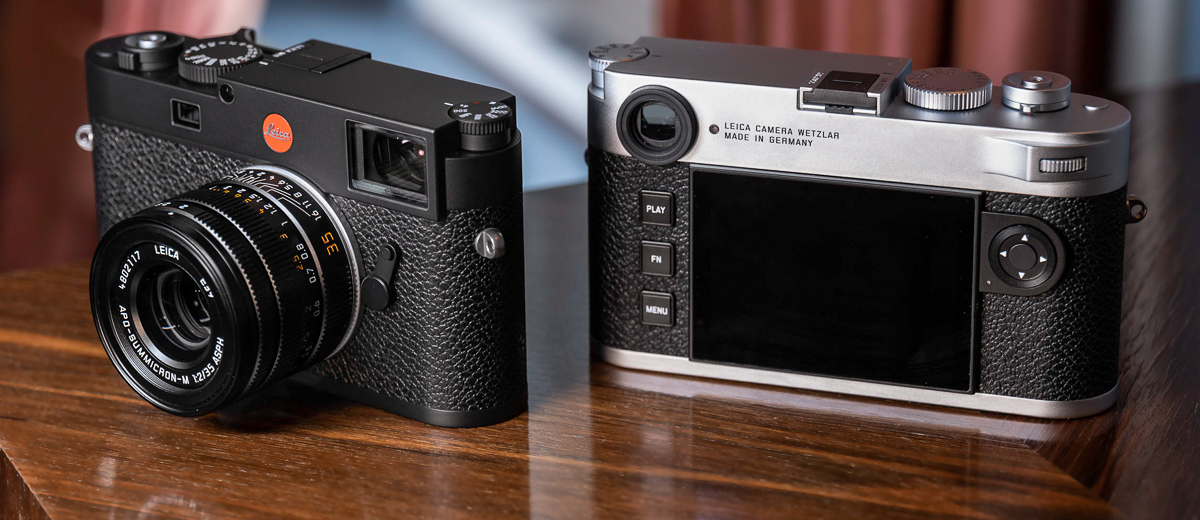
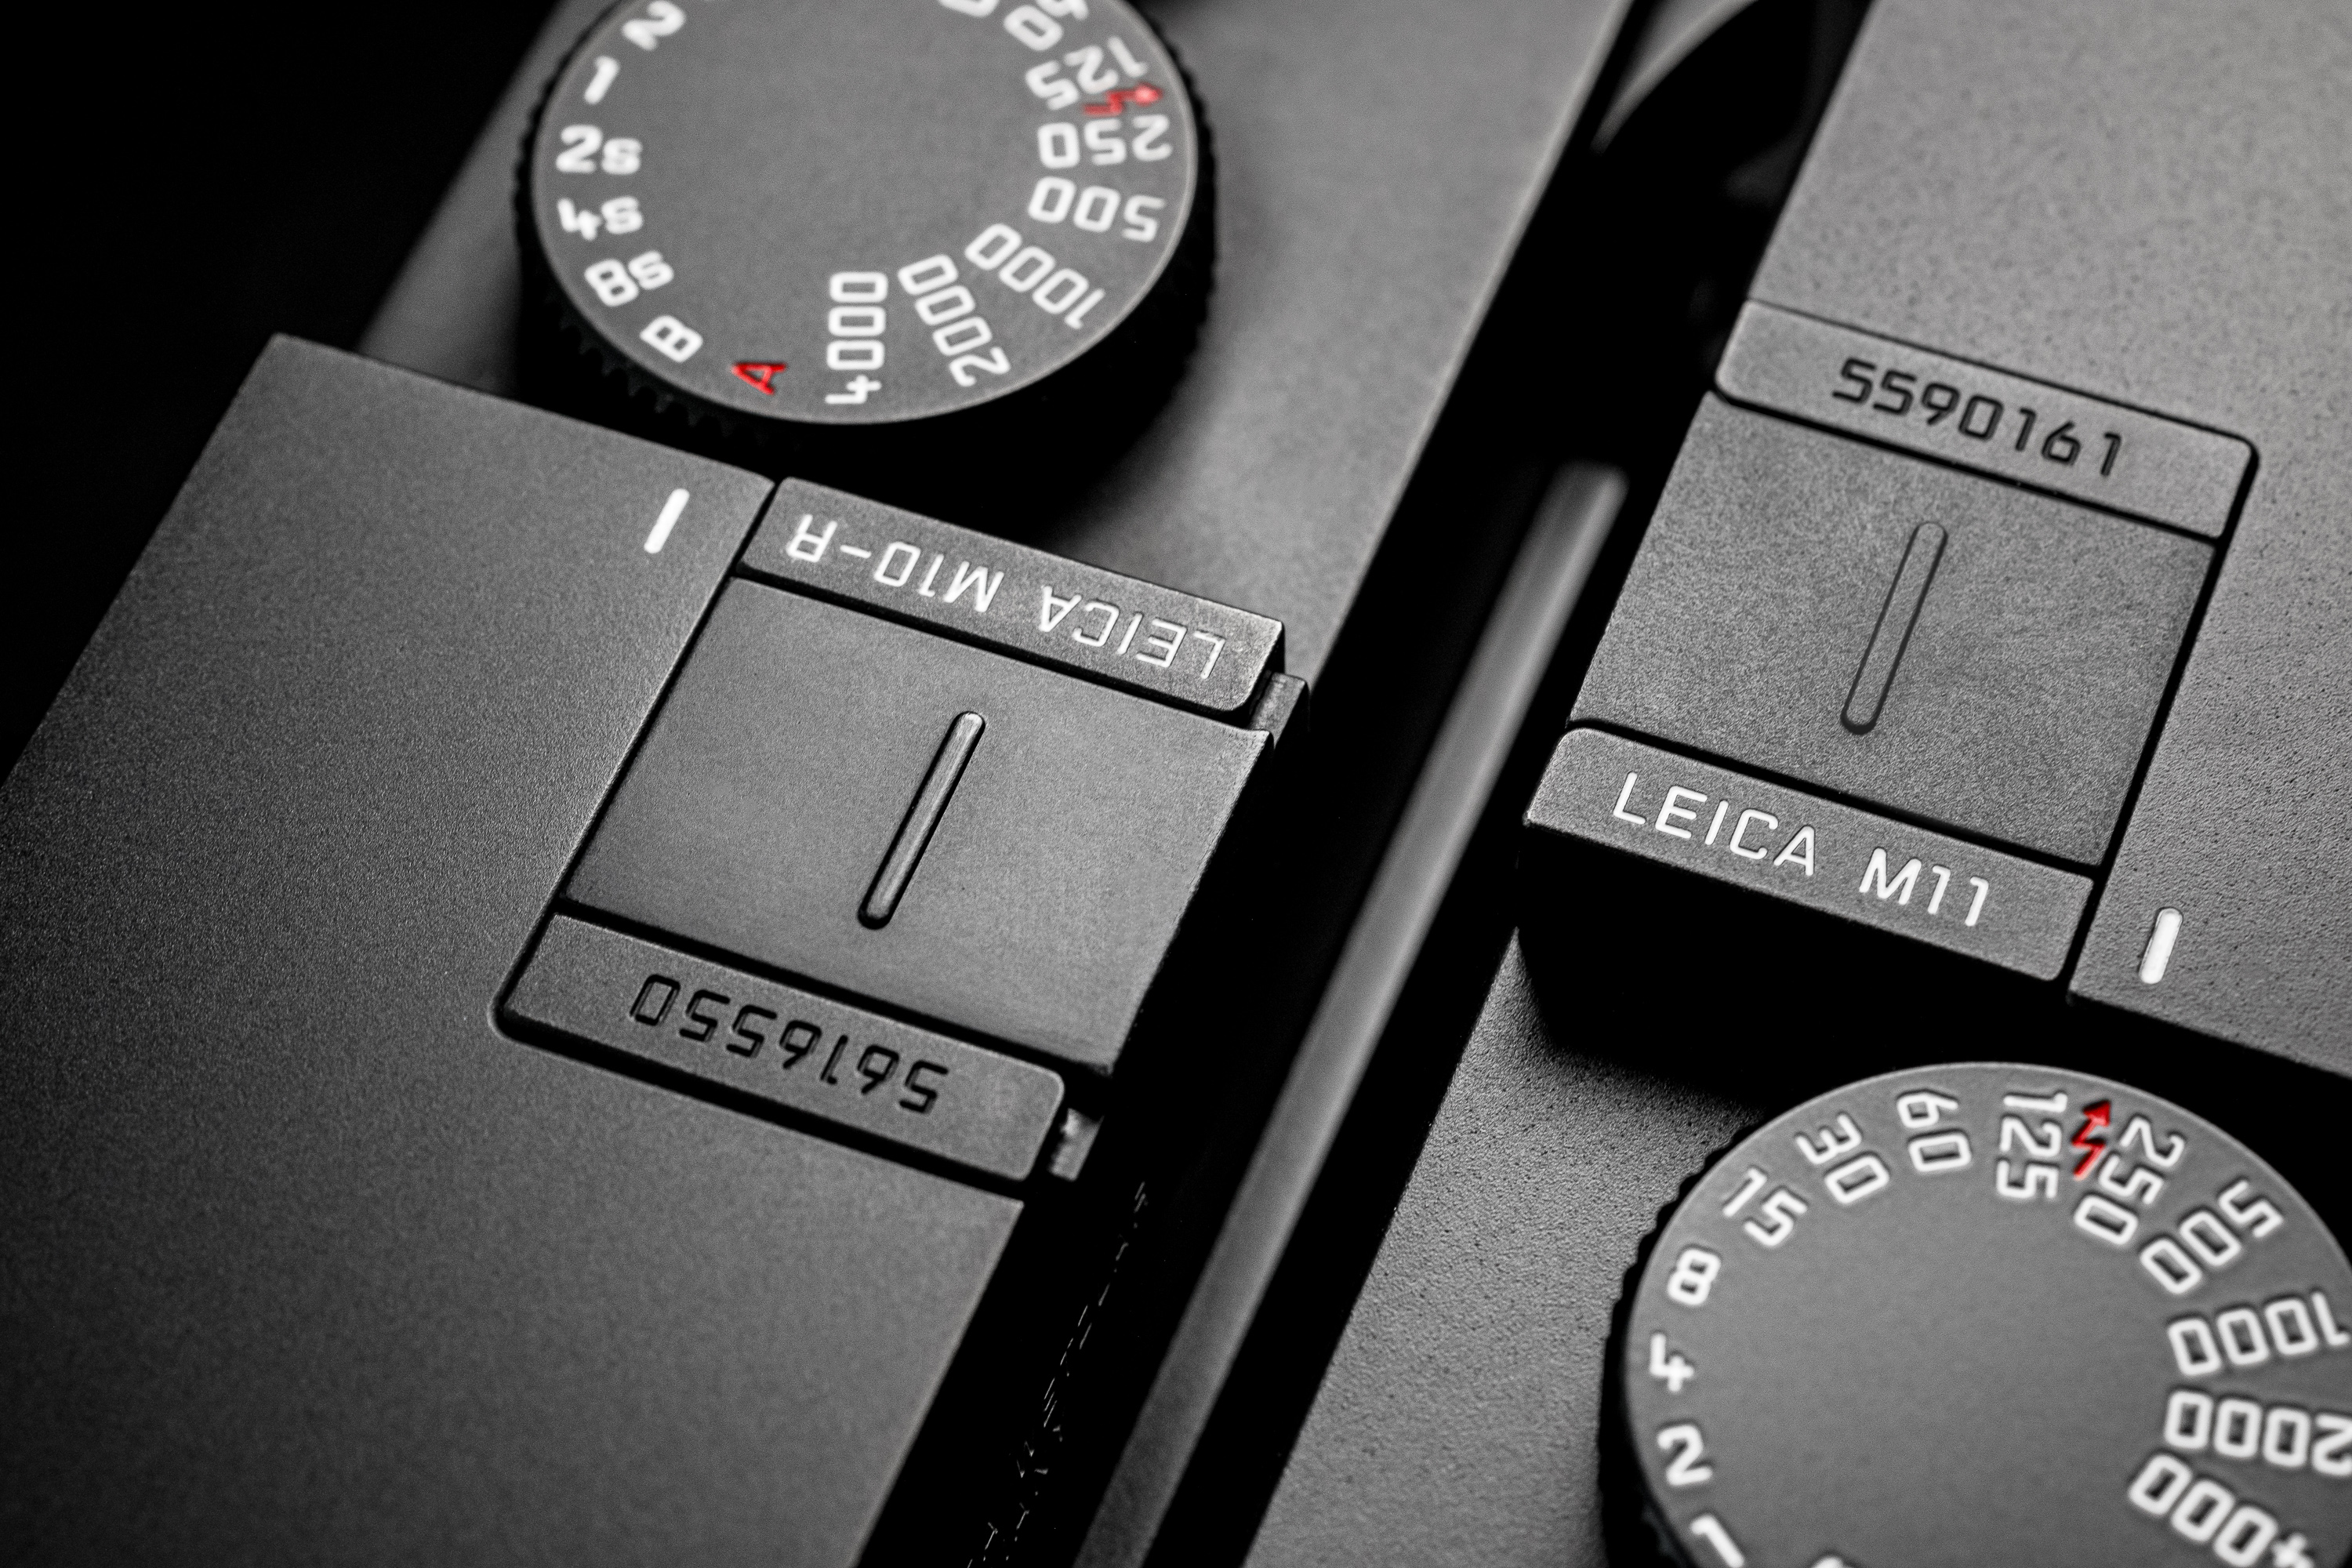
From the top, front and back, the M11 bears more than a casual resemblance to the M10. All the major elements are there: the ISO and shutter speed dials up top, the on/off switch at the base of the perfectly weighted shutter release, along with the familiar viewfinder and rangefinder windows. On closer inspection you’ll notice some minor tweaks here and there, like moving the front focus assist button to the top plate next to the shutter speed dial, a slightly different button layout flanking the rear LCD in a new floating configuration, a shallower top plate, and of course, that all-important LEICA M11 engraving in the hot shoe. And if you examine the finish on the black model, you might note that the surface has a more finely textured matte look, versus the smooth anodization of the M10. But a revolutionary change wasn’t needed here. Leica knocked it out of the park with the M10 design. No reason to meddle with what has worked so well.
Now, pick up the camera and you will immediately feel the difference in heft, at least on the black version. Here, Leica opted for a machined aluminum top plate, shaving about 110g, for a roughly 20% reduction in weight. The lighter-than-it-looks feel echoes the sensation of a long-time M shooter holding a Q2 for the first time. Don’t care for something lighter? No problem. If you want the full-fat solid brass experience, Leica has you covered. Opt for the silver chrome model and you’ll get that familiar tanky mass, clocking in the same as an M10-R at 640g including battery.
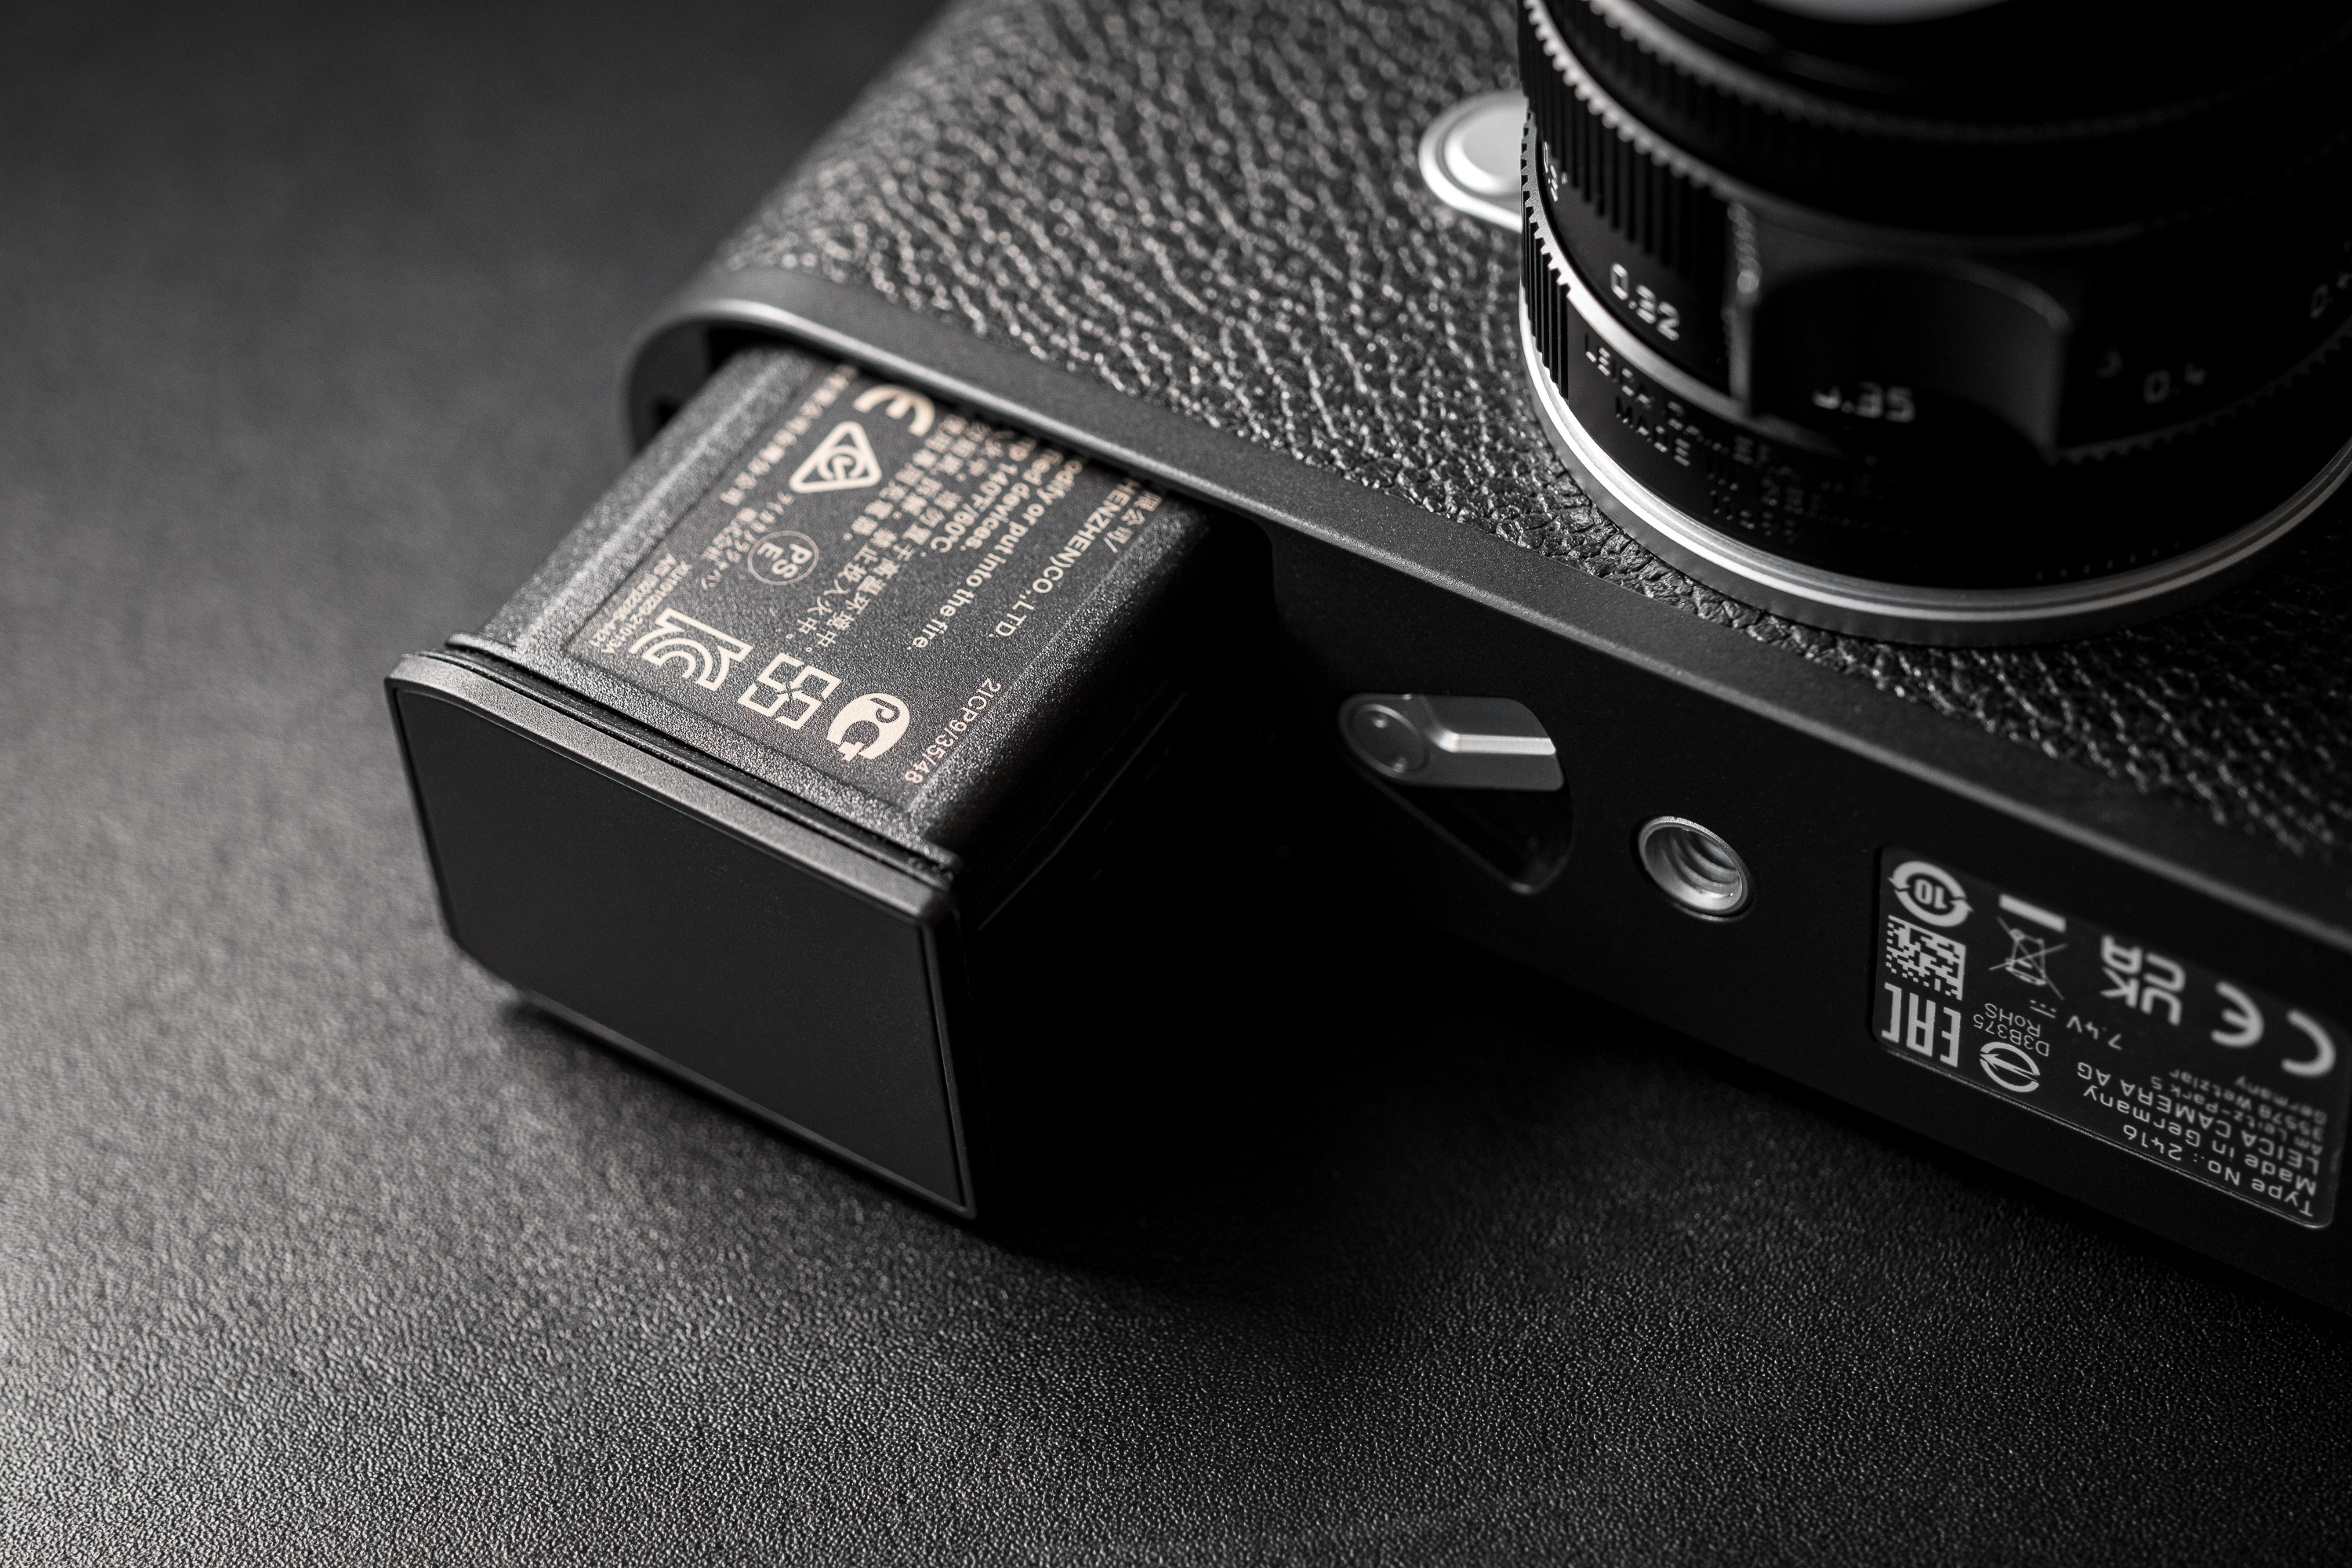
Once you’ve got the camera in hand, flip it over and you’ll see the most significant and obvious change. Yep, the M11 has no baseplate. Heresy, I know. How could Leica fly in the face of almost 70 years of tradition? Every M going back to the M3 has rocked a baseplate. How dare they! Look, I’ve been an M shooter for the better part of 20 years. But I’ve also shot the majority of my recent work with the SL2 and Q2 Monochrom. And you know what? I don’t miss the baseplate. The convenience of the quick battery release and memory card access easily outweighs whatever nostalgia I personally hold on to. I got used to the new normal within minutes of using the M11. I think most everyone else will too.
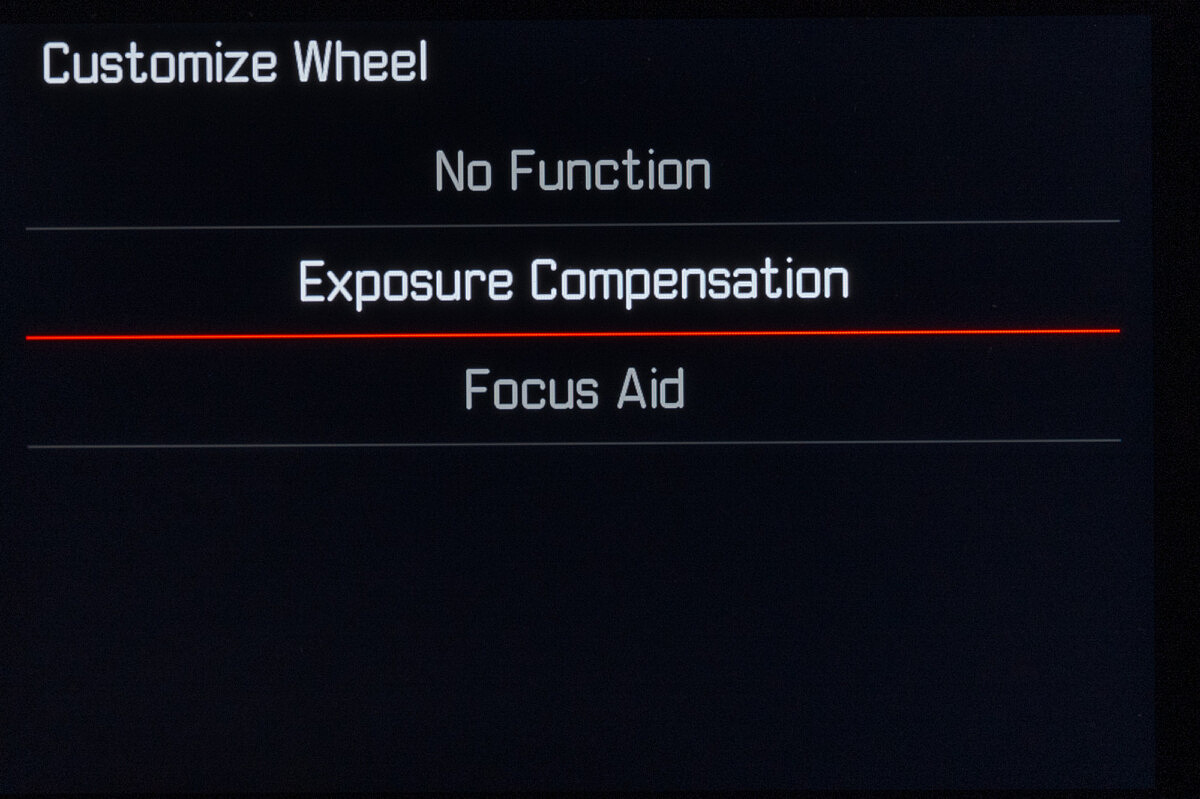
A subtle yet wonderful change that could easily go overlooked is the now clickable rear thumbwheel. Assignable to a custom function, Leica was able to add this additional control without cluttering up the minimalist design. Just like the rear FN button and top button, a long press brings up a list of selectable functions and a short press activates that option. During my testing, I assigned it to bring up exposure compensation, then used the wheel to quickly adjust. If you’re more inclined to have direct and nuanced control over ISO than the large whole steps on the dedicated ISO dial, you could assign M-ISO to the thumbwheel and have far more precise 1/3 steps. Or, for both functions, use the Customize Wheel menu to set the wheel to Exposure Compensation, then long-press to assign it to M-ISO. In this scenario, simply rotating left or right directly changes EV, but a short press in will activate the M-ISO menu on screen so you can select an ISO. Choices, choices.
New and Improved
With most of the exterior physical changes covered, let’s dive into the plentiful upgrades under the hood.
New Sensor
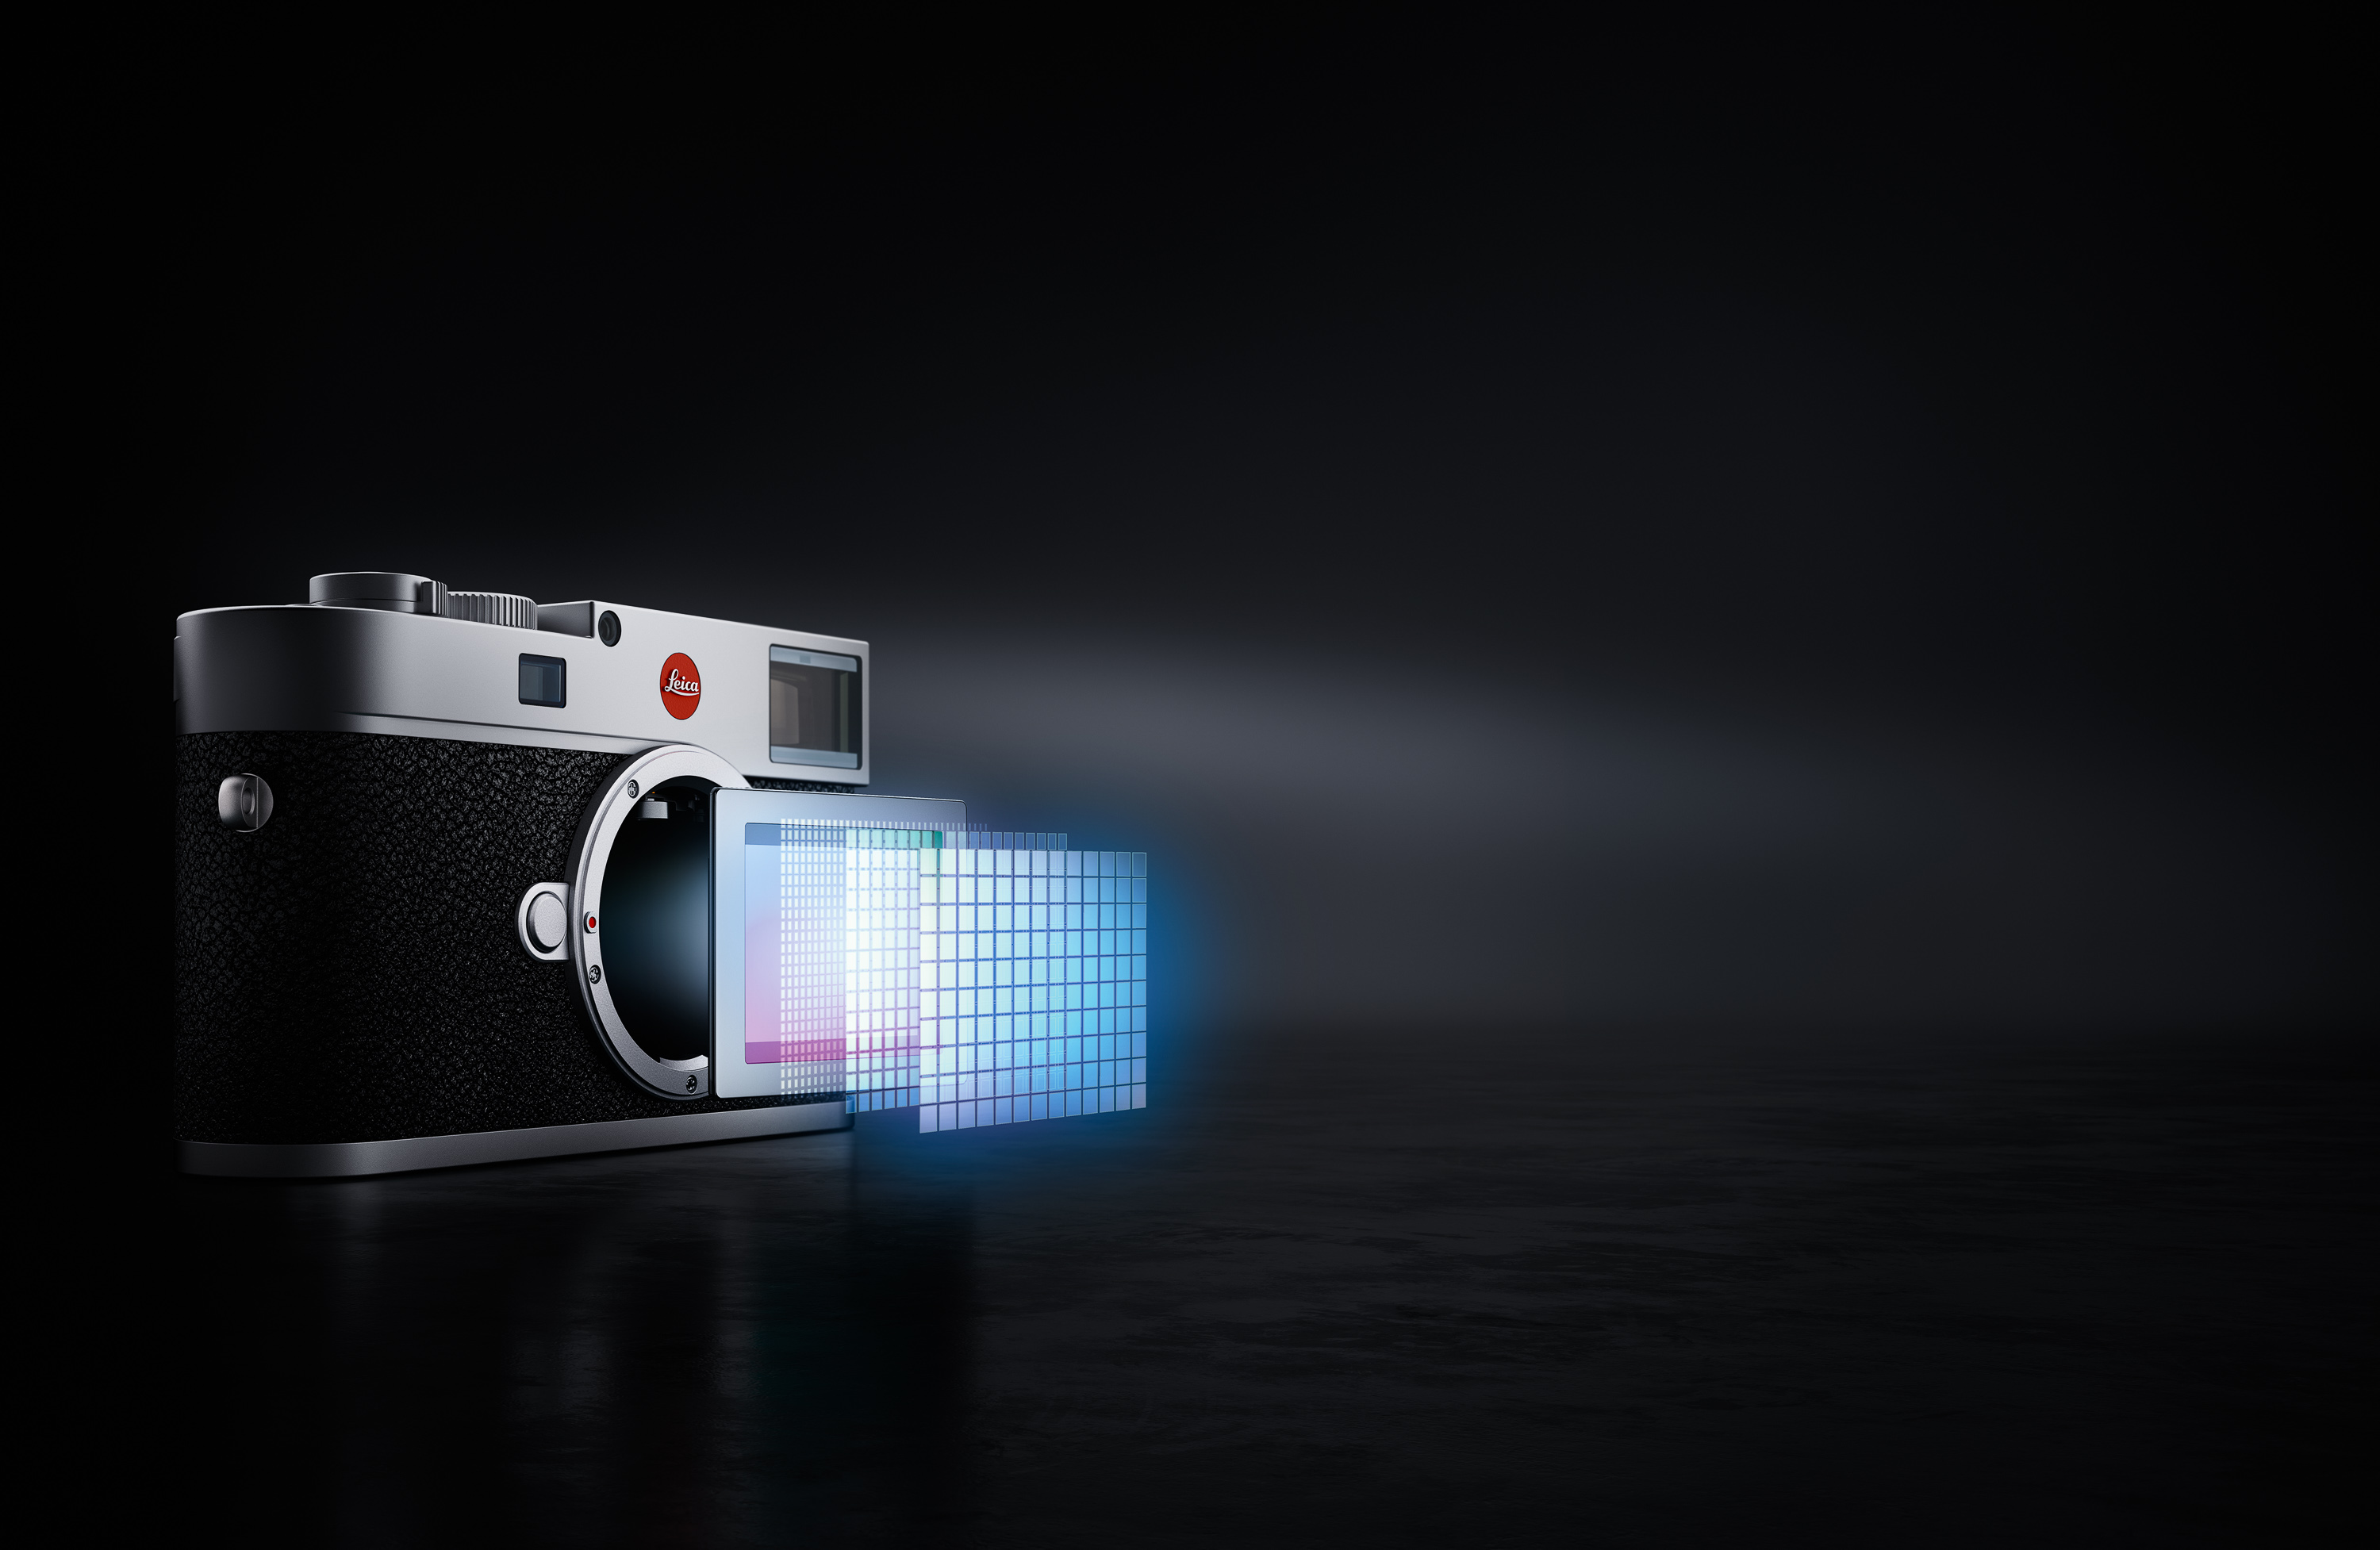
Without a doubt, the star of the M11 show is the new custom sensor. Leapfrogging their own 47-megapixel chip used in the top-of-line professional mirrorless SL2 and the little powerhouse Q2, the M11 boasts a 60-megapixel monster. Fully loaded with all the latest technical innovations, this chip delivers next-level image quality. Given the shrink down to a diminutive 3.73 micron pixel pitch, conventional wisdom would suggest less light gathering capacity. So, to eke out the very best performance, the engineers opted to use BSI technology for the first time in an M body. Back Side Illuminated sensors move the supporting electronics to the rear of the chip, allowing for significantly more photosensitive surface area and shallower pixel wells, resulting in no sacrifice versus a lower-resolution traditional design sensor with electronics in the top or middle substrate layers.
And because of this, the Leica M11 fills the role of multiple cameras in one. In the SL-System, you must choose if you want high resolution with the 47-megapixel SL2 or super-clean low light results with the 24-megapixel SL2-S, which also sports a BSI sensor. On the M11, you get both high resolution and low-light performance without sacrificing either.
Spoiler alert, the results from full resolution up to ISO 10,000 are outstanding. Not just acceptable, truly outstanding. It’s mind-boggling that the M11 can trade blows with the M10-R at high ISO while packing 50% more pixels. And if this is the baseline, before Adobe optimizes the debayering algorithms for Lightroom and Camera Raw, we’re only going to see performance improve over time.
Of course, the design team also employed a custom microlens structure to maximize light gathering even further and optimize for the high-incidence angle of non-retrofocus M lenses. And, with one of the thinnest dual layer high-absorption UV/IR cover glasses ever made, they manage to get even more performance and light transmission. The sensor features a dual-gain architecture, with two native ISO settings. This allows for a base sensitivity all the way down to a native ISO 64 without foregoing the high end, which goes up to ISO 50,000. And if that still wasn’t impressive enough, the M11 gets a further optimized color filter array and new image processing algorithms for the best color reproduction and nuance of any M camera to date.
Triple Resolution
For the first time ever on a Leica digital camera, the M11 offers variable resolution with hardware-based pixel binning and smart remapping of the Bayer filter array. At the full 60 megapixels L-DNG setting, the camera churns out 14-bit files with 15-stops of dynamic range at base ISO, previously the exclusive territory of the medium format Leica S (Typ 007) and S3. Drop to 36 megapixels in M-DNG to get a small dynamic range boost and slightly cleaner files before noise reduction is applied, along with improved burst depth. Go down again to S-DNG at 18 megapixels if you don’t need high resolution but do want unlimited burst shooting.
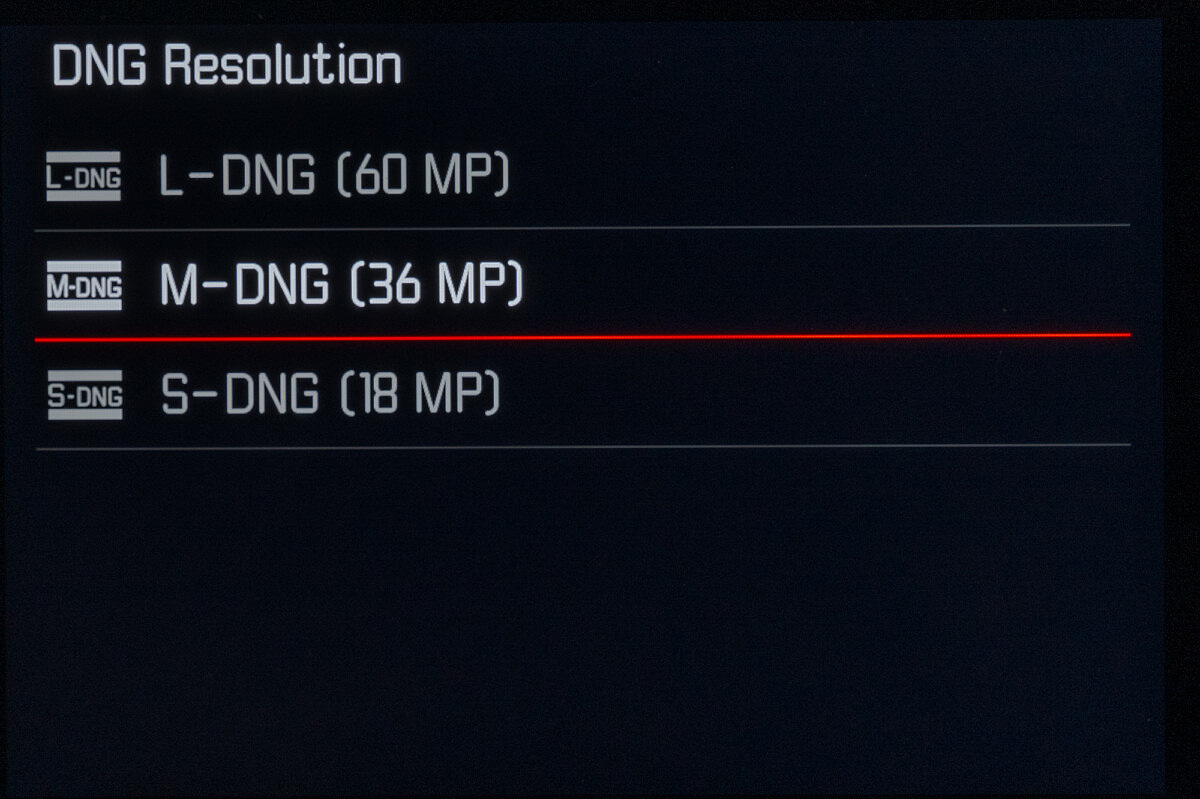
While the camera hardware and firmware offer the triple resolution functionality, Adobe looks like they still have some more work to do on the software side at time of publication. In my testing, all resolutions performed essentially the same, with the slight edge going to the full L-DNG setting due to the higher pixel density and better optimization in Lightroom. It will be interesting to see if Leica further optimizes pixel binning in firmware or if Adobe can extract even more performance from the current M-DNG and S-DNG files.
New Maestro III Processor
Processing all those pixels, we’ve got the capable Maestro III processor, paired up with a larger 3GB image buffer and full UHS-II SD card compatibility. Snappy and responsive, from menu operation to playback, everything just feels faster. Firing off a burst in high-speed mode at 4.5 frames per second results in no waiting time. Images are immediately available for review and the camera is always ready to shoot more. Maximum DNG burst depth is 13-15 frames at full resolution, 30 shots at 36 megapixels, and unlimited at 18 megapixels. To put the speed bump into context, the current top-of-the-range M10-R captures 4.5 frames per second but is limited to a maximum burst of just 10 shots. The M11 achieves the same frame rate with 50% longer bursts despite the 50% increase in pixel count. At a more comparable apples-to-apples resolution of M-DNG, the M11 manages a 300% improvement in burst depth. Impressive.
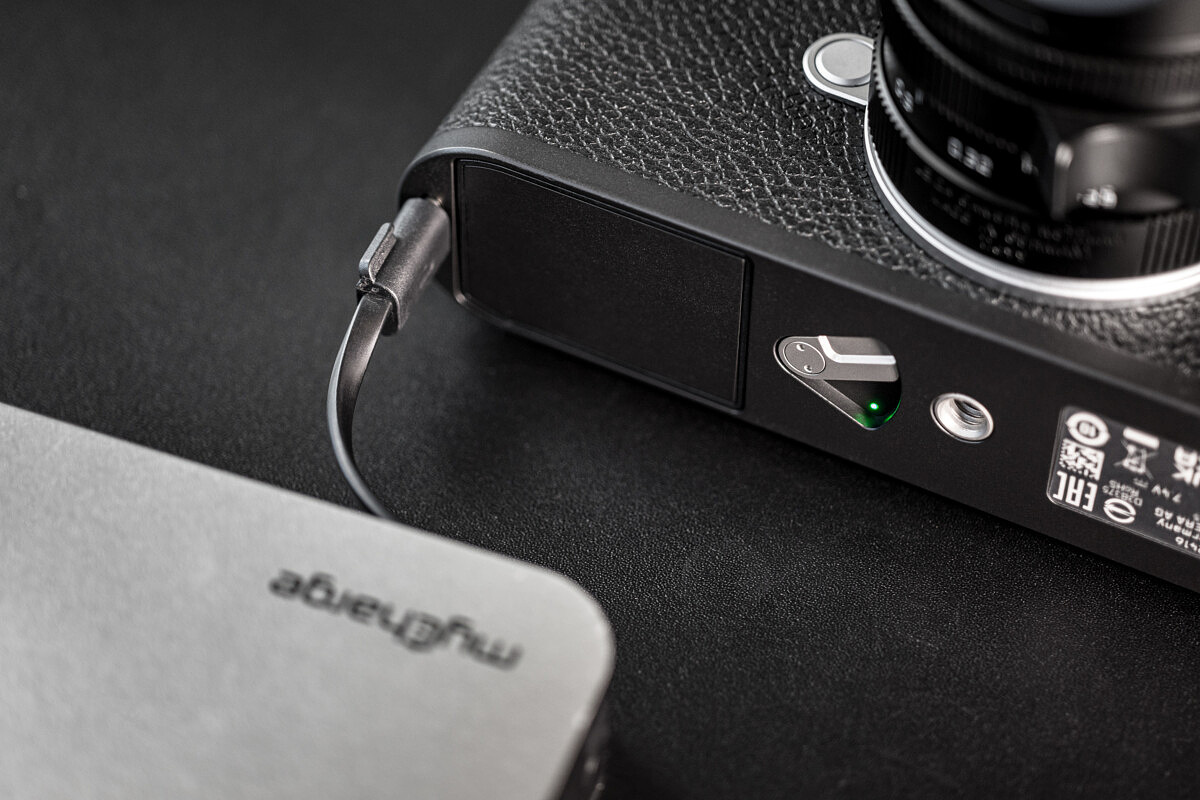
Even chewing through around 300 megapixels per second, Leica’s latest custom silicon is extremely power efficient. Combined with the new 63% larger 1800 mAh BP-SCL7 battery, the M11 can go all day on a single charge. Yes, really. For my testing, I had one battery and shot hundreds of images a day over the course of 10-12 hours. Granted, I did top up along the way by using another one of the M11’s welcome additions – the USB-C port on the bottom of the camera.
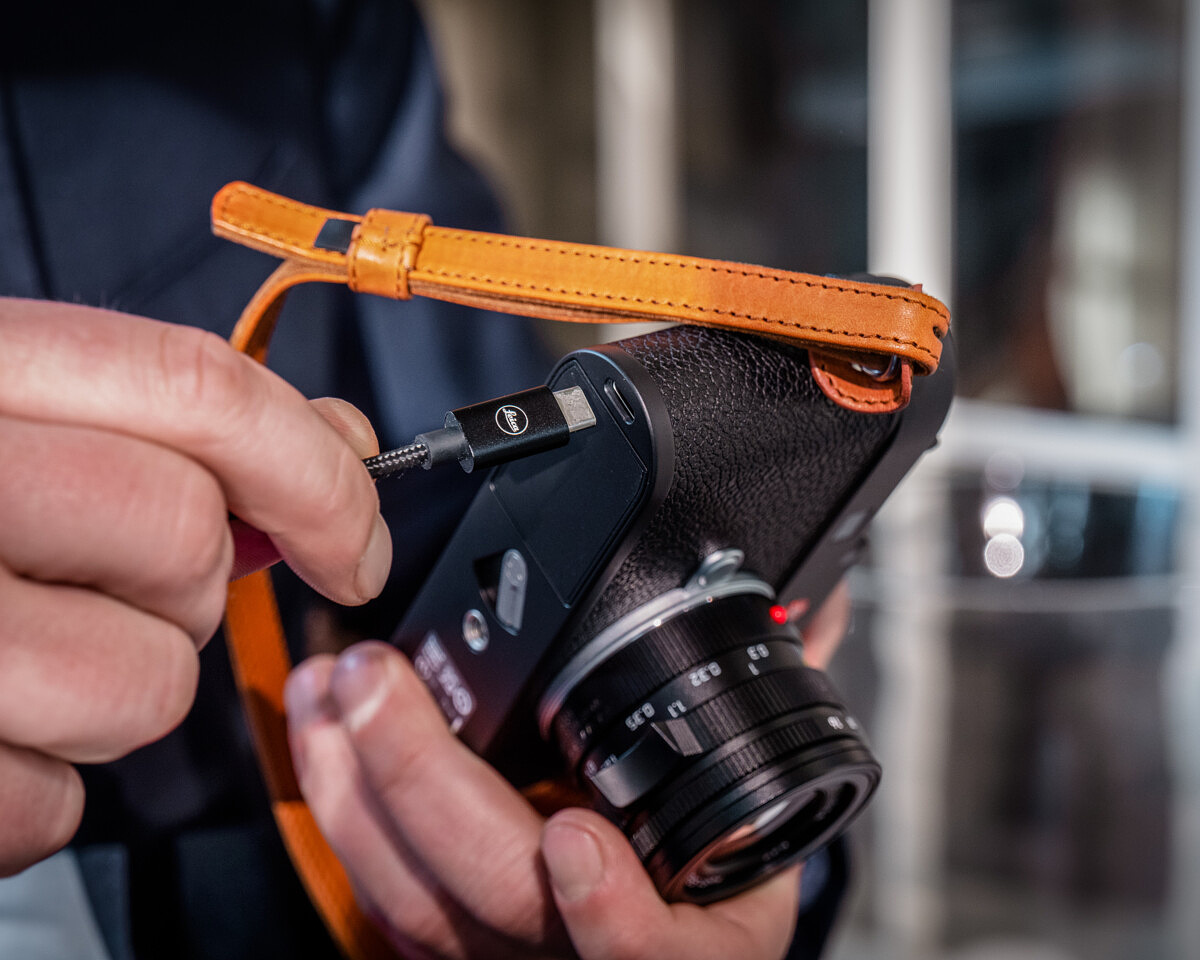
USB-C Port for Data and Power
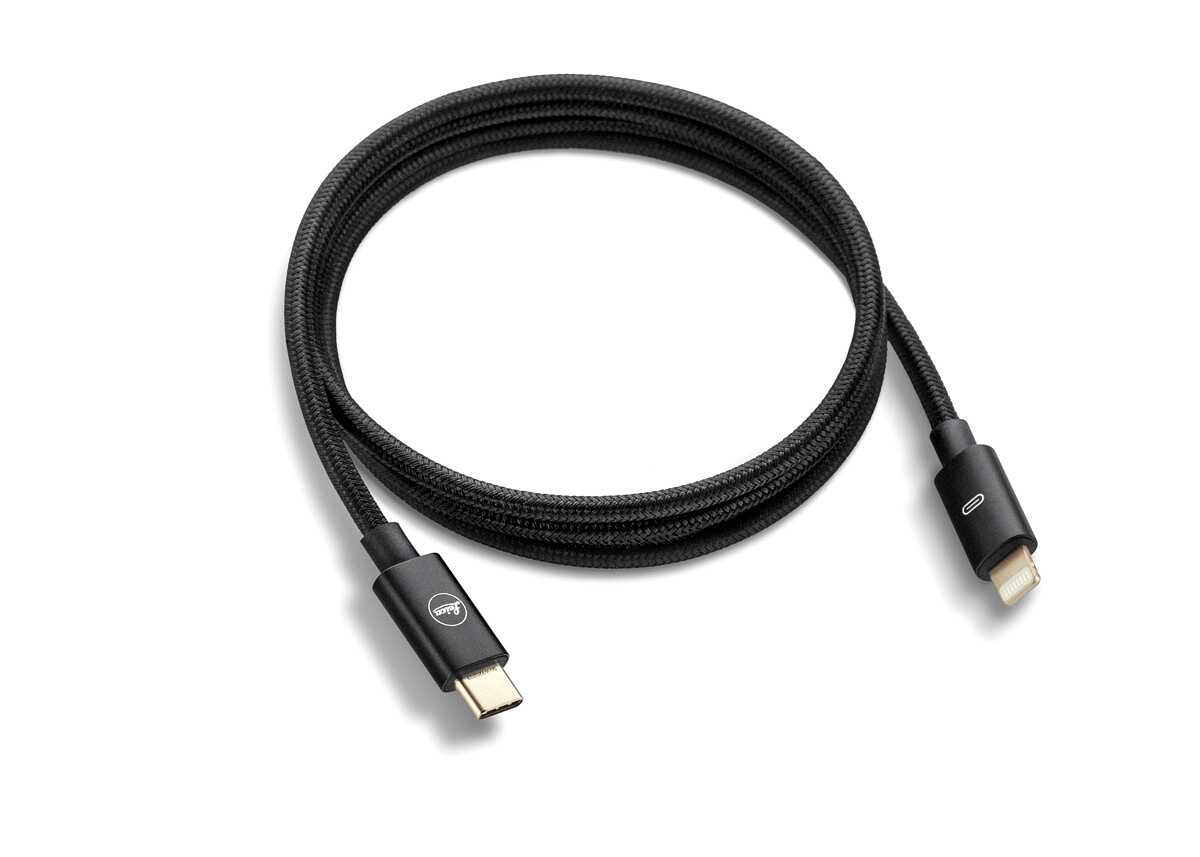
The USB-C port on the bottom of the M11 can connect directly to an iOS device for use with the Leica FOTOS app. Either use the included Apple MFi certified USB-C to Lightning cable for an iPhone or a standard USB 3.1 Type-C to Type-C cable for an iPad Pro. Be sure to always use the bundled Leica USB-C to Lightning cable since a standard charging cord will not work for data transfer. Likewise, the Leica cable can’t be used for charging your phone as it isn’t designed for power delivery.
You can also import directly into Lightroom with a standard USB 3.1 Type-C or Thunderbolt 3 cable by setting the camera to PTP mode in the menu. A word of caution here. Be wary of the much slower USB 2.0 Type-C charging cables that are now ubiquitous and make sure you use one that’s specifically certified as USB 3.1, USB 3.2, Thunderbolt 3 or simply indicates a 10Gbs data rate. And since the port supports power delivery, the battery will charge from your computer while you have it connected. In fact, just about any USB-C power source will charge the camera, either while being used or when powered off. During my testing, I routinely used the port to plug in a myCharge portable power pack to keep the camera battery in fighting shape while out and about.
Currently, the M11 only has options for Apple MFi and PTP modes. While Mass Storage mode might be coming in the future, it’s not an option right now. PTP, or Point-to-Point USB mode enables data transfer for software that specifically supports the camera. At launch that includes Adobe Lightroom, Adobe Bridge Photo Downloader, Apple Image Capture Utility, and Apple Photos. But the camera won’t show up as a drive in MacOS or Windows without Mass Storage mode. The SL2 has options for both PTP and Mass Storage, so hopefully this is added sooner rather than later.

Updated Connectivity to FOTOS app
Marking another first for Leica, the M11 is an Apple ‘Made for iPhone and iPad’ Certified accessory. To receive this certification, Apple ultimately signed off on the camera and its supplied cable to work seamlessly with iOS devices. Leica will be releasing a firmware update in the second half of 2022 to make the most of this enhanced connectivity with the Leica FOTOS app, including location data-based geotagging, access via Bluetooth, increased data transfer rates and the ability to update camera firmware via the app.
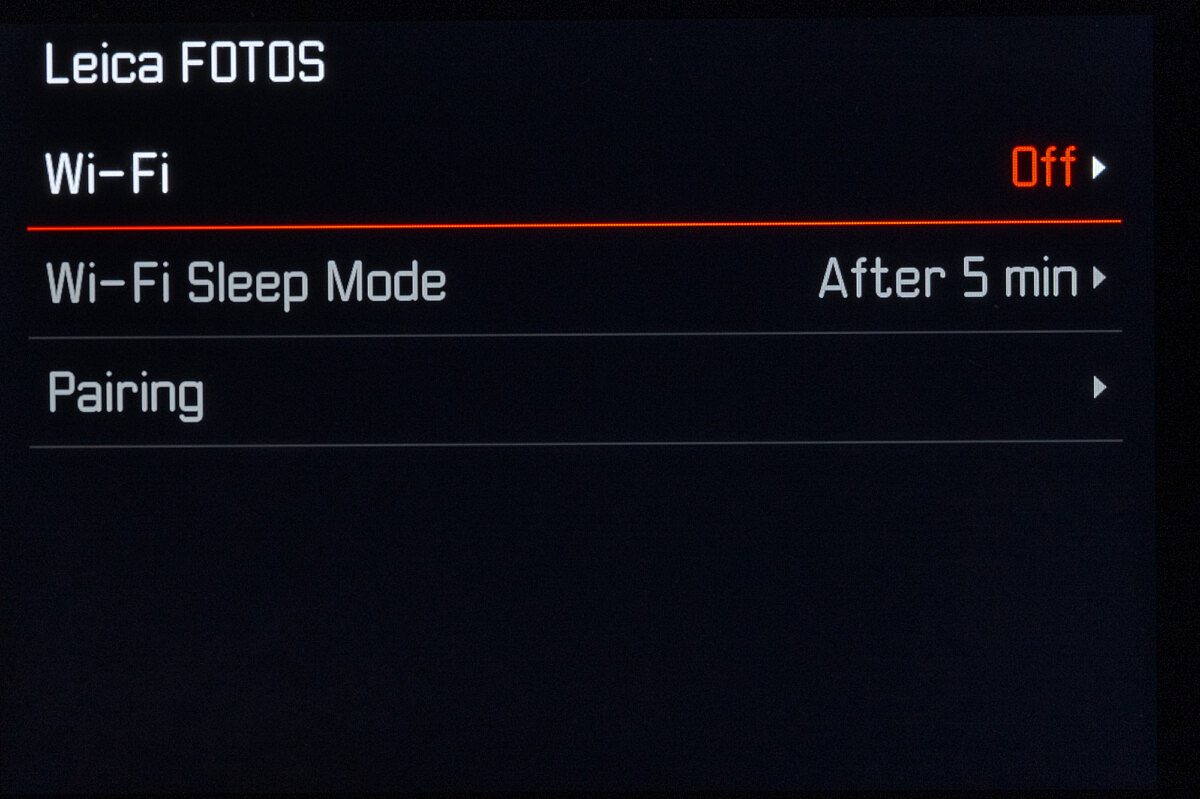
Wireless upgrades
The M11 comes loaded with all the wireless goodies to smoothly connect to the Leica FOTOS app without the need for a cable. Inside, the camera is packing both dual-band 2.4/5Ghz 802.11 a/b/g/n/ac Wave2 Wi-Fi 5 and Bluetooth 4.2 BR/EDR/LE modules. Initial setup is still managed by pointing your phone’s camera at the QR code displayed on the rear LCD after selecting to add an M11 in the FOTOS app. The process is simple and only needs to be performed the first time you connect the camera. After that, you can view and download images from the camera, or even remotely control the M11 for wireless shooting.
New battery and charger
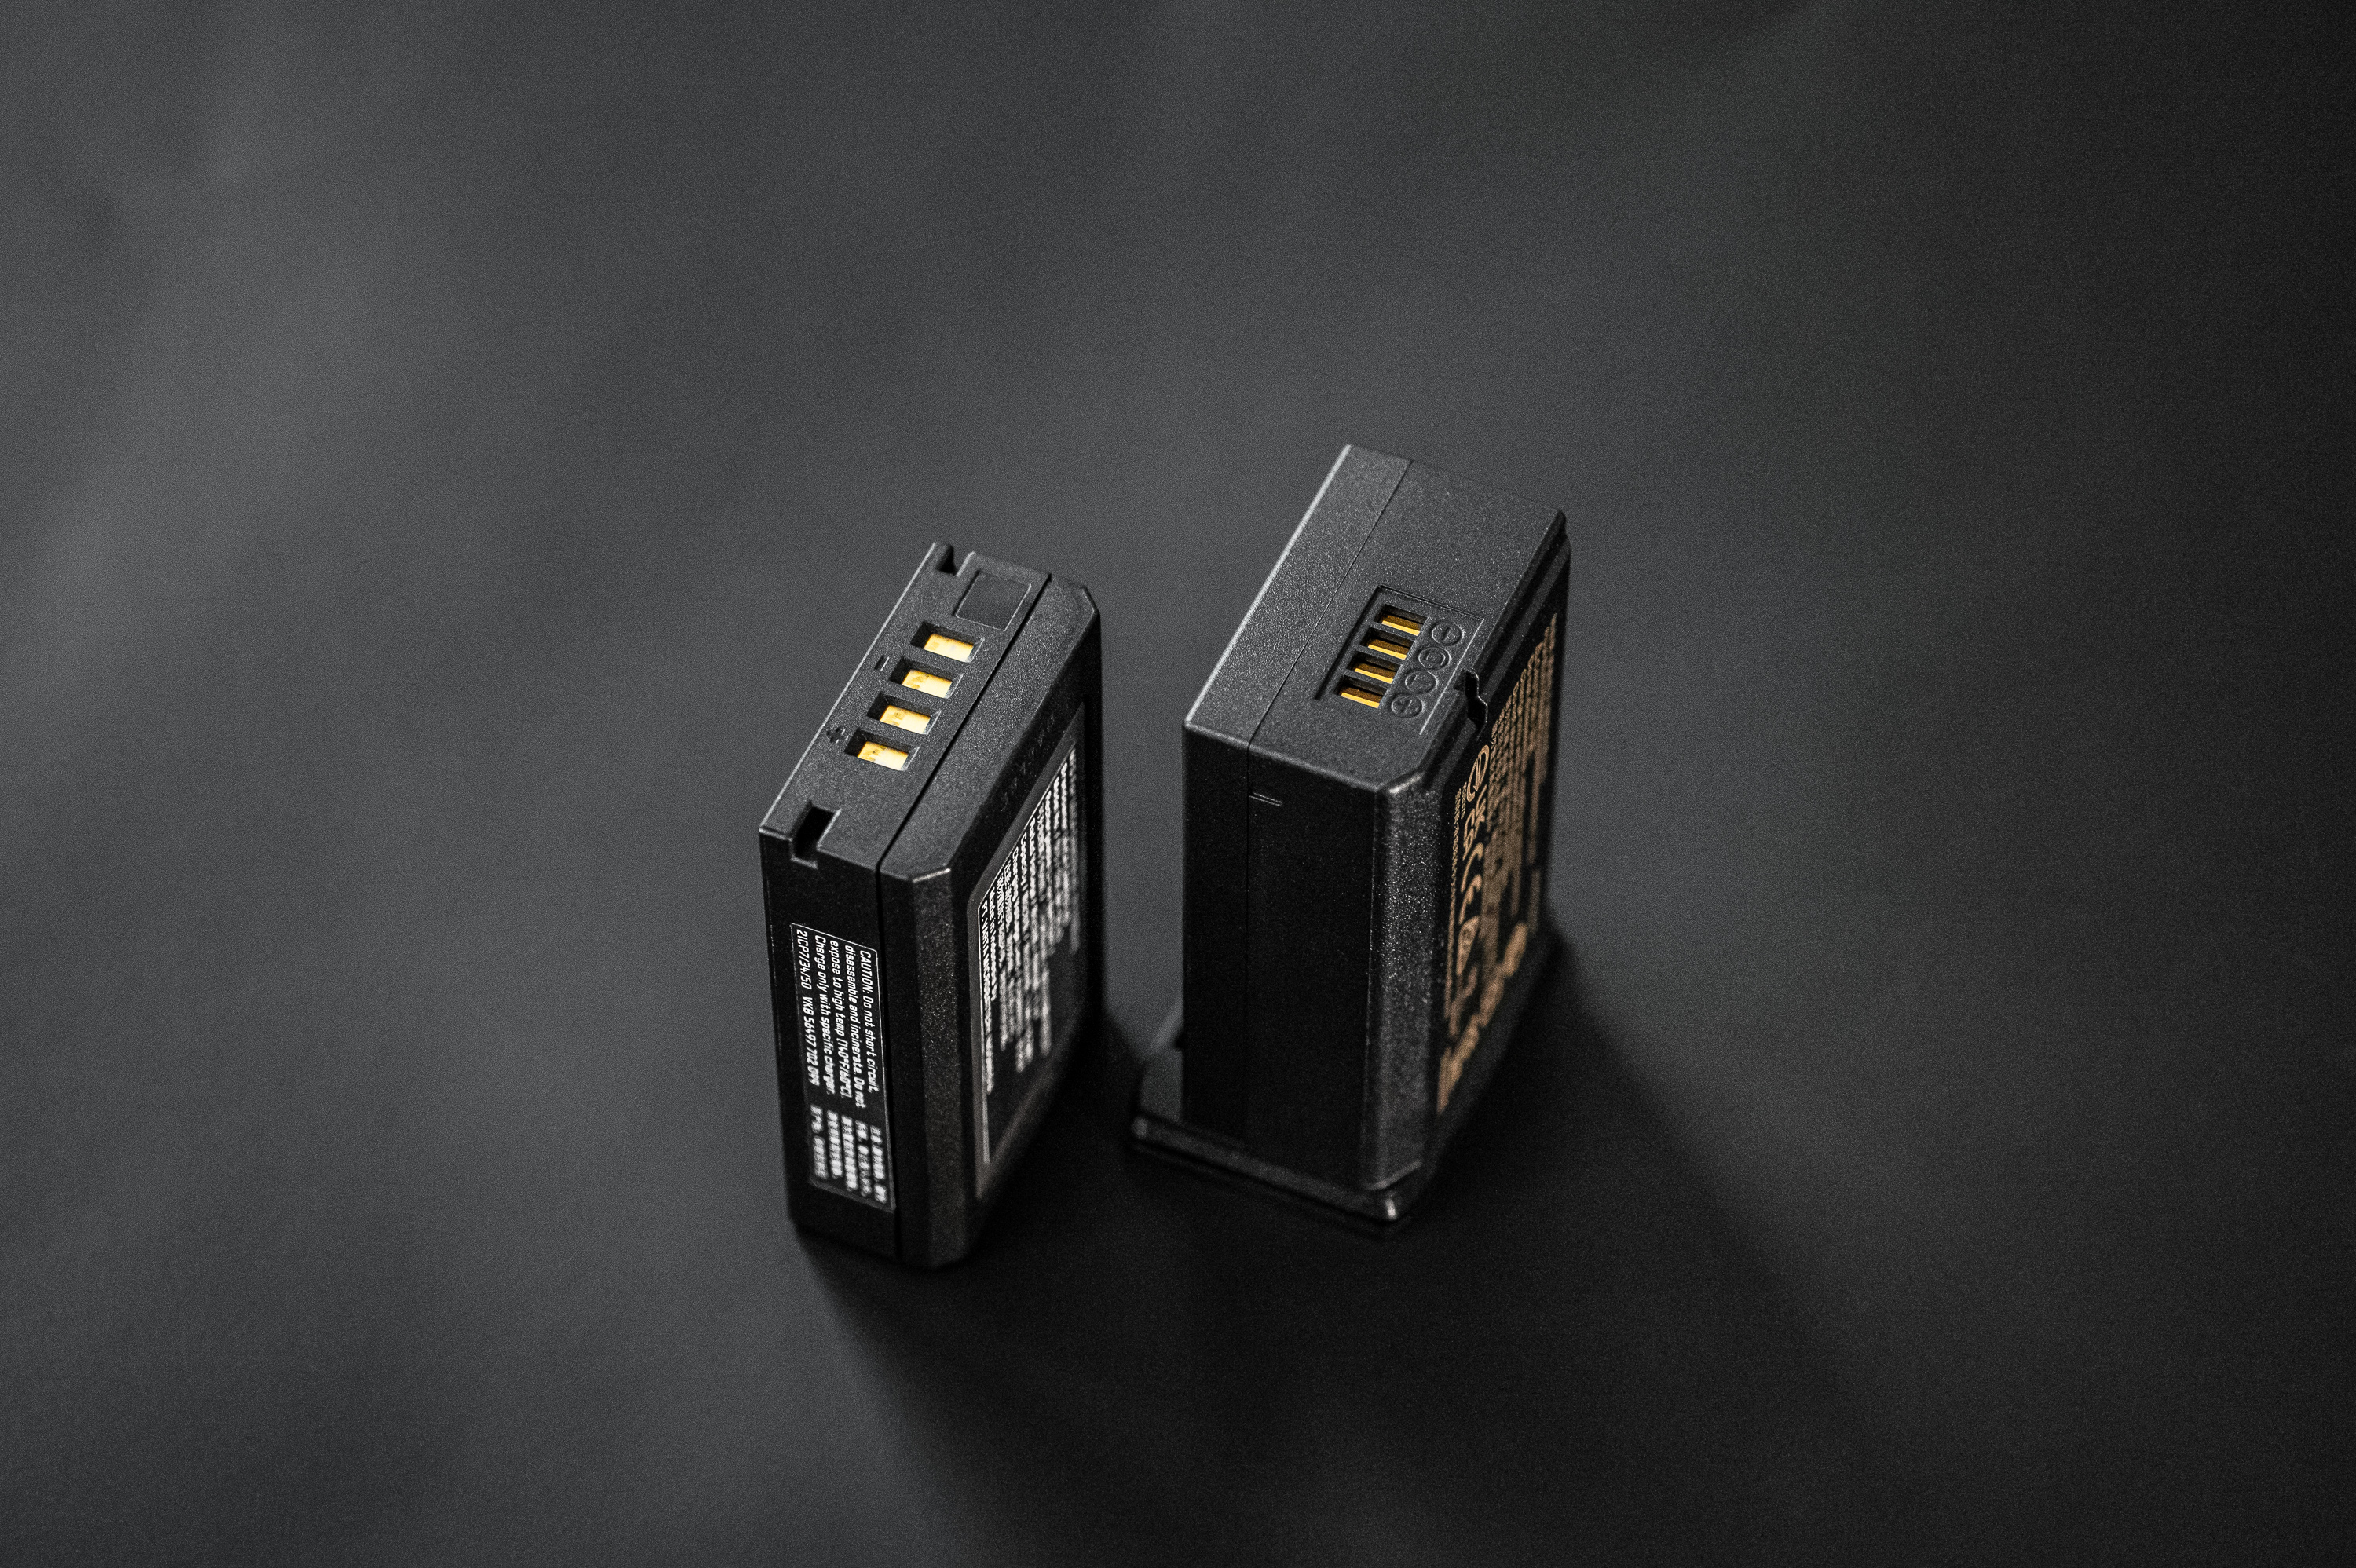
I’m sure I wasn’t alone hoping that the M11 would take the BP-SCL4 from the SL601, SL2, SL2-S, Q2 and Q2 Monochrom. I regularly carry a Q2 Monochrom alongside my primary SL2 setup when on landscape outings, and the ability to share batteries and chargers is a huge advantage. For those wanting to pair the M11 with an SL or Q setup, that convenience is unfortunately not going to be possible. Given the confines of the M body and that the battery is required to also function as a cover for the SD card slot that sits in the same compartment, the trusty BP-SCL4 just wasn’t a viable option.
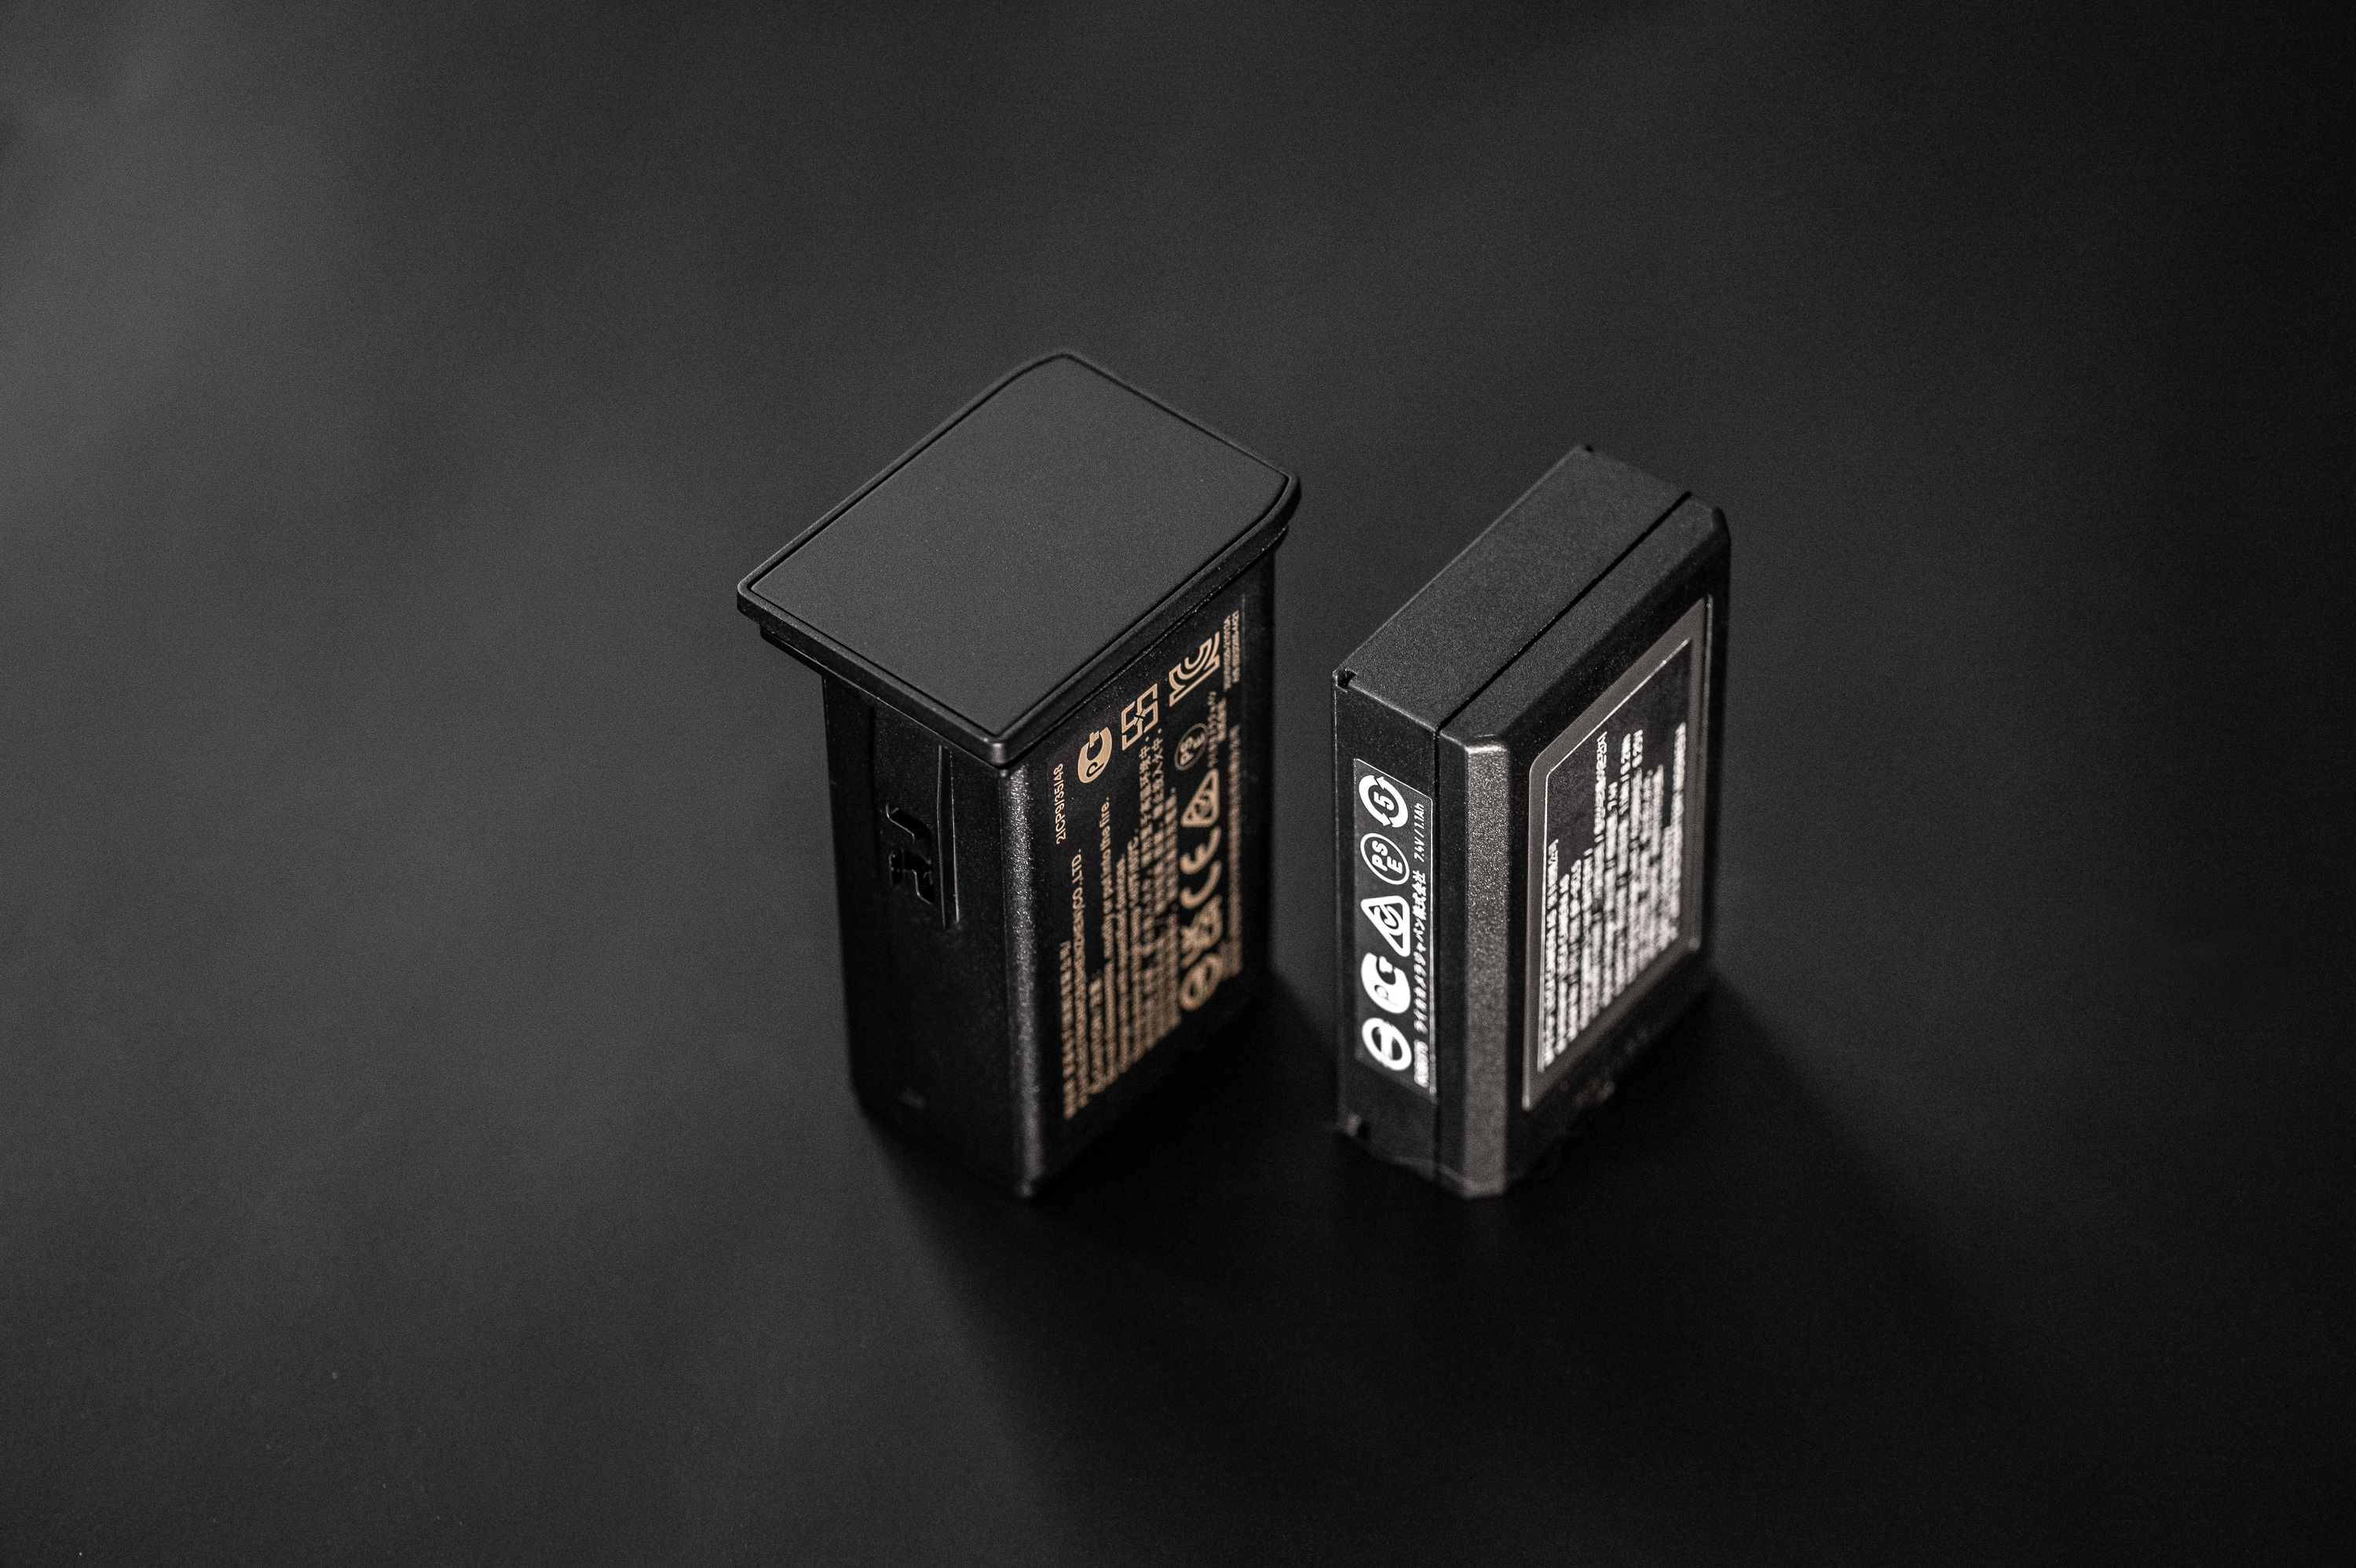
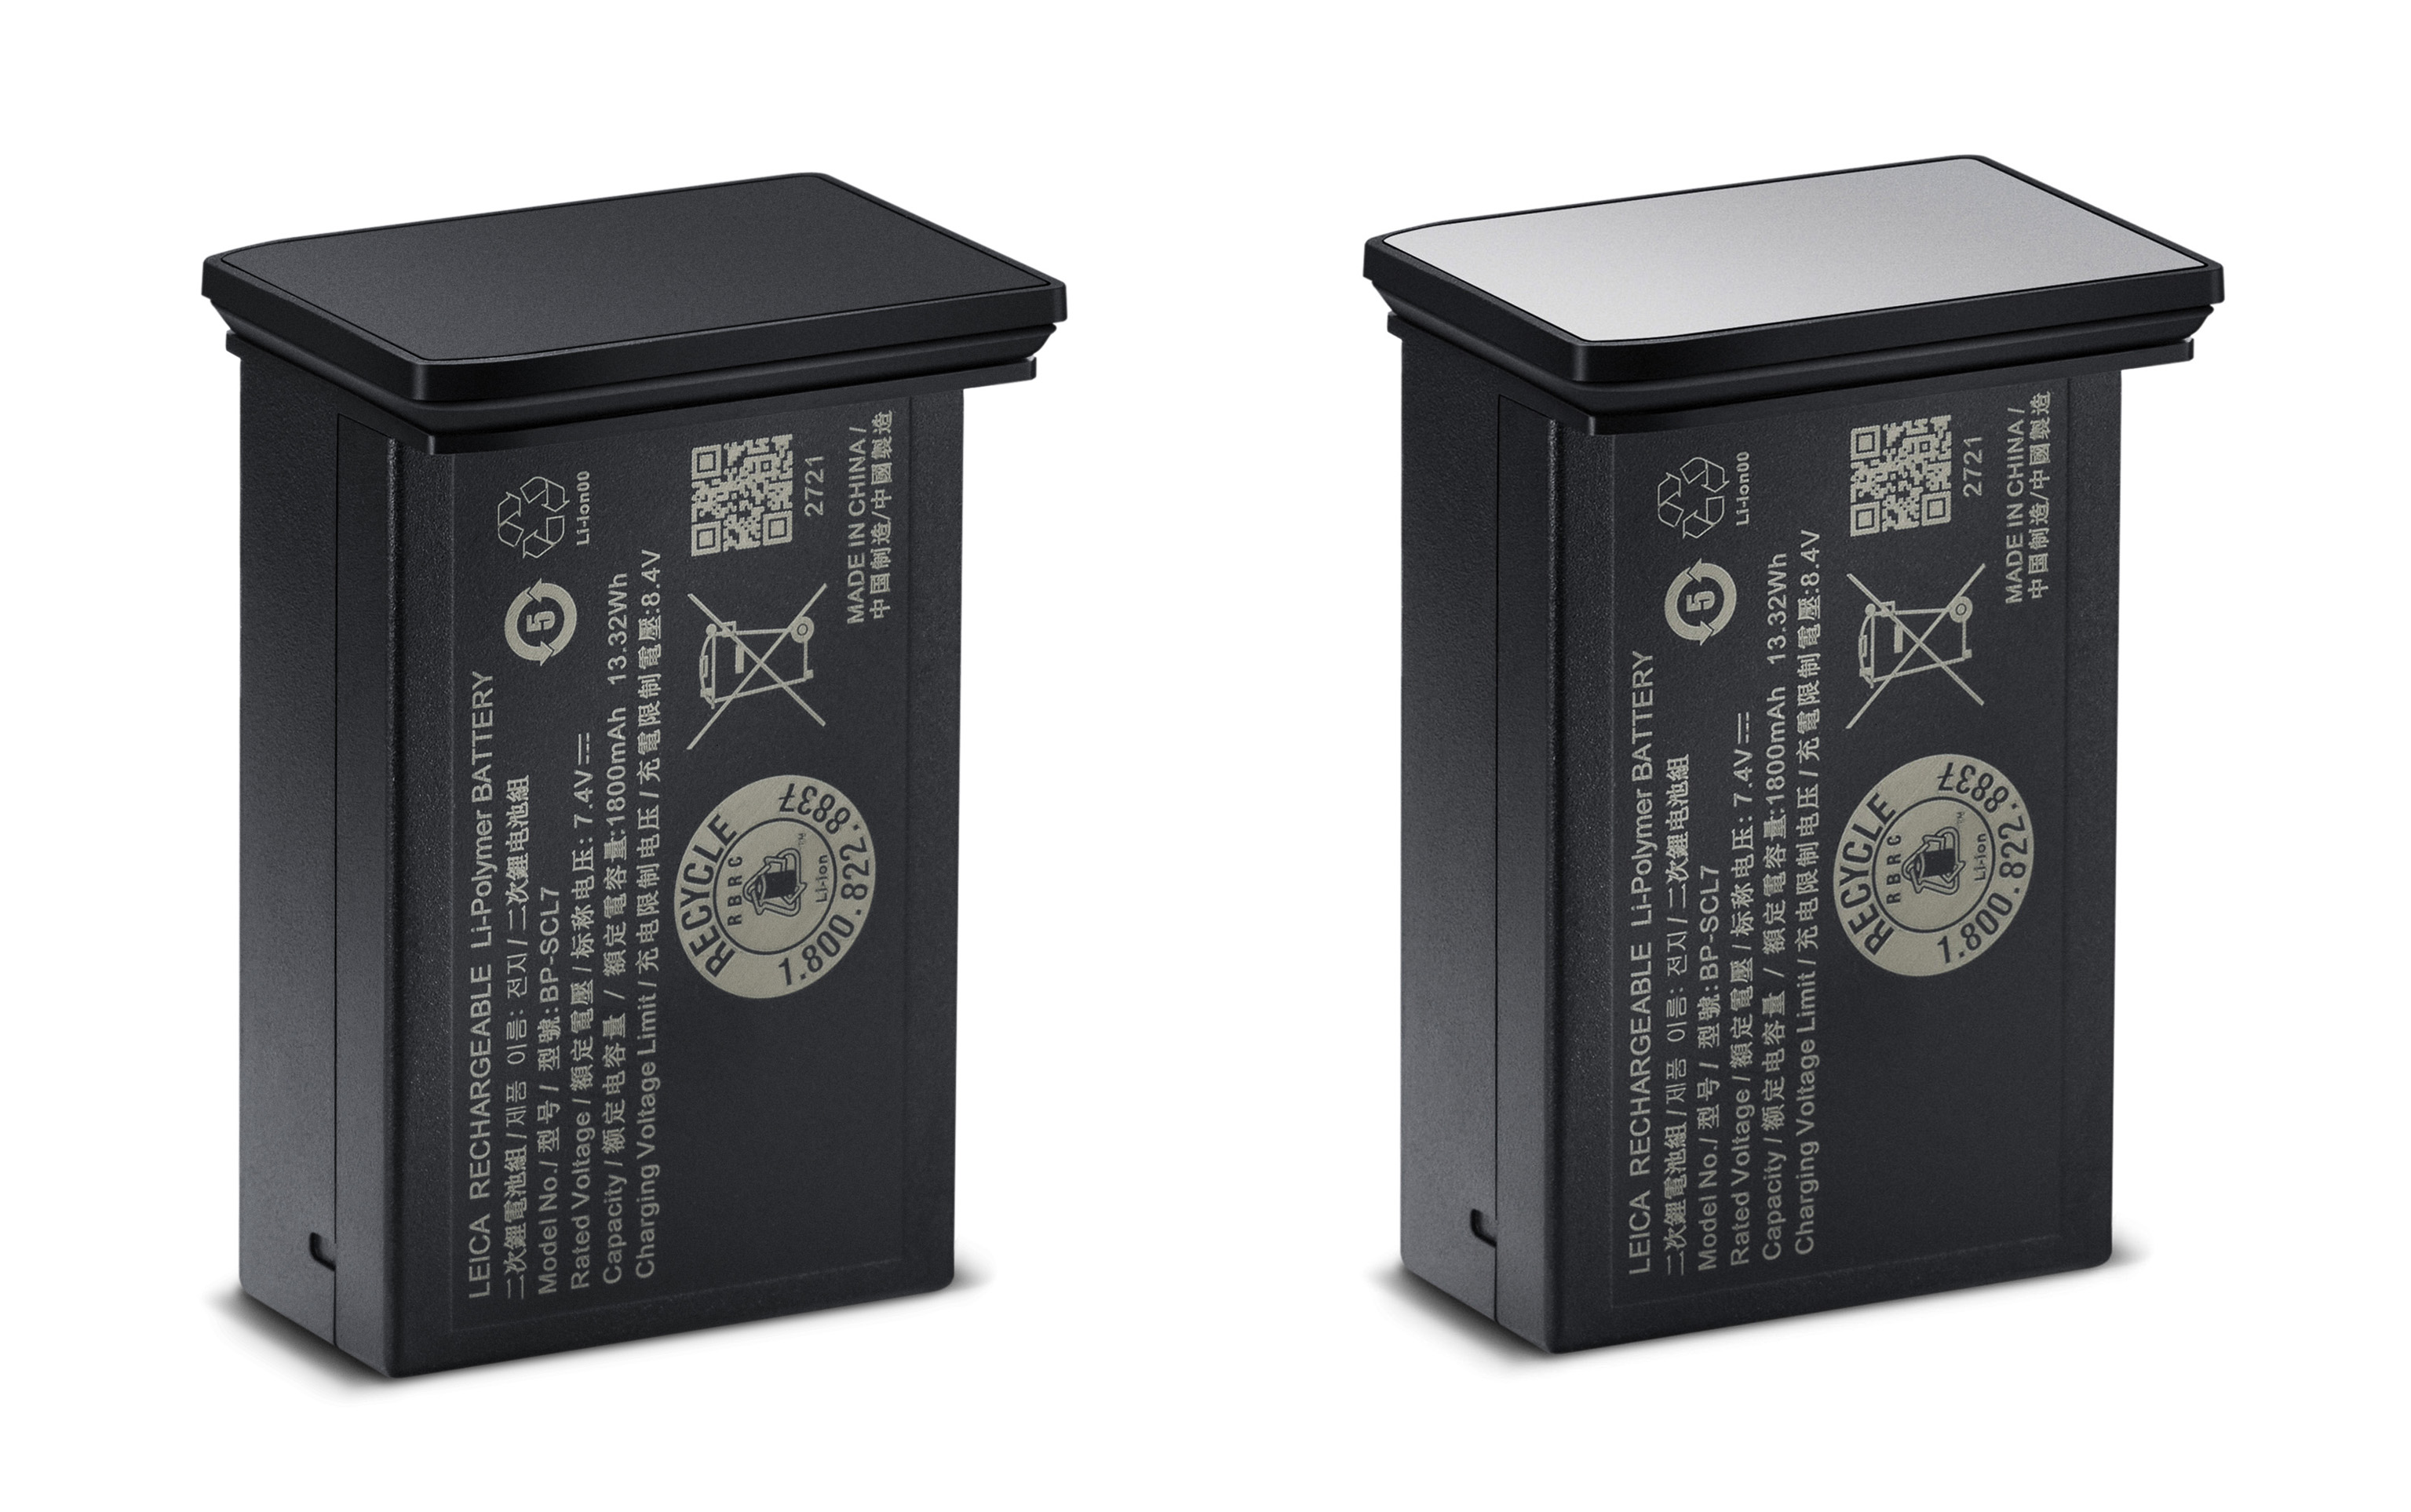
Thankfully, the new BP-SCL7 offers almost the same capacity as the BP-SCL4, a solid 1800mAh at the same 8.4v, yielding 13.32Wh. For comparison, the M10’s BP-SCL5 is rated at 1100mAh at 8.25v for a total of 8.2Wh. I’ll save you the math – that’s an impressive 63% increase in total battery power. Side-by-side, the difference is obvious with the new battery showing its pumped-up proportions, but so is the practical battery life.
Combined with advances in power efficiency, the M11 can get you through a full day of shooting on a single battery. Leica estimates a downright-impressive 1700 images per charge when using the optical rangefinder. Naturally, activating live view will cut into battery life, but a solid 700 captures by CIPA standards for 100% live view shooting is nothing to scoff at. We’ve come a long way from needing four or five batteries for a single day’s live view shooting on the M (Typ 240).
The BP-SCL7 comes in two flavors – with a black or silver bottom to match the different finish options. And those matching inserts are now metal, a nice touch, both in terms of durability and aesthetics. I’d imagine if we ever see any special edition M11 cameras with a different body finish, a battery would be made to match.
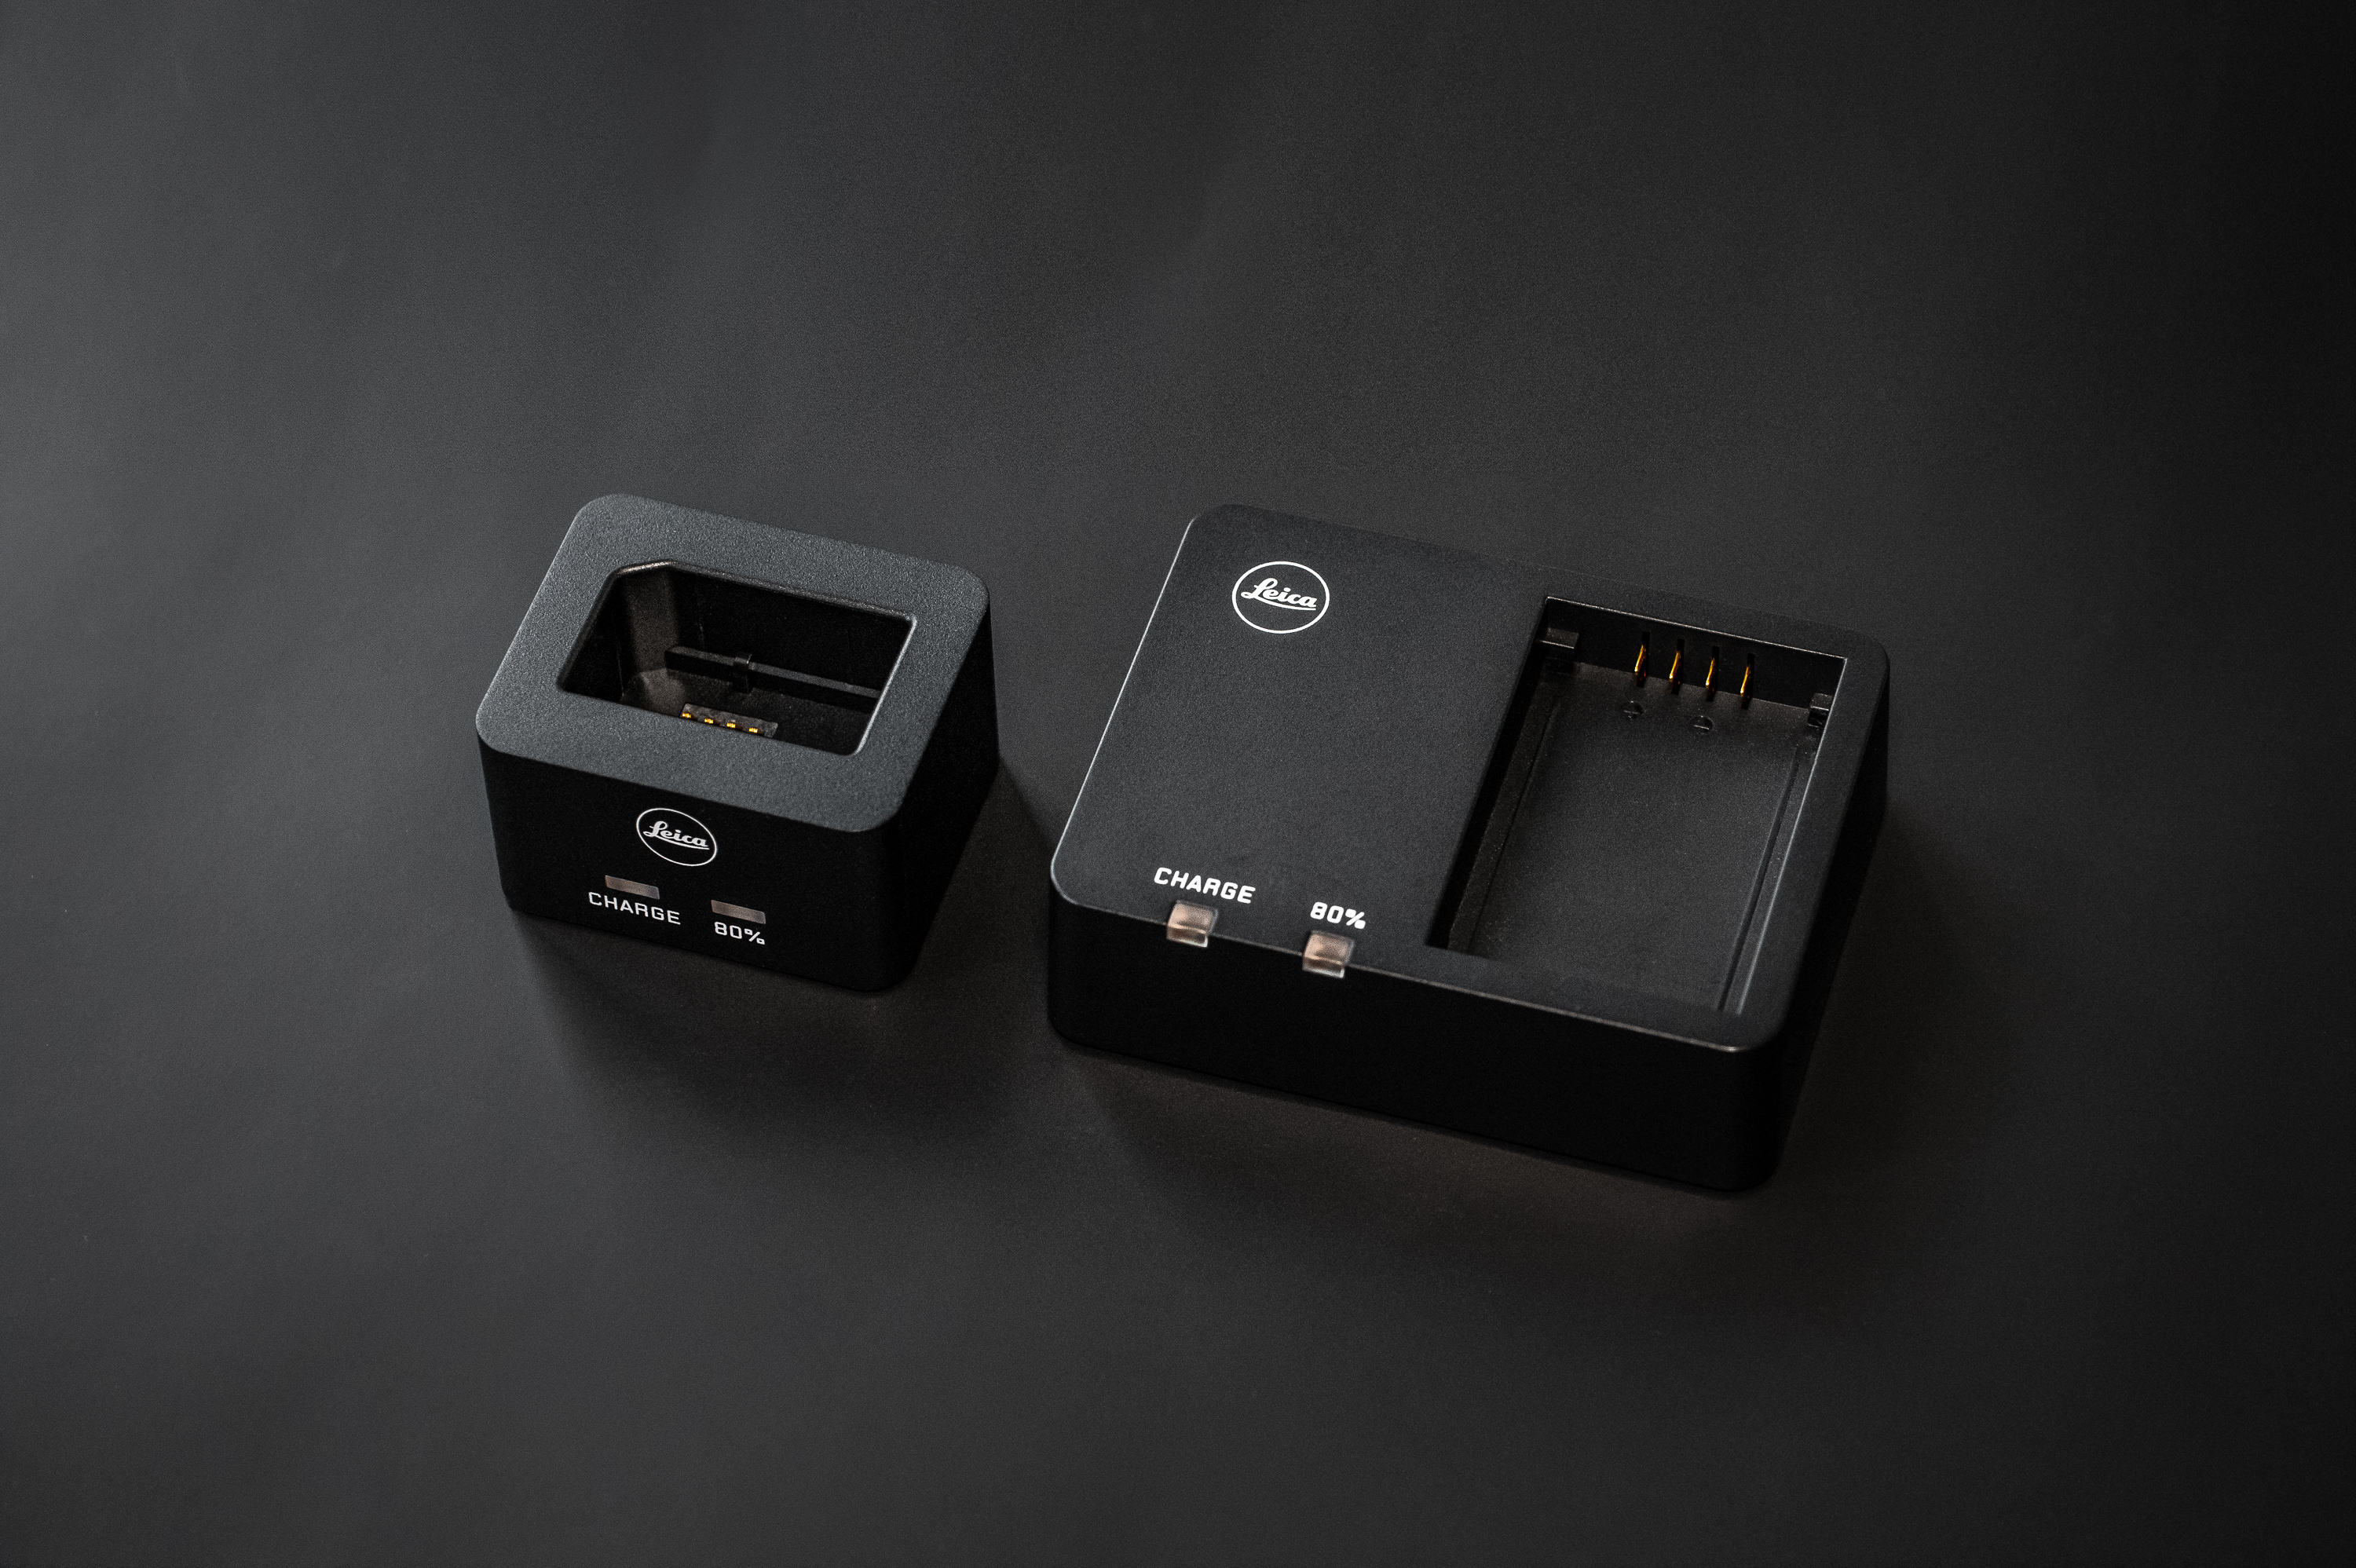
While the battery is noticeably larger, the new BC-SCL7 battery charger is actually quite compact and hopefully a sign of things to come for other systems. By ditching the standard figure-eight mains power AC connector in favor of a USB-C PD port, the charger doesn’t require an internal transformer. While this allows for a much smaller design, it also means you can use a wide array of USB-C power adapters, including one you might already have for your laptop, iPad or myriad digital devices. In fact, while the camera does come with a 10W Leica-branded USB power adapter, I’d just use a more svelte and higher-power aftermarket unit with or without space-saving flip-out prongs. I used the Anker Powerport III 20W Cube, with twice the power output in half the size of the included wall adapter.
Because the BP-SLC7 charger is so lightweight and small, you could easily bring along an extra to charge two batteries from a dual-port charging brick like the Anker 521 40W Nano Pro. Alternatively, top up one battery in the charger and the second one in the camera, again all with USB-C.
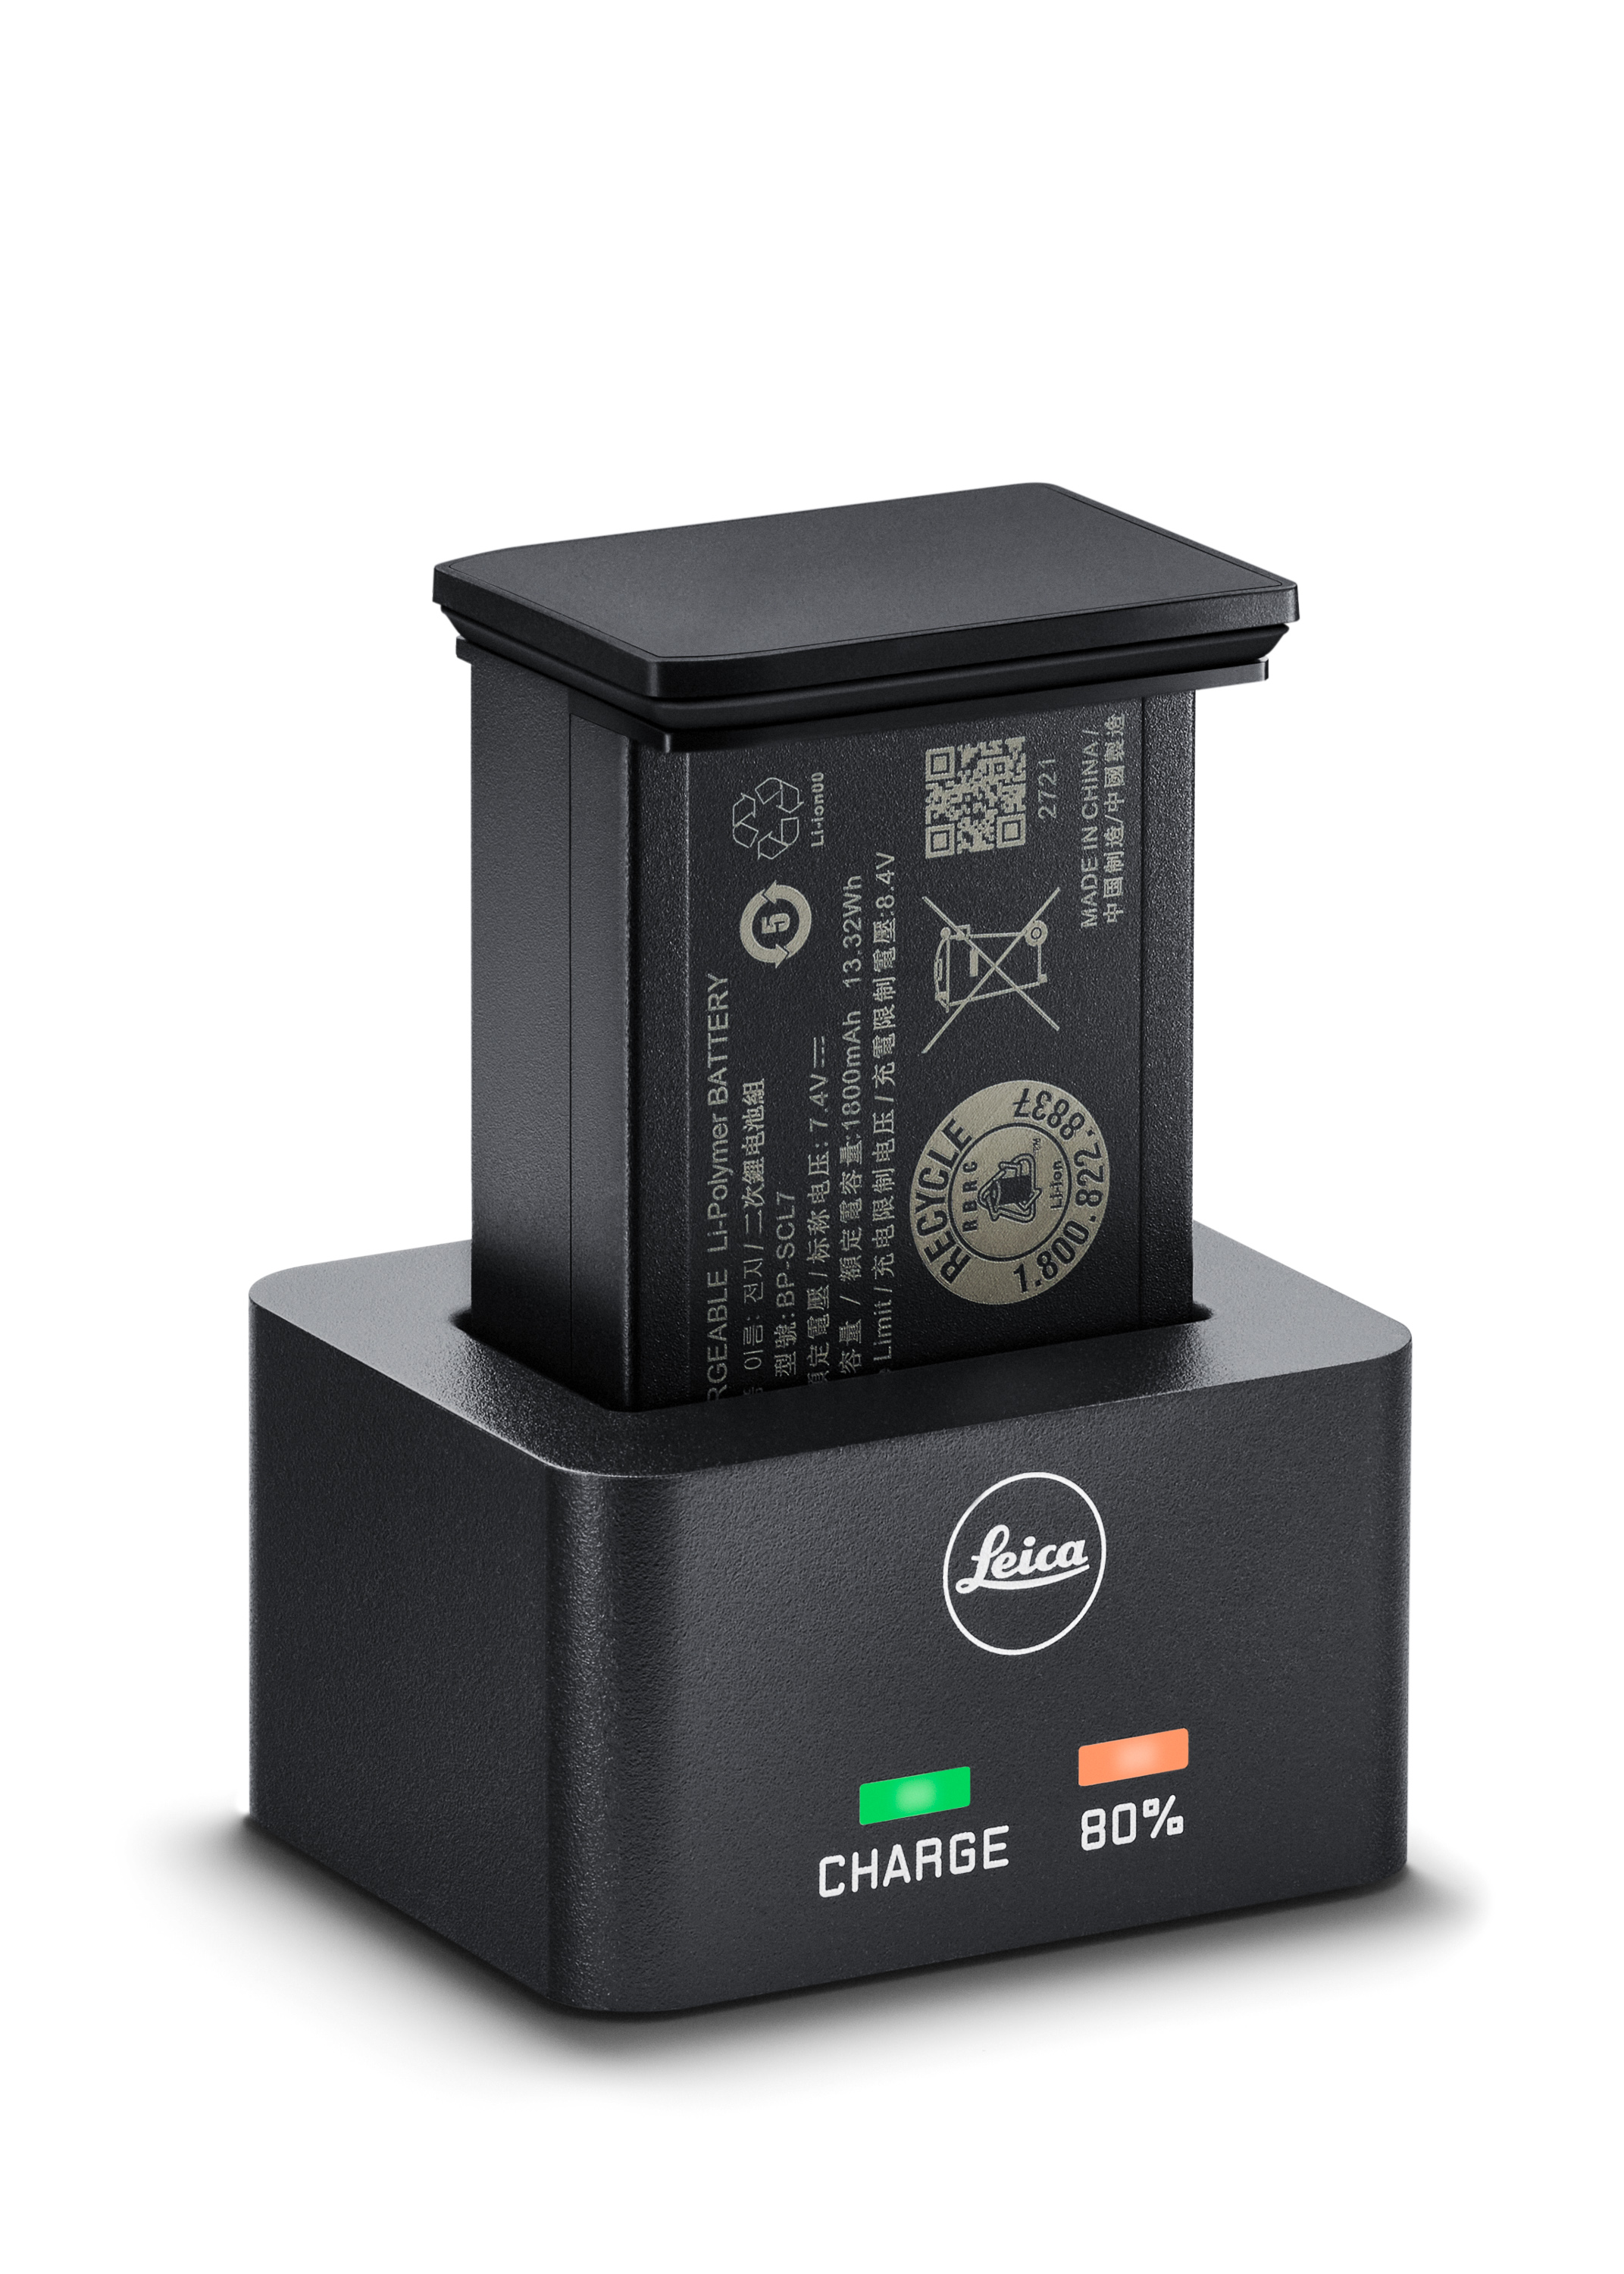
The charger itself is nicely designed, with two LED lights on the front, a single USB-C power-in port on the back, a slot for the battery on top, along with a set of low-profile anti-slip rubber feet on the bottom. When you insert the battery, gently press down on it and catches on either side snap into two small detents on the battery, securing it with a satisfying click. The battery is held in place and won’t fall out of the charger, even when inverted, yet the system doesn’t require a release. Just pull the battery while holding the charger and out it comes with minimal force. Two rectangular LED indicators function just like other modern Leica chargers. The amber charge light will flash with decreasing frequency as the battery nears completion, with the second green LED illuminating when reaching 80% capacity.
64GB Internal Memory
In yet another first for an M camera, the M11 comes with 64GB of high-speed memory onboard. While I still recommend using high-speed UHS-II SD cards for storage as they are both faster for downloading and higher capacity – I personally use the Lexar Professional 1667x UHS-II 128GB cards, the internal memory can be useful in certain scenarios. The most obvious use cases are for those times when you either forget to put an SD card in the camera before heading out or simply run out of space on the one you’re using. Having a reserve tank offers nice peace of mind.
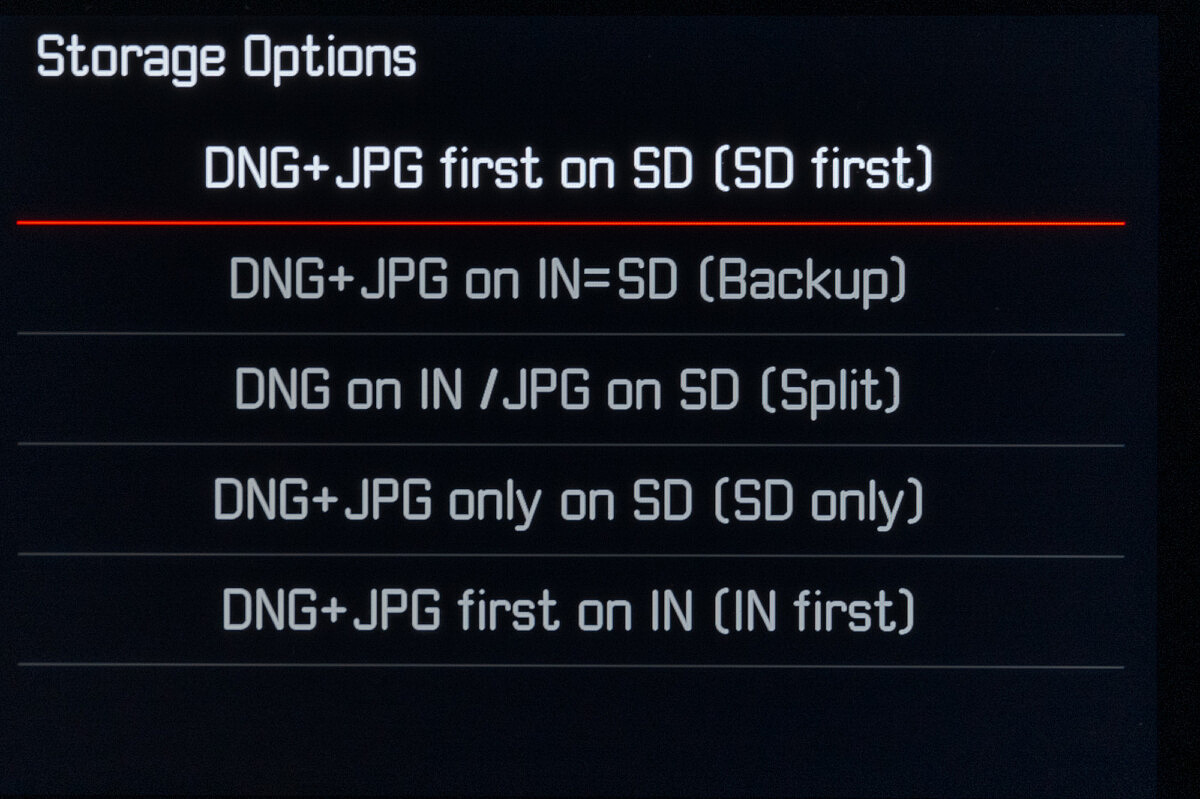
Beyond the covering-your-butt duty, Leica has added in some extra functionality. Due to space constraints in the slender M body, there simply isn’t room for a second SD card slot like in the SL2 and SL2-S. But you can set the camera to utilize the built-in memory like you would a second card slot. Use the default SD first setting to take advantage of the extra capacity once the SD card is full. Select the Backup (IN=SD) option to record a backup copy to the internal memory. If you shoot DNG+JPG, Split will save the DNG files to the internal memory and JPGs to the SD card. Unfortunately, I’d have preferred to see the exact opposite behavior here, with the larger DNG files going to the SD card and smaller JPGs going to the internal memory. Of course, you can opt out of using the internal memory completely by selecting SD Only. This would be my preference for most situations.
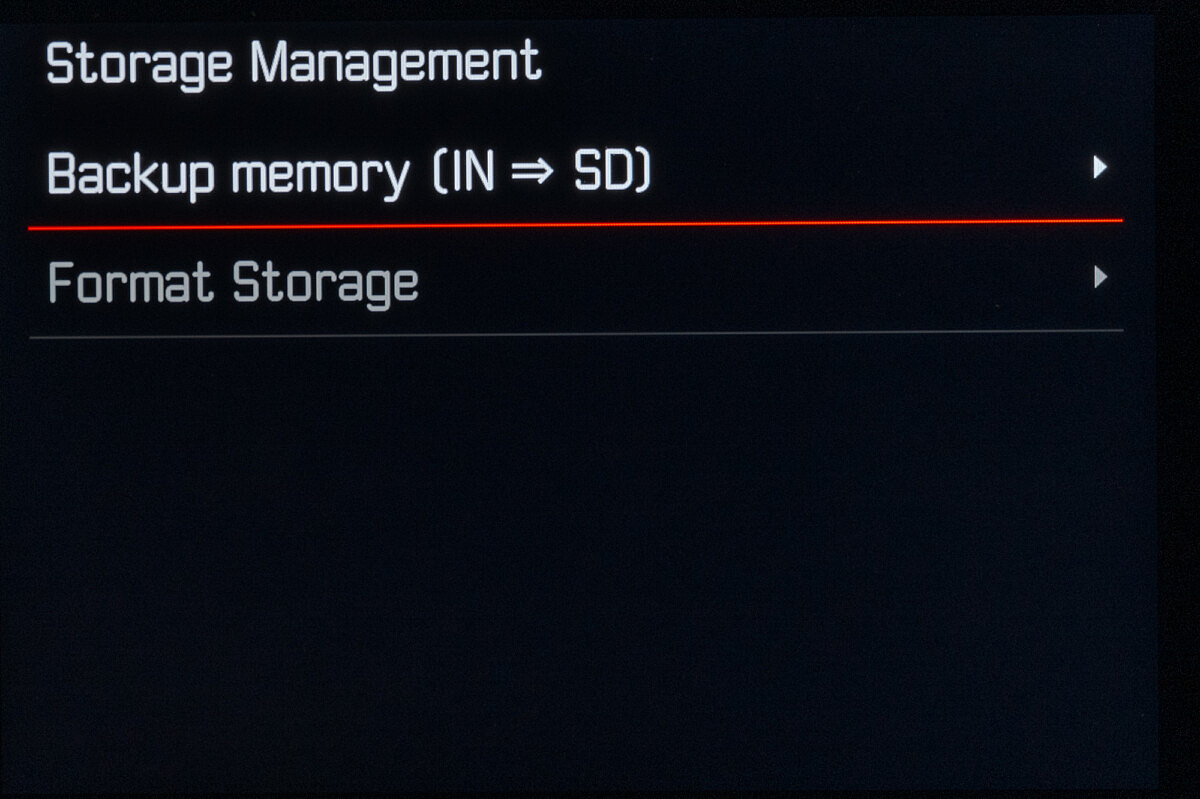
With a USB 3.1 Type-C or Thunderbolt 3 cable, images stored on internal memory can be downloaded to a computer in PTP mode or to an iOS device using the MFi setting. You can also offload pictures from the built-in storage to an SD card using the Backup memory (IN => SD) function in the Storage Management menu. Transferring 300 images (16.7GB) from the internal memory to a Lexar Pro 1667x 64GB card in camera took 3 minutes and 43 seconds for an average speed of 76MBs. Importing the same batch of photos directly into LR over a USB 3.1 cable was a bit faster at 3 minutes and 10 seconds due to a slightly higher 90MBs average data rate. Definitely serviceable, but for comparison, I imported the same 300 DNG files from the Lexar SD card using the built-in UHS-II card reader on my 16-inch MacBookPro. Here, it flew at 185MBs for a total import time of just one minute flat. In other words, the built-in memory isn’t slow, but it’s nowhere near as fast as a 250MBs UHS-II SD card and compatible reader.
Currently, the USB-C connection can be used in either Apple MFi or PTP (Point-to-point). I’d love to see two additions. The first would be a Mass Storage option, which would allow a computer to see the camera’s internal memory as a mounted external drive. Rather than relying on software like Lightroom or Capture One to transfer images, you could simply drag and drop from Finder on a Mac or Explorer on Windows. Another nice update would be the ability to plug in an external SSD or flash drive in order to back up in the field. Beyond firmware, the M11’s USB-C port would need to deliver adequate power, so while on my wish list, it may not be possible.
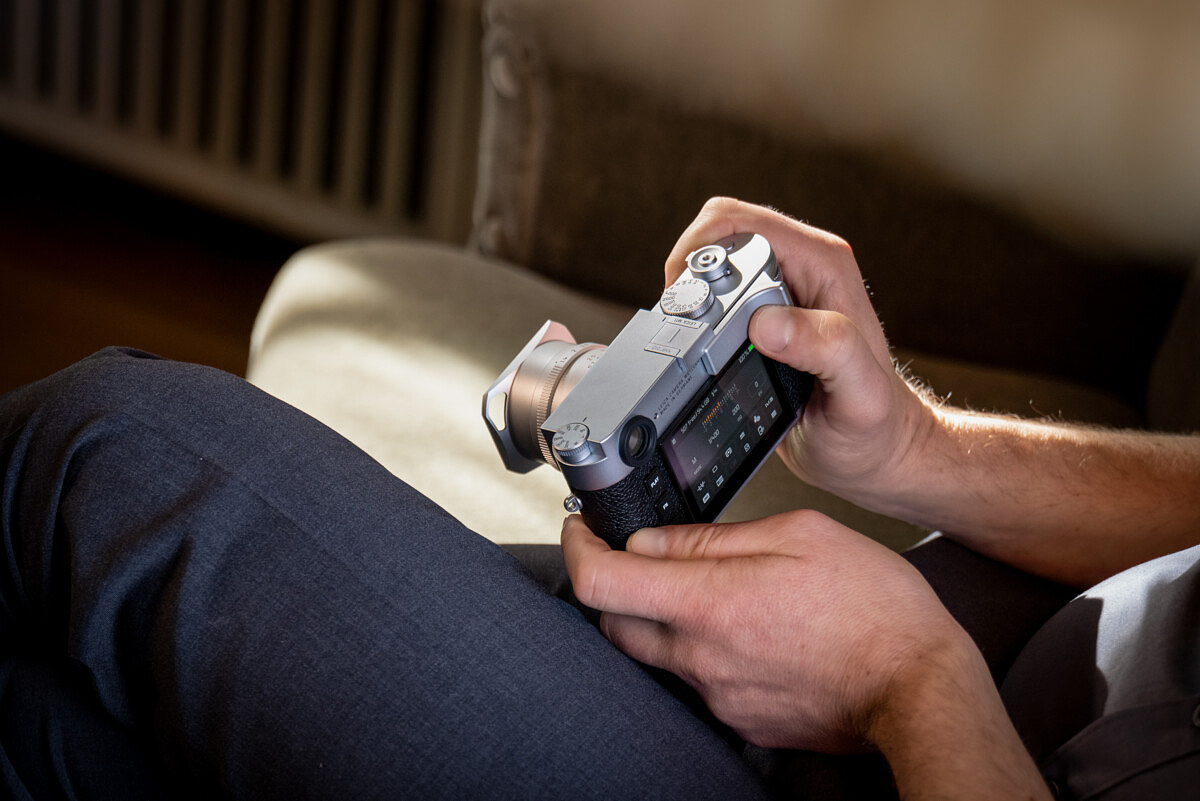
New Rear LCD Screen
Occupying most of the real estate on the backside of the M11, the new LCD is sure to please. With double the resolution, now 2.3 megapixels, 800 nits of maximum brightness and covering 100% of the sRGB color space, the 2.95-inch display slightly edges out the already excellent one on the SL2 and SL2-S to be the best currently offered in the Leica lineup. During my testing I used the rear screen for all my live view focusing and shooting (since the EVF wasn’t available yet), and it performed admirably. I was especially impressed with the additional clarity and dead-on color accuracy.
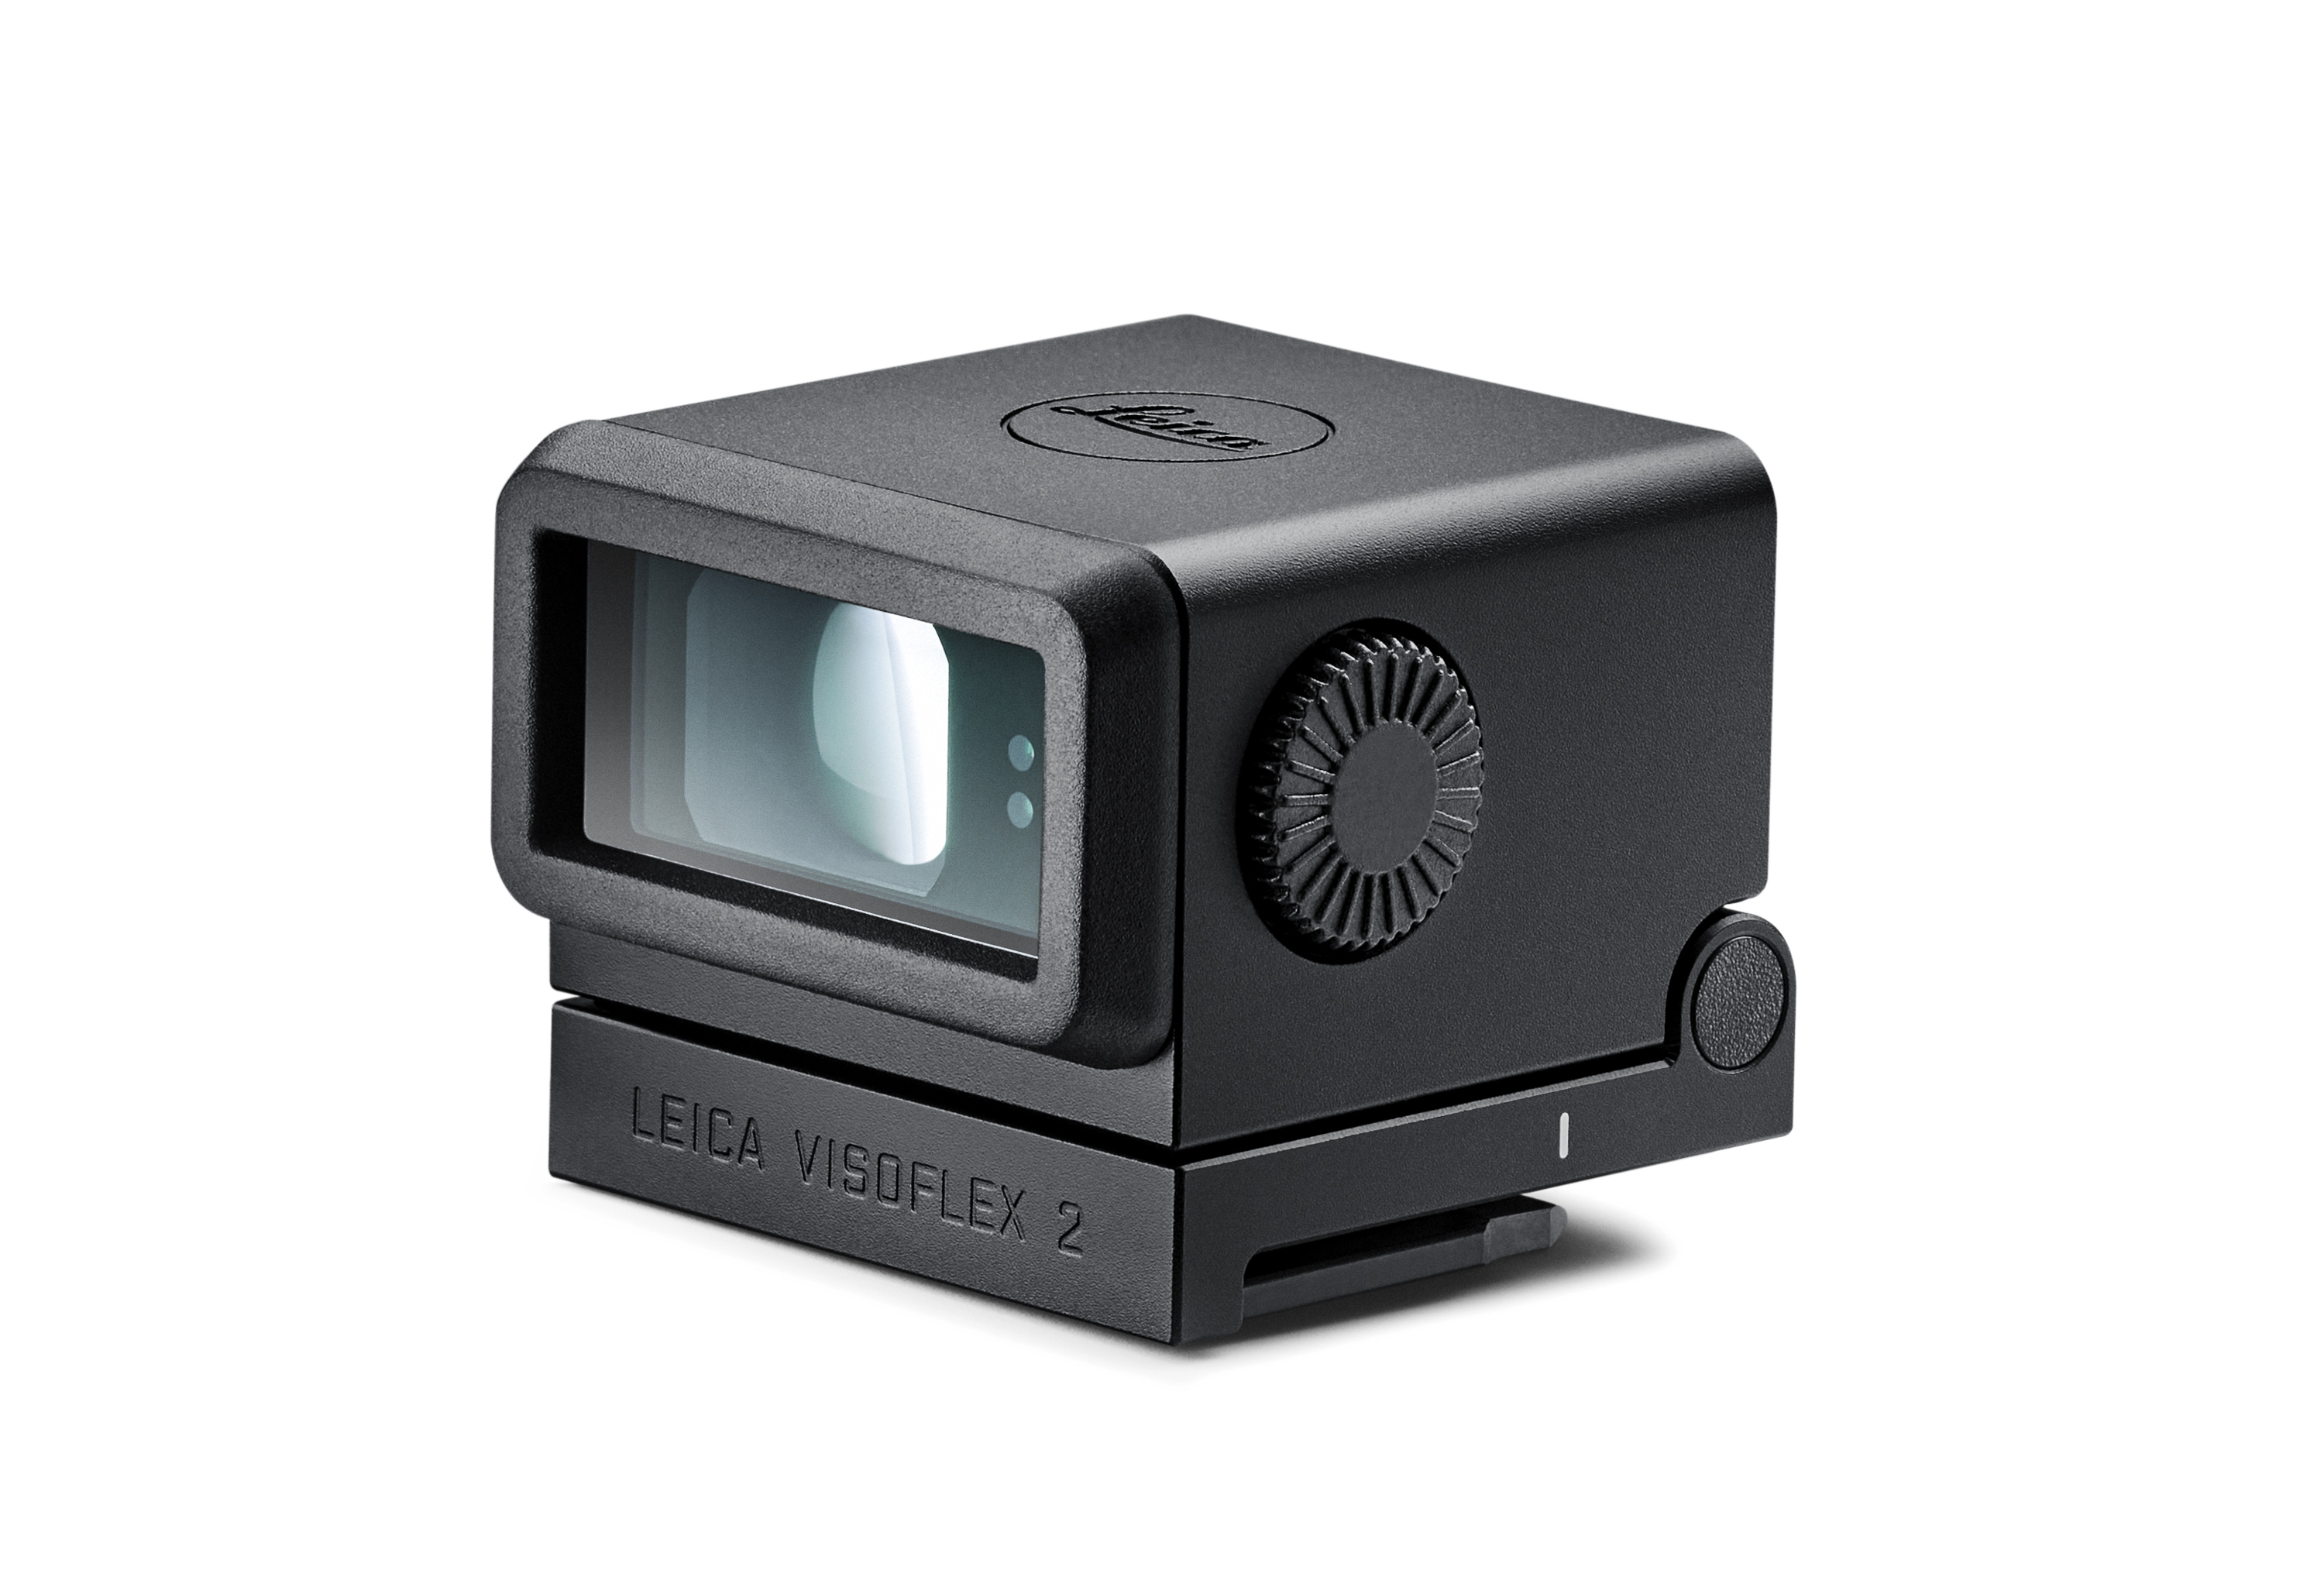
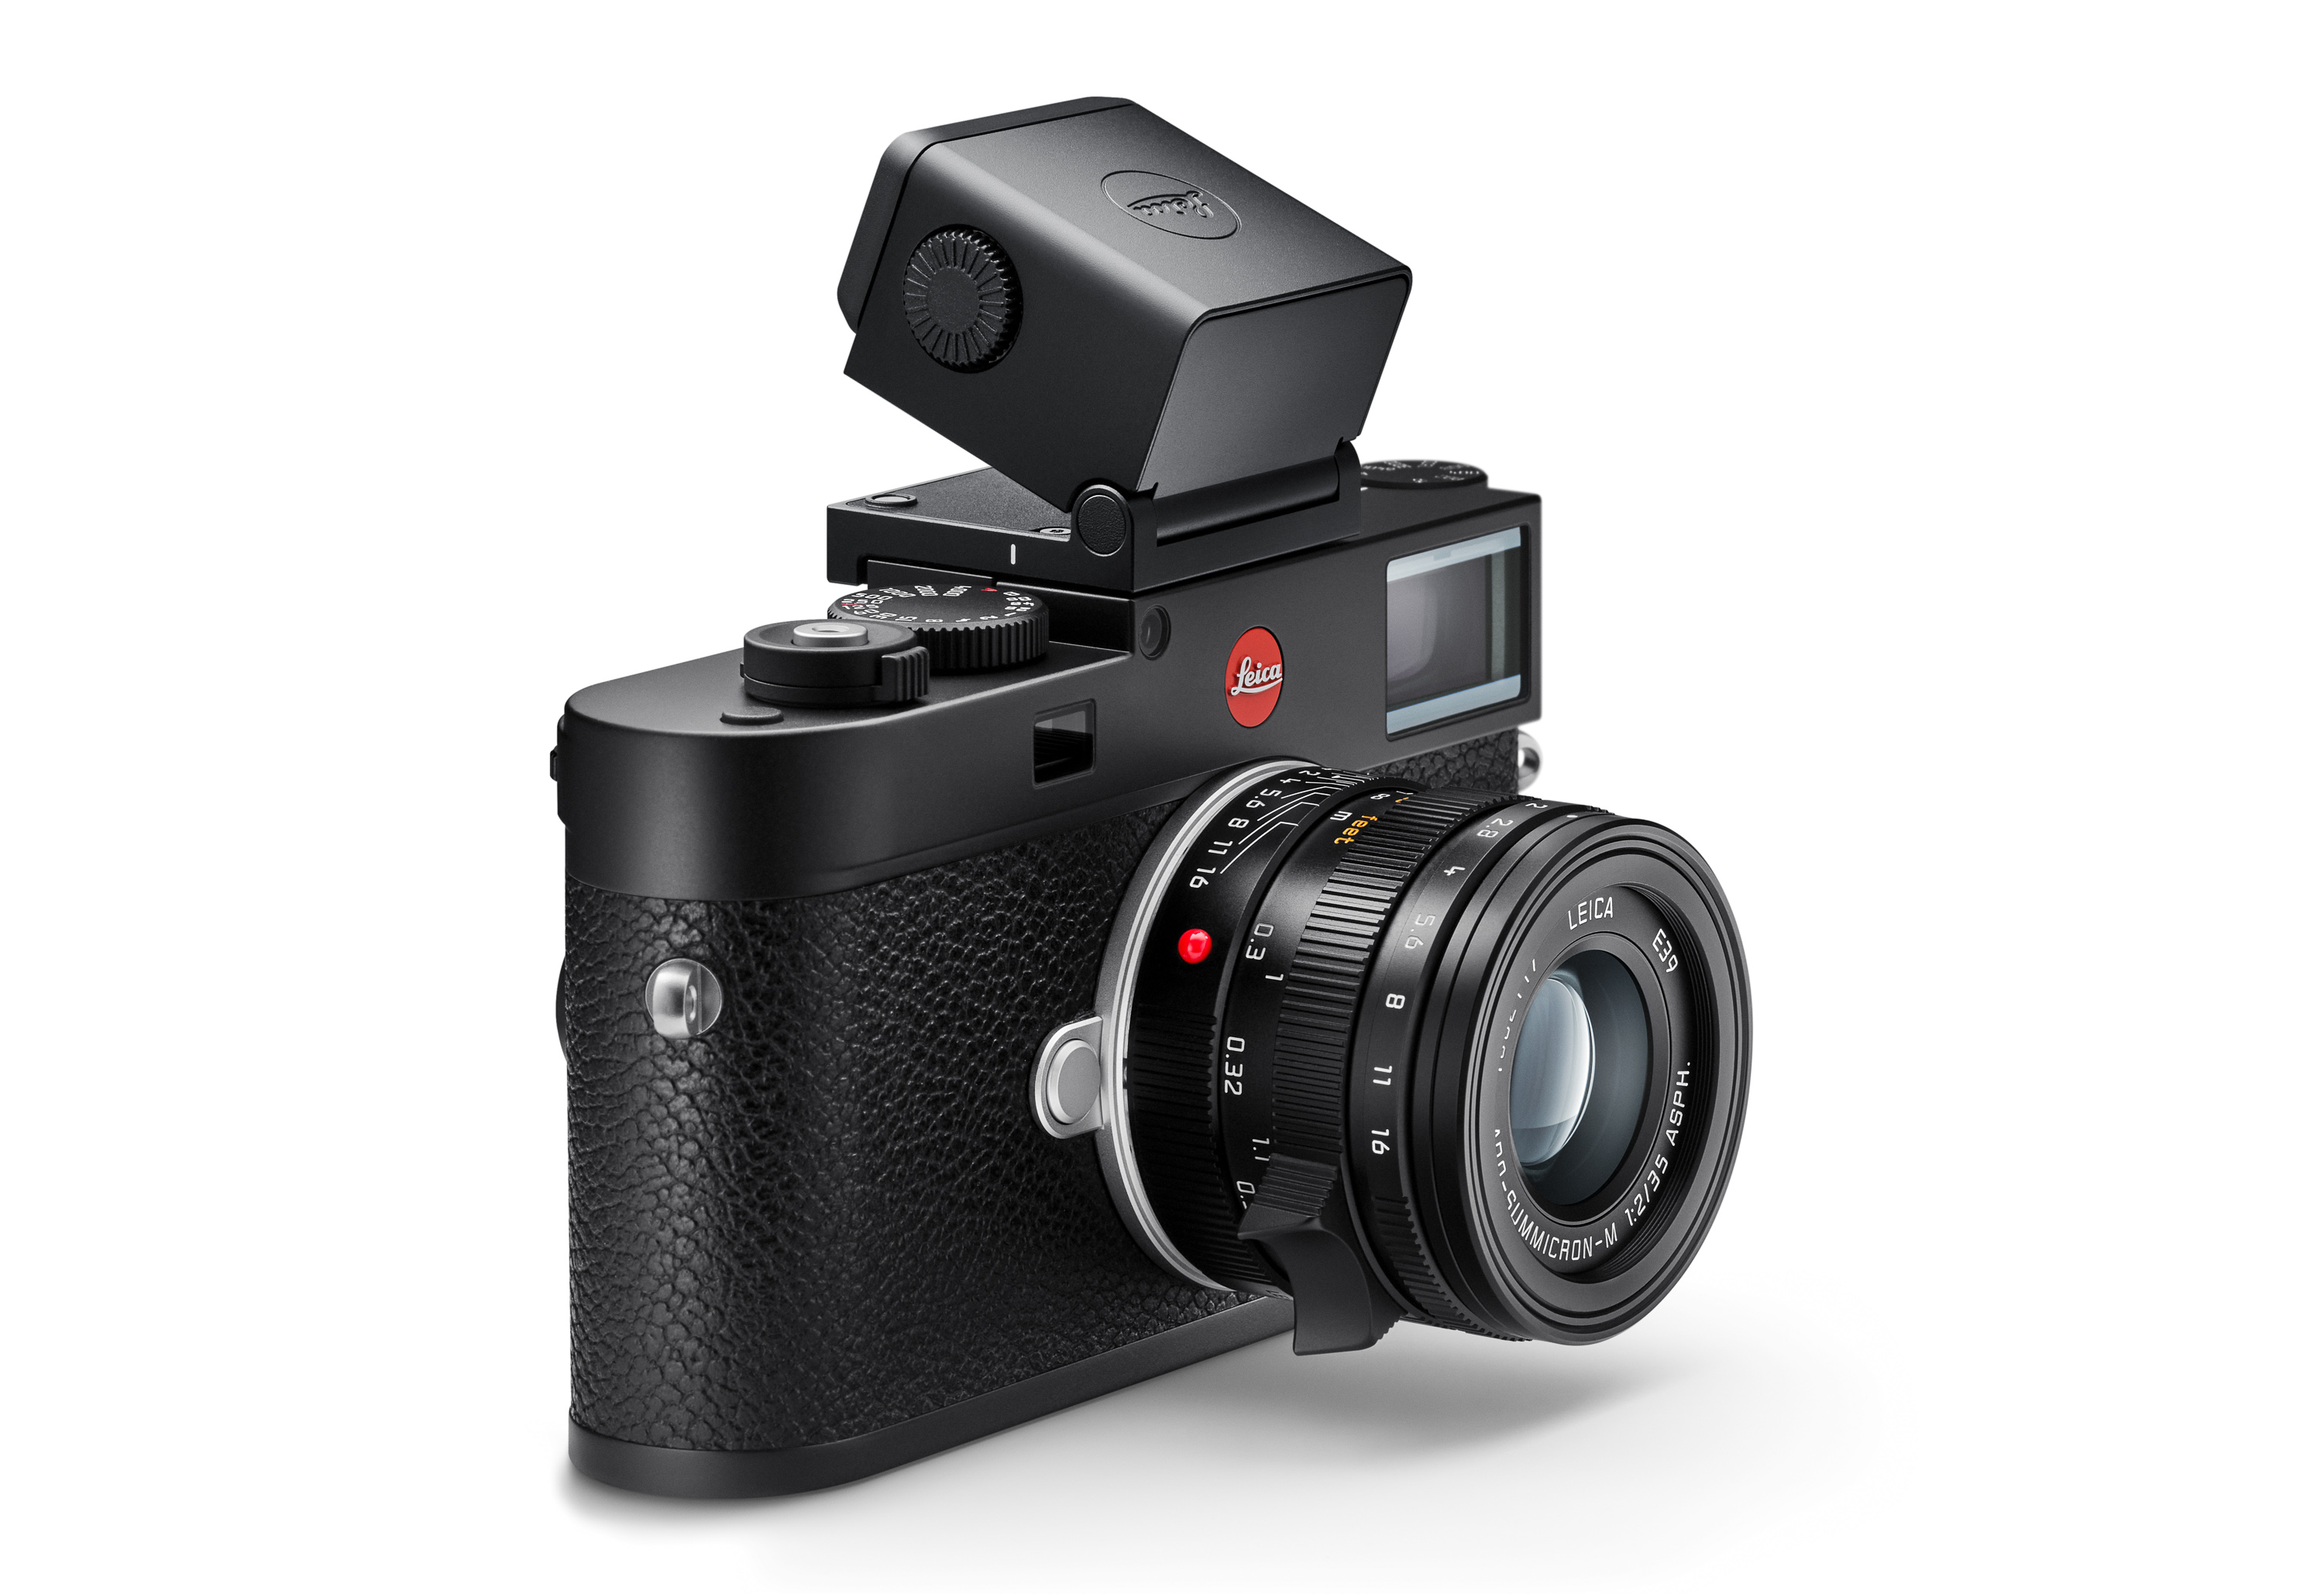
New Visoflex 2
Speaking of the EVF, the M11 gets a massive upgrade with the new Visoflex 2 being launched in tandem with the camera. The somewhat rectangular and boxy EVF offers up a 3.68-megapixel OLED panel, built-in -4 to +3 adjustable diopter, ample eye relief and three positioning steps at 0°, 45° and 90°. The all-metal housing feels premium and ups durability. As an added bonus, the new Visoflex 2 will be backwards compatible with the entire M10 generation of cameras with upcoming firmware expected in March 2022. Those mainly interested in the M11 because of the new EVF might be satisfied with just a viewfinder upgrade instead. While a welcome move on Leica’s part, adding value and utility for M10 owners, there are some important caveats.
First, given camera hardware limitations, the 3.7-megapixel Visoflex 2 will display a slightly smaller image at 2.4 megapixels when mounted on an M10, the same as the current Visoflex (Typ 020). Without having seen this implementation firsthand, it’s tough to say whether there will be any tangible image quality difference from one EVF to the other. Also, if you make use of the included GPS of the current Viso, you may not want to switch since this feature hasn’t been carried over. For those hoping to use your M10 EVF on the M11…sorry, that won’t work either. The current Visoflex (Typ 020) is not forwards compatible.
Lastly, the M11 features a little extra trick for EVF users that M10 shooters won’t get. With such high resolution on the new camera, the focus aid’s 100% view could have proven to be a tad jittery, and possibly nauseating, so Leica included digital image stabilization when in magnified live view. Just to be clear, this isn’t the same kind of sensor-based IBIS of the SL2 or lens-based OIS in the Q2. The feature only smooths out the live view experience for easier critical focusing but does not offer any advantage for shooting. Immediately apparent during my testing, I’d love to see this implemented across the entire product range.
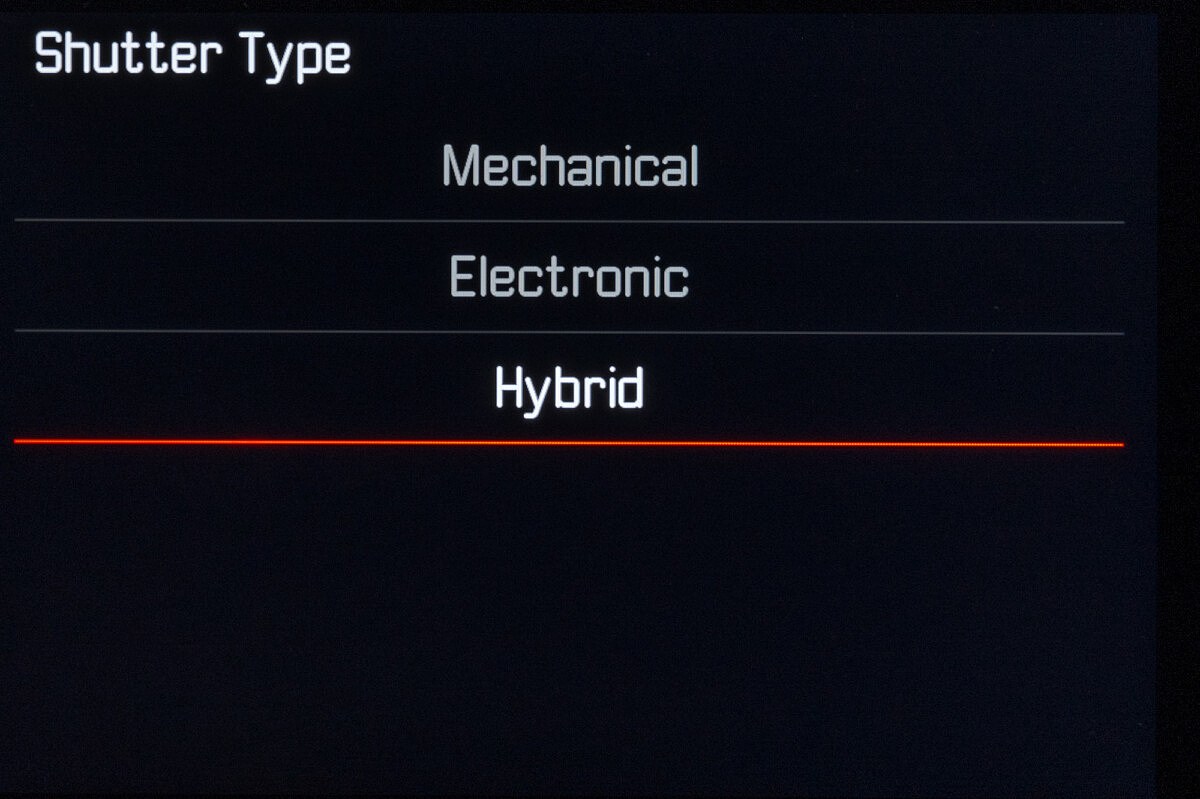
Electronic Shutter
Starting with firmware v2.0 for the SL (Typ 601) in early 2016, all Leica digital cameras since have featured electronic shutter capability…except the M system. But now the M gains this extremely useful functionality in the M11. Just like the M10 generation, mechanical speeds still top out at 1/4000th, but in Hybrid or Electronic modes, electronic shutter speeds up to 1/16,000th are now on offer. In practical terms that means that you can shoot an f/0.95 Noctilux wide open in full sun without an ND filter. Or, switch to Electronic only to eliminate all shutter vibration and shoot in complete silence. Sure, the ultra-quiet shutter carried over from the M10-P, M10-R and M10 Monochrom is barely audible in most circumstances, but sometimes you need no noise at all.
Longer shutter speeds
On the other end of the spectrum Leica has lengthened the maximum exposure time to a full 60 minutes. Considerably longer than the M10-R’s 16-minute and double the SL2’s 30-minute limit, the hour-long exposures offer up previously unobtainable night photography options. Just like on the SL2, Long Exposure Noise Reduction can be disabled if you don’t want to wait for another hour before being able to take the next shot. But before turning it off for all your pictures, remember that LENR isn’t just there as an inconvenience. By capturing and analyzing an equivalent-length dark frame exposure, image quality on long exposures improves dramatically by subtracting out any hot pixels or thermal noise.
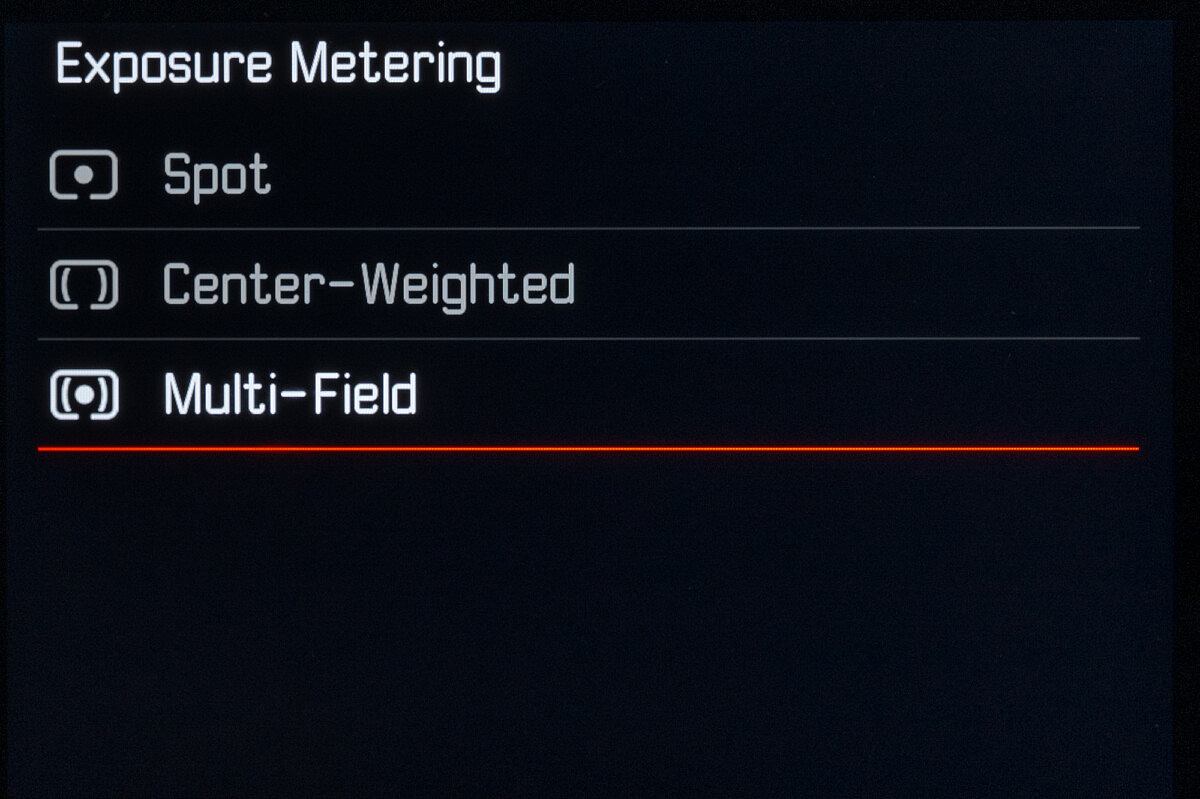
Multifield metering
Removing the lens with the camera powered on reveals another subtle change. The sensor is exposed, with the shutter curtain opened. Even when not in Live View, the camera analyzes the scene based on information directly from the sensor rather than a traditional meter measuring light reflected off the shutter blades. In fact, the M11 has no internal light meter. Regardless of metering mode, Center-weighted, Multifield or Spot, the sensor is actively being used to measure luminance of the scene. This makes the exceptional battery life even that much more impressive, and of course, the metering system as accurate as that in a mirrorless system like the SL2.
Handgrip
Despite my appreciation for the near-perfect ergonomics of the SL2 and its chunky grip, I’ve never been a huge fan of the add-on handgrips for M cameras. I had one for my M7 yet didn’t use it much. I toyed with grips on the M240 generation, then later the M10, but still didn’t really bond with them. Instead, I much preferred a simple Thumbs Up or Leica Thumb Support. Now, Leica’s latest M11 hand grip might make me reconsider. The grip secures onto the base of the camera with a flip-out, captive screw. Finger-tighten and the connection between camera and grip is rock solid, with no play whatsoever. A rubber bottom insert hinges to grant access to the battery and the SD card slot within. No unscrewing necessary. Likewise, the USB-C port is always accessible.
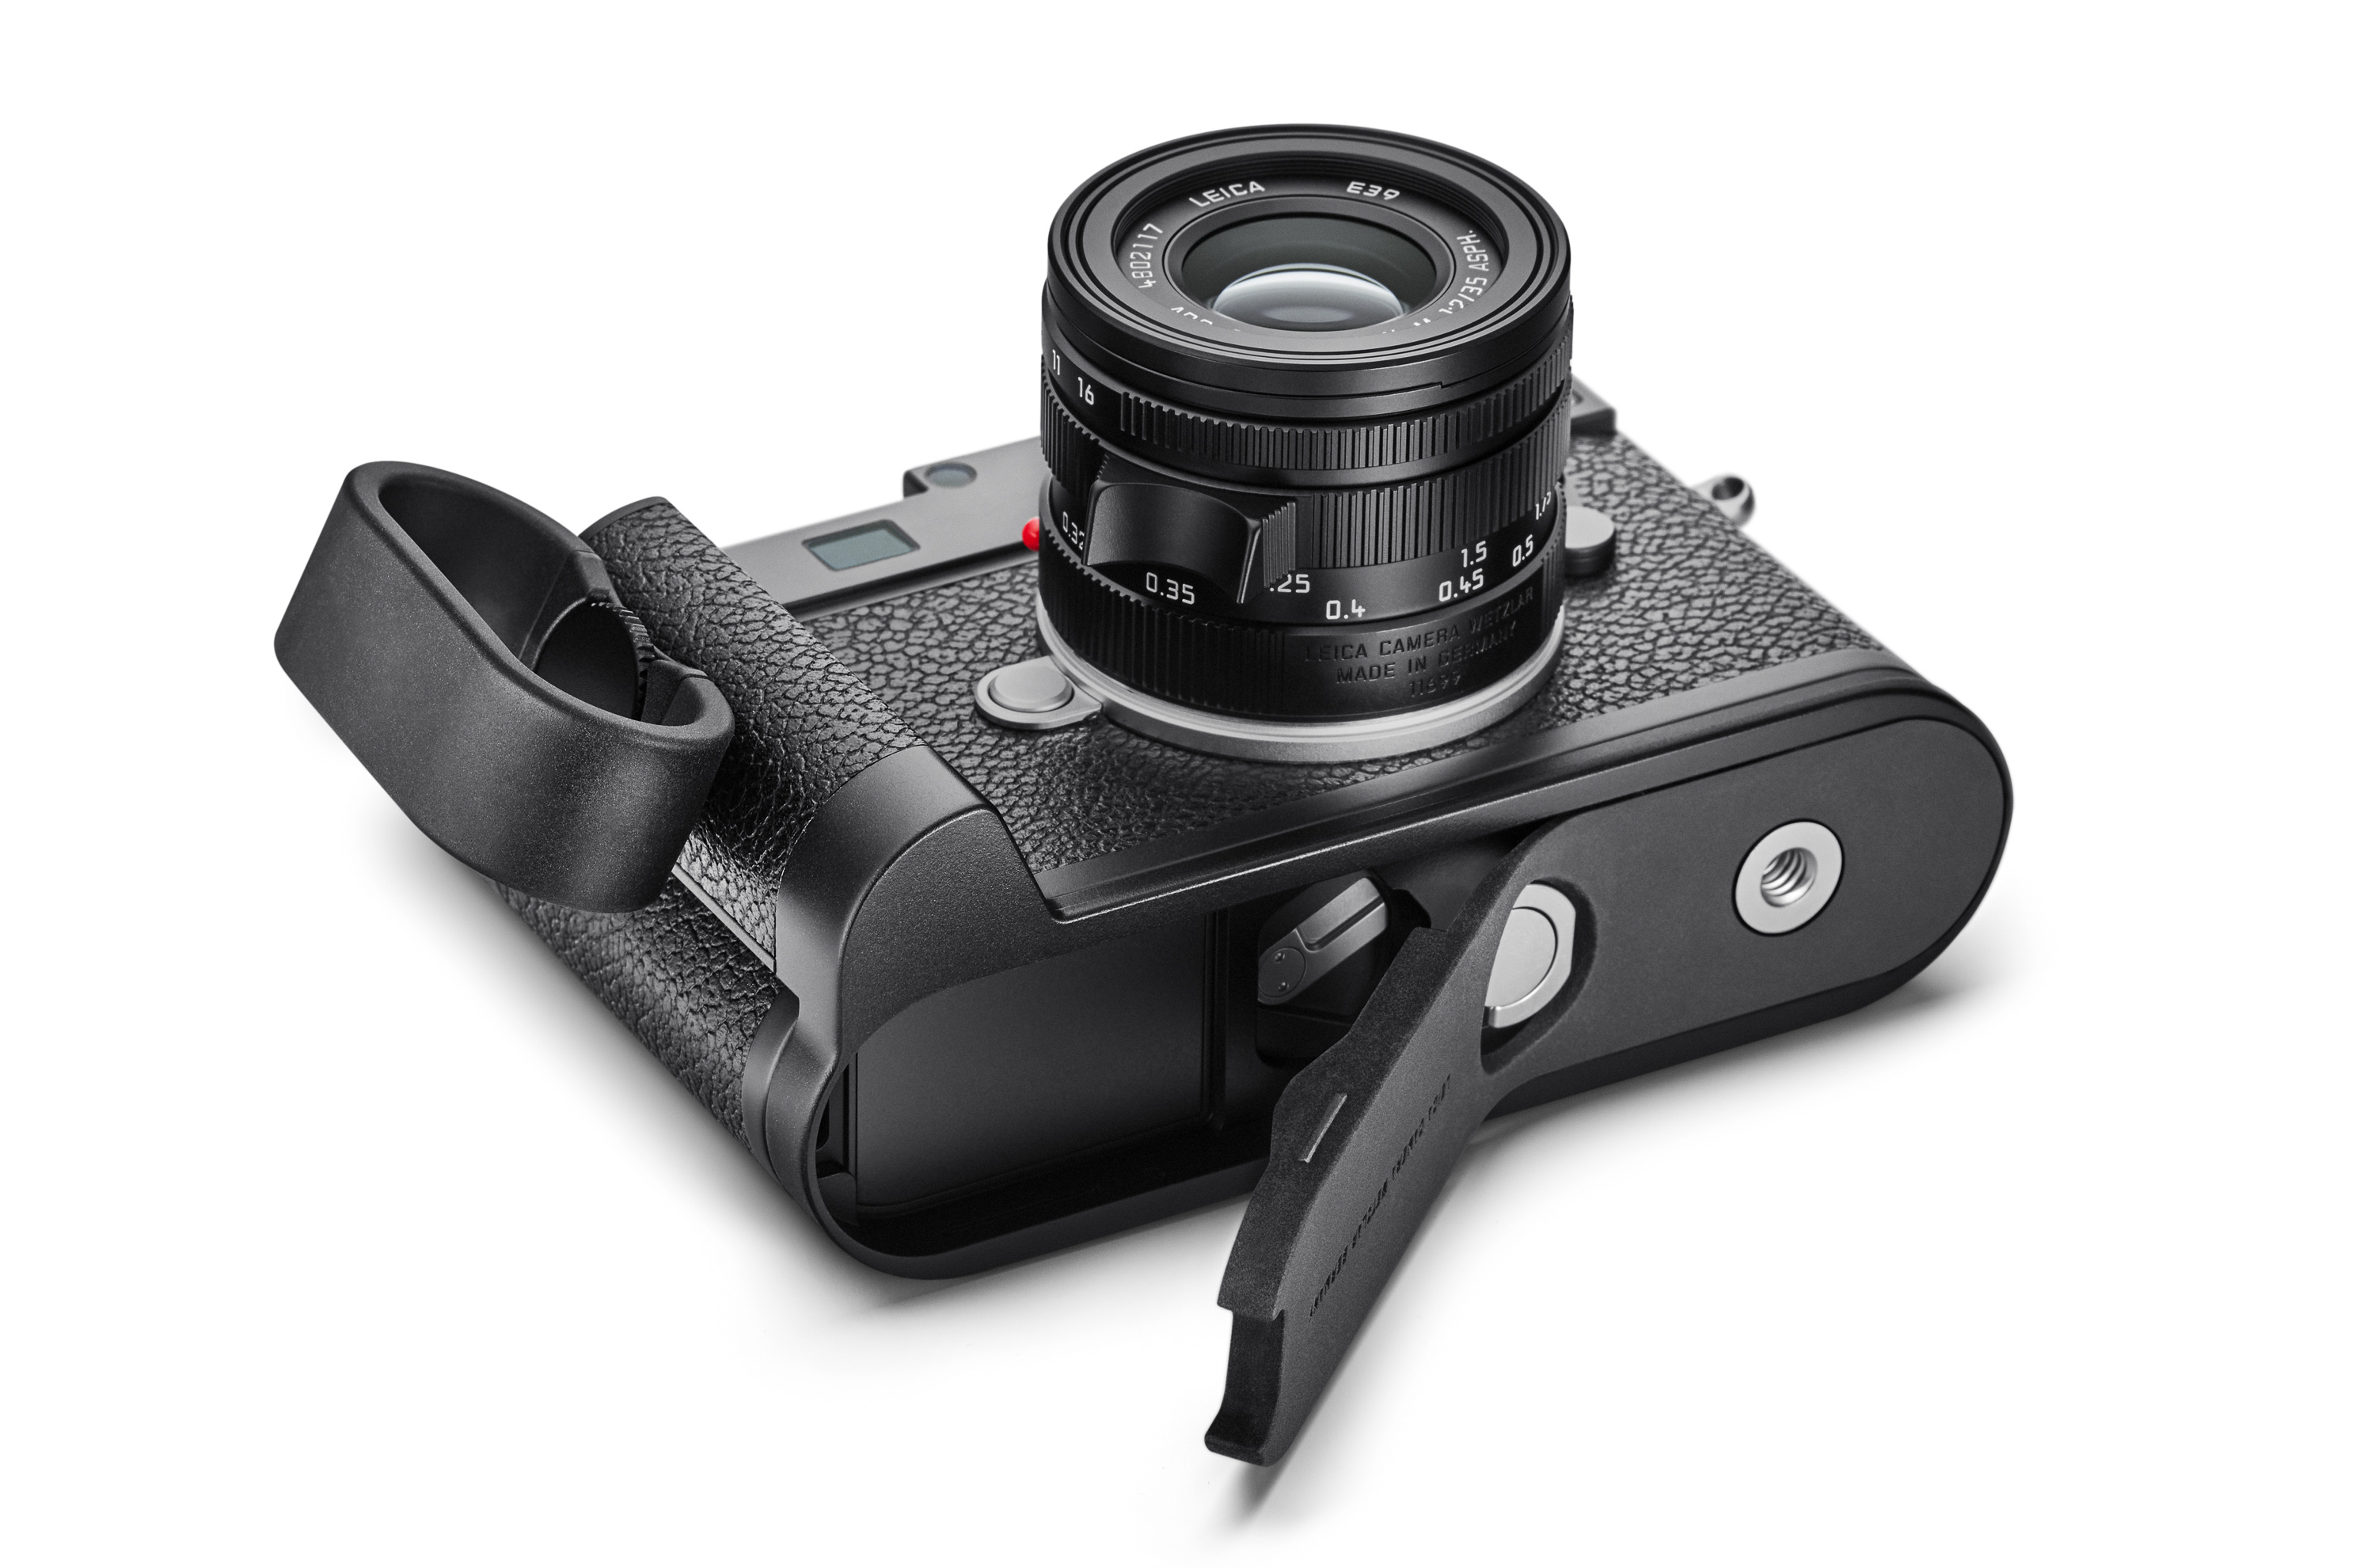
But the biggest win here is for those looking to mount the M11 on a tripod. The front and rear edges combine to form a universal Arca-style quick release plate that extends the full length of the grip. Granted, this design is far from revolutionary, with Really Right Stuff offering such add-on full-length plates with optional handgrip since the days of the M9. But kudos to Leica for seeing the need and implementing a first-party solution, similar to their rollout of the Thumb Support for the M10 after years of users mounting Thumbs Ups on their Leica M cameras. If you don’t plan on using the handgrip but also want to use the M11 on a tripod, be prepared for a less-than-ideal placement of the 1/4”-20 socket – with a quick release plate, you won’t be able to access the battery release lever.
Tech from other Leica cameras
In order to improve the M11 on all fronts, Leica pulled from advancements they made on other recent cameras in the roster. They’ve done this with almost every launch in recent years. If technology or a great feature is developed for one product, it’s then made available for all subsequent ones. In taking this product engineering approach, each camera retains its individual personality yet feels immediately familiar with very little learning curve. It’s why I was able to hit the ground running with the M11 – it worked just like every other Leica camera I regularly use.
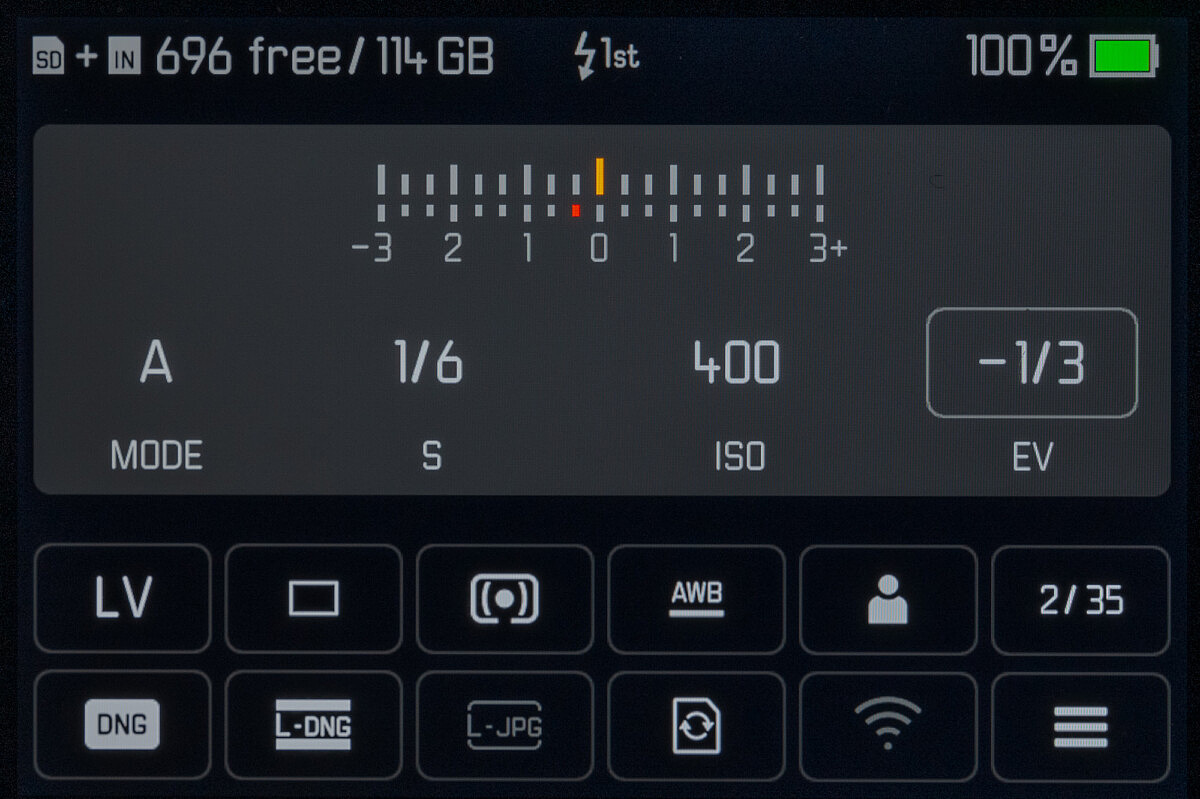
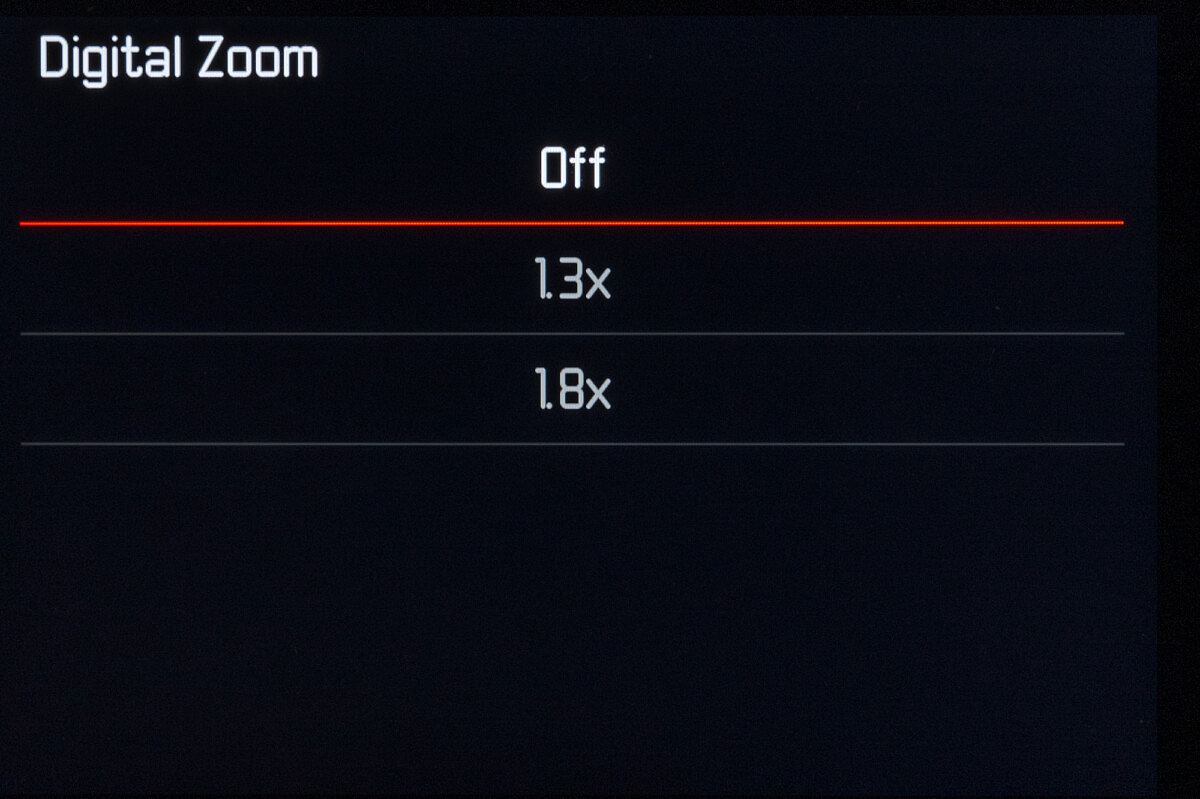
The baseplate design echoes that of the TL2 or SL2 with a battery release lever and the bottom of the battery sitting flush with the camera’s baseplate. Lighter weight aluminum top plate construction of the black model first pioneered with the M (Typ 262) is put to good use here. The three buttons flanking the left side of the rear LCD are lifted directly from the Q2 and SL2, as is the handy touchscreen quick menu. The clickable thumbwheel – another takeoff of the SL2, was first used on the groundbreaking S2. And the three assignable function buttons, again featured from the SL2 and Q2, speed up real-world shooting. Digital crop modes of 1.3x and 1.8x work the same as those on the Q2, with overlaid framing boxes to see what’s happening outside the frame. Also on other cameras in the line-up, the electronic shutter is a welcome addition, as is the off-sensor mirrorless metering methodology pioneered on the SL.
Testing in NYC
When Leica invited me to New York to ‘see something new and exciting,’ I didn’t hesitate. Two things I love – New York City around the holidays and new toys from Leica. With the NDAs and travel arrangements out of the way, I eagerly awaited my meeting with the team from Leica USA. In a nondescript conference room in the Financial District, marketing specialist Nathan Kellum was on hand to give me a one-on-one unveiling and full rundown of the new camera. His enthusiasm for the M11 was genuine, and mine was building as he walked me through all the upgrades and features of the new M. And then he showed me some of his own images from the camera. I was blown away, and even more excited to get out and use the new beauty for a few days in the city.
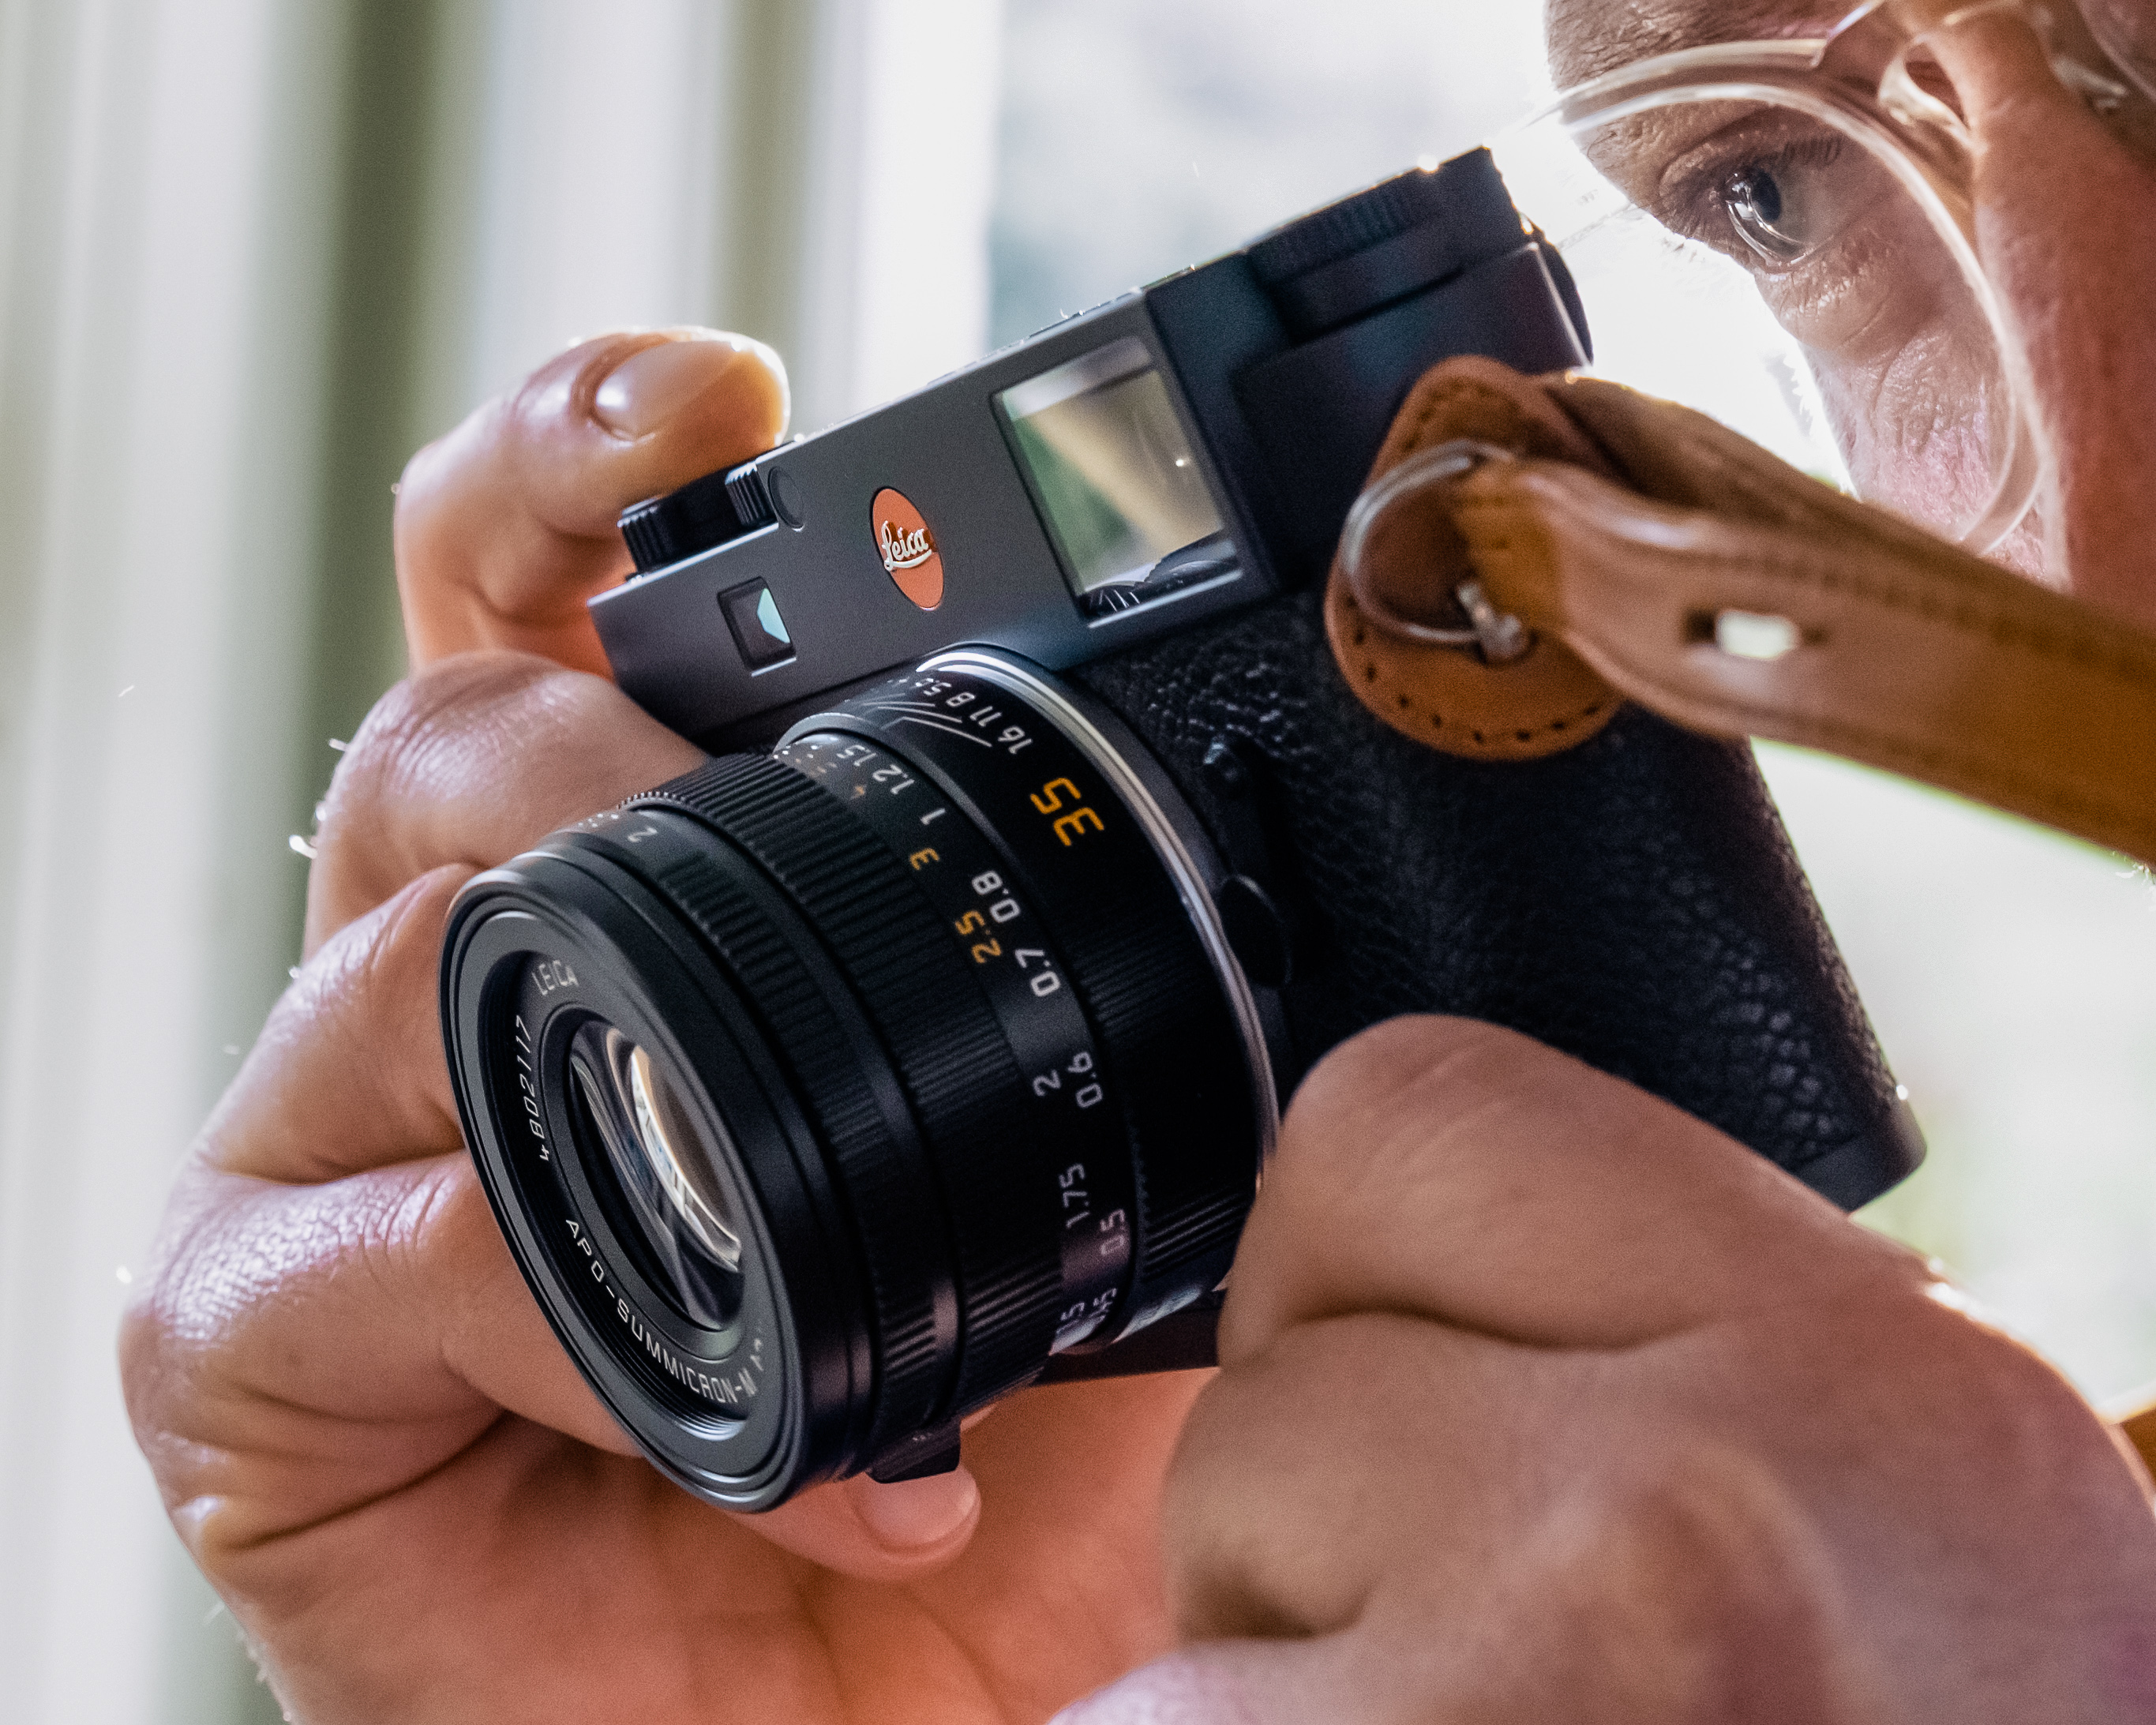
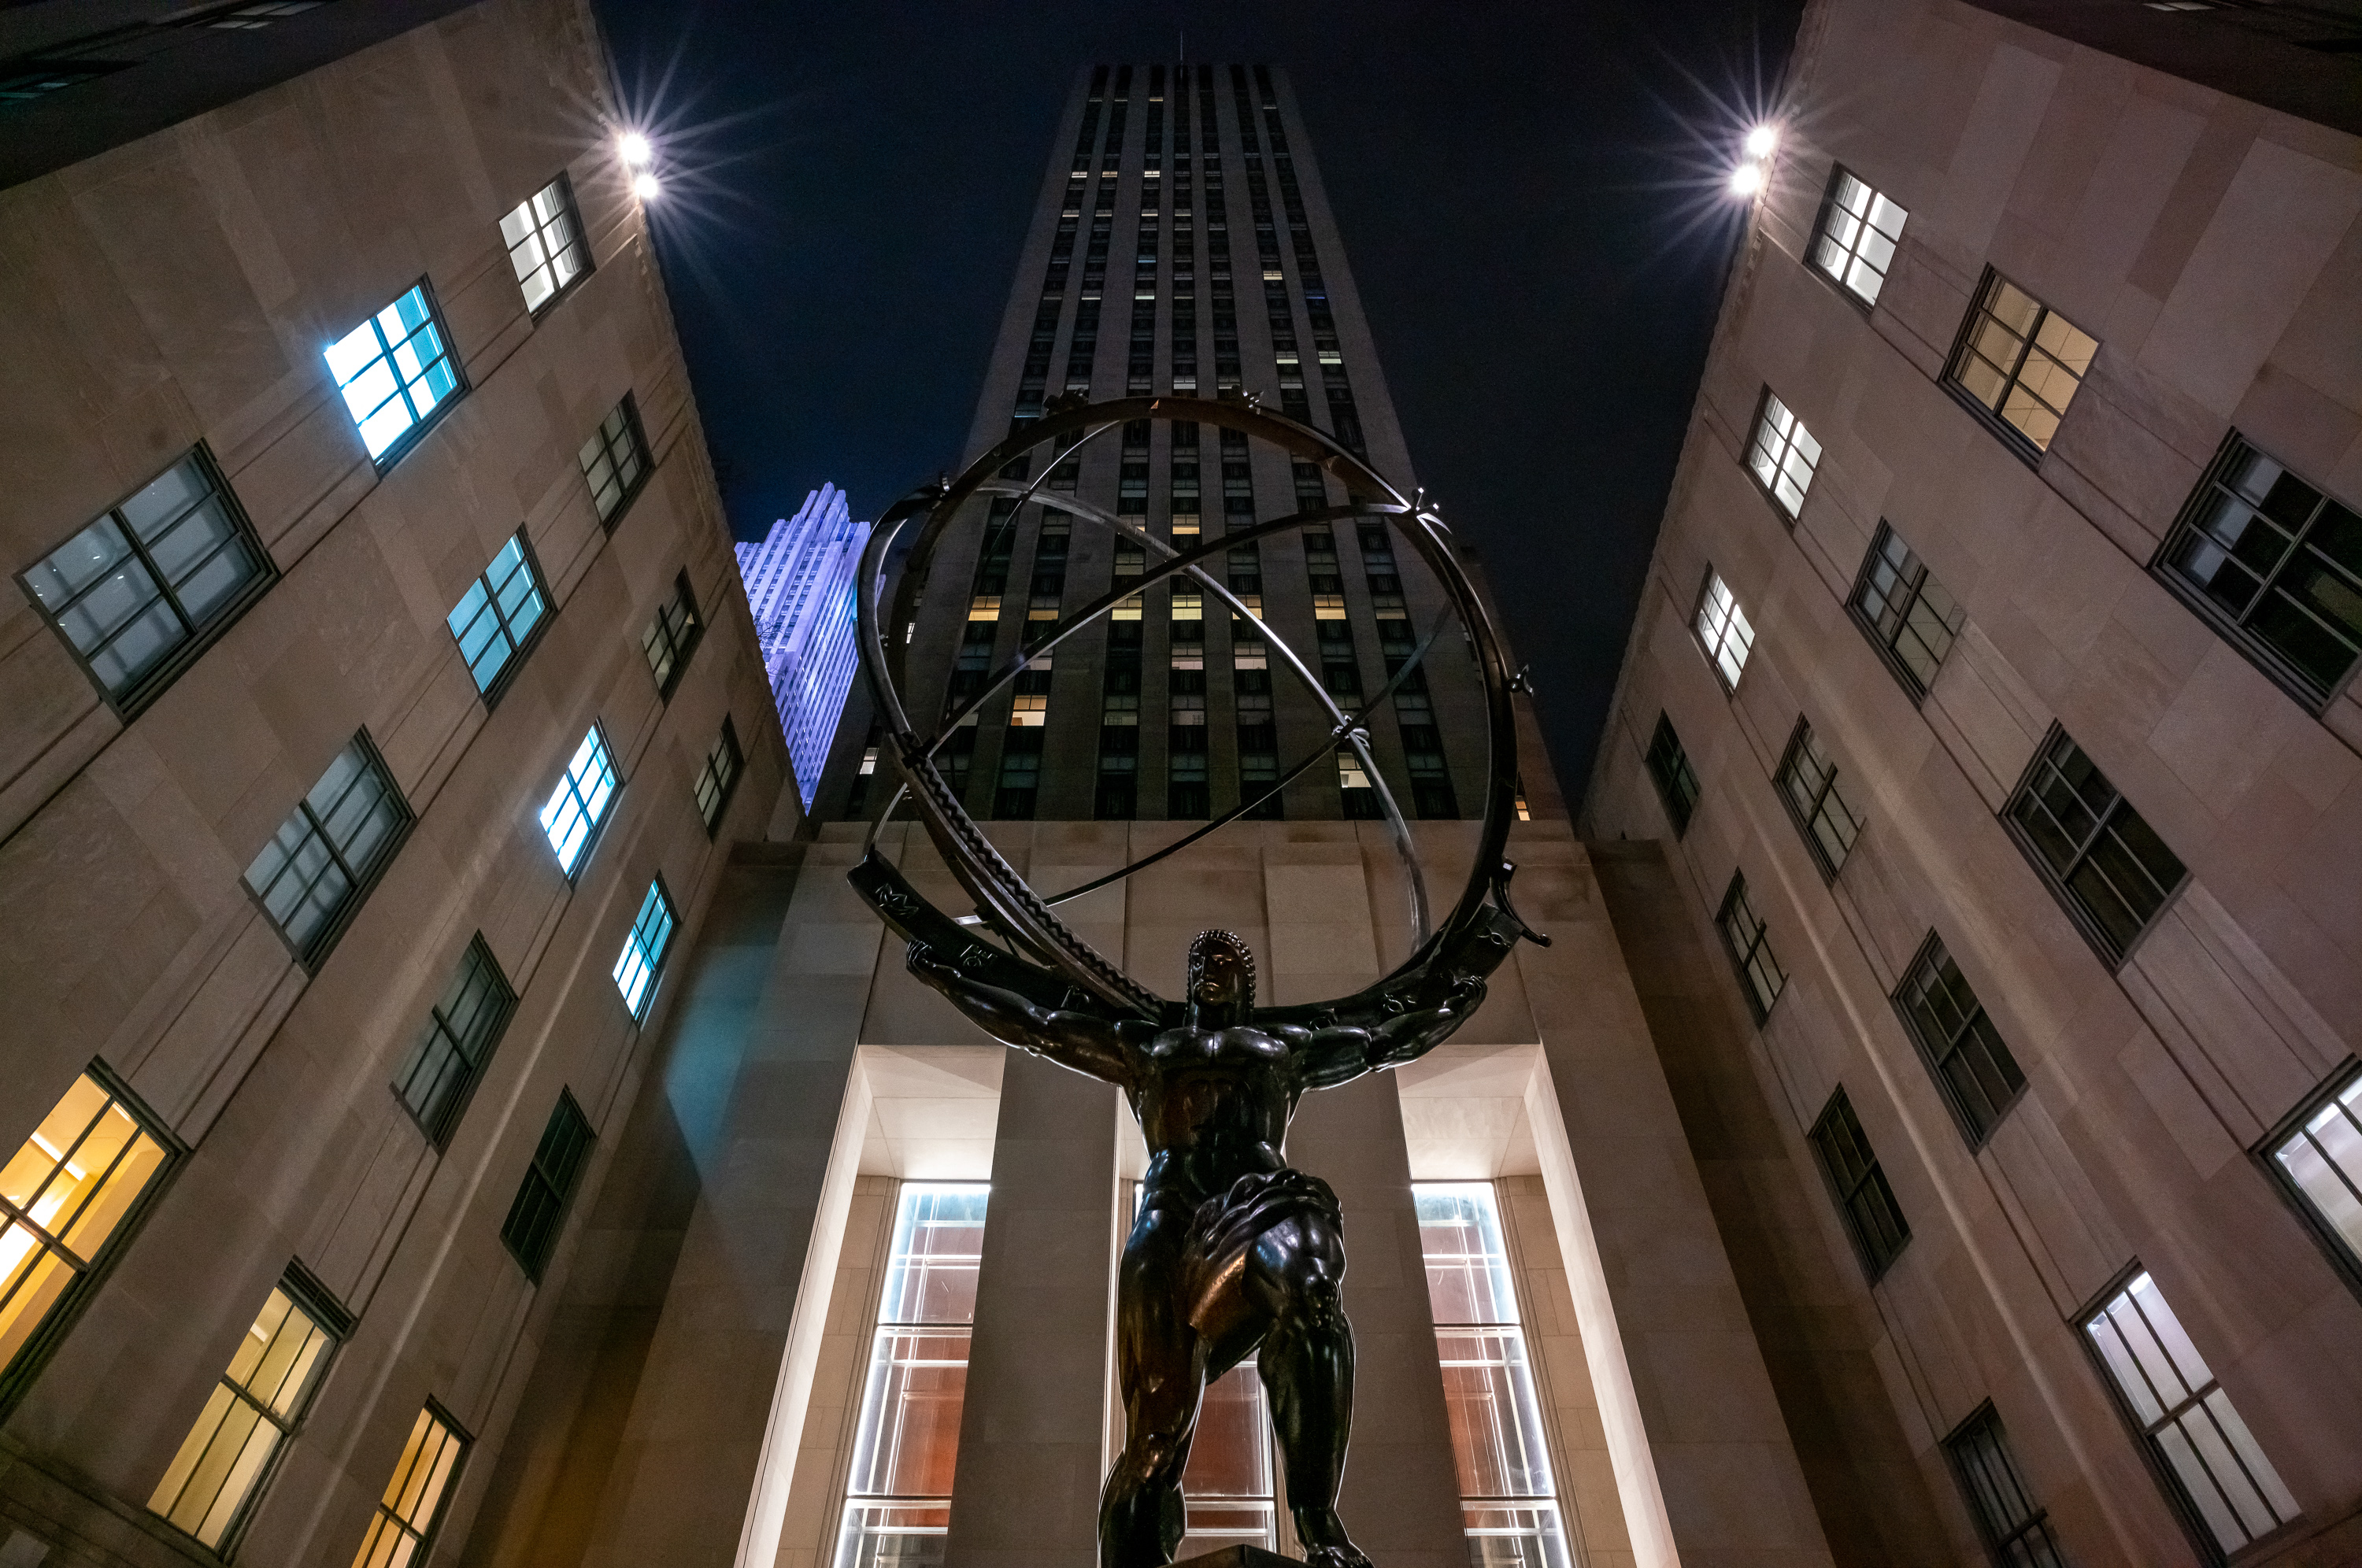
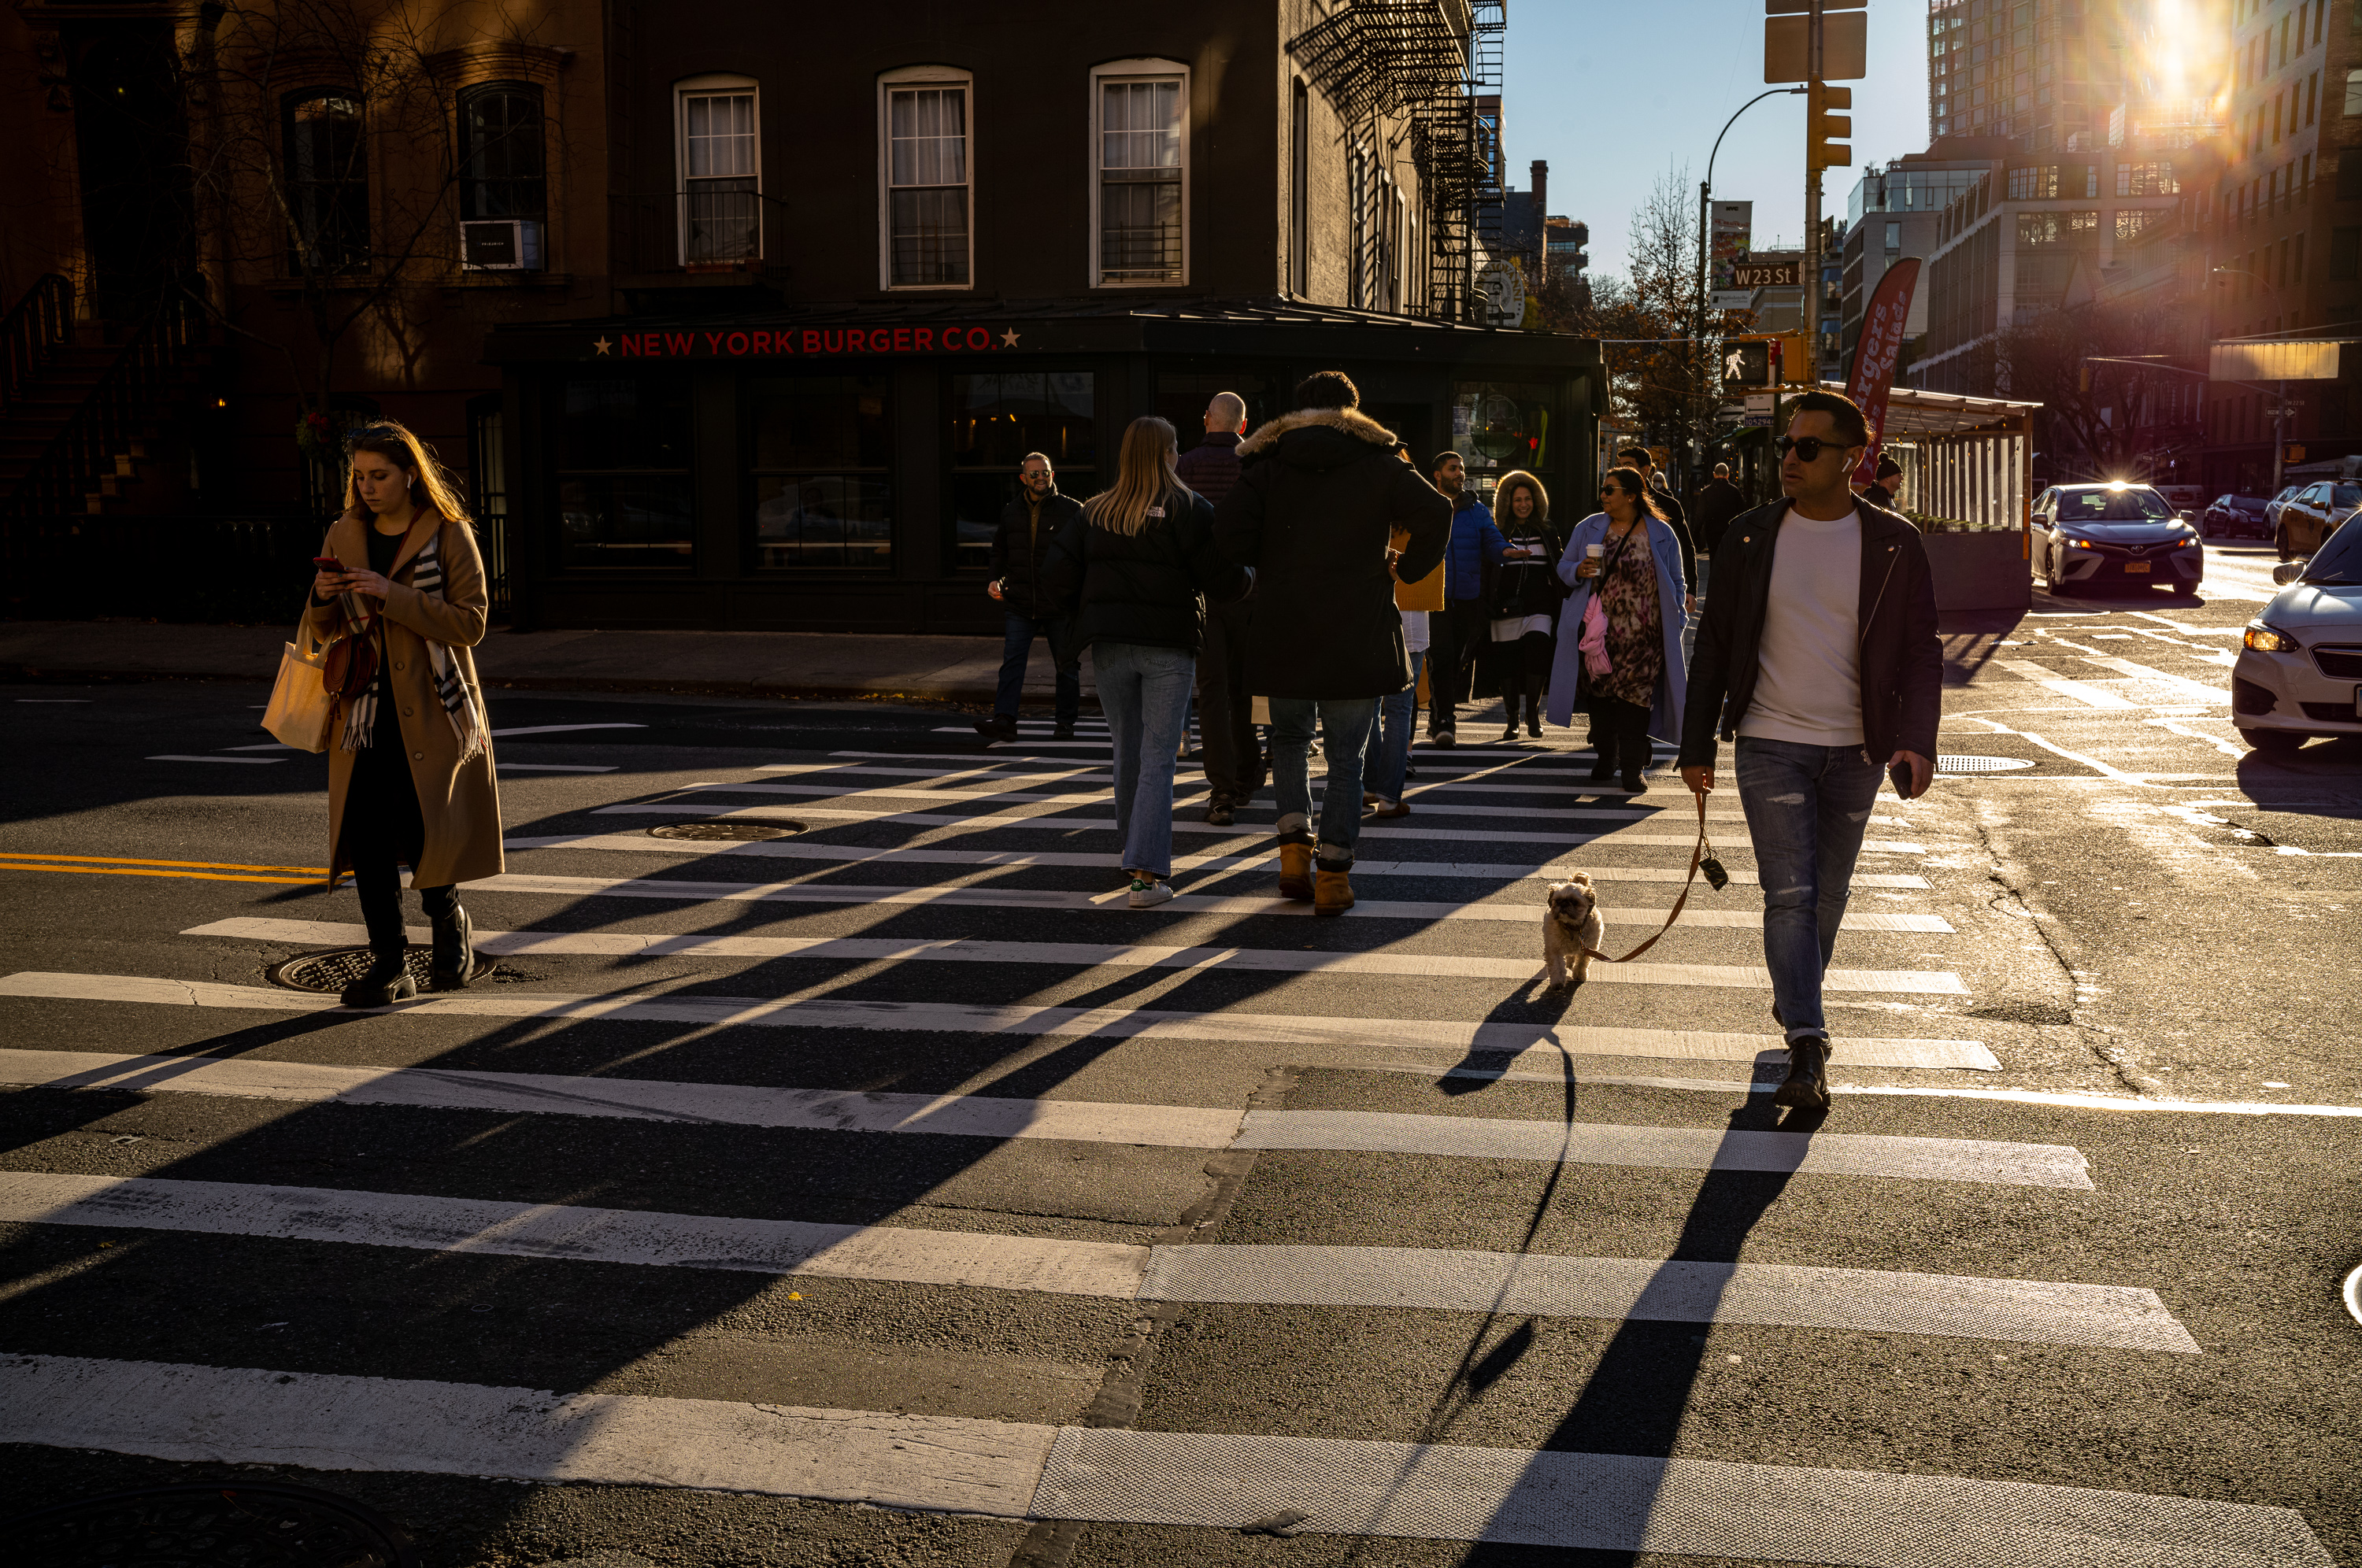
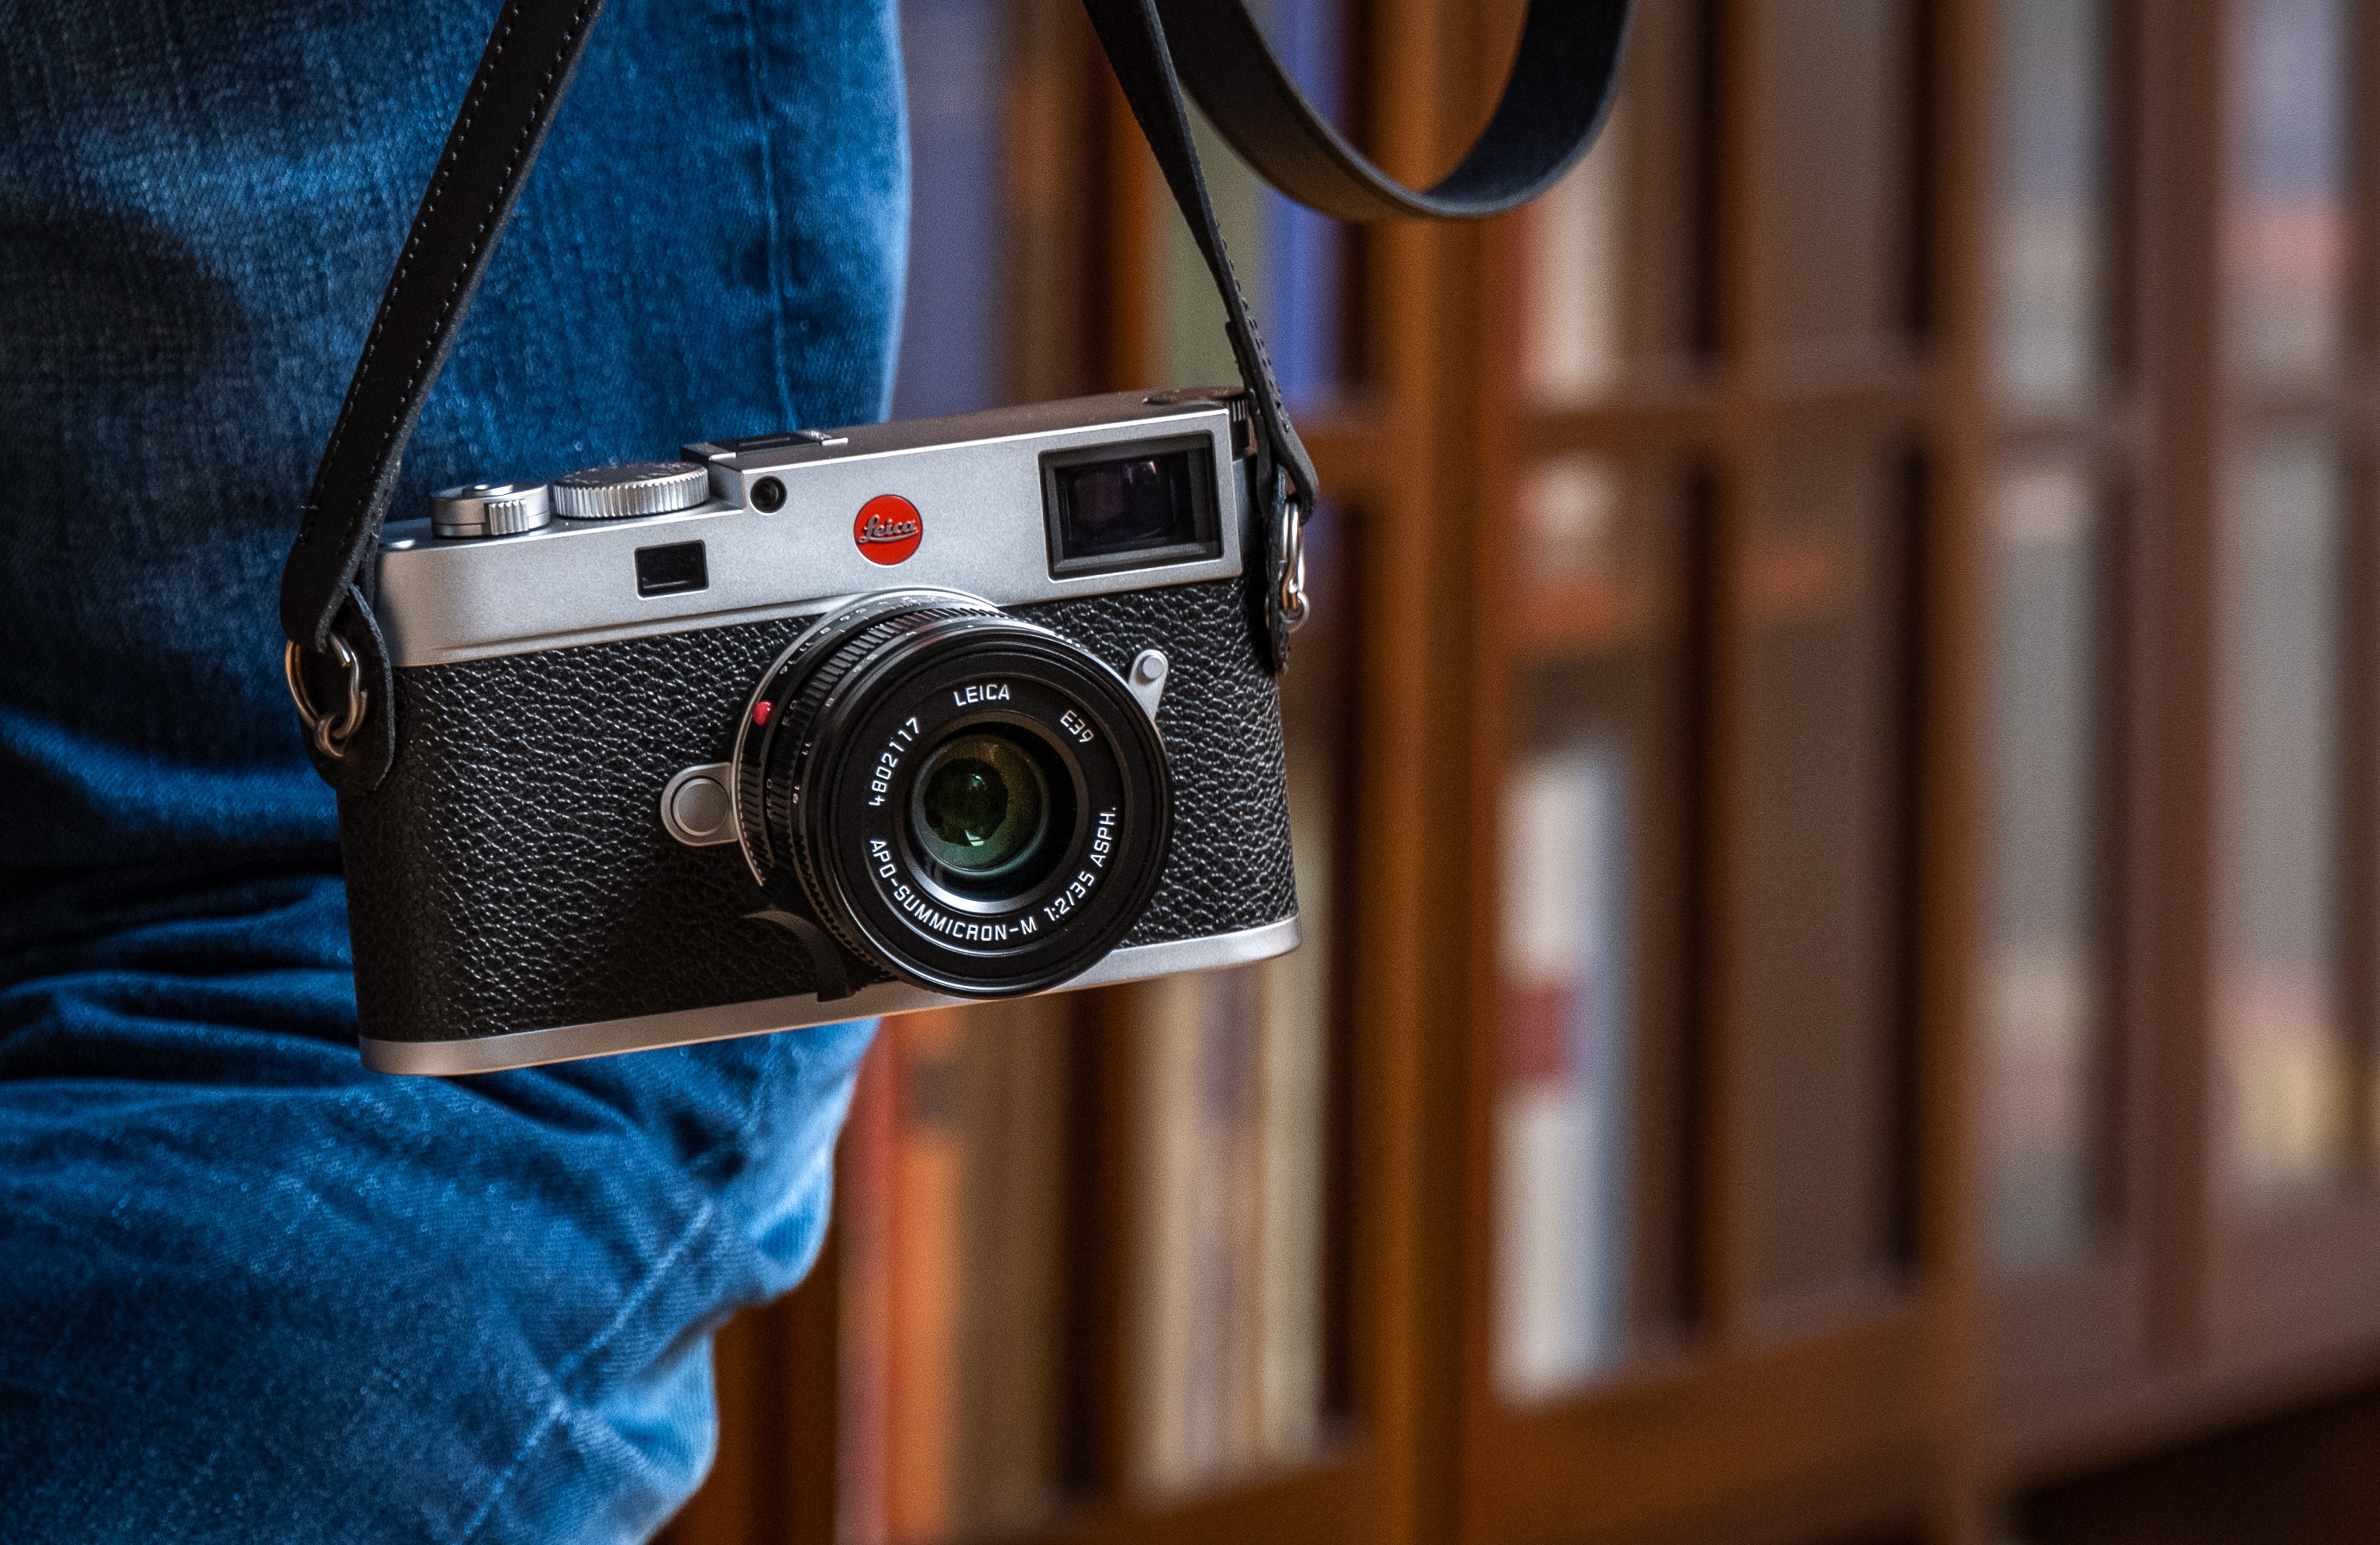
1/500th sec @ f/8 ISO 64
And I had come prepared. I was packing my usual kit of M lenses with one notable exception. In place of my most-used and well-loved Summilux-M 35mm f/1.4 ASPH FLE, I decided to up the ante with the elusive and extraordinary APO-Summicron-M 35mm f/2 ASPH. Apart from Leica not being able to make them in any meaningful quantity to meet the overwhelming demand, the lens is about as perfect as it gets. Diminutive in size and grandiose in performance, the 35 APO is the ideal complement to the M11. Along with the 35, I brought my Super-Elmar-M 18mm f/3.8 ASPH and Elmar-M 24mm f/3.8 ASPH for wide angle work, the 50 APO-Summicron-M for portrait and general use, as well as my now 20-year old Elmarit-M 90mm f/2.8 for a bit of telephoto reach.
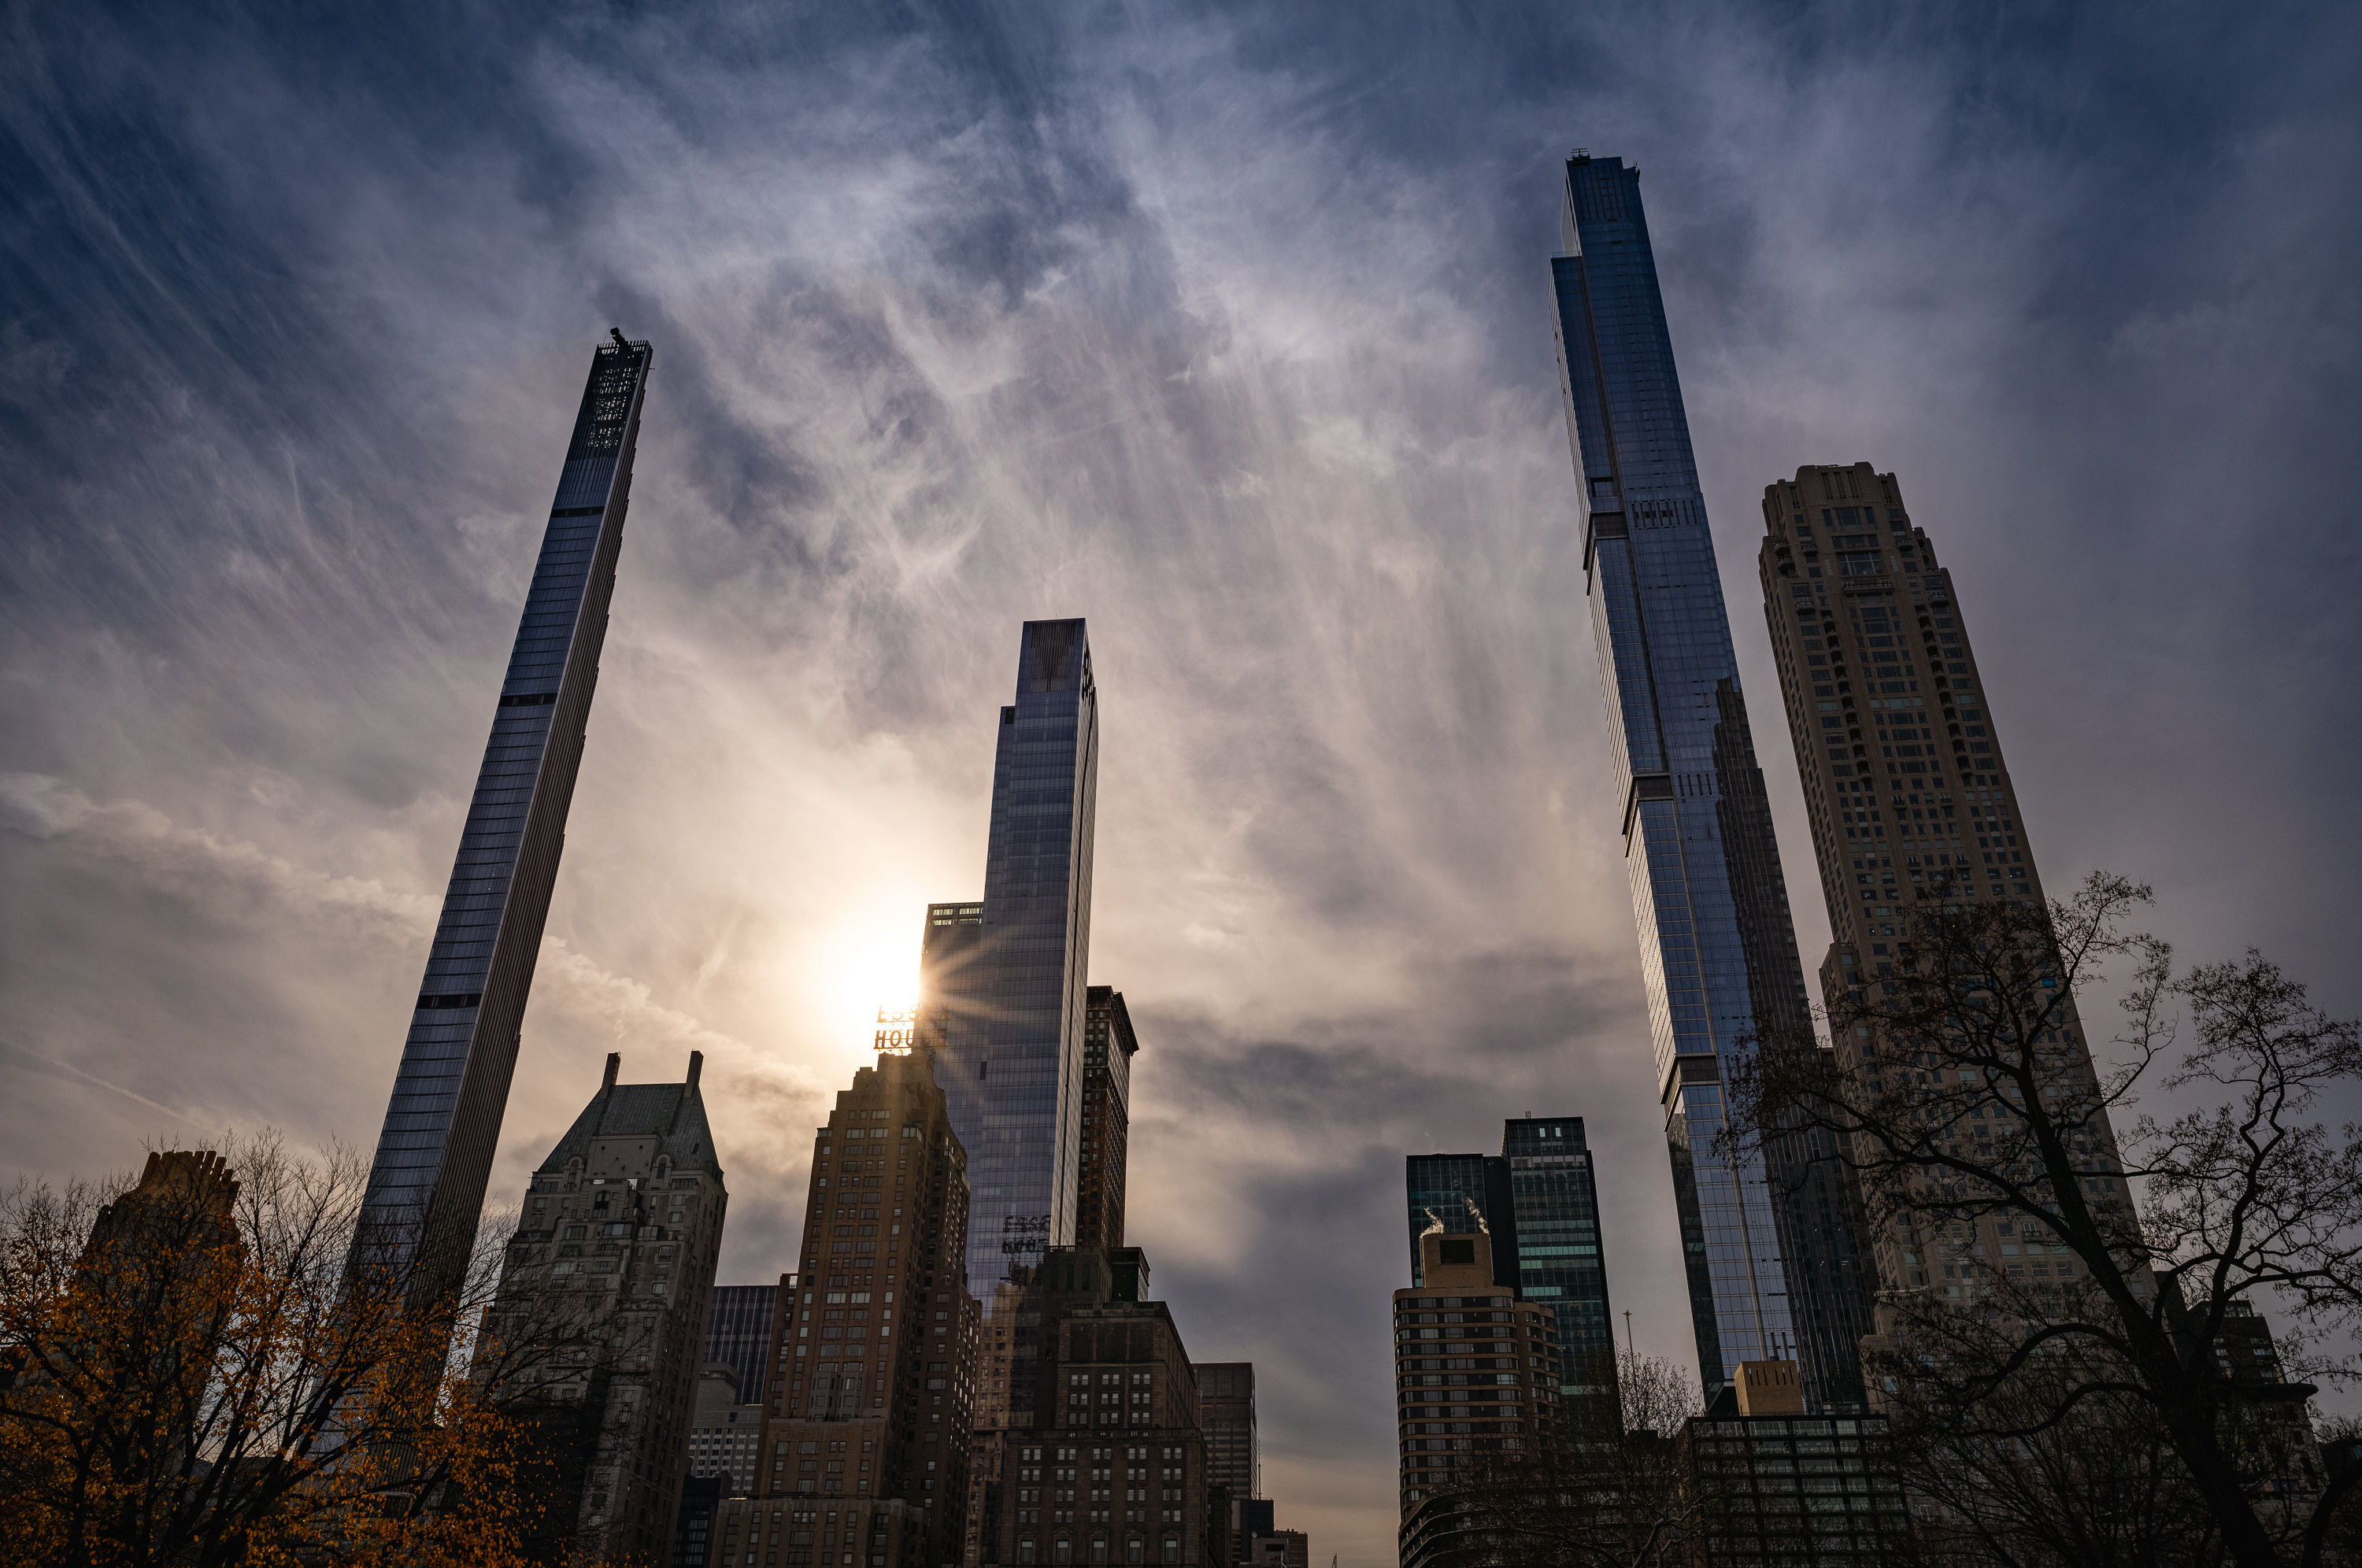
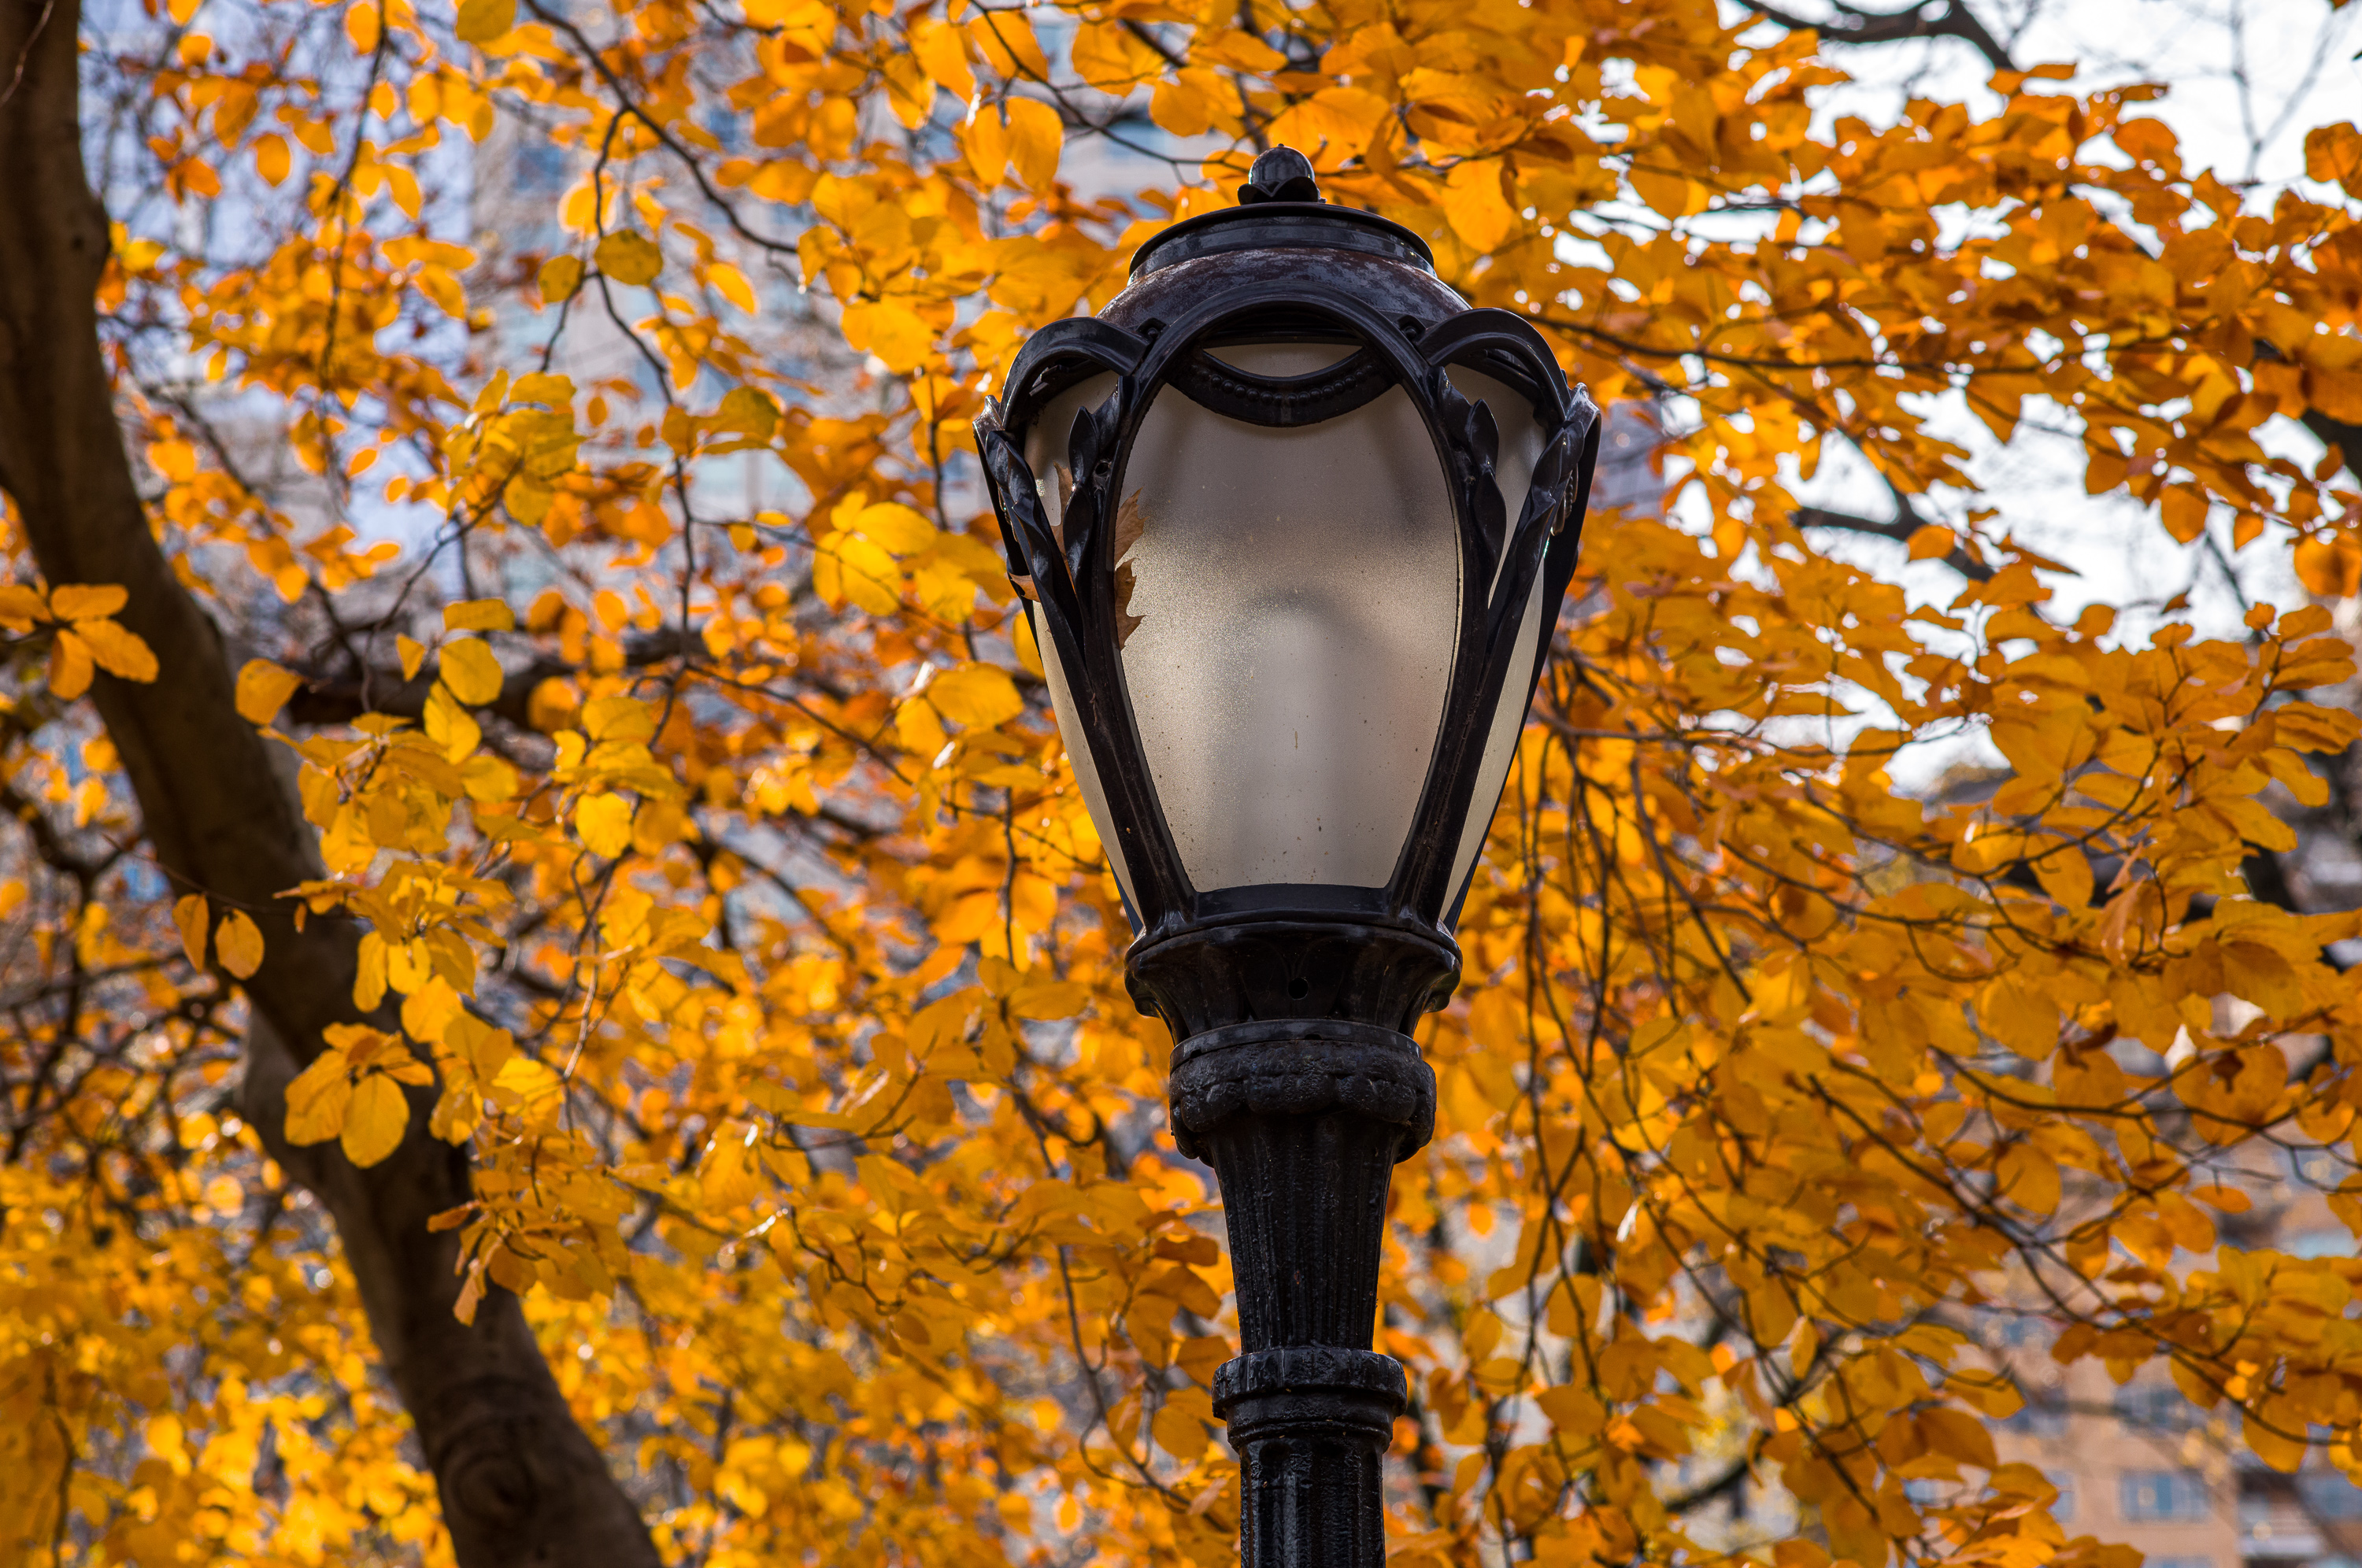
A stroll through Central Park
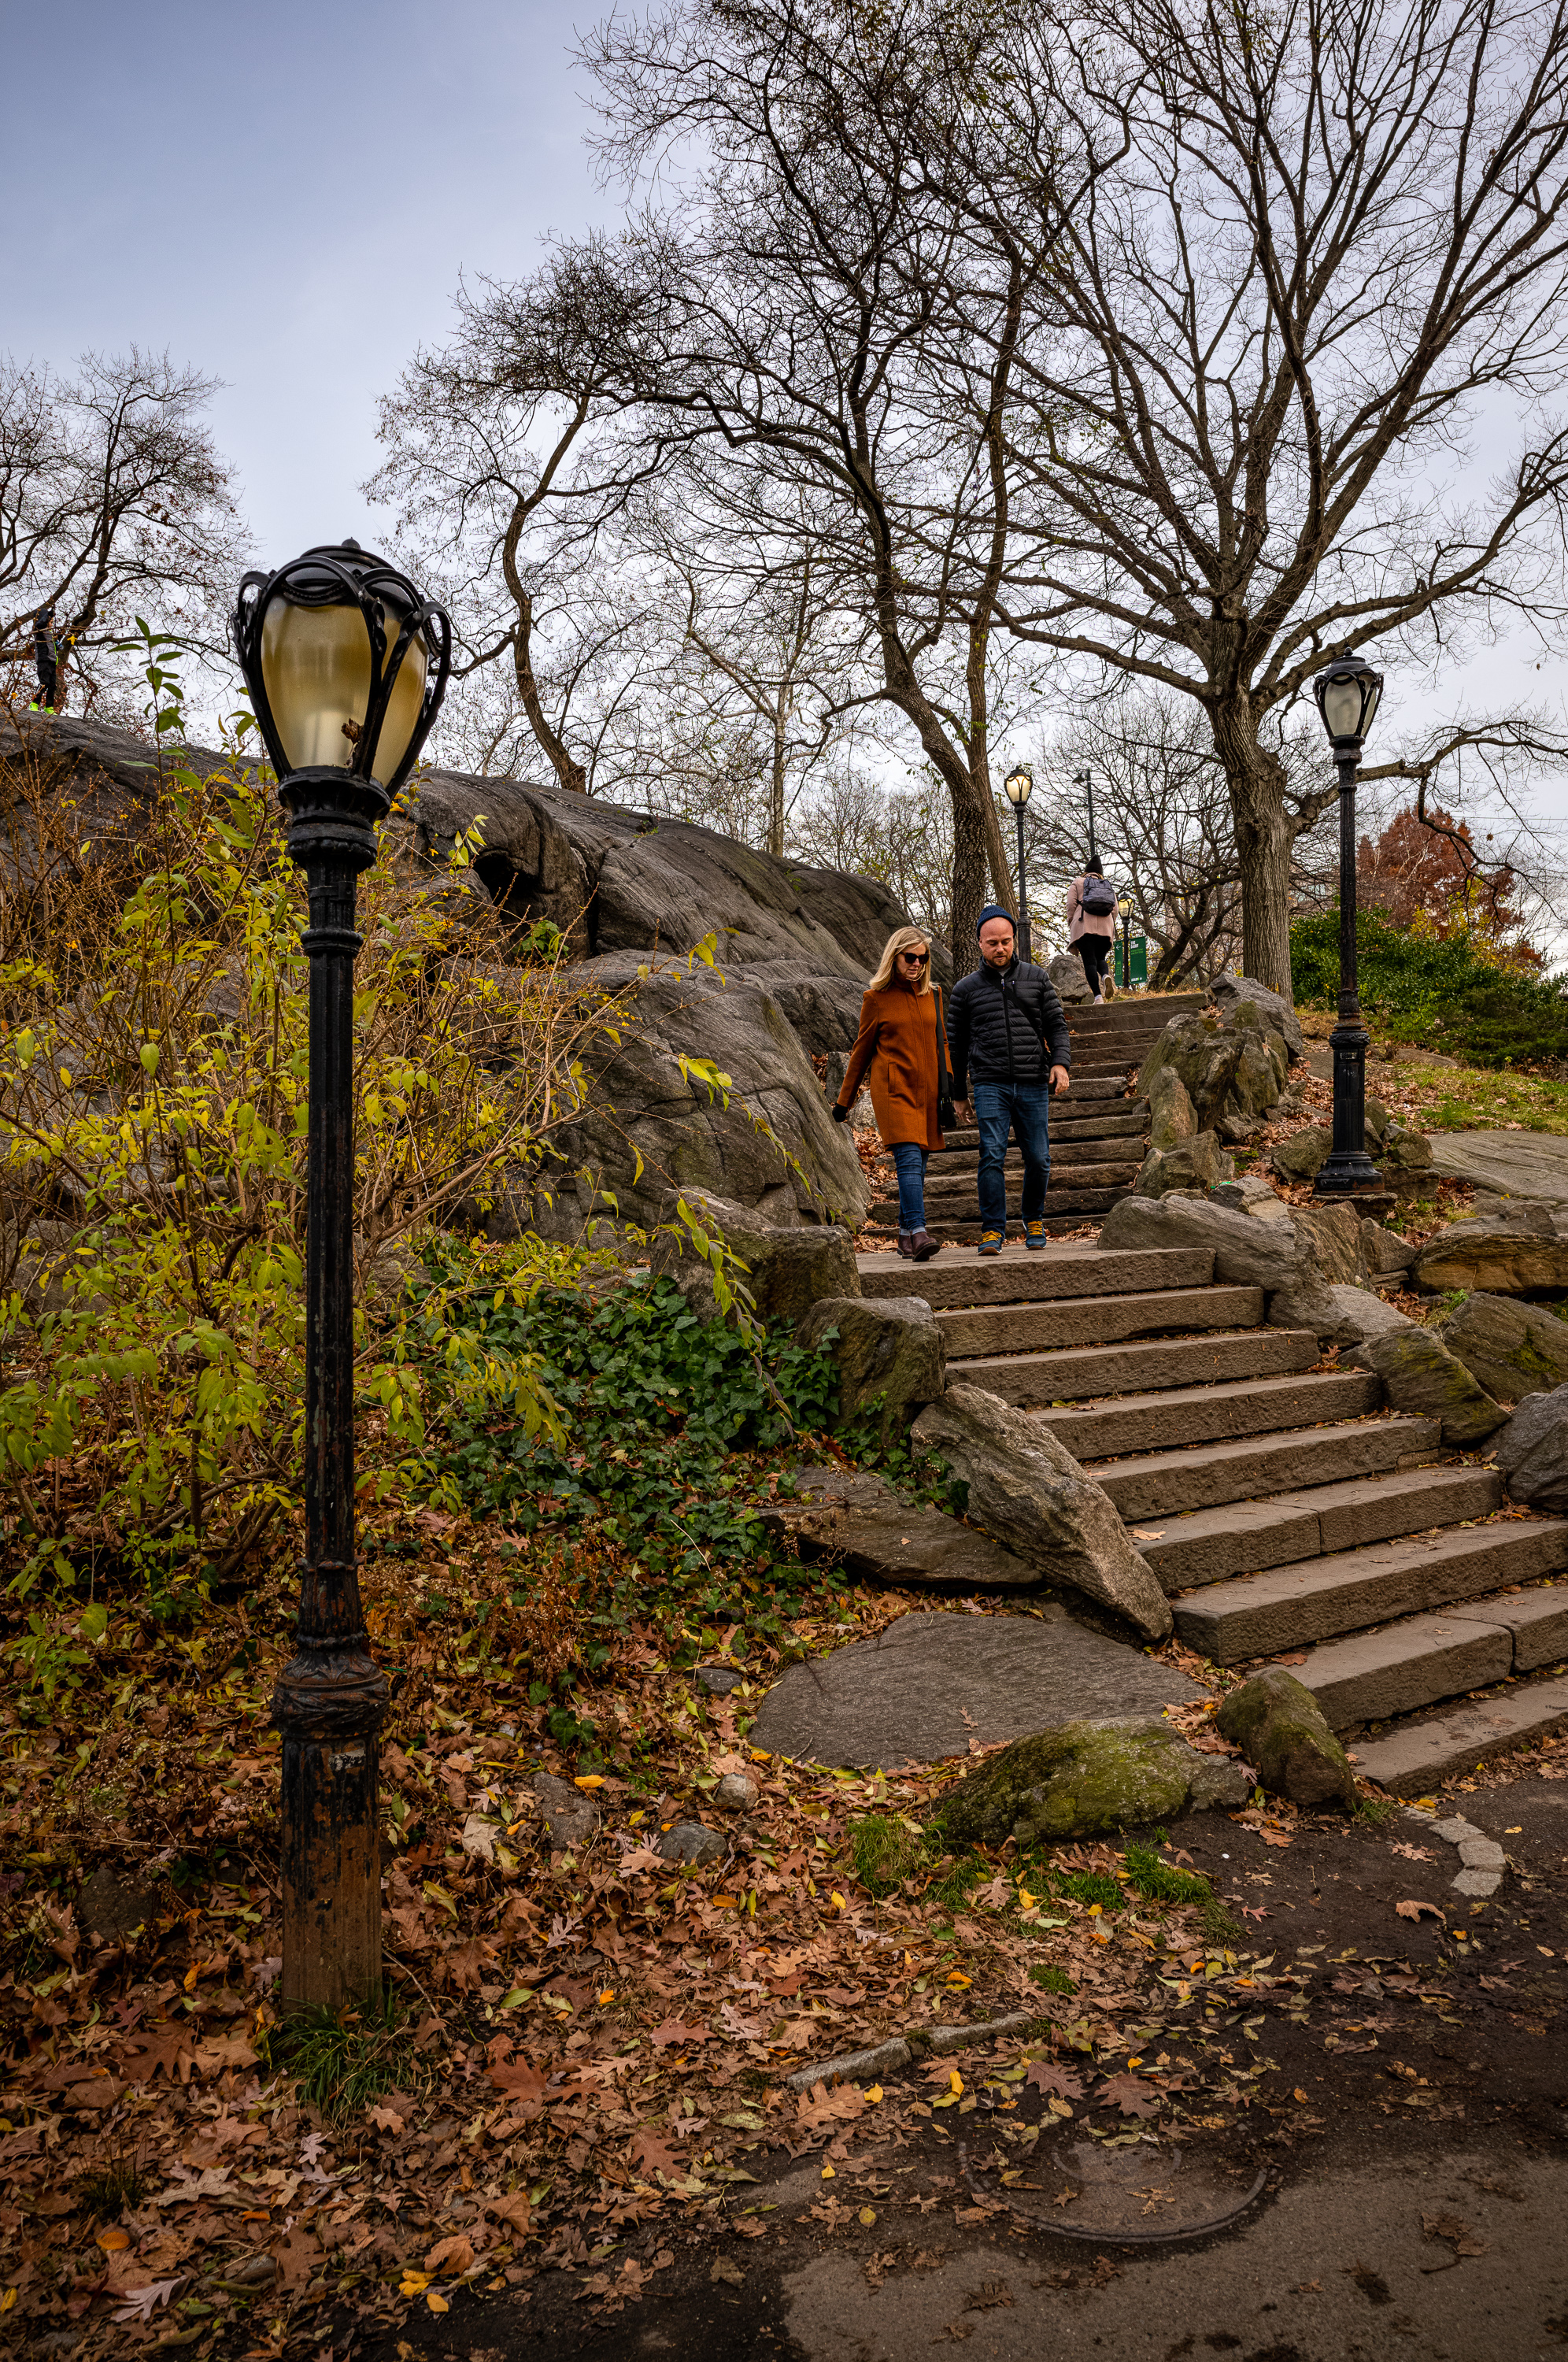
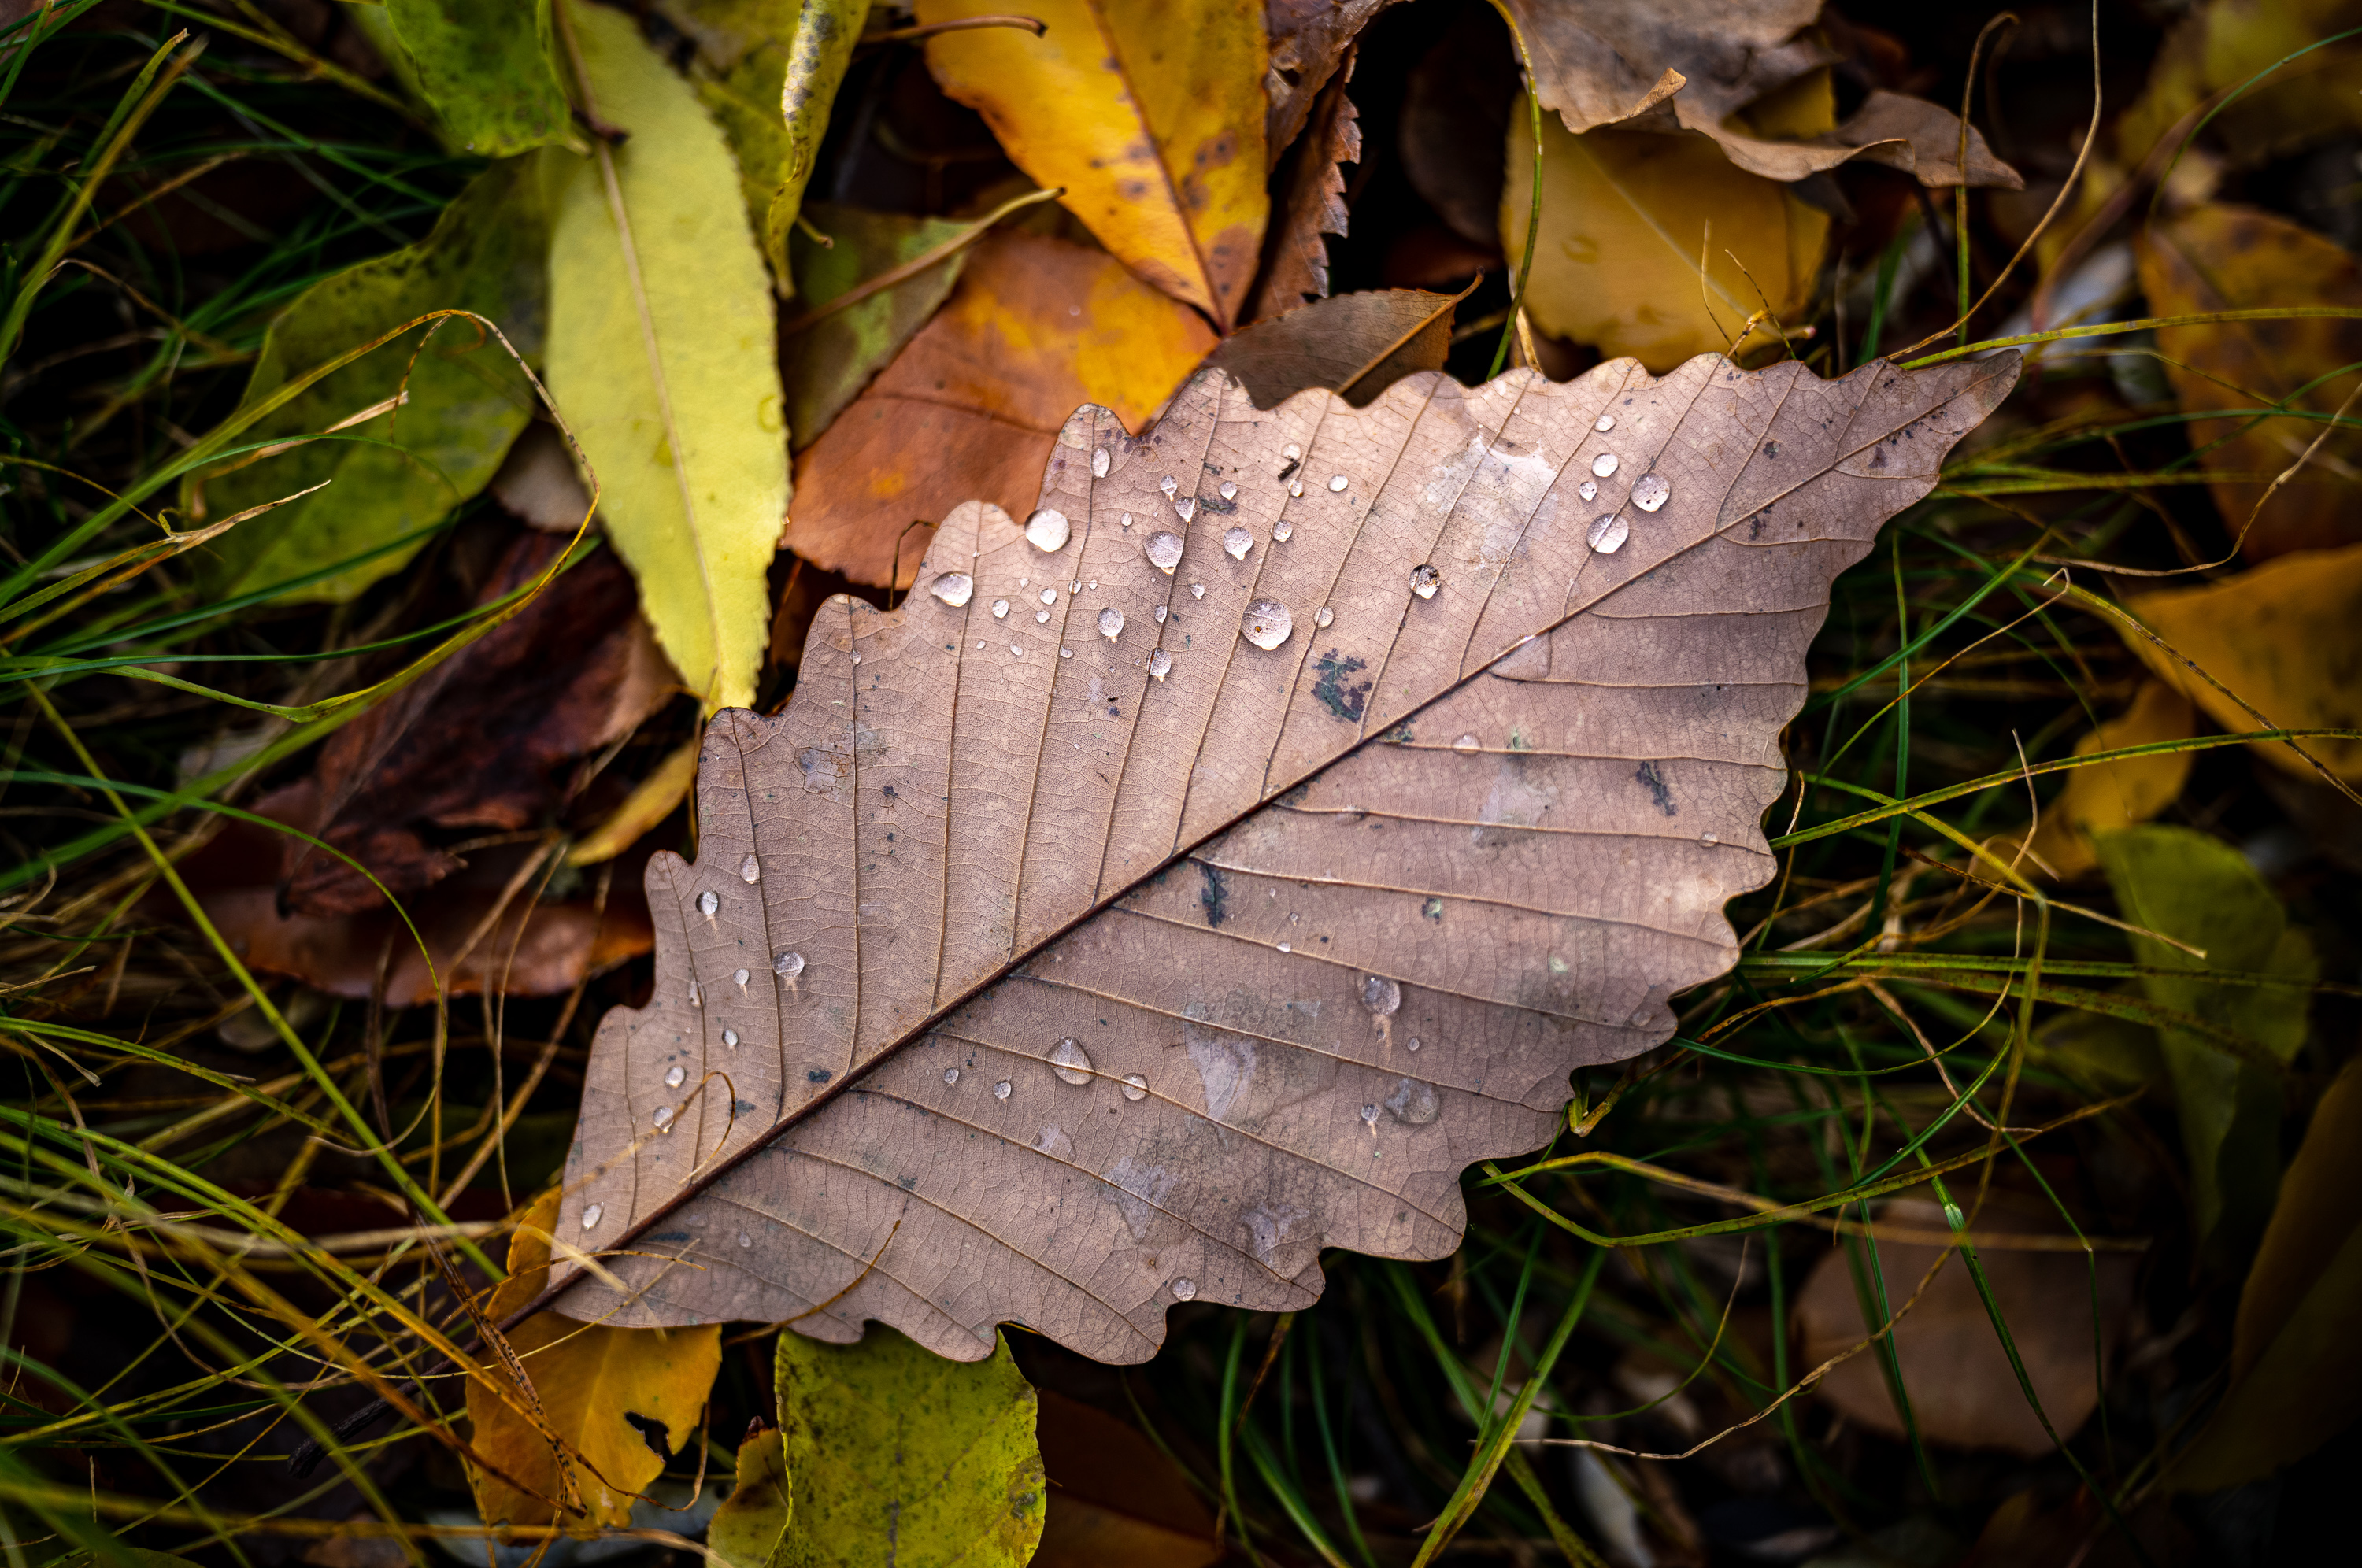
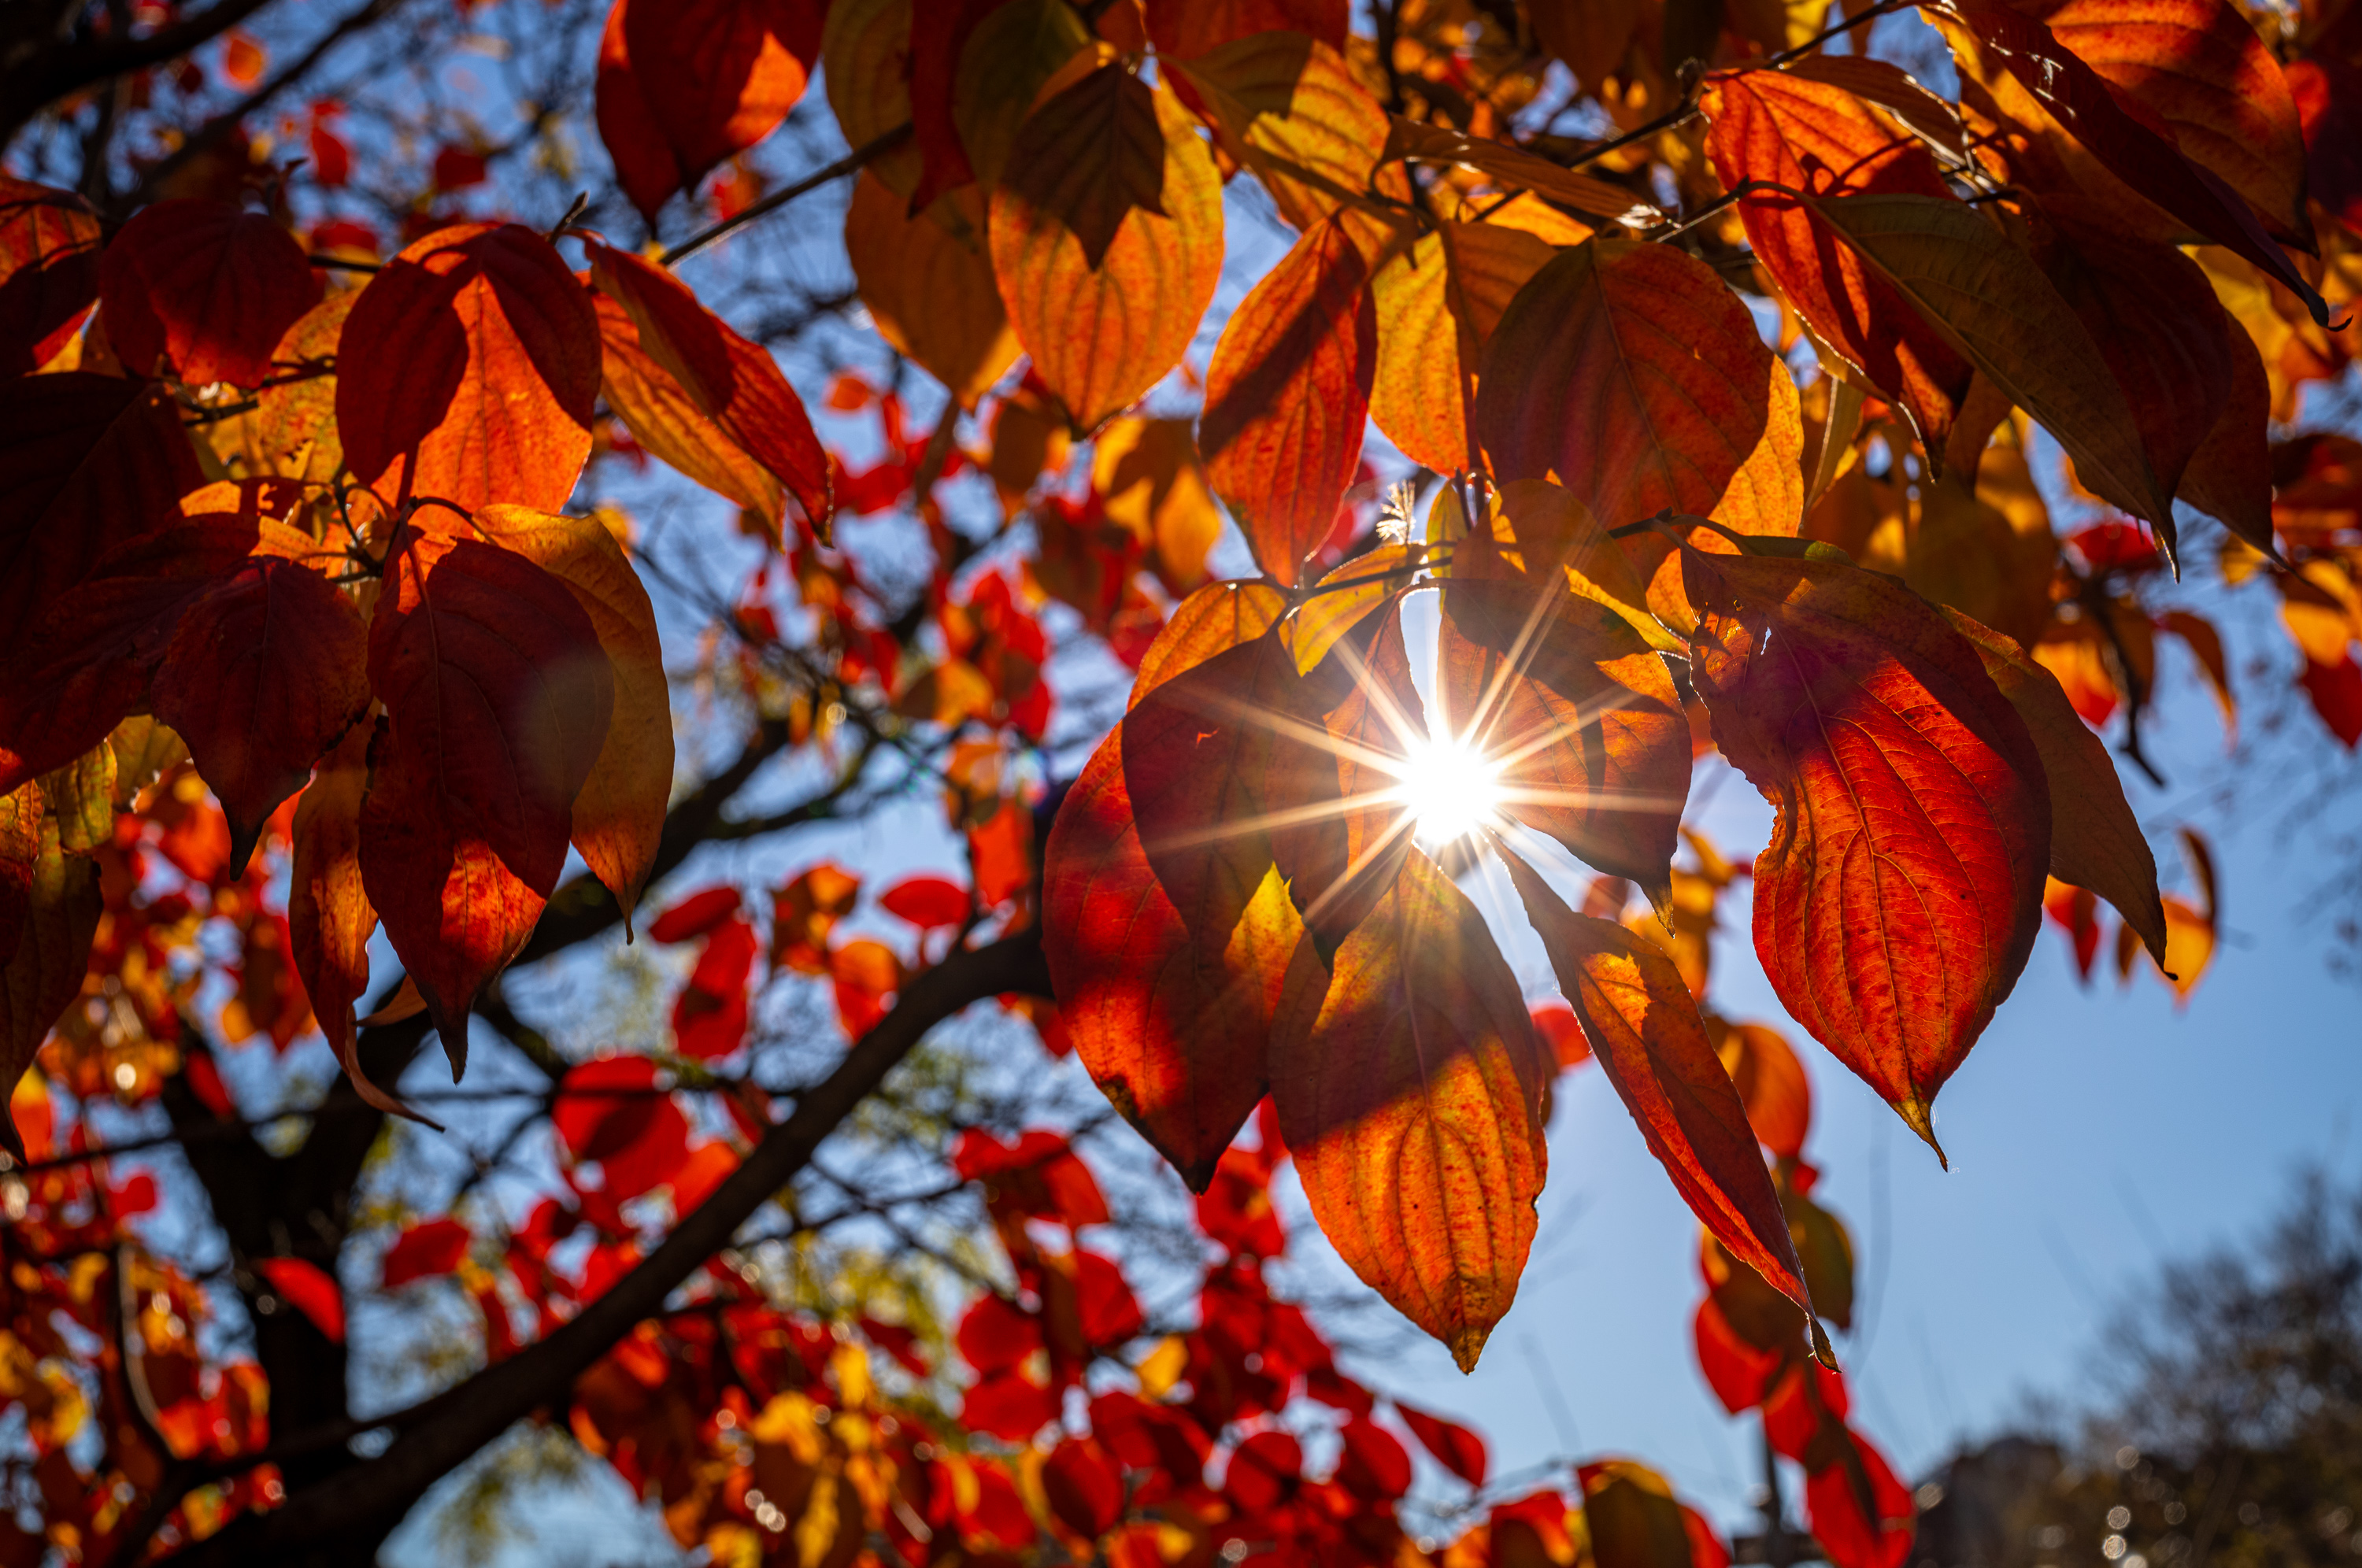
The next morning, I left my hotel and made my way through Columbus Circle then into Central Park. The goal of the day was simple – explore the Park and hope there was still some fall color hiding somewhere. This would be my nature and landscape day.
1/250th sec @ f/8, ISO 500
1/320th sec @ f/8, ISO 160
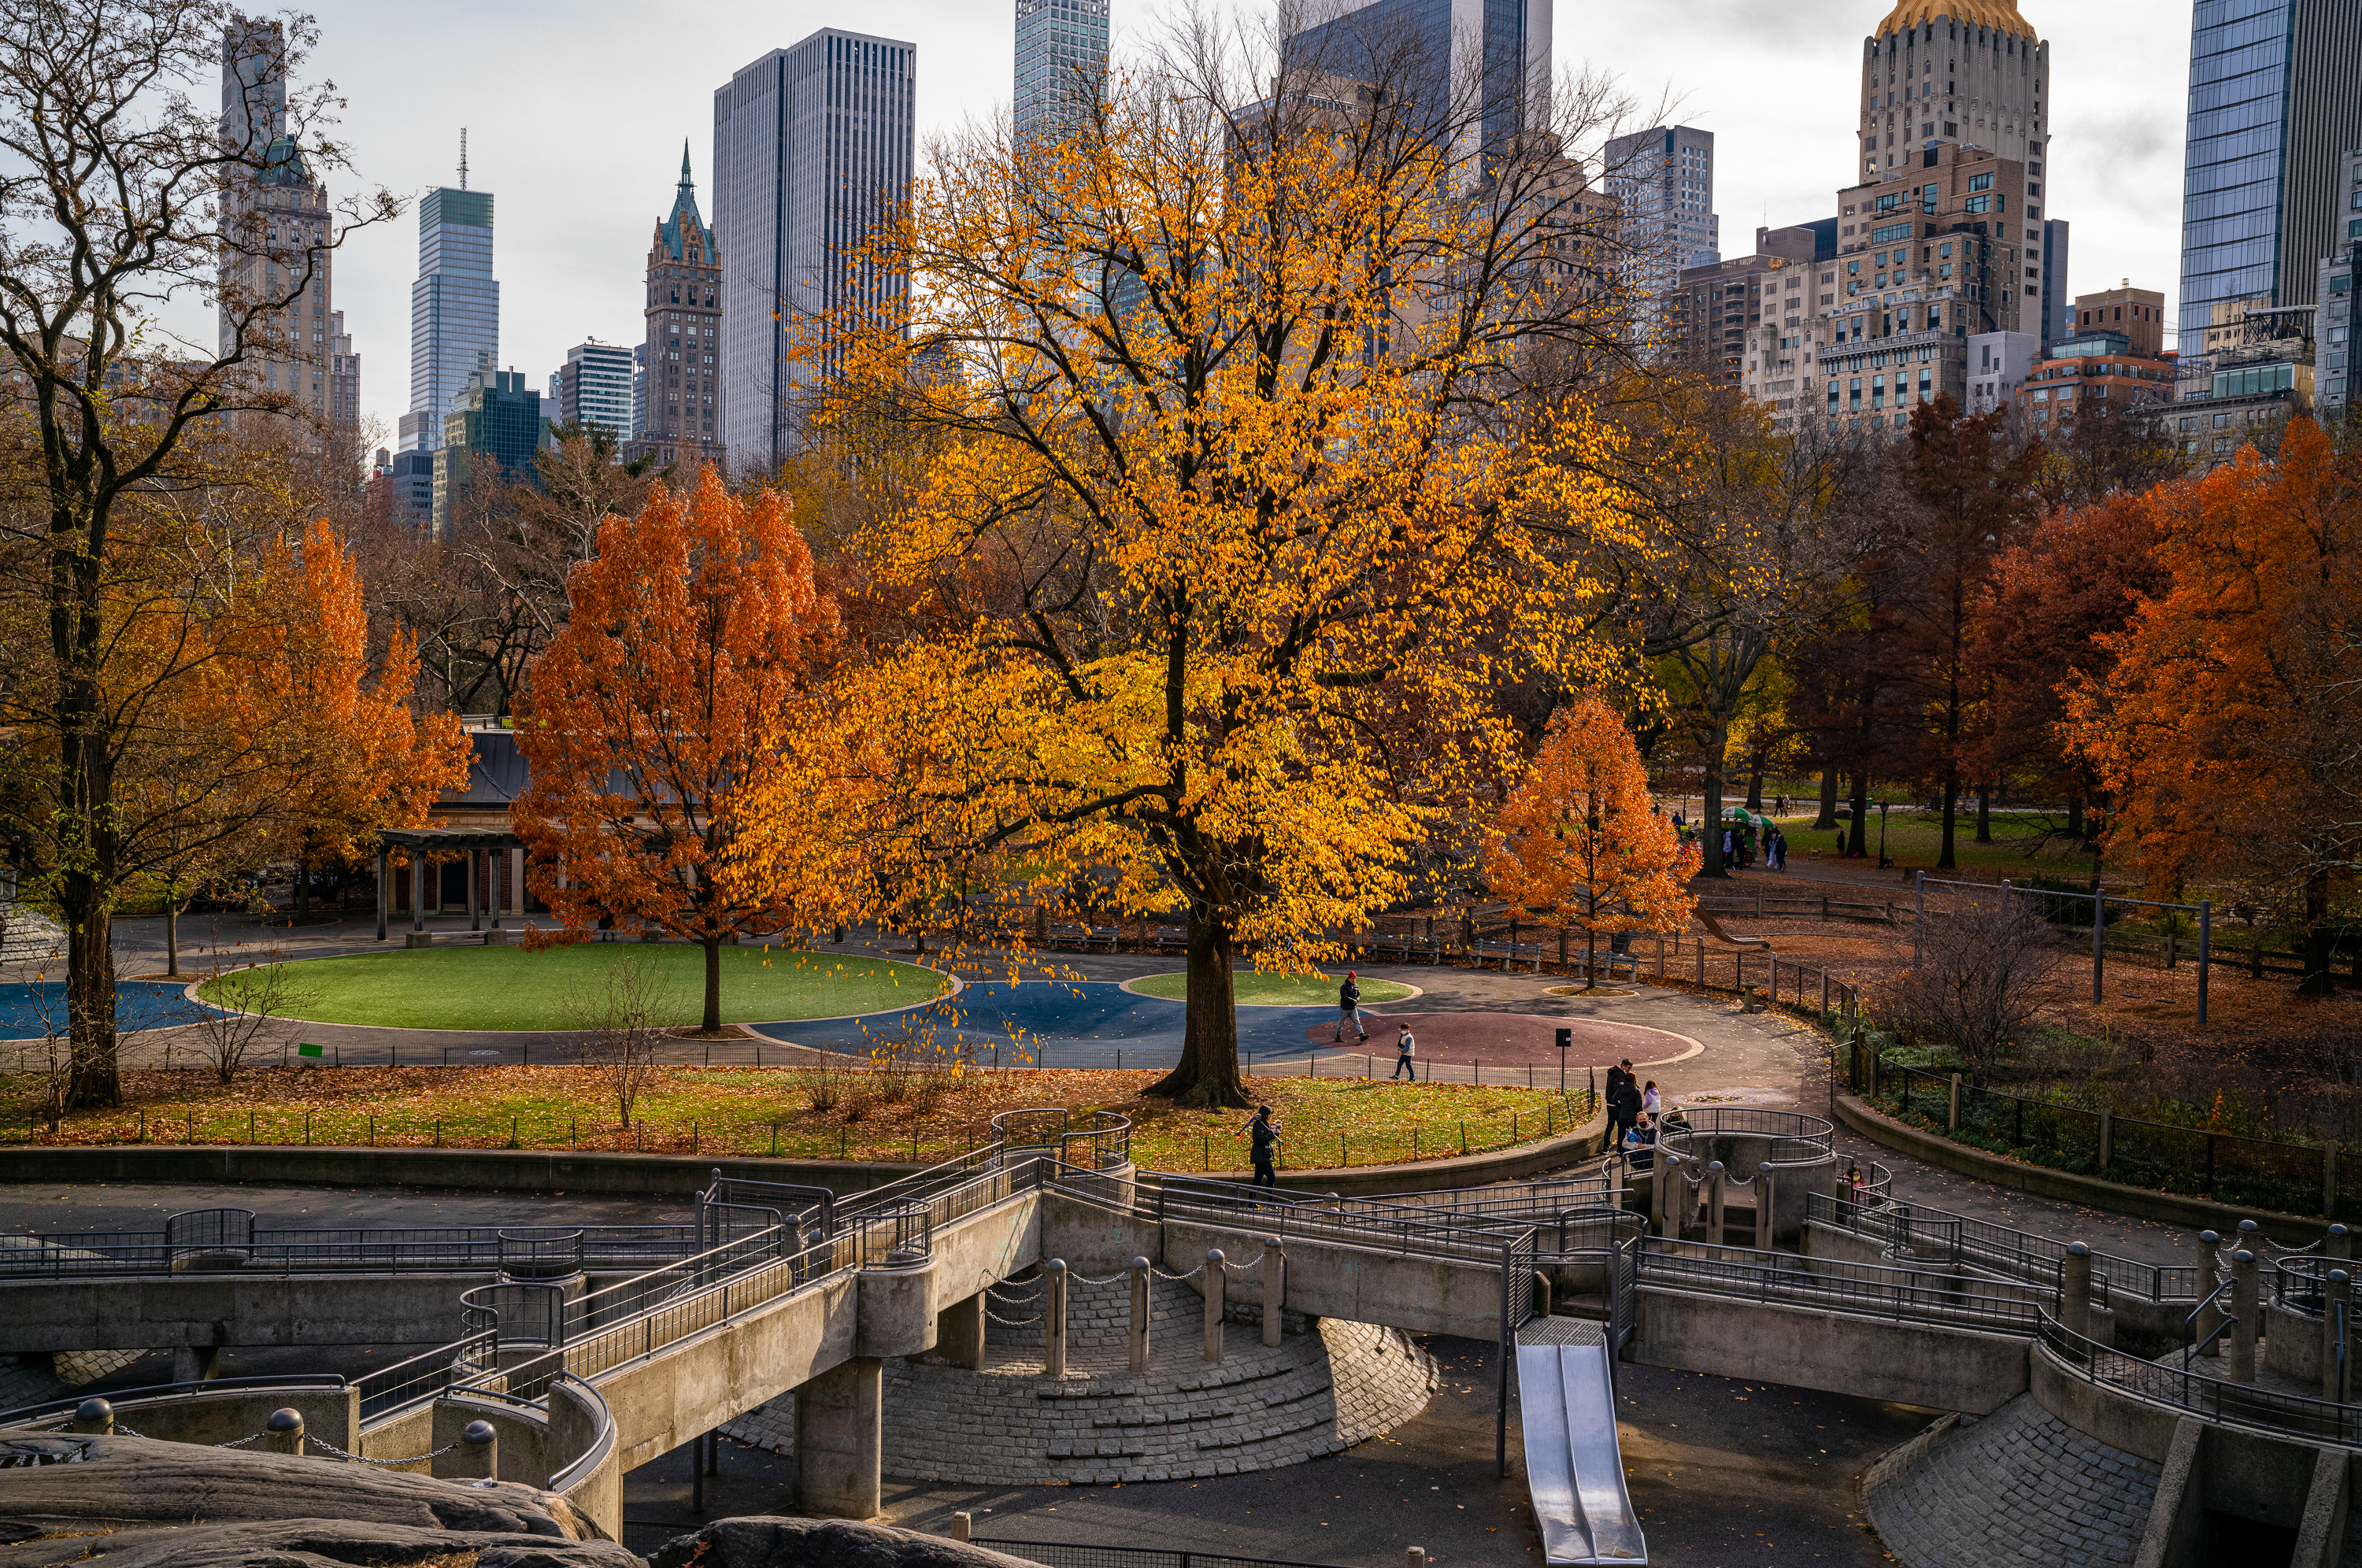
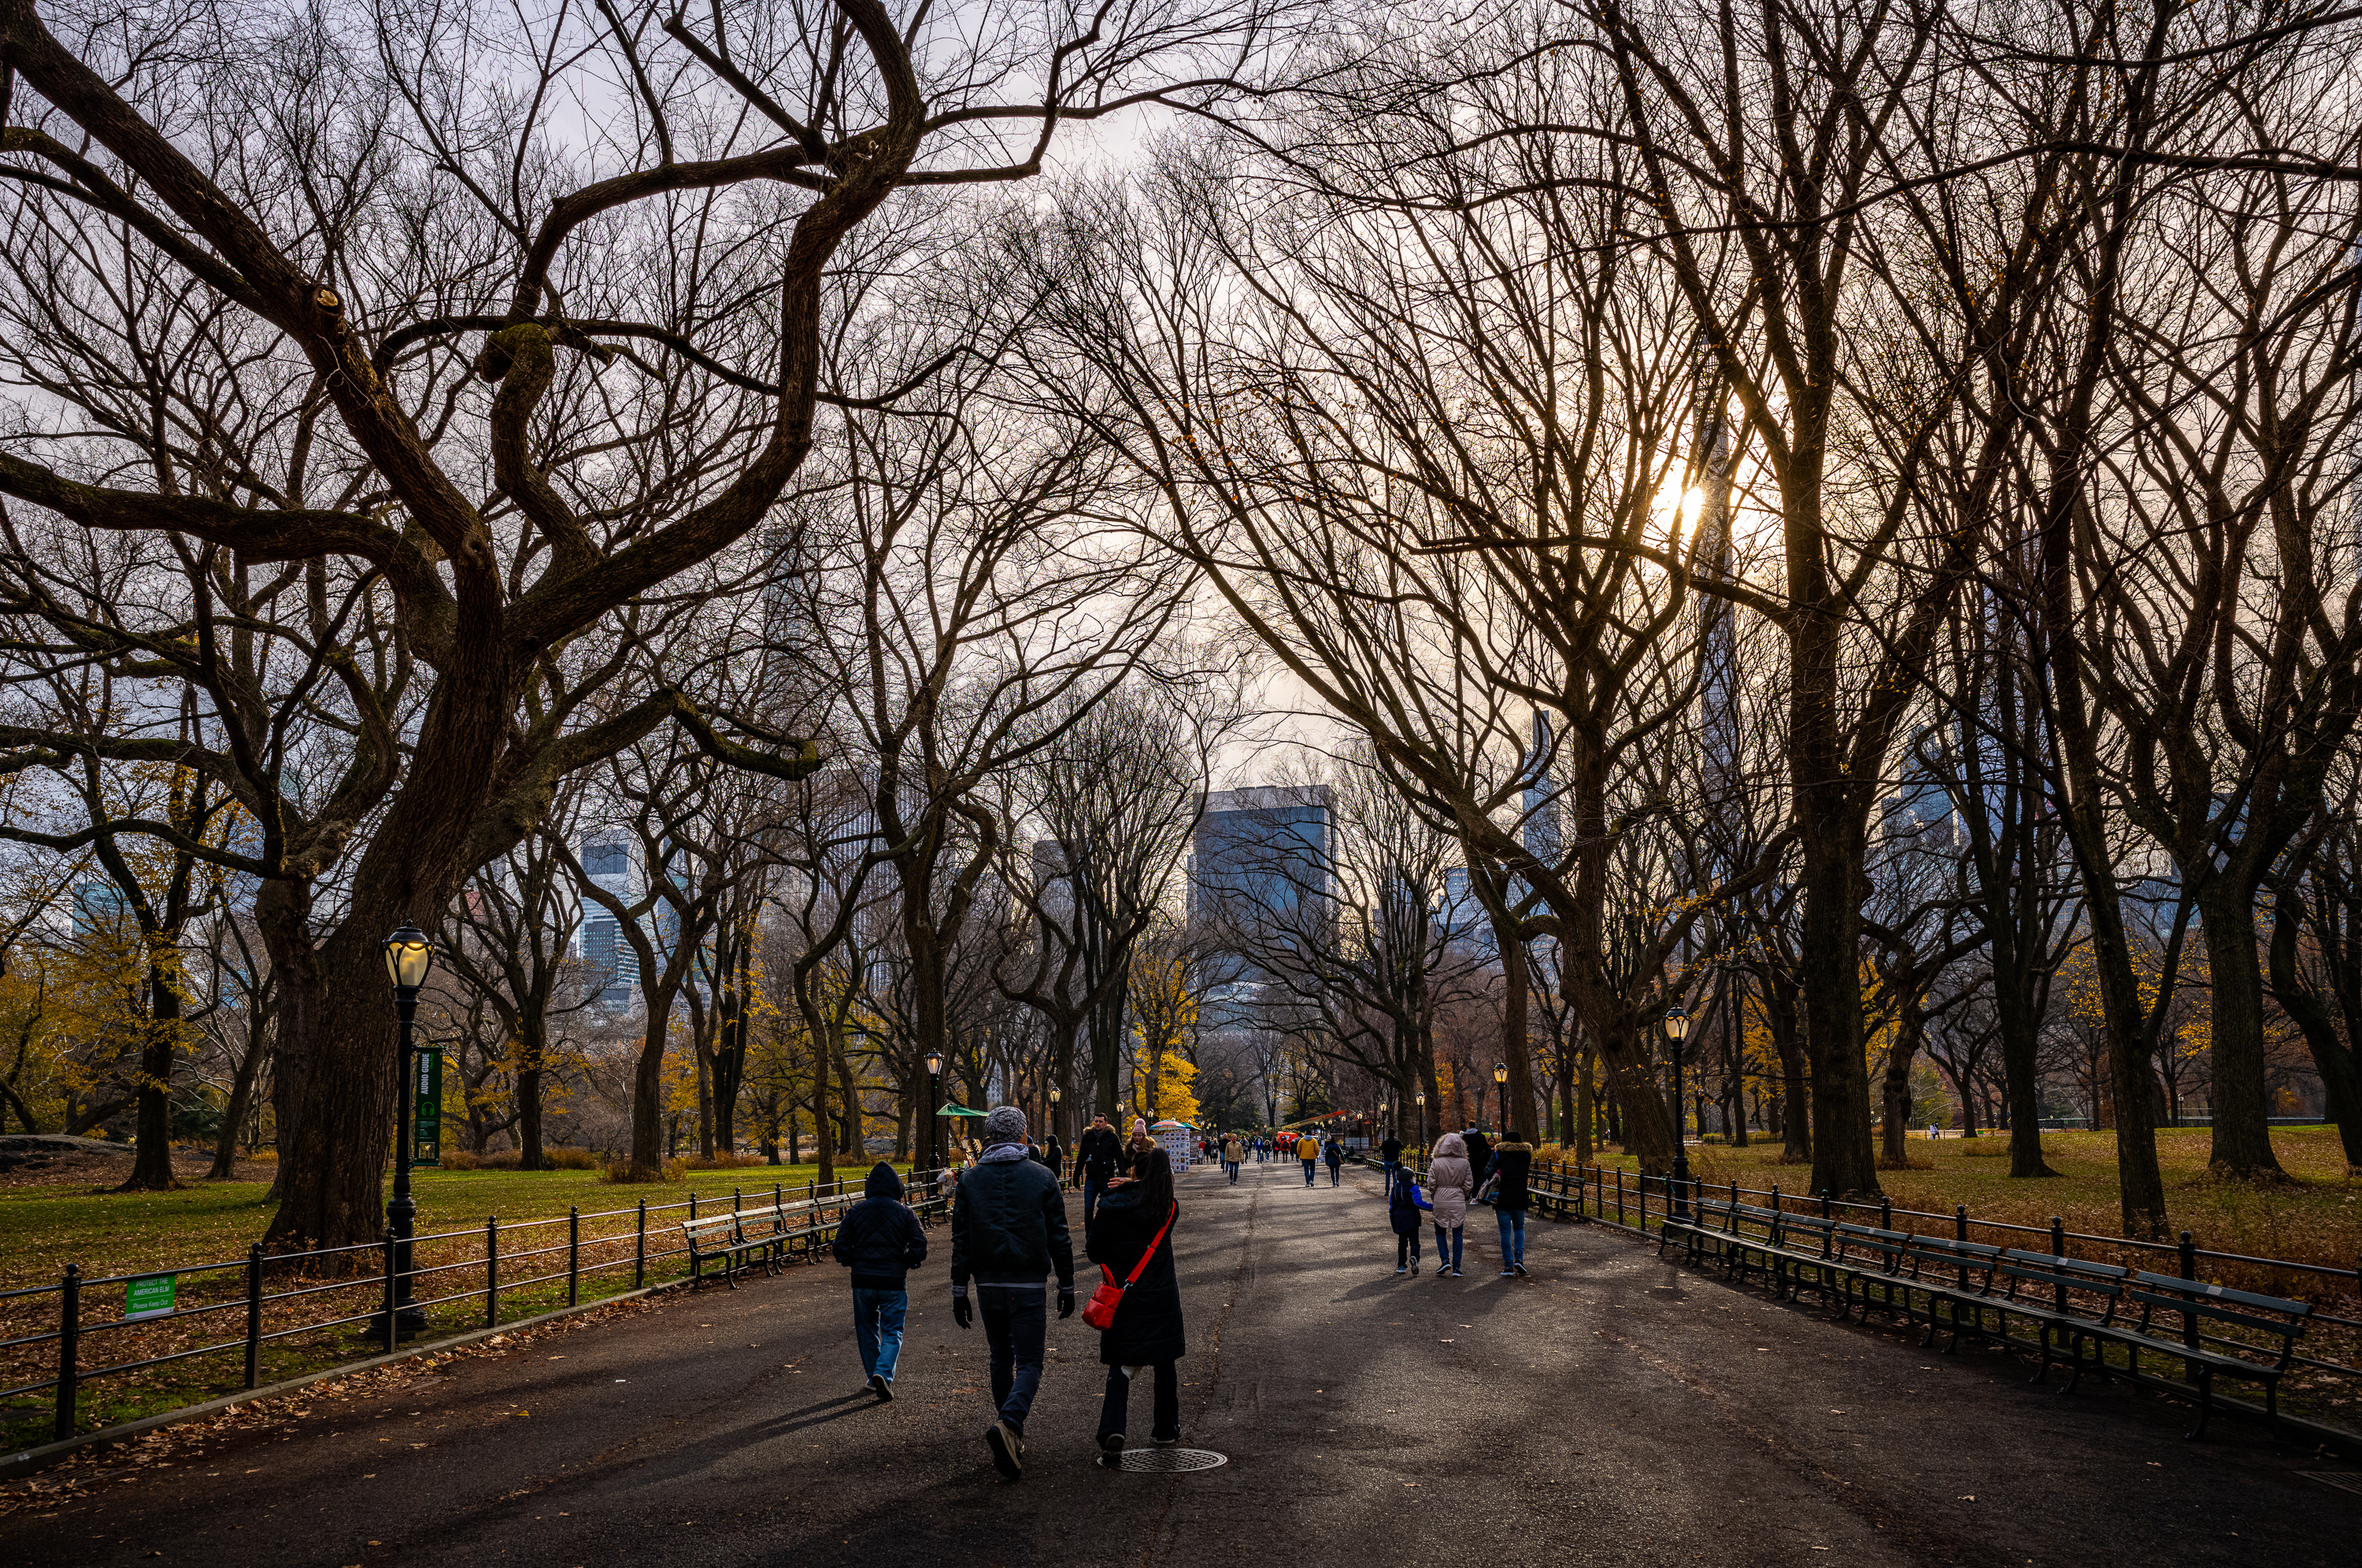
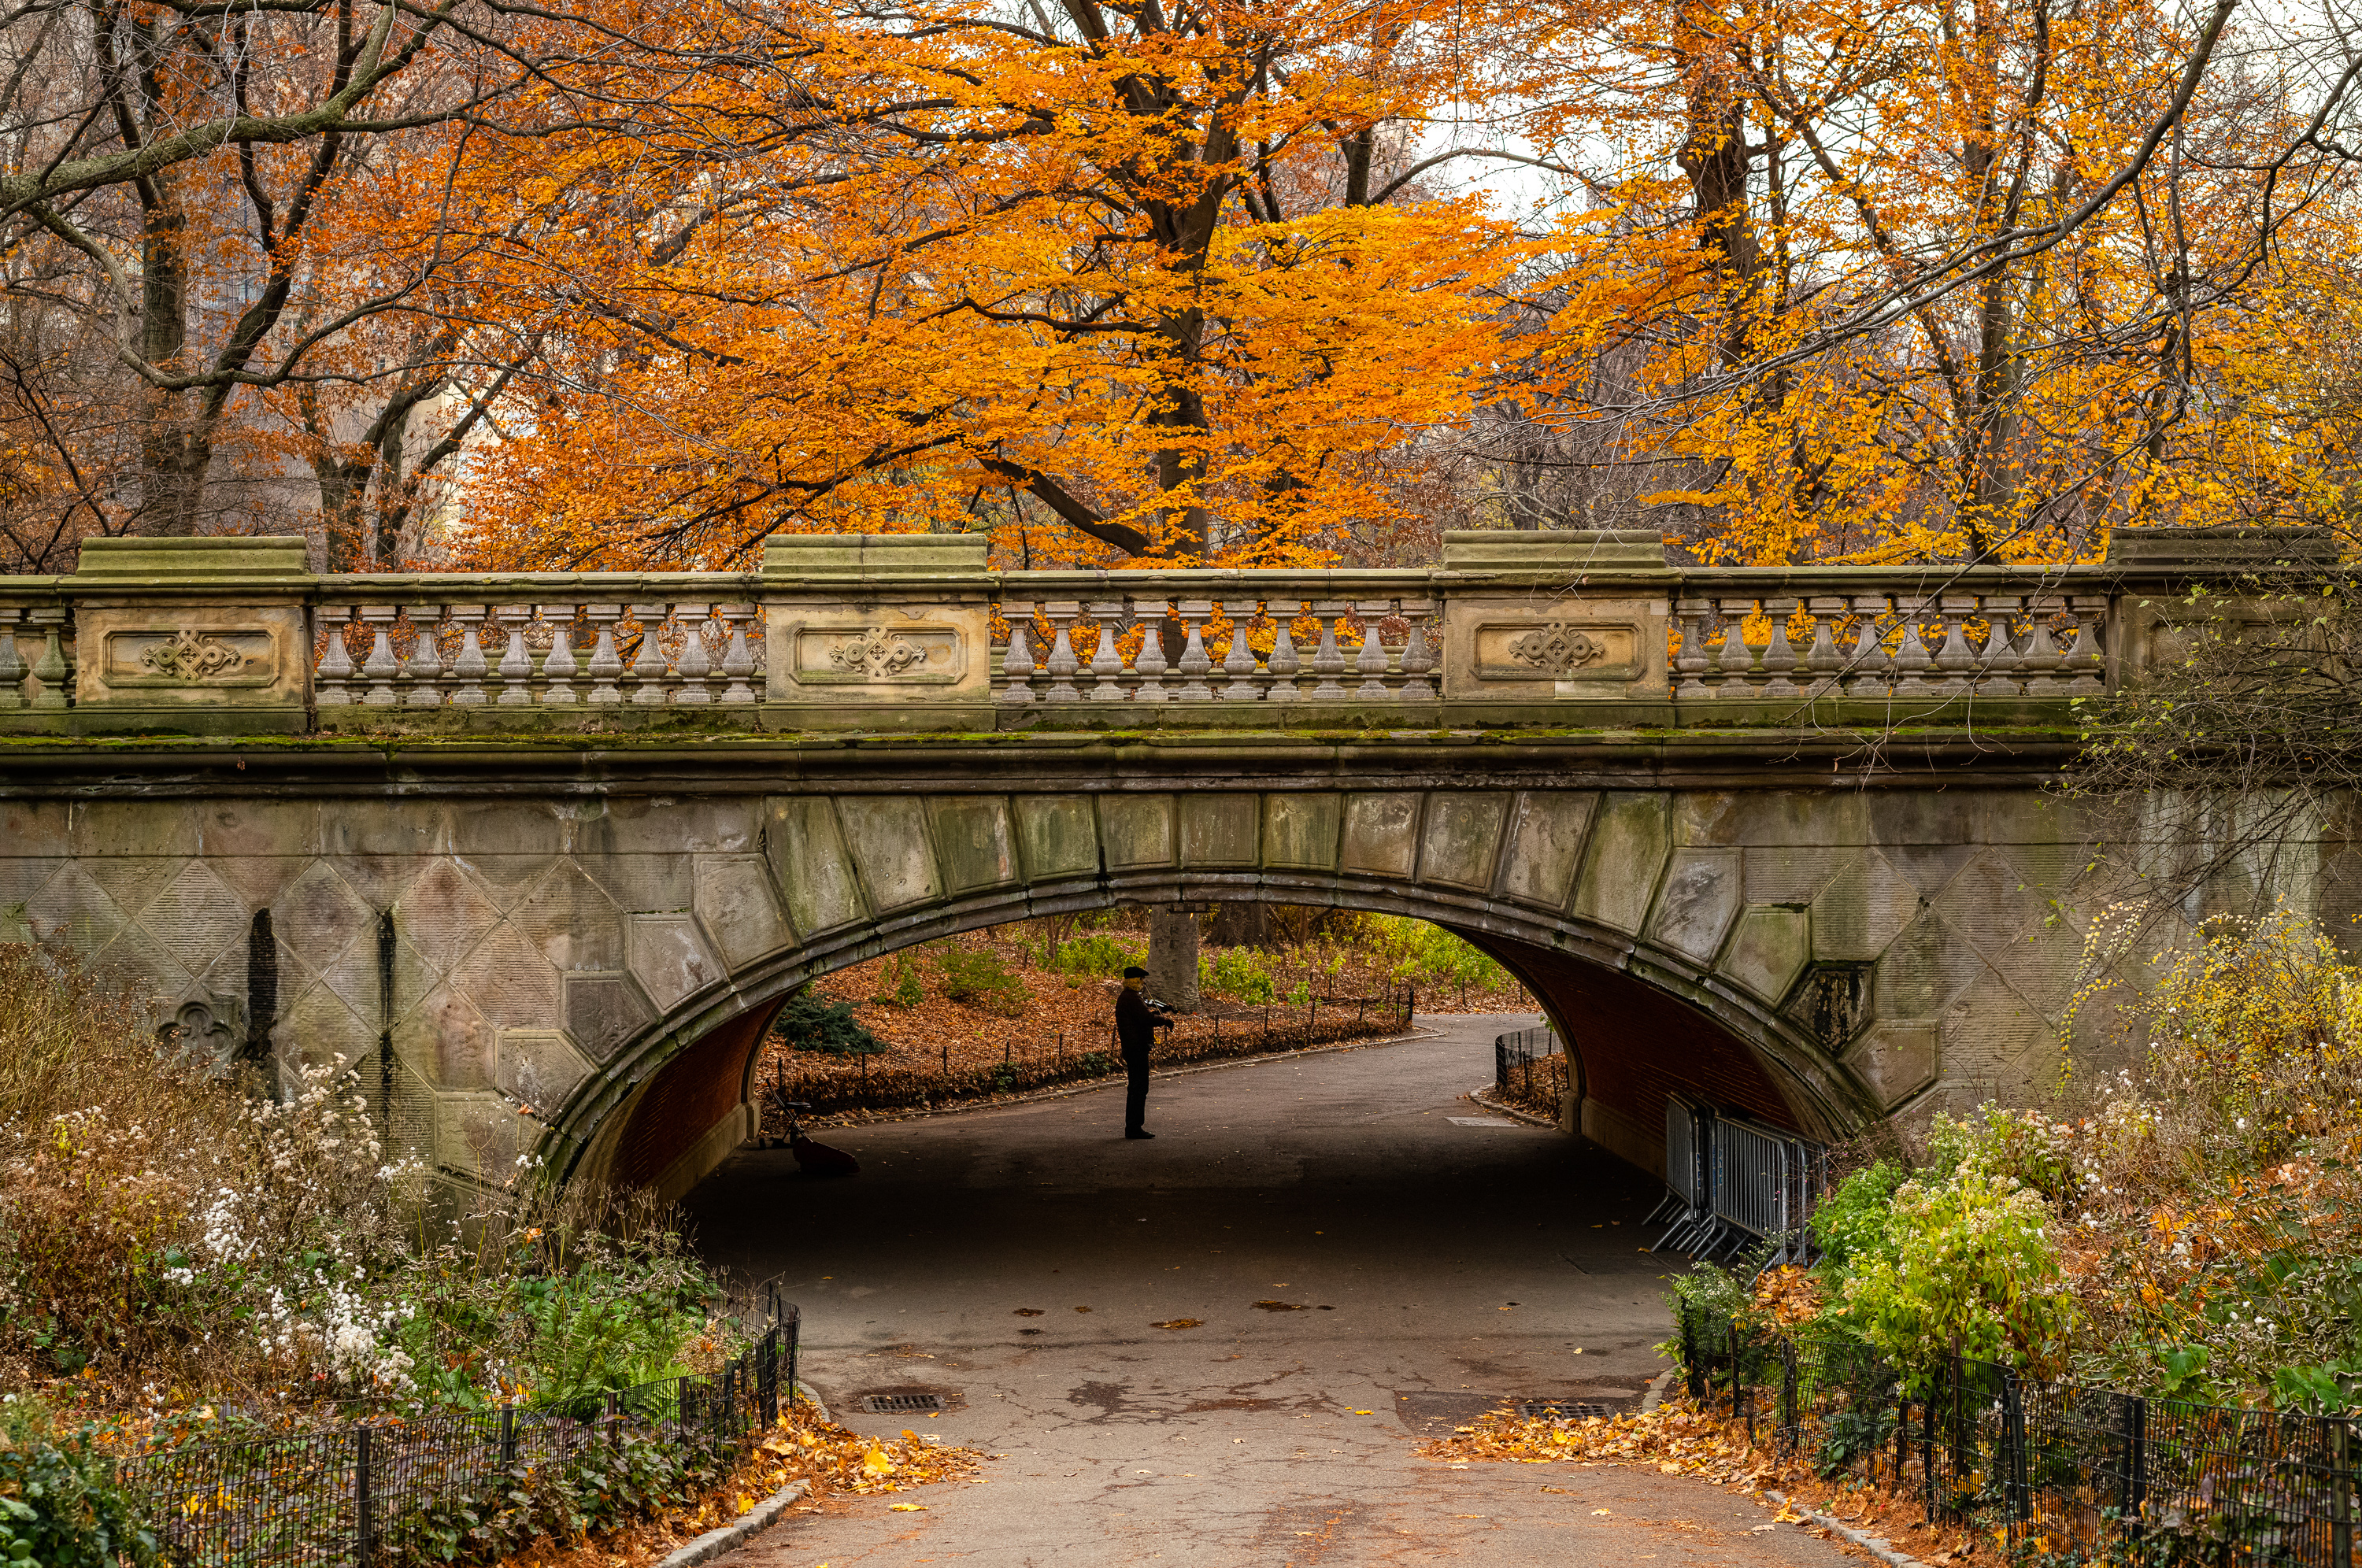
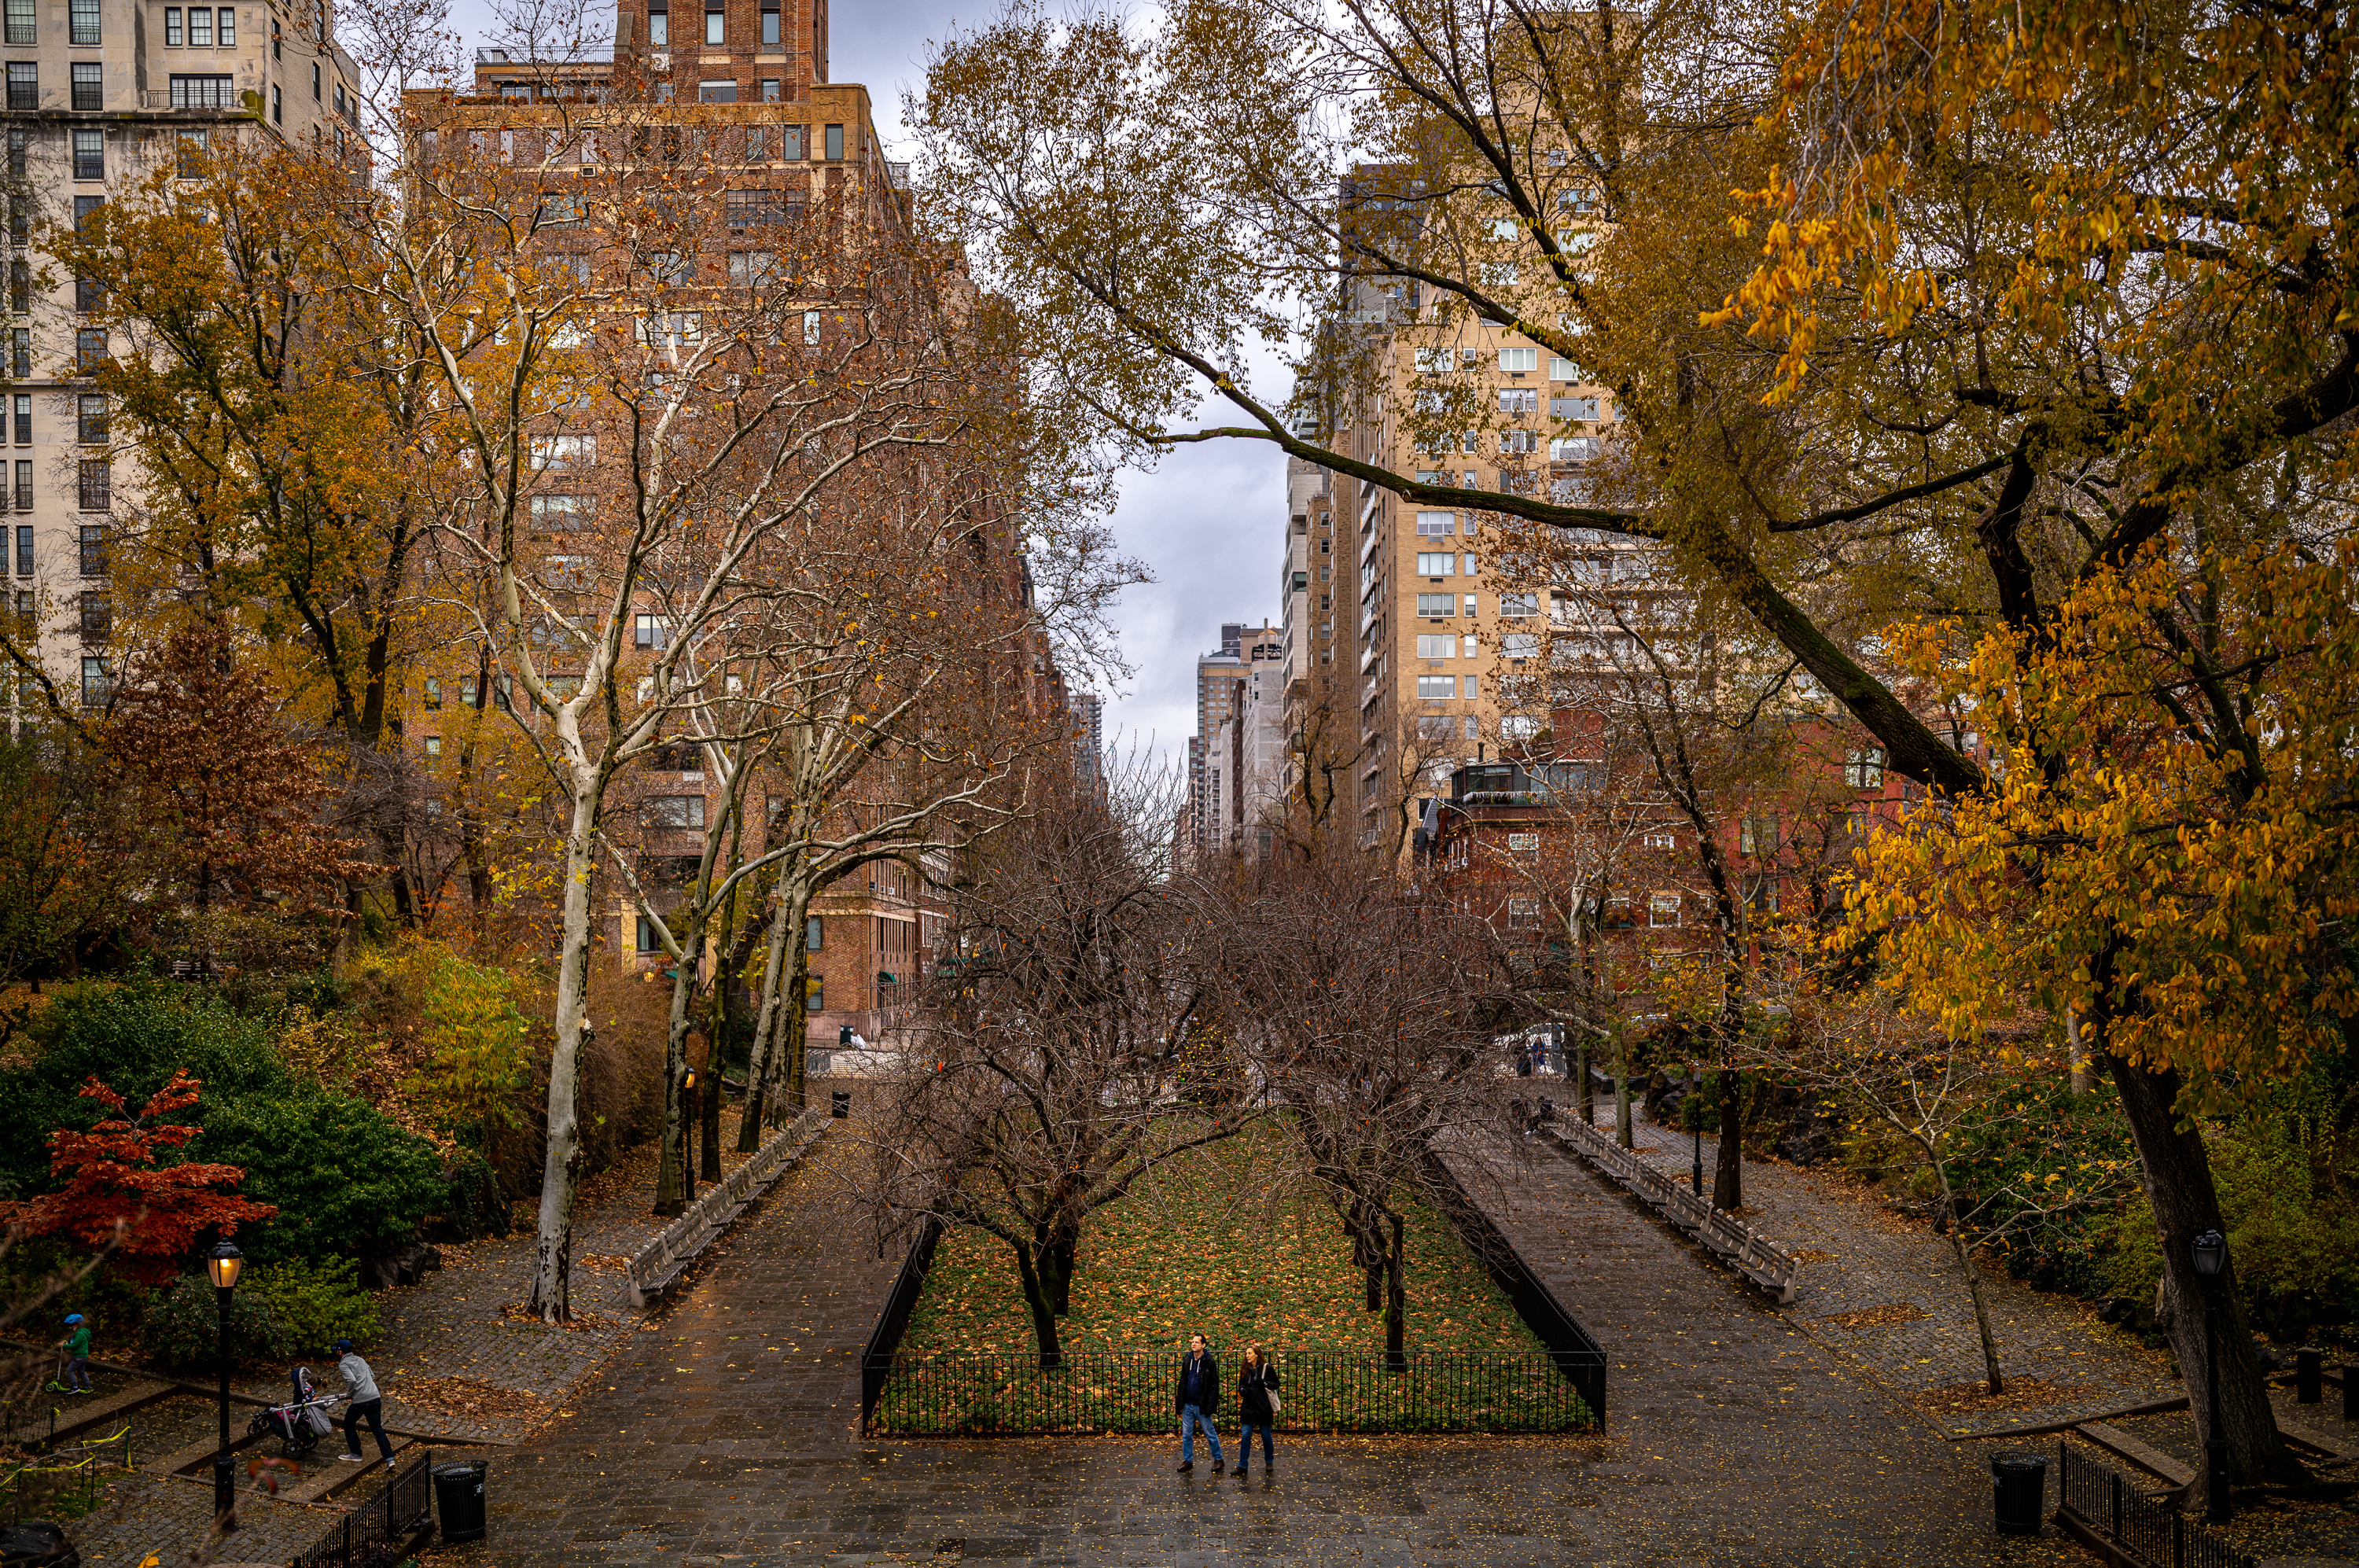
Mere steps from the hustle and bustle of Midtown Manhattan, Central Park is one of my favorite places in New York, a serene and expansive oasis in a fast-moving and congested urban jungle. Despite being early December, the Park still felt like a brisk Fall Day. Maybe it was the color still clinging to a few trees, fallen leaves fresh on ground, or perhaps the mild, mid-50’s temps.
1/320th sec @ f/5.6, ISO 400
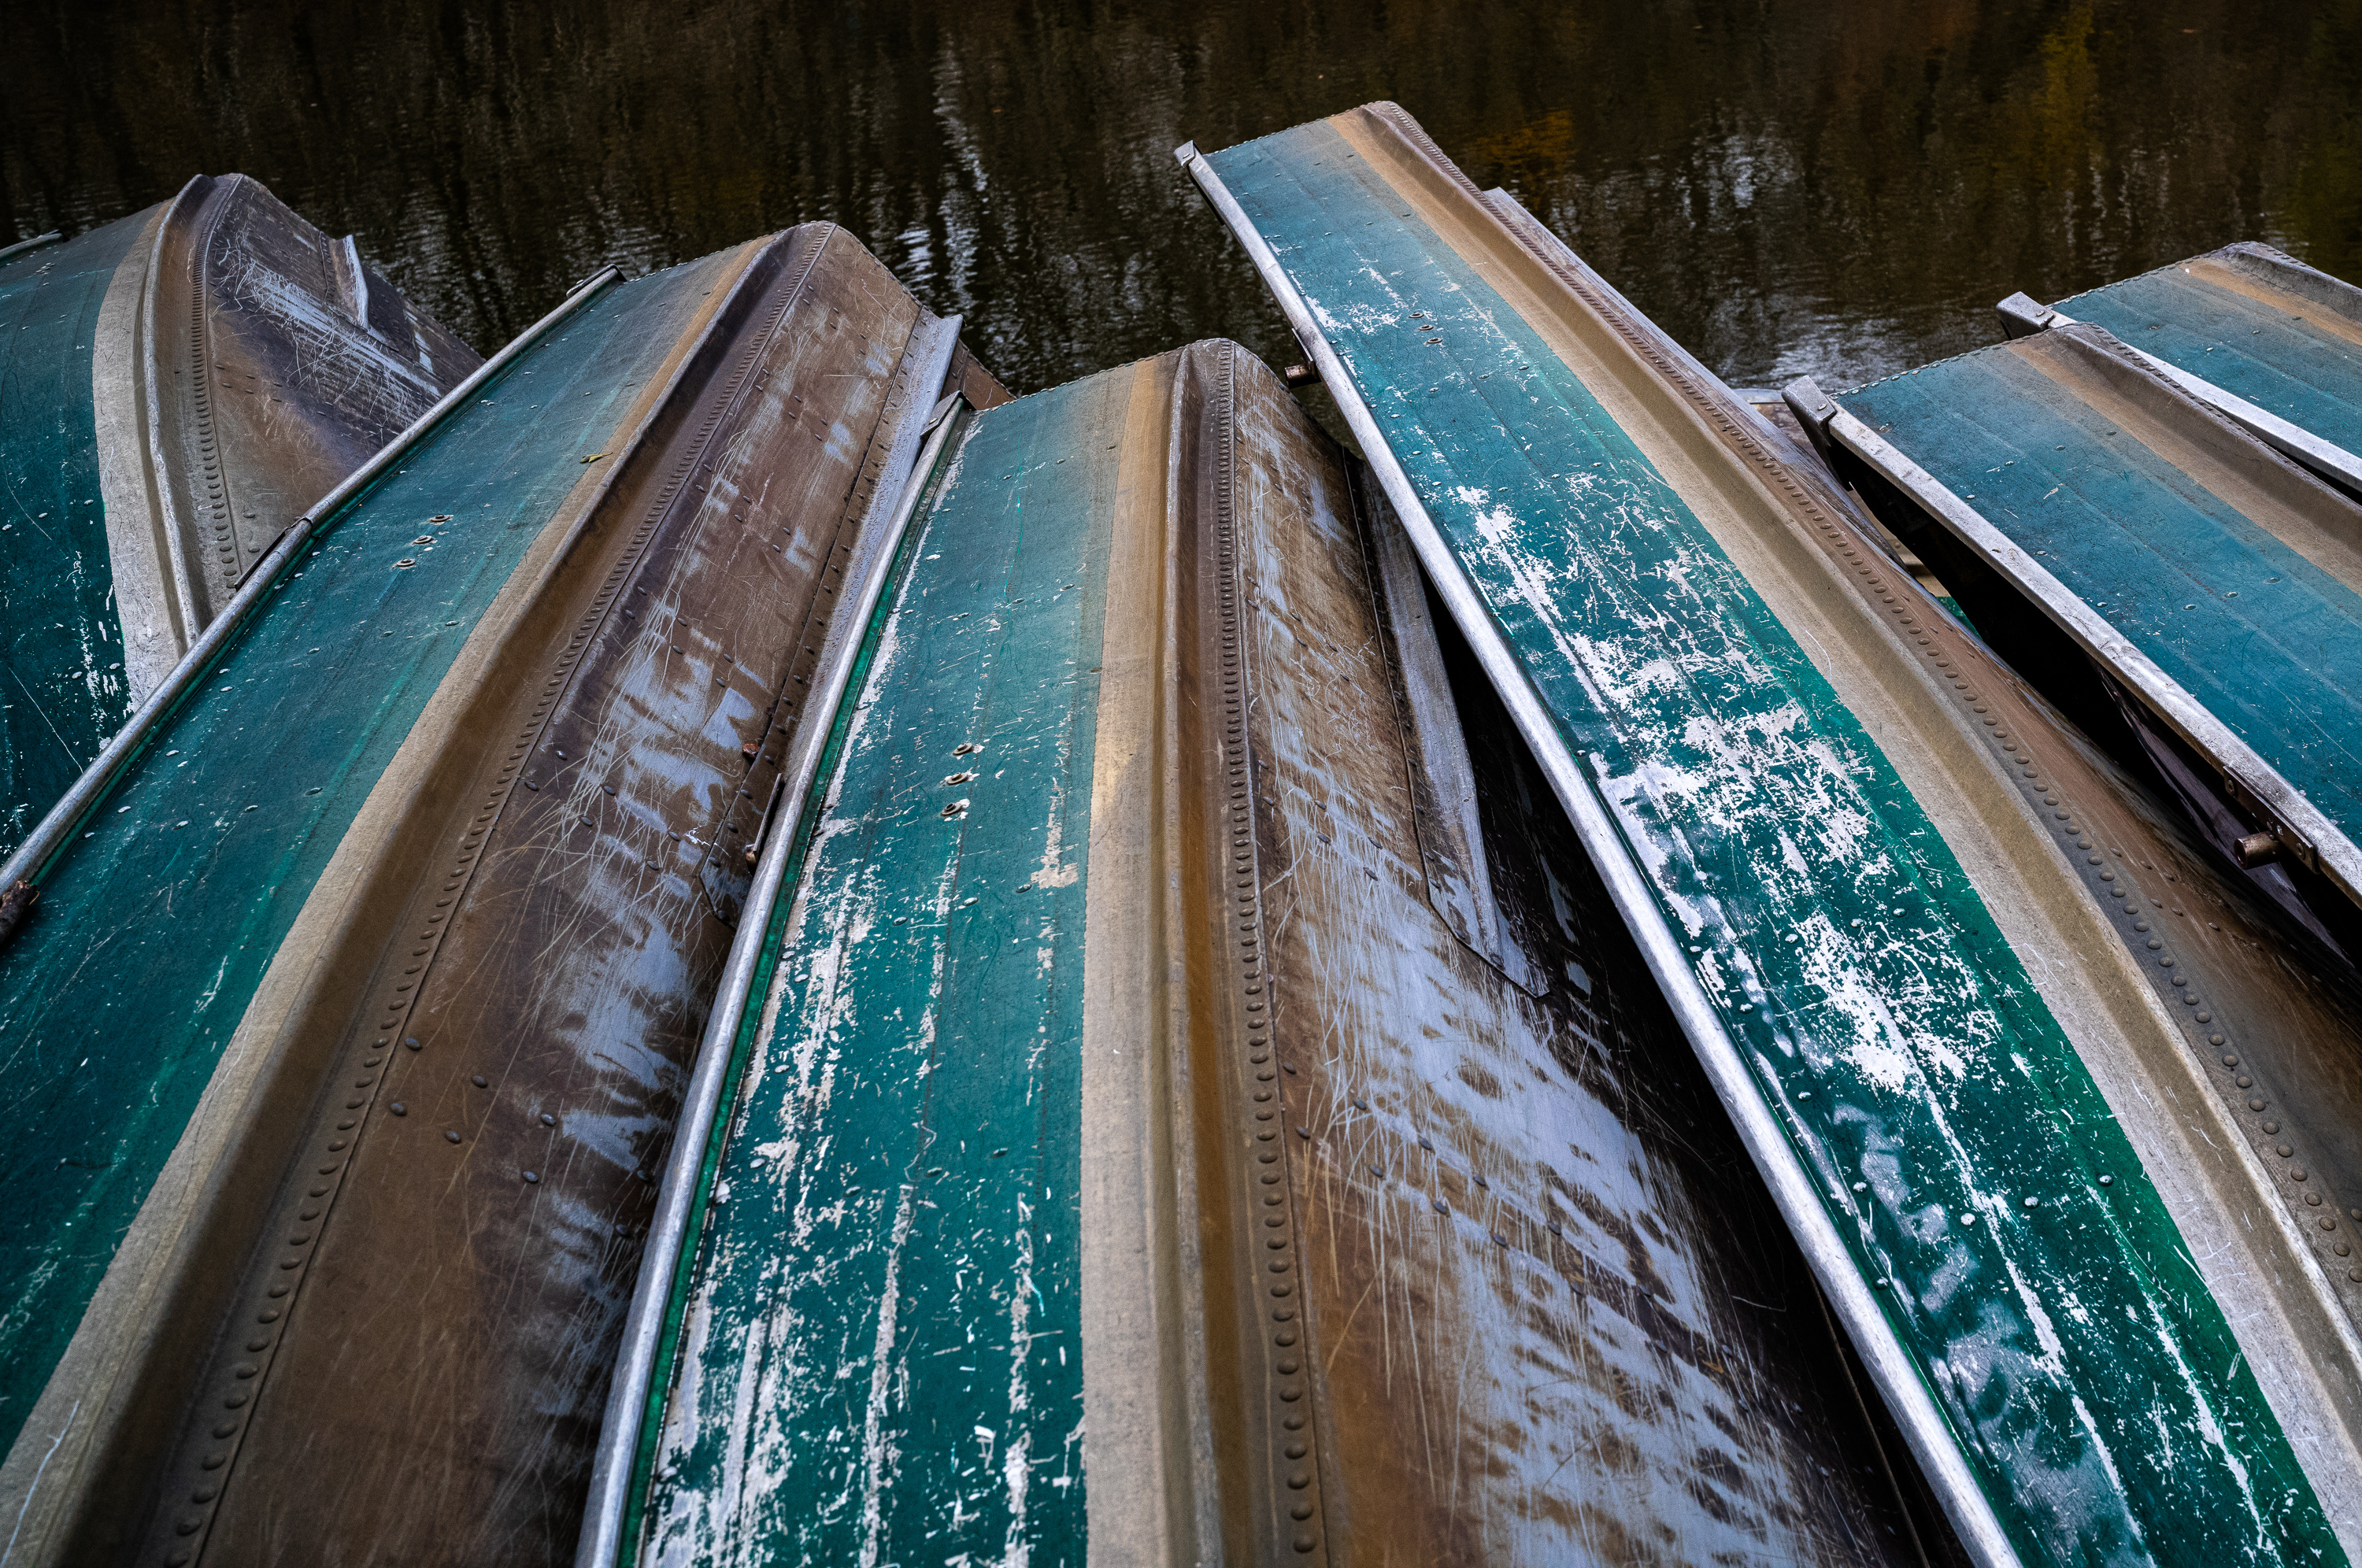
But an almost ghost-town emptiness and stillness hung over the park. No picnickers splayed out on the various lawns basking in the sun, no kids clamoring on the playgrounds, not a single boat in the pond. I had hoped for a fresh snowfall blanketing the park in white peacefulness, but ultimately, I quite liked being witness to the quiet transition between the seasons.
1/320th sec @ f/8, ISO 320
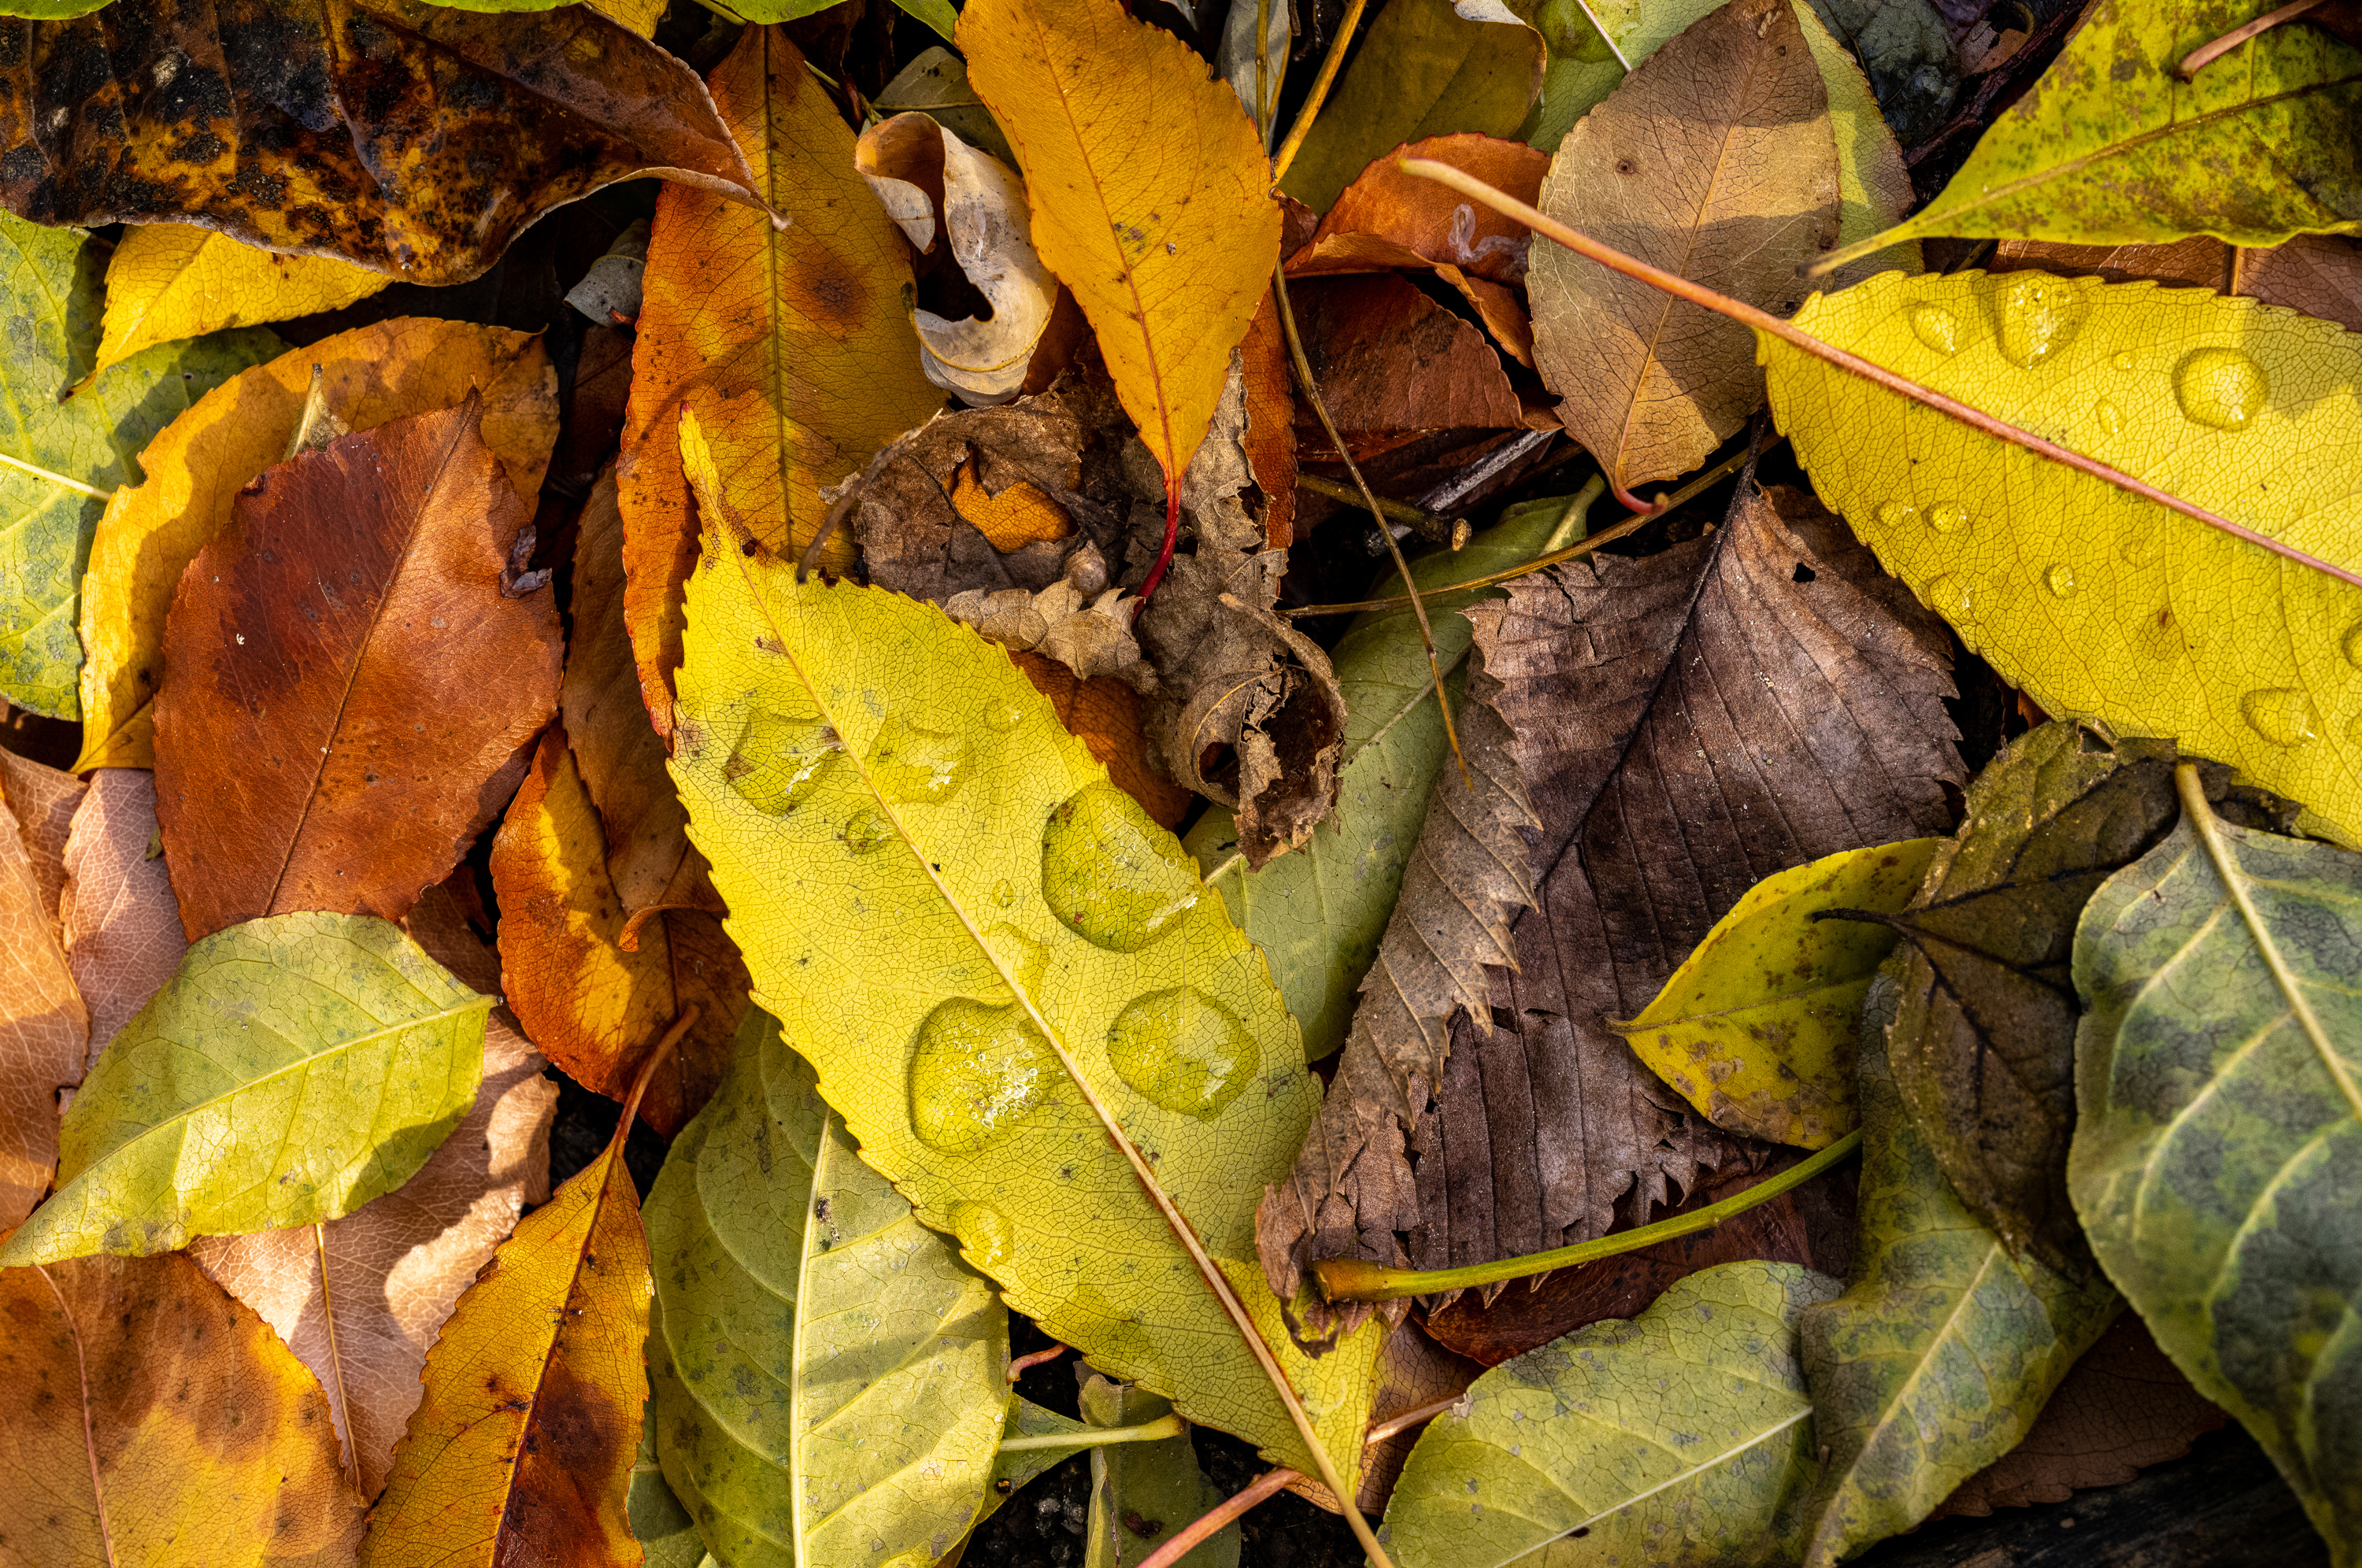
Photographically, I was drawn to the details as well as the grander vistas. Most of my lenses got a good workout as I played around with different focal lengths and subject matter. The 24 Elmar worked as wonderfully for capturing the city skyline rising out of the trees as it did for bare branches arching over a wide walkway usually shady and lush in the warmer months.
1/3000th sec @ f/8, ISO 64
1/320th sec @ f/8, ISO 64
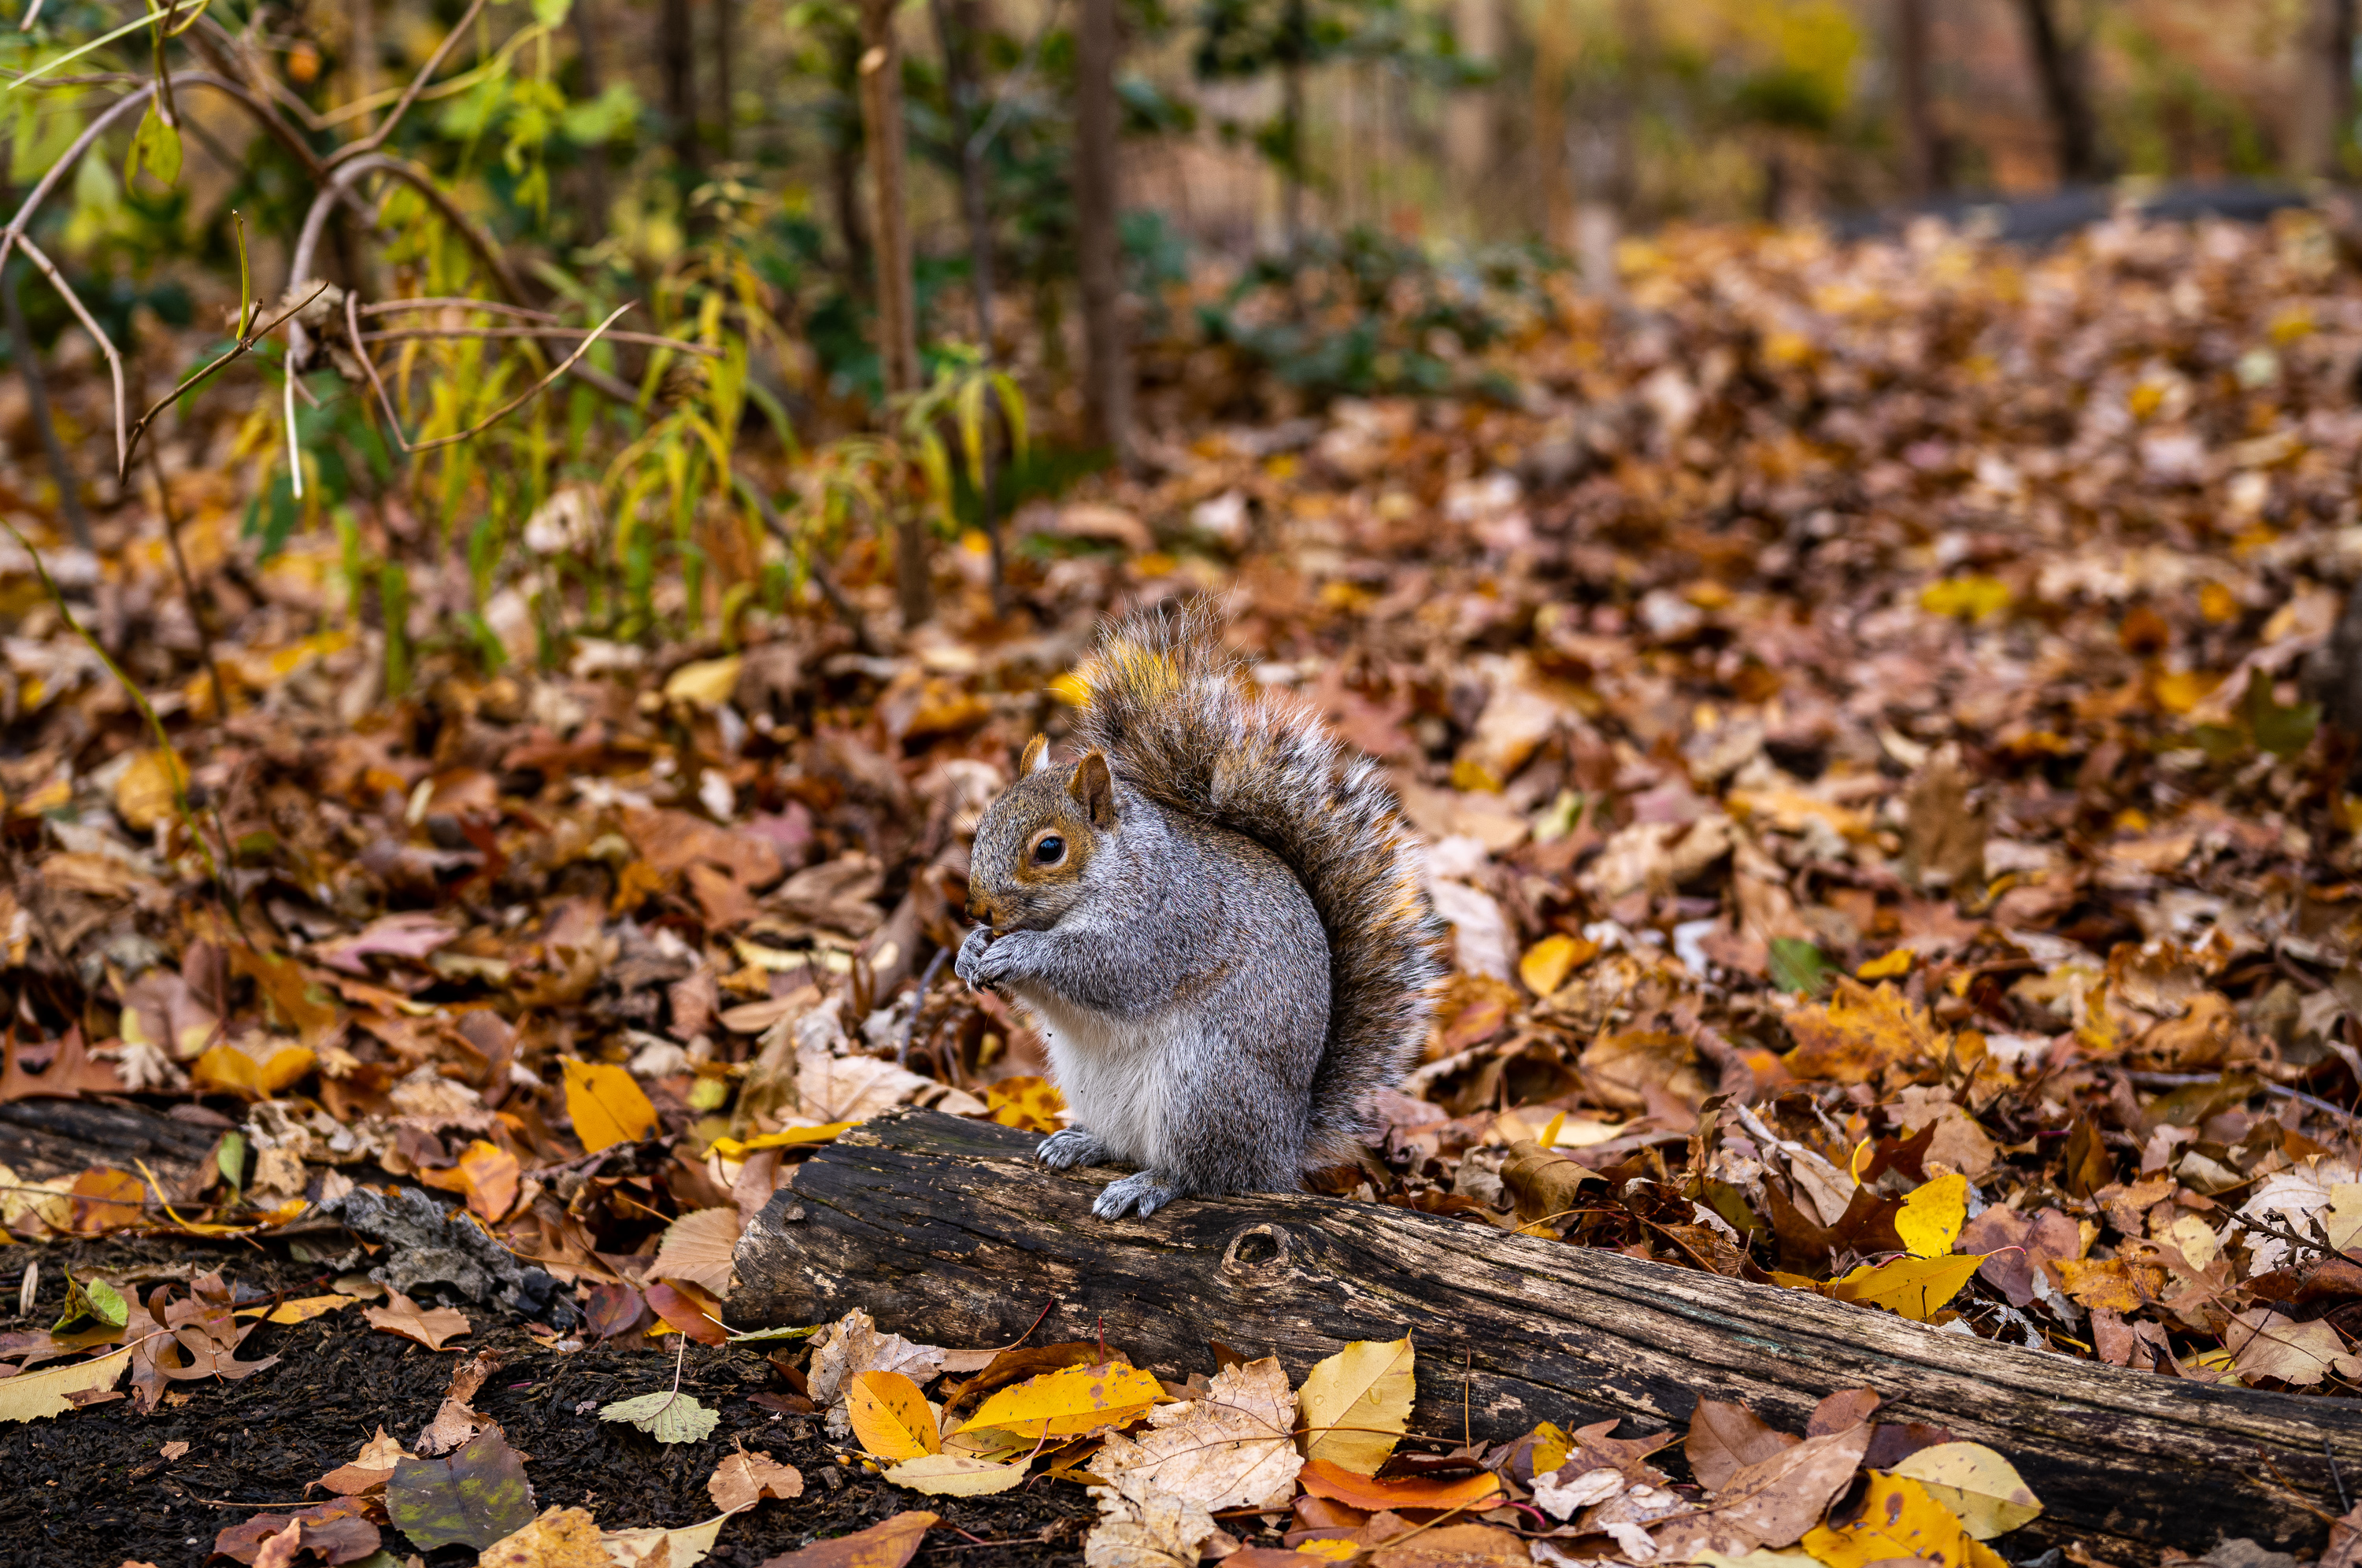
My 90 Elmarit was on squirrel duty, and when combined with the 1.3x digital crop mode, made for some very engaging portraits of the local wildlife.

1/320th sec @ f/4, ISO 100, 1.3x Crop Mode
The 50 APO and 35 APO handled the primary walk-around shooting with their always exceptional rendering and nuance. The 35 APO also pulled double duty with its close-focus range. Combined with the stabilized live view and responsive 100% focus assist, I was able to home in on the most subtle details.
1/320th sec @ f/5.6, ISO 160
1/640th sec @ f/2, ISO 64
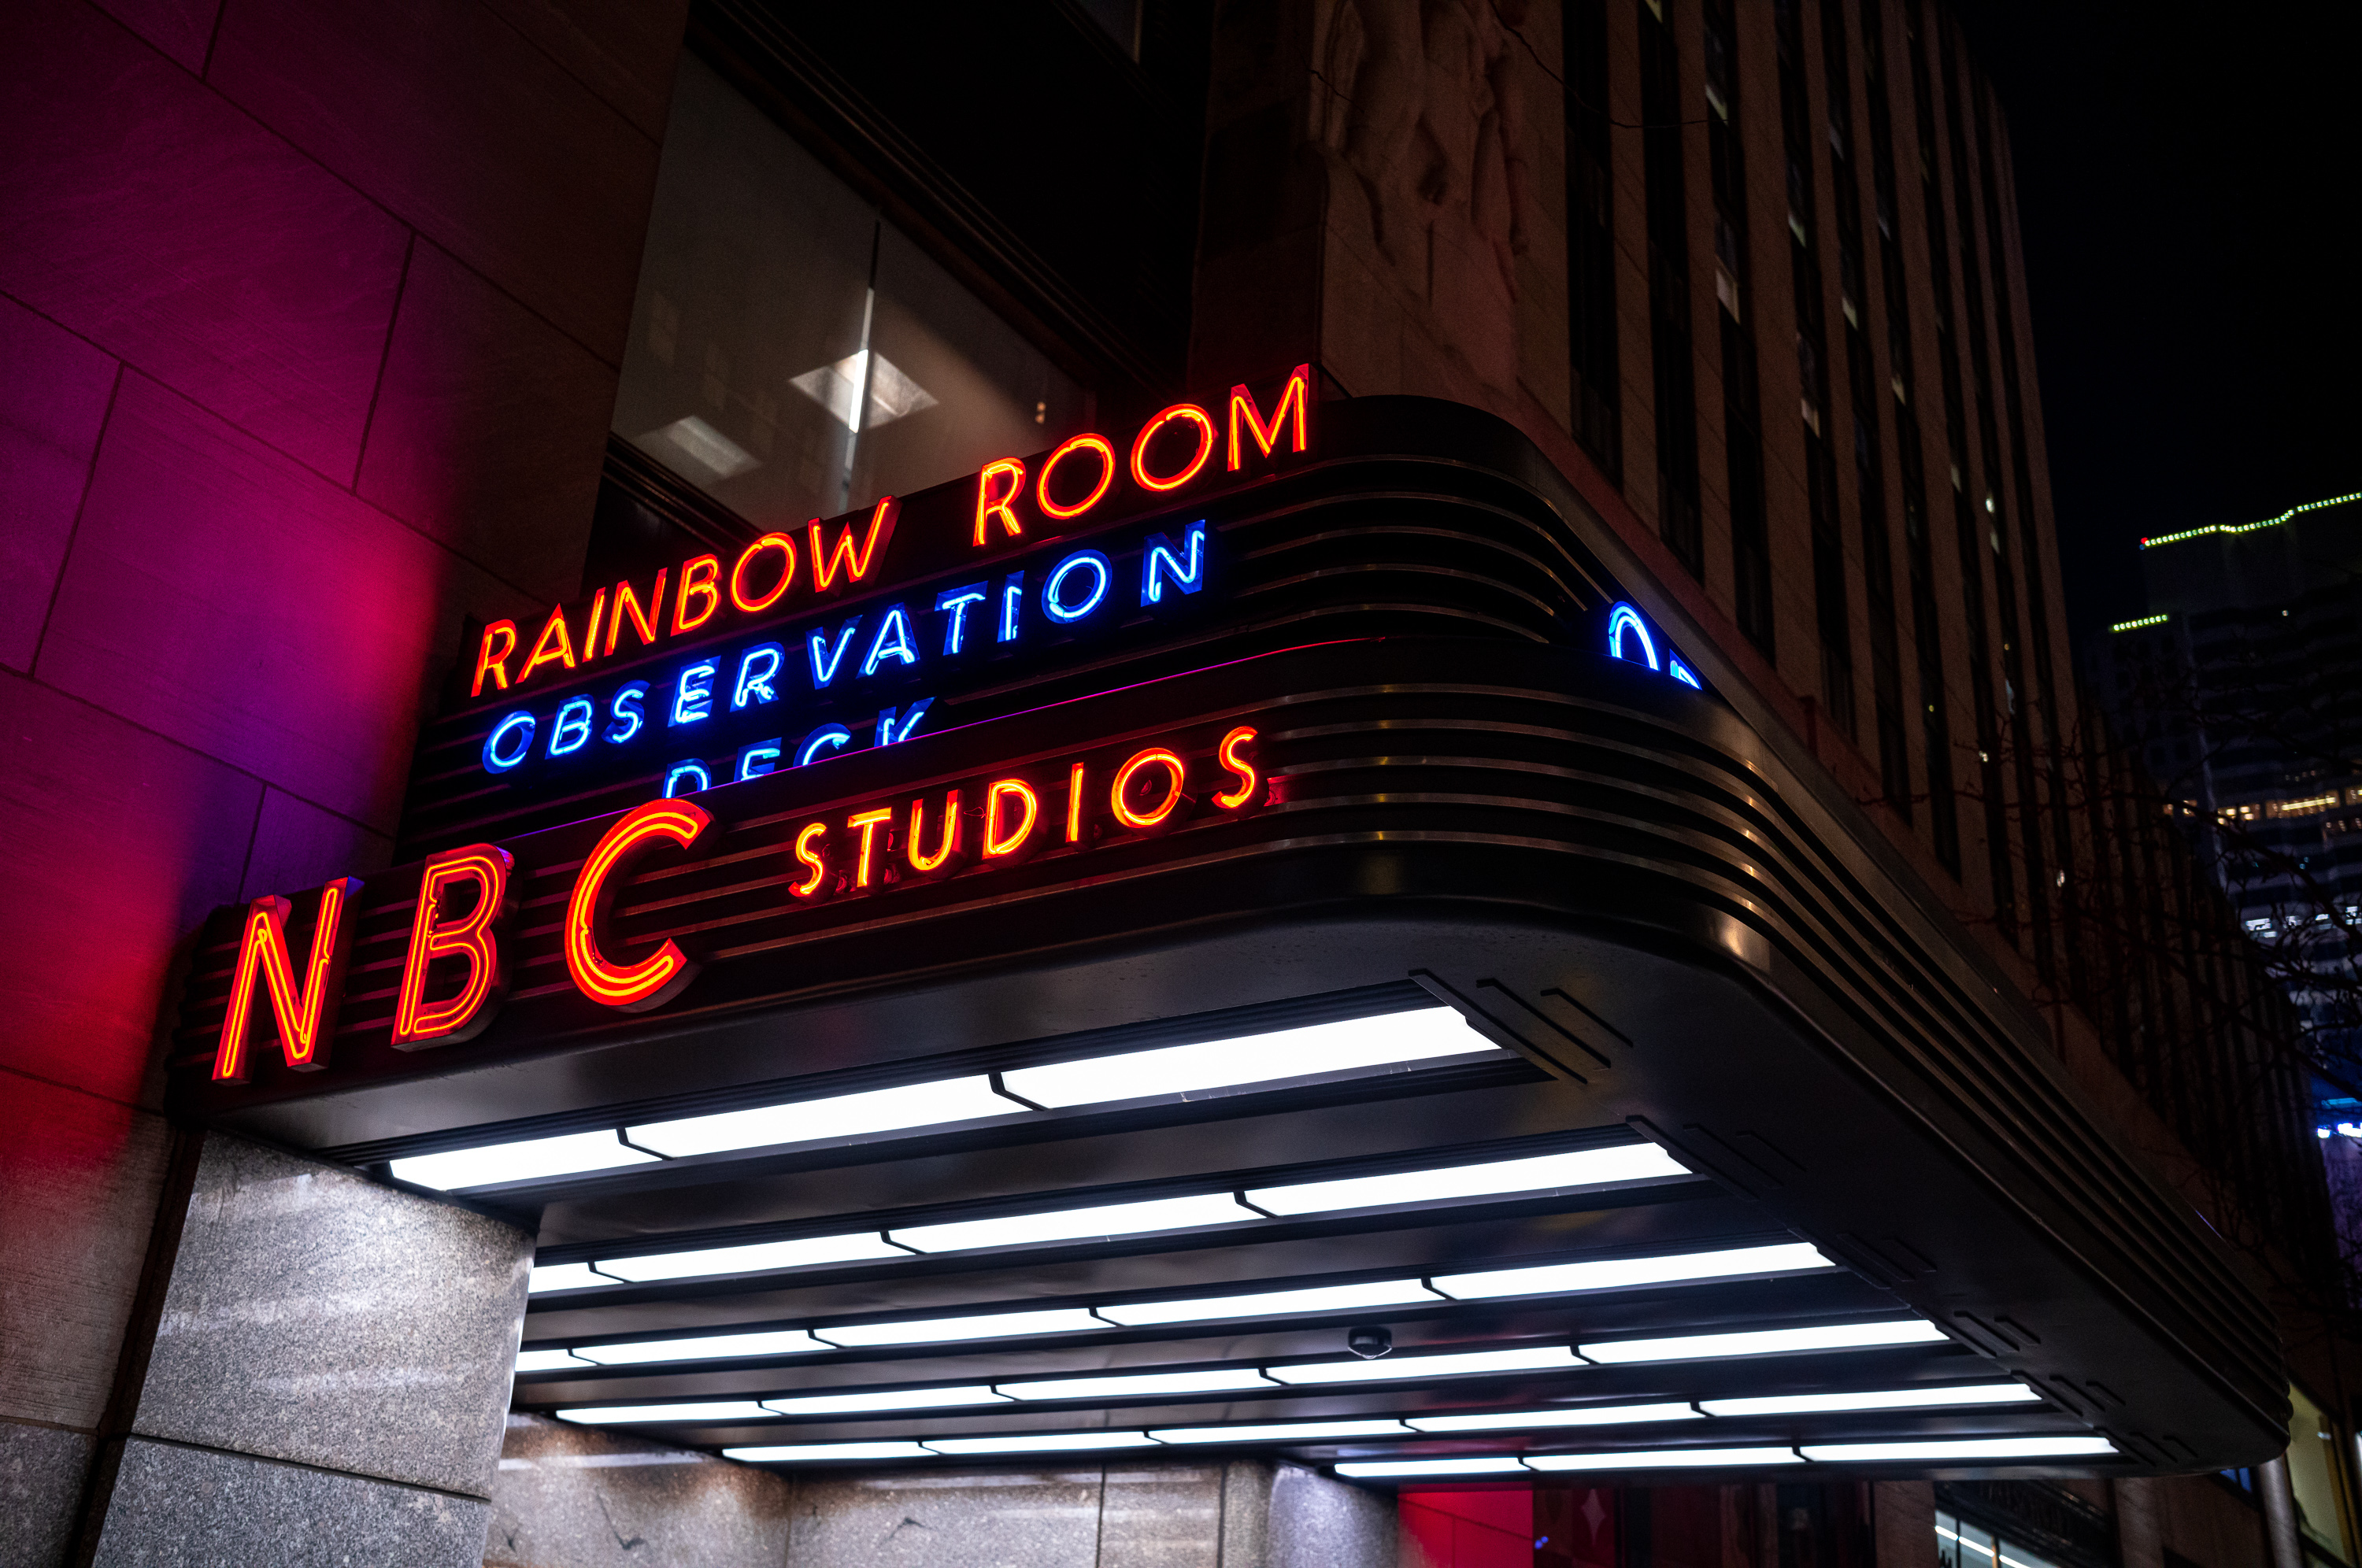
After a few hours of wandering aimlessly, I exited the tranquility of the park back to the frenetic city streets. I grabbed a late lunch, warmed up with a hot coffee and thought about where to go next. Following my park exploration, the camera battery was down to 35%. Considering the amount of live view used, I was impressed. But I wanted to do some night shooting and worried that it might not have enough juice for another few hours of heavy shooting. So, while refueling myself with food and beverage, I left the camera to charge from the myCharge battery pack. By the time I was on my way to Rockefeller Center an hour later, the battery was at 85% and ready for action.
1/320th sec @ f/5.6, ISO 640
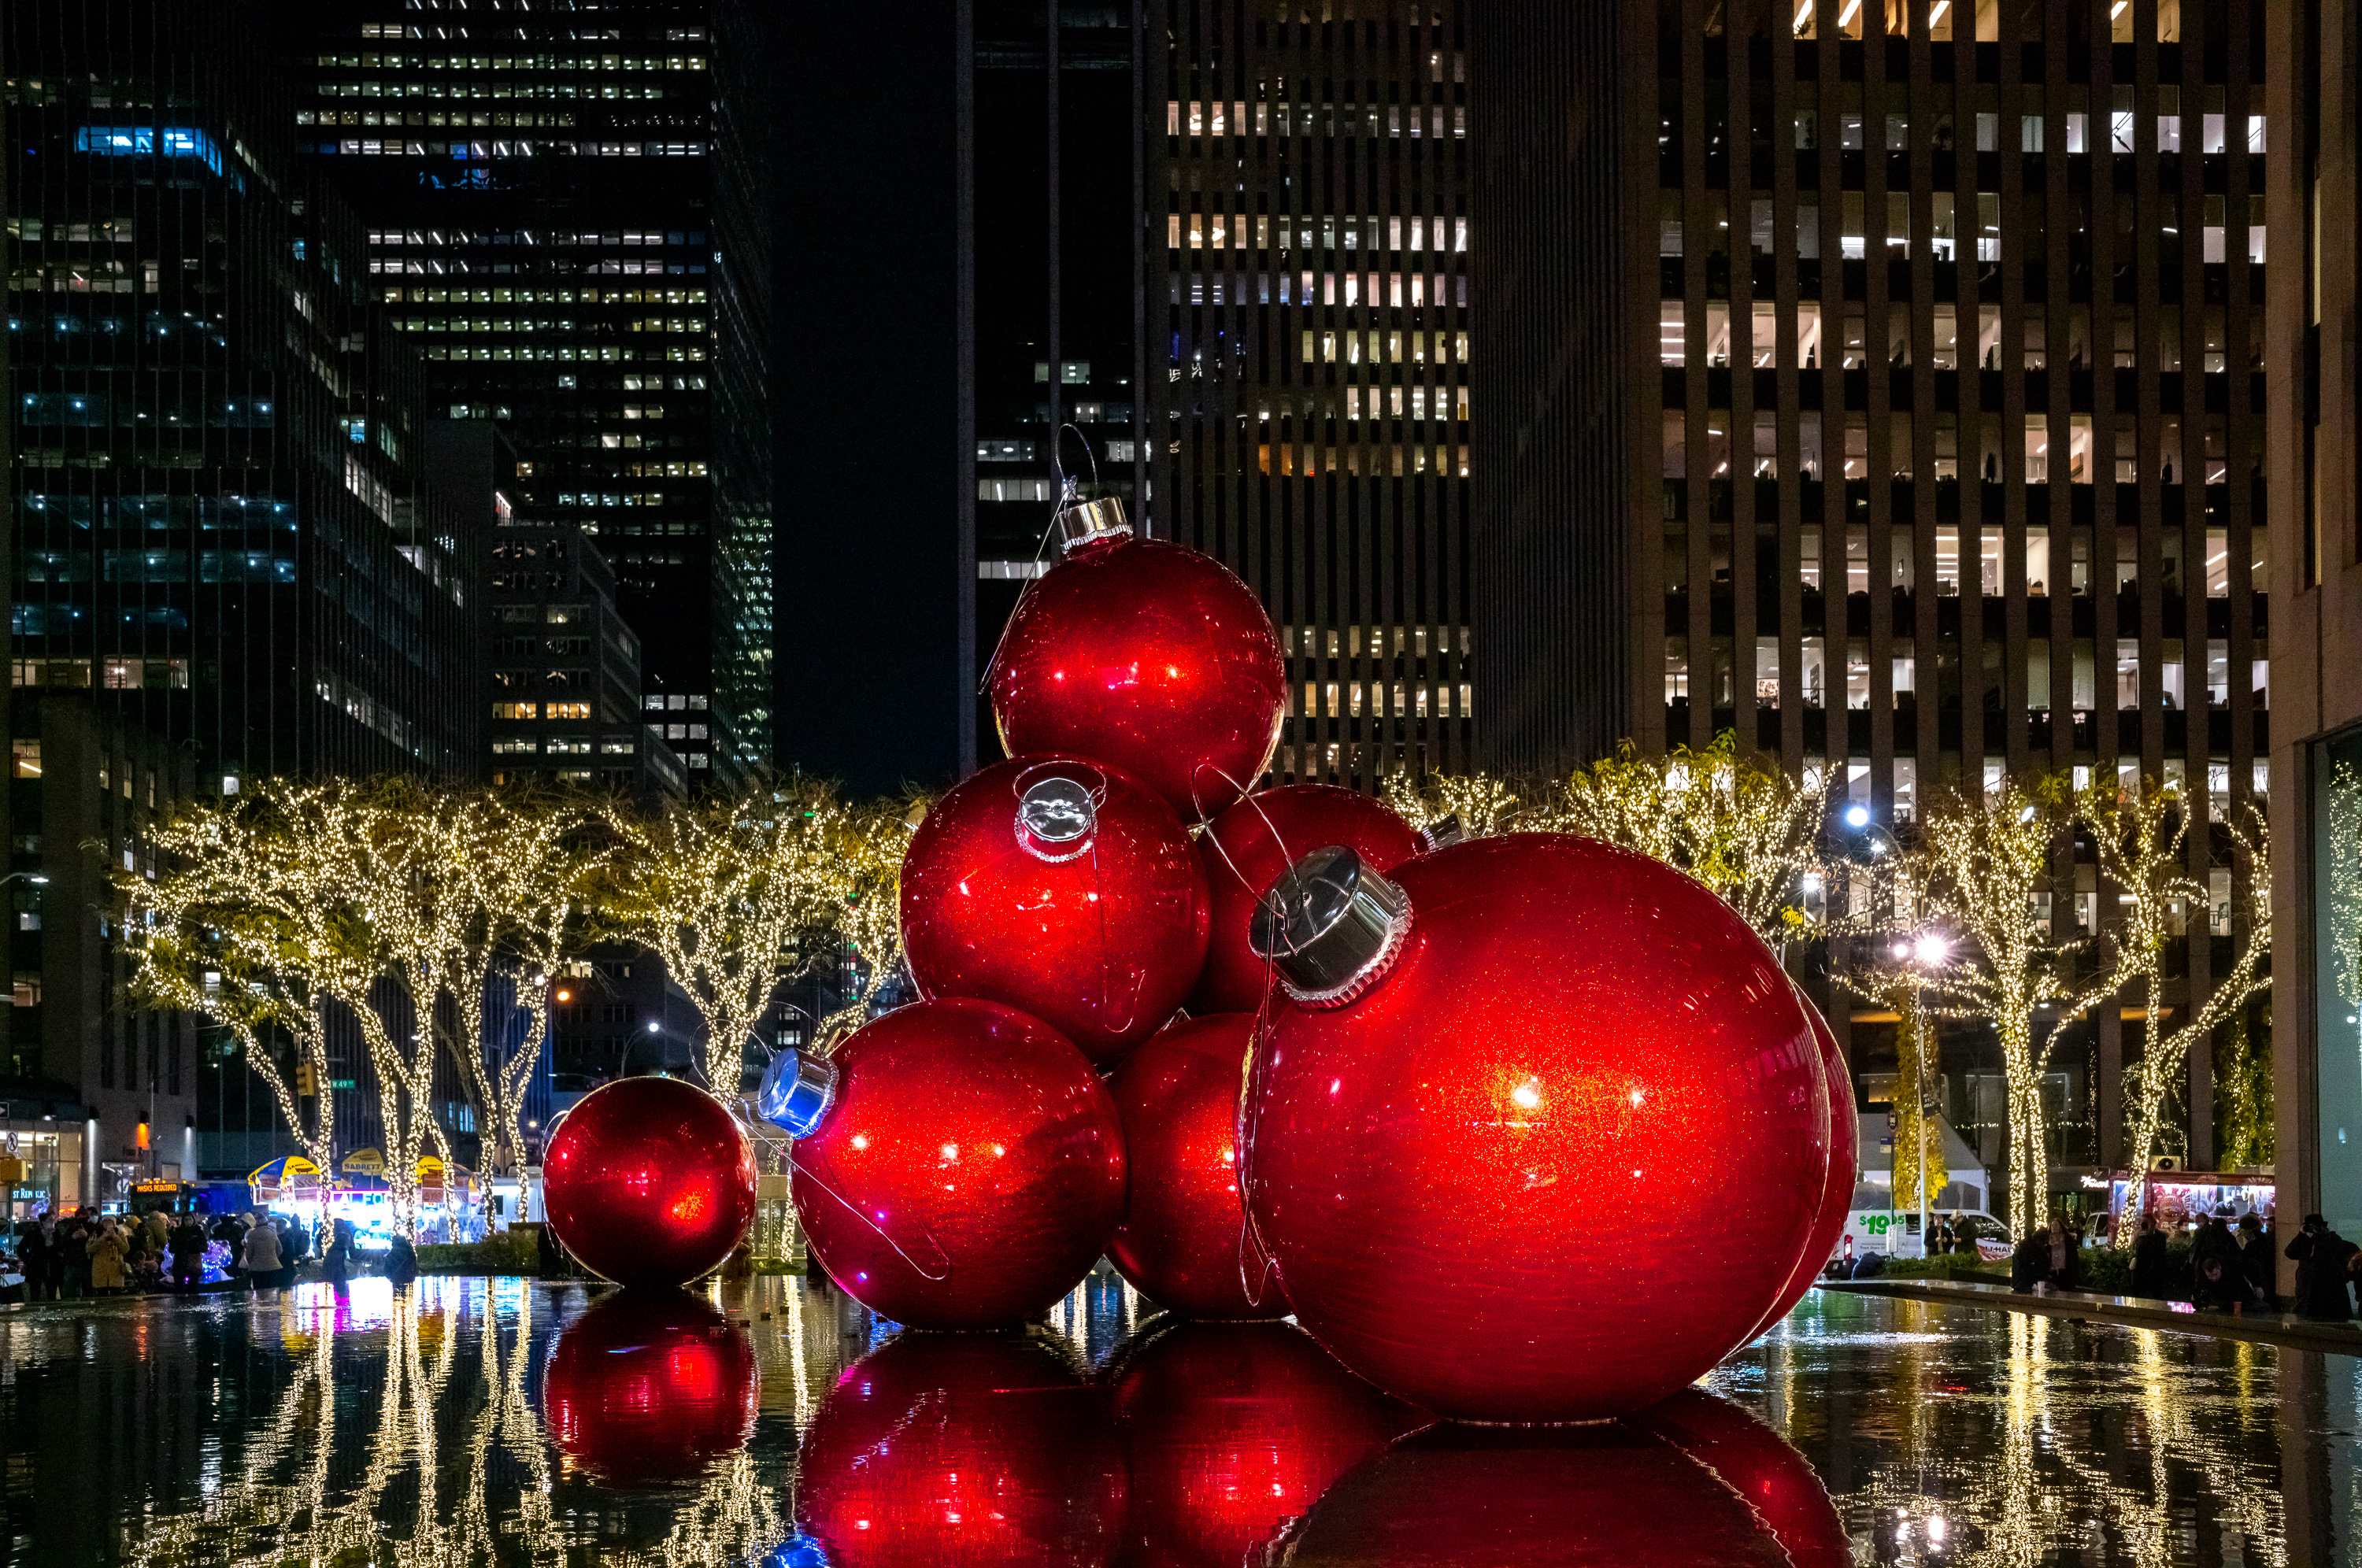
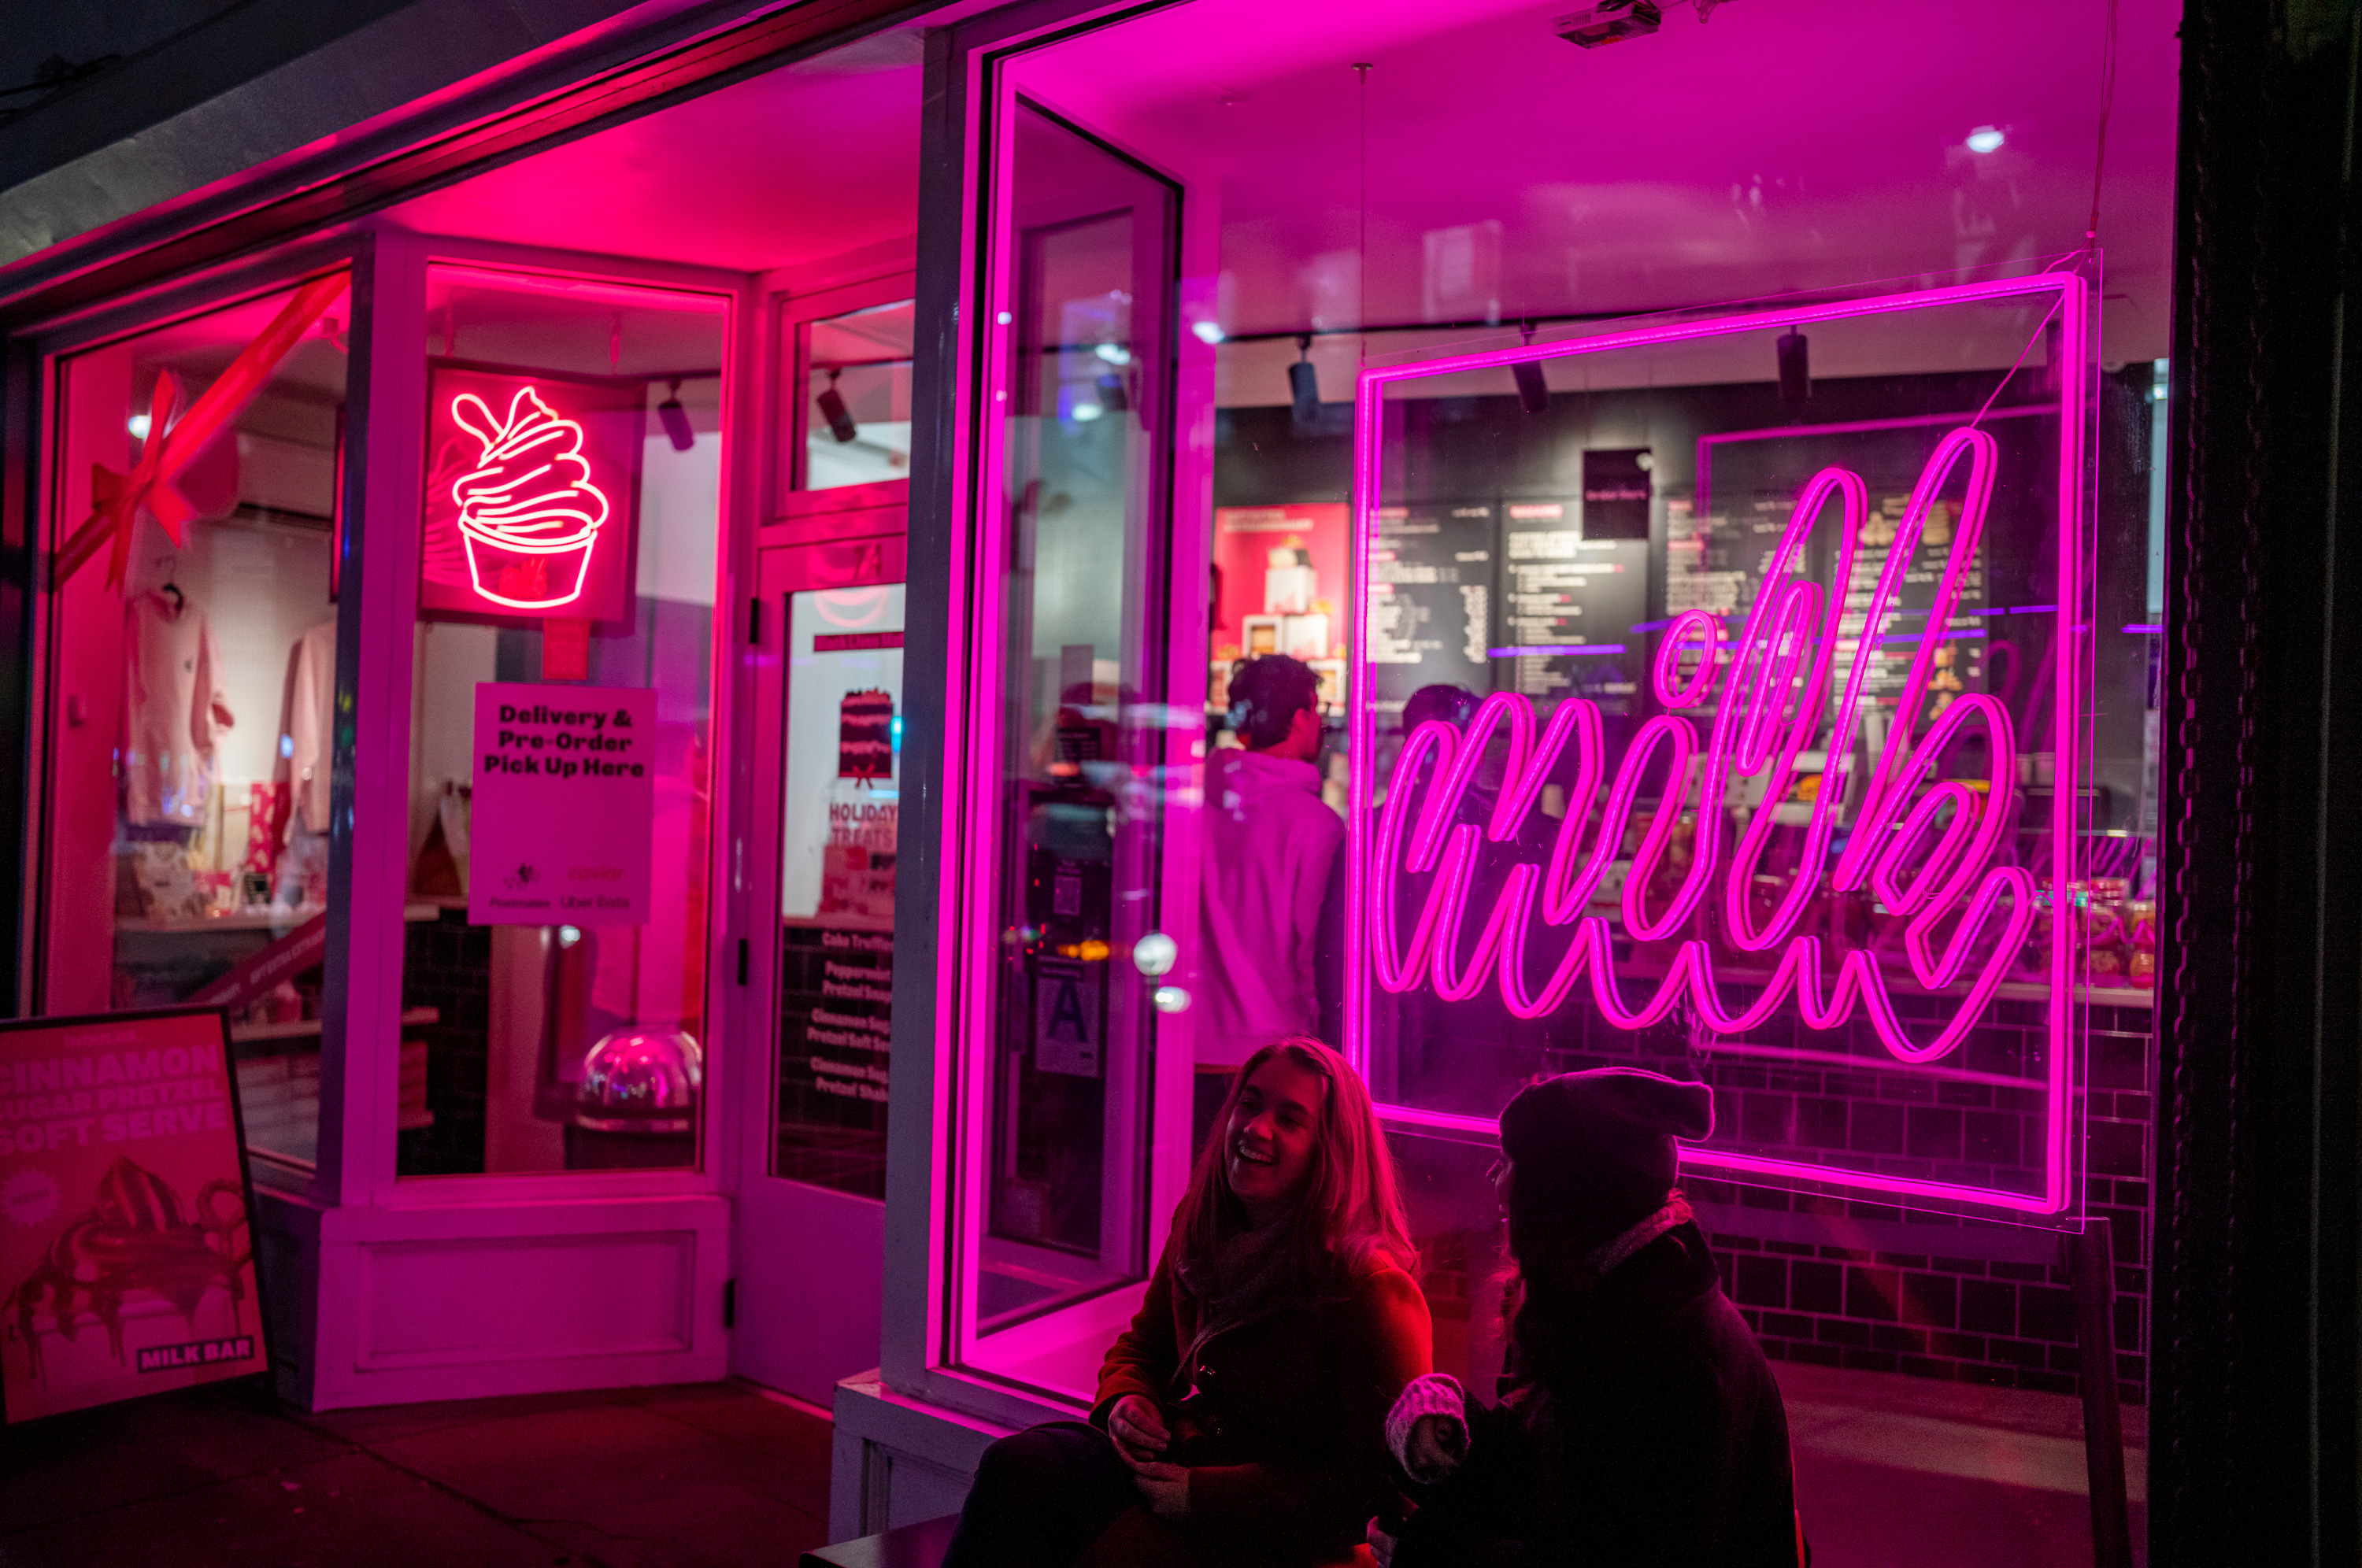
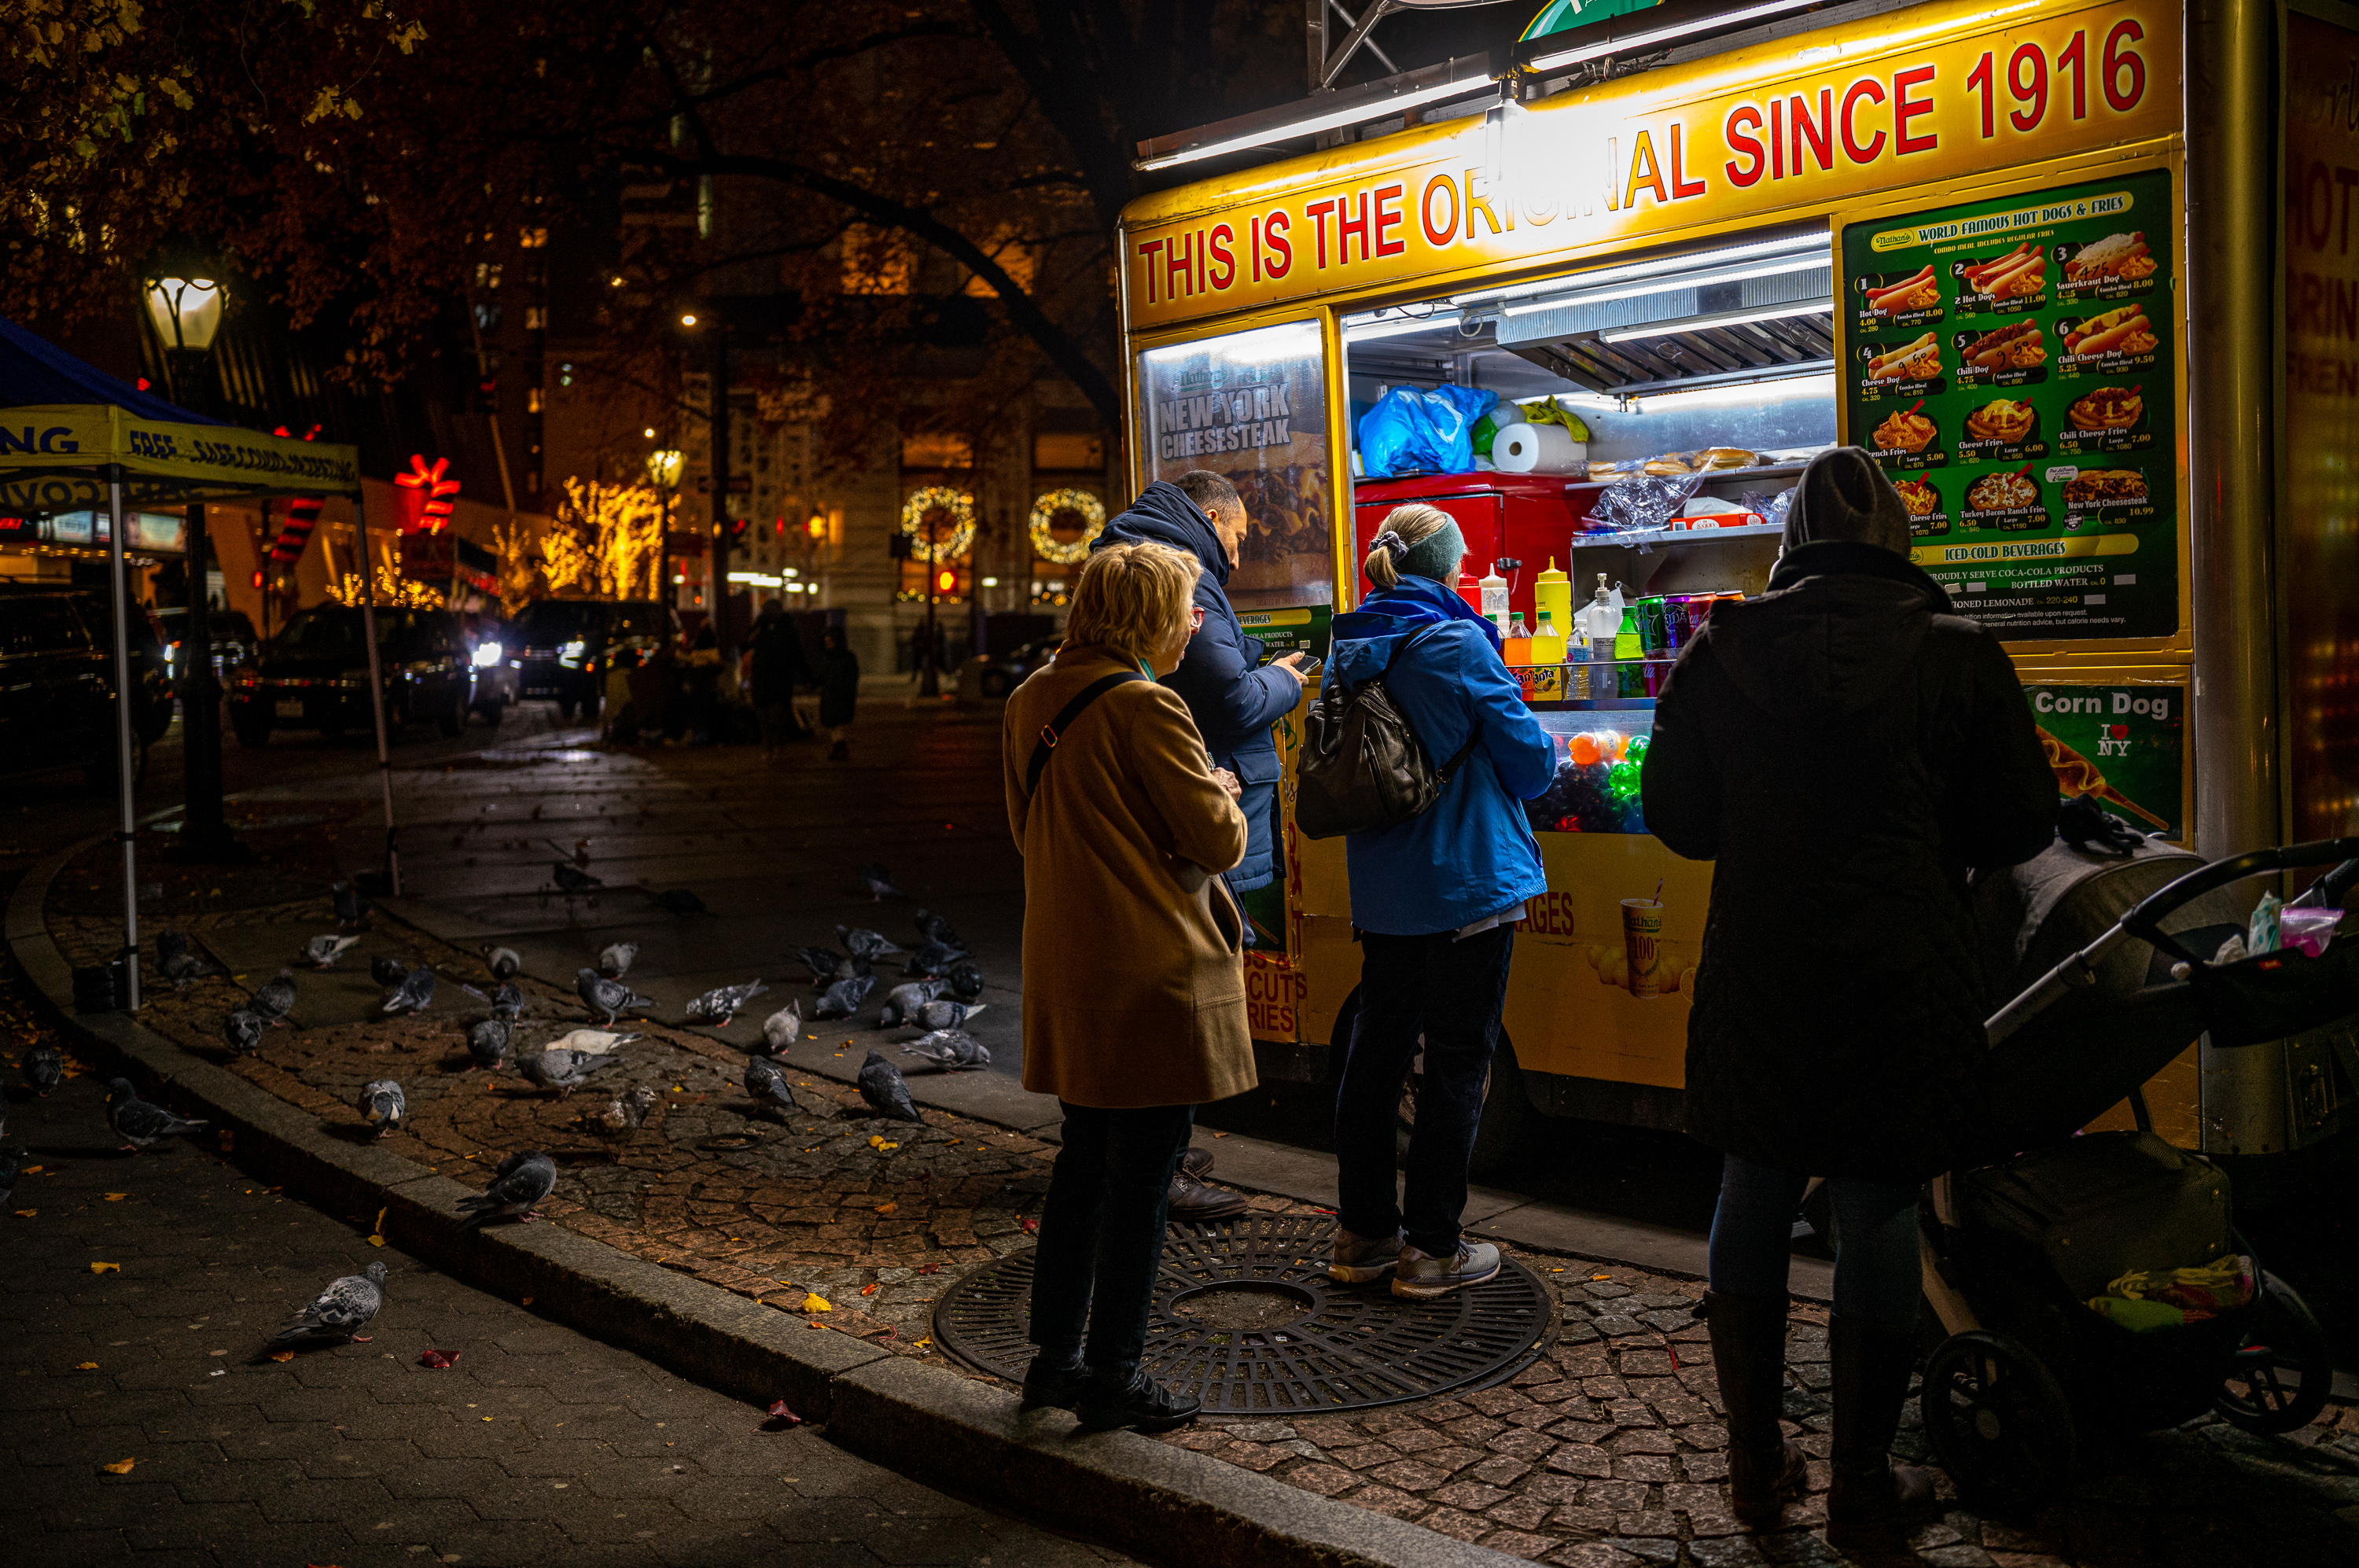
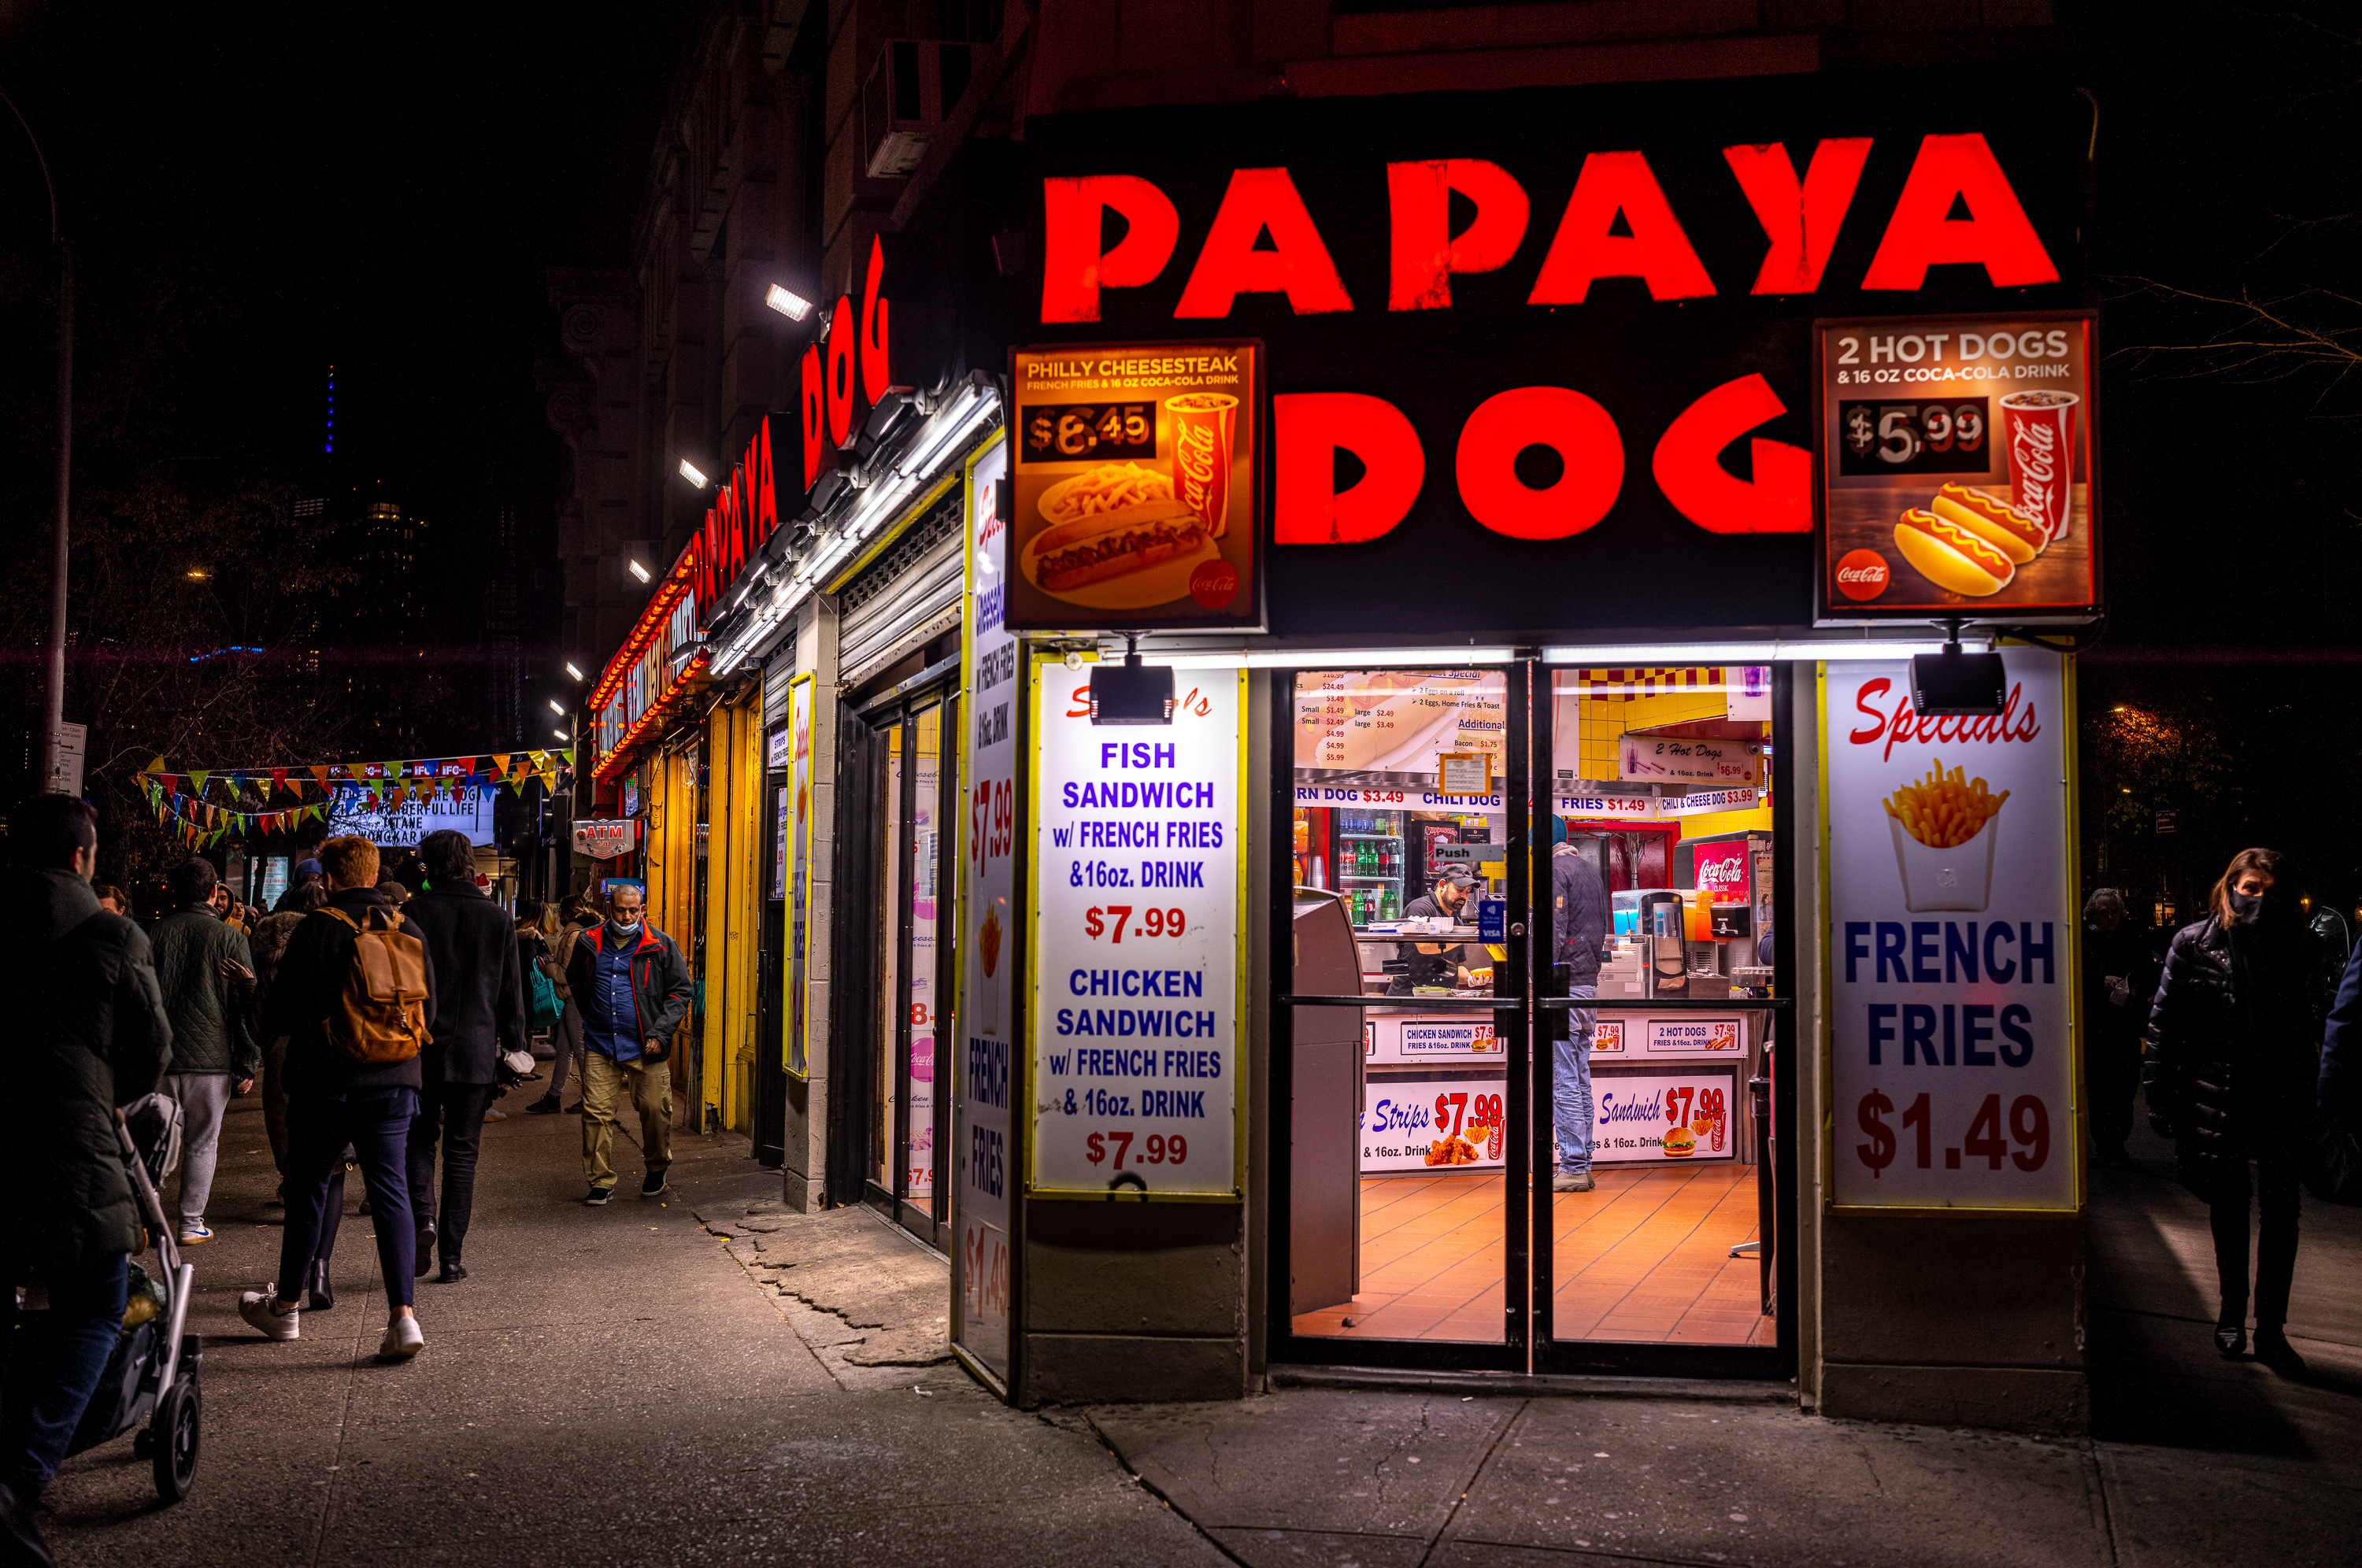
Midtown at Christmas
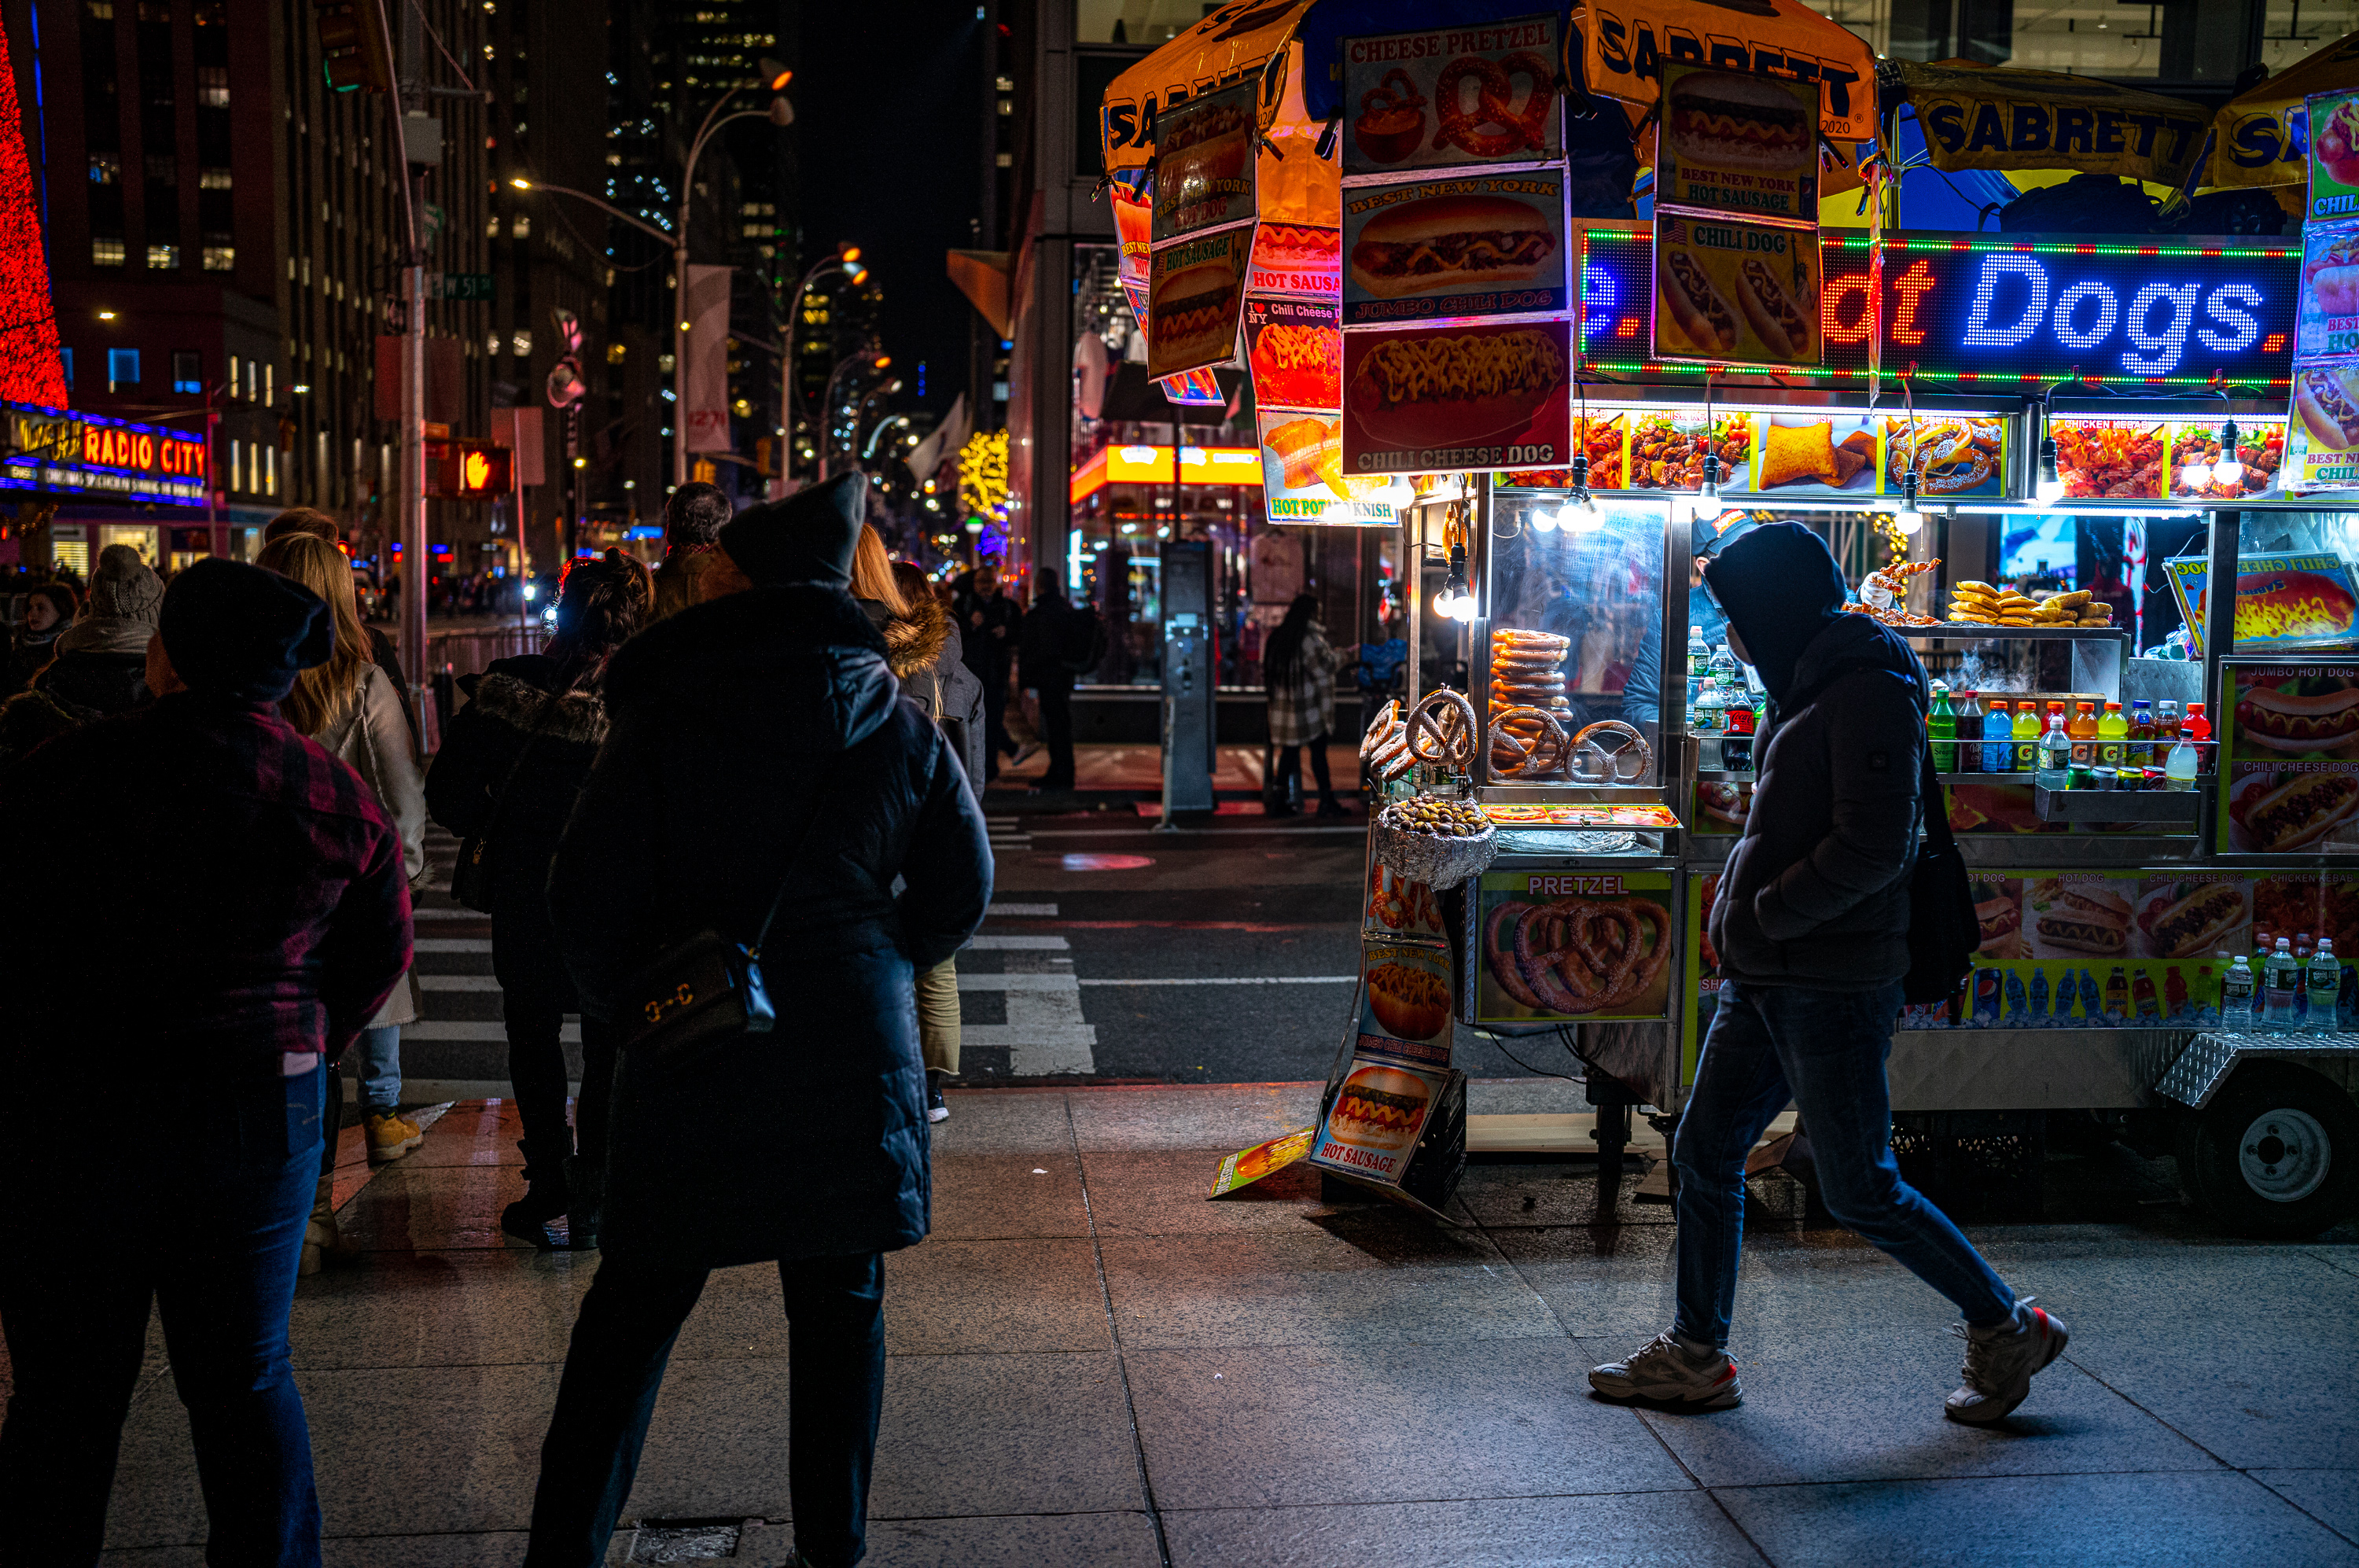
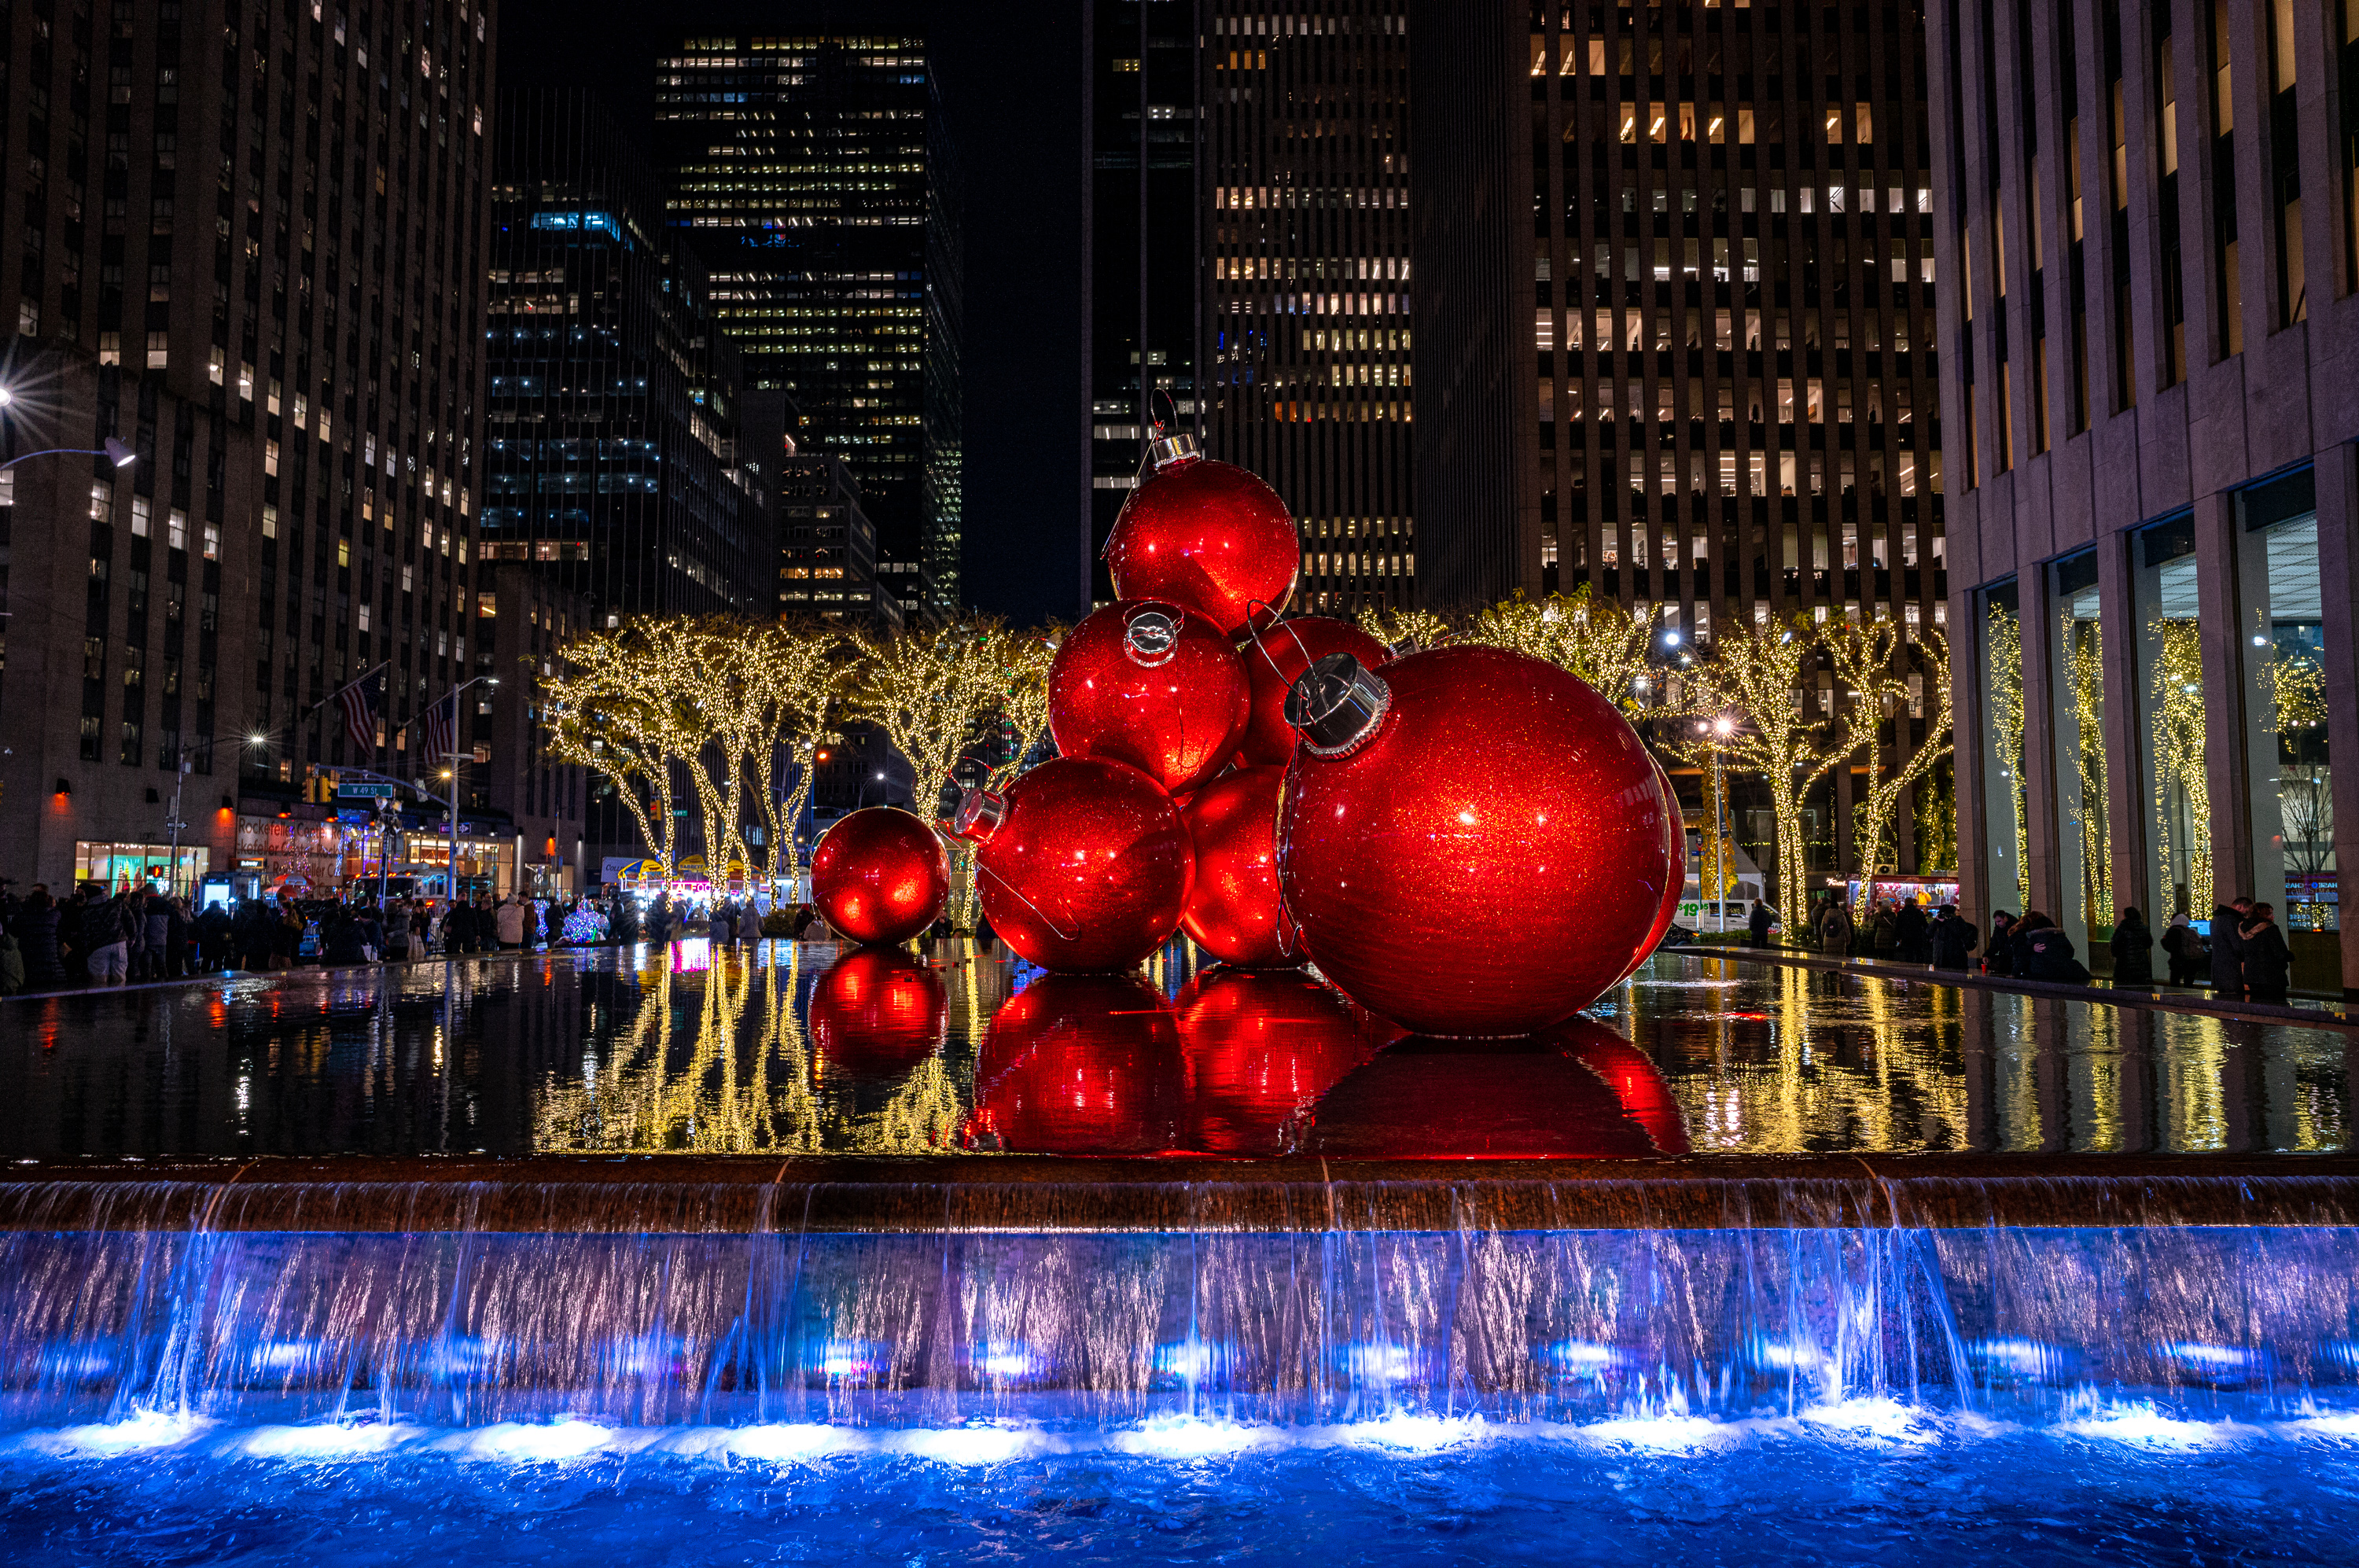
Inarguably, the epicenter of nighttime holiday festivities in NYC is in Midtown. Rockefeller Center, Bryant Park, Times Square. Lights galore with the crowds to match. So that’s exactly where I went to put the M11 through its paces.
1/320th sec @ f/4, ISO 500, M-DNG
1/320th sec @ f/2 ISO 1600
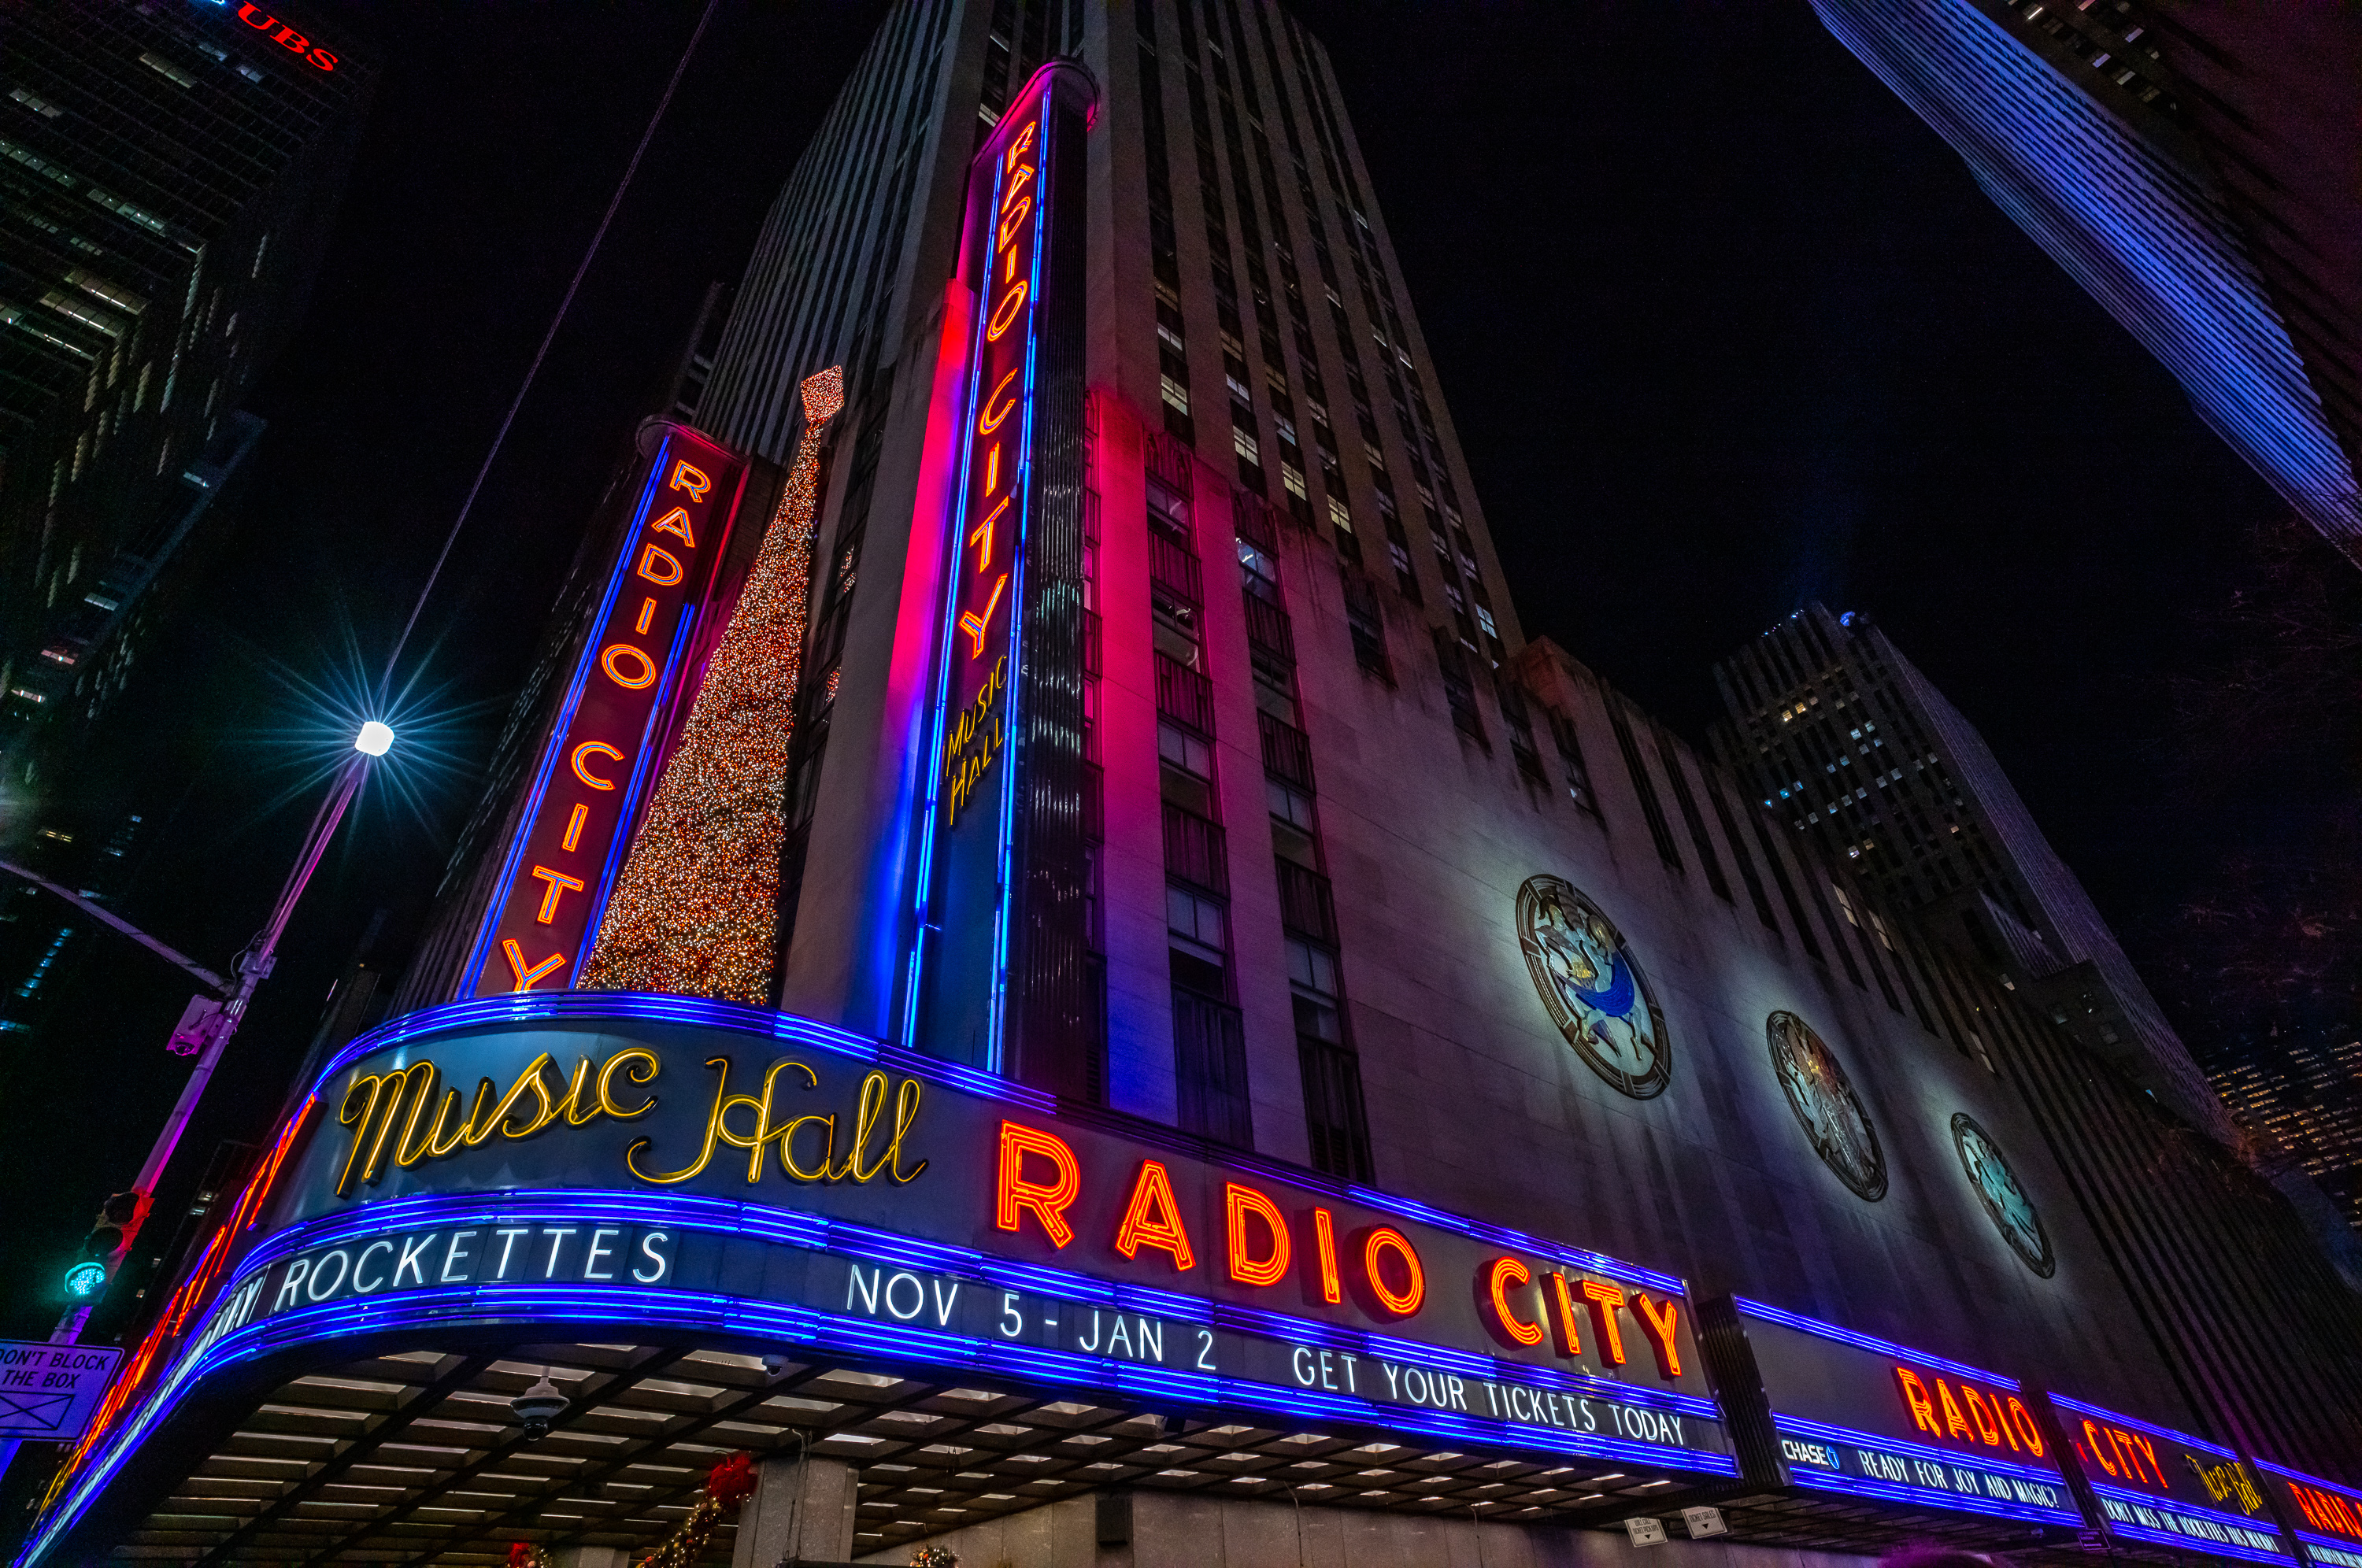
Mainly relying on the 35 APO for street photography and the 18 Super-Elmar for architectural shots, I pressed my way through the throngs of locals and tourists (mostly tourists). I relied on my usual Auto ISO, letting it run up to ISO 10,000 when needed. The sensor-based multifield metering worked extremely well for the contrasty and tricky lighting conditions.
1/60th sec @ f/8 ISO 10,000
1/25th sec @ f/8 ISO 800, M-DNG
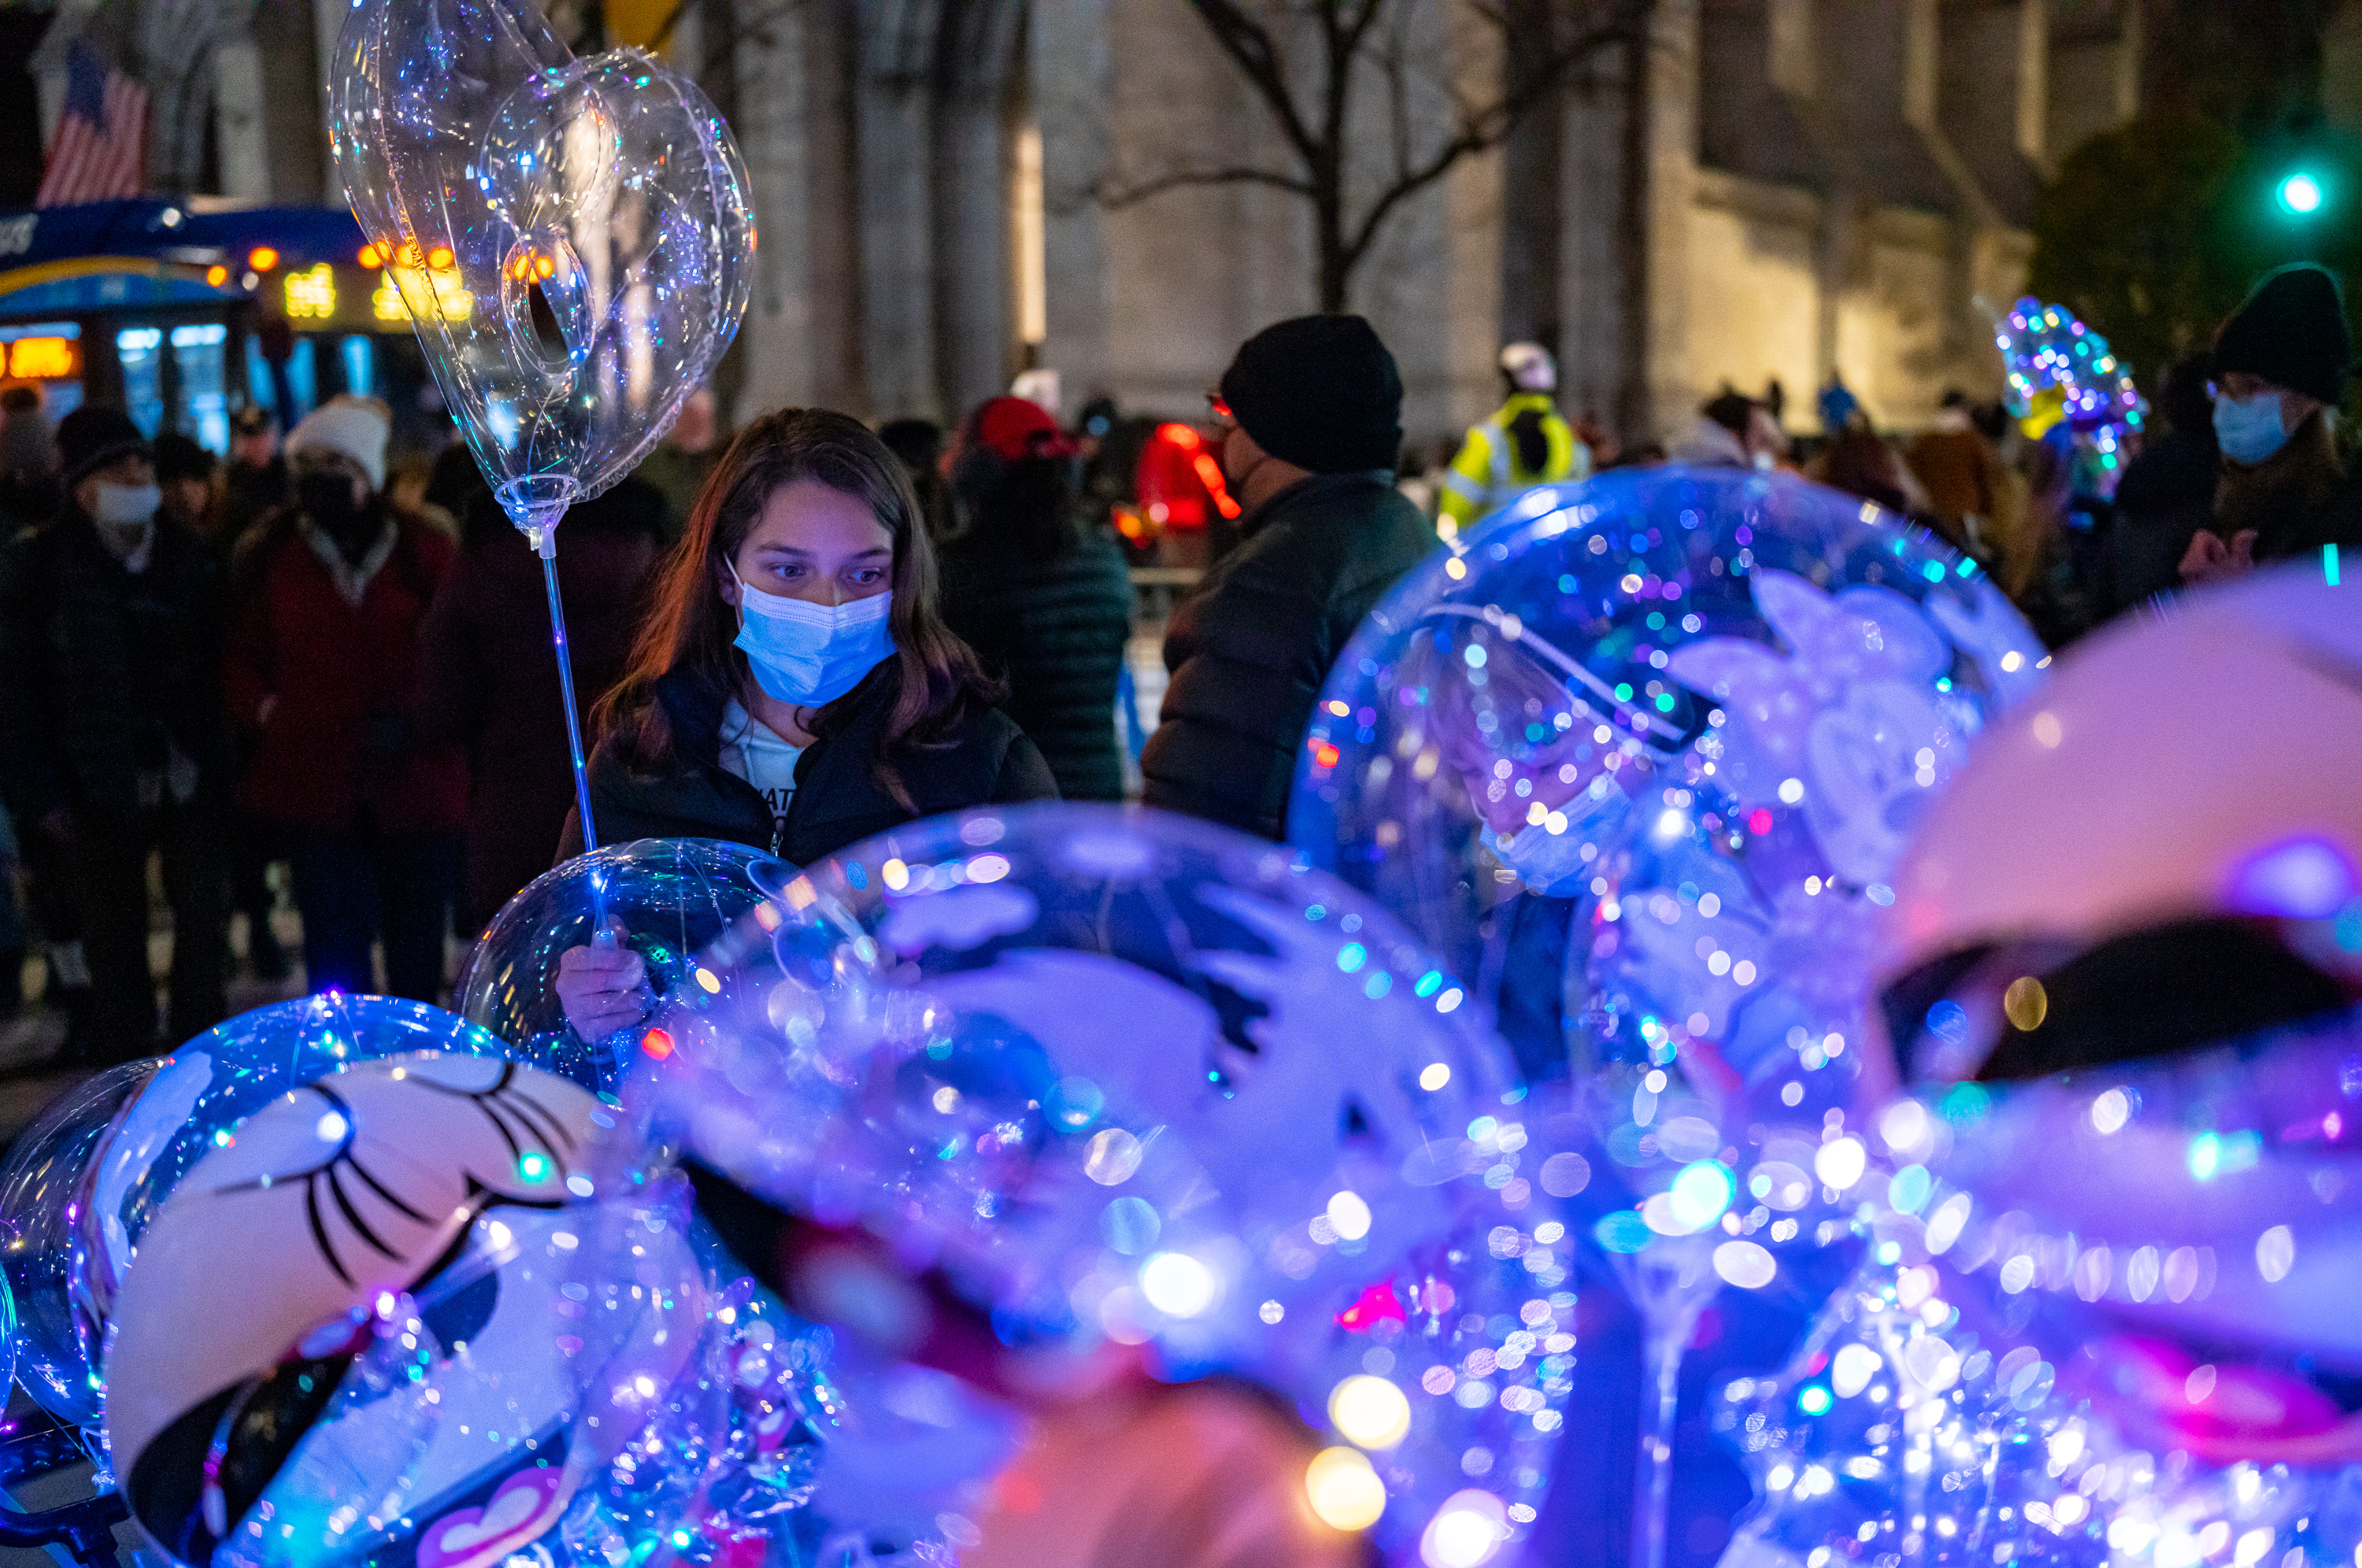
Blindingly bright lights adjacent to near-black skies, with areas awash in blue and purple – easy for most cameras, this is not. And yet, the M11 shrugged off all these challenges, delivering consistently amazing results. I’d love to take credit for the incredible exposures, but it’d be misplaced. On the post processing side, the files had so much room for highlight and shadow recovery that even near misses were no issue at all.
1/160th sec @ f/8 ISO 8000
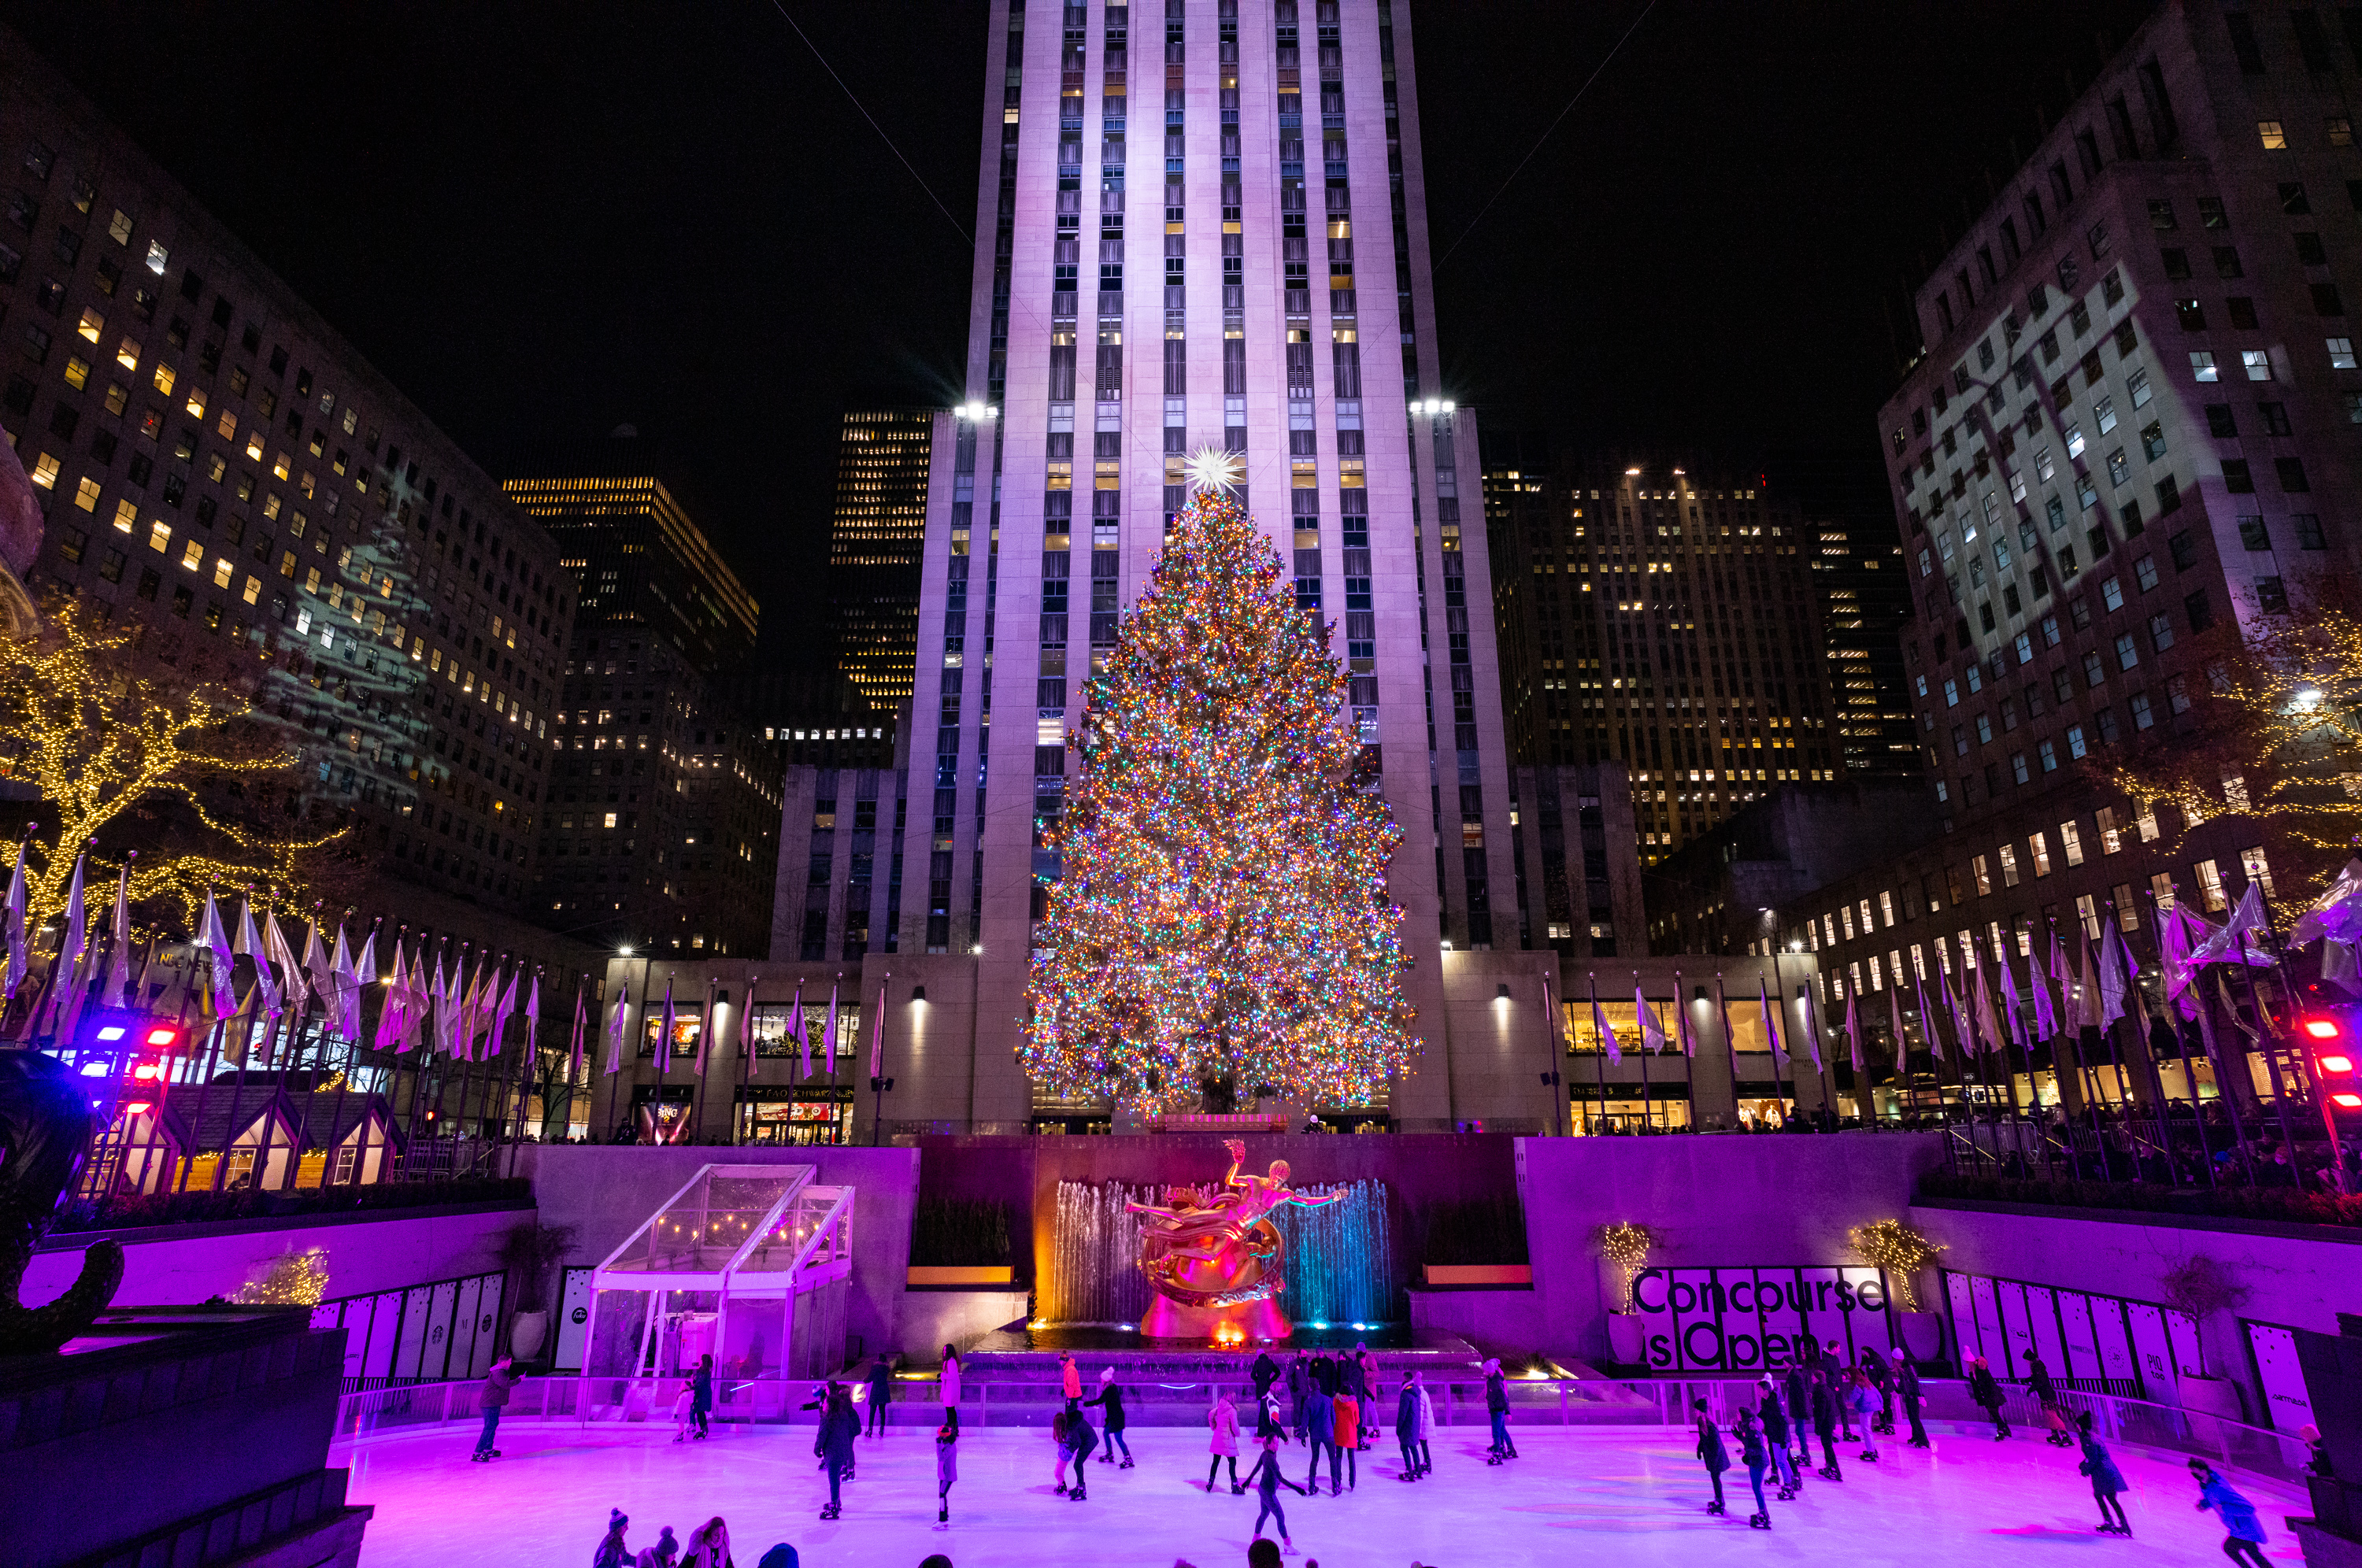
Rockefeller Center always makes for an excellent backdrop and in December even more so. The massive tree, lit up and topped with a star, stands proudly over the iconic ice-skating rink. Yet both are dwarfed by the main tower stretching into the night sky. The 18 just barely manages to capture the full scene. Perhaps a Wide Angle Tri-Elmar would have been better, offering a more expansive field of view at 16mm, but I’m still partial to the now-discontinued super wide angle fixed lens. Sharp, fun and easy.
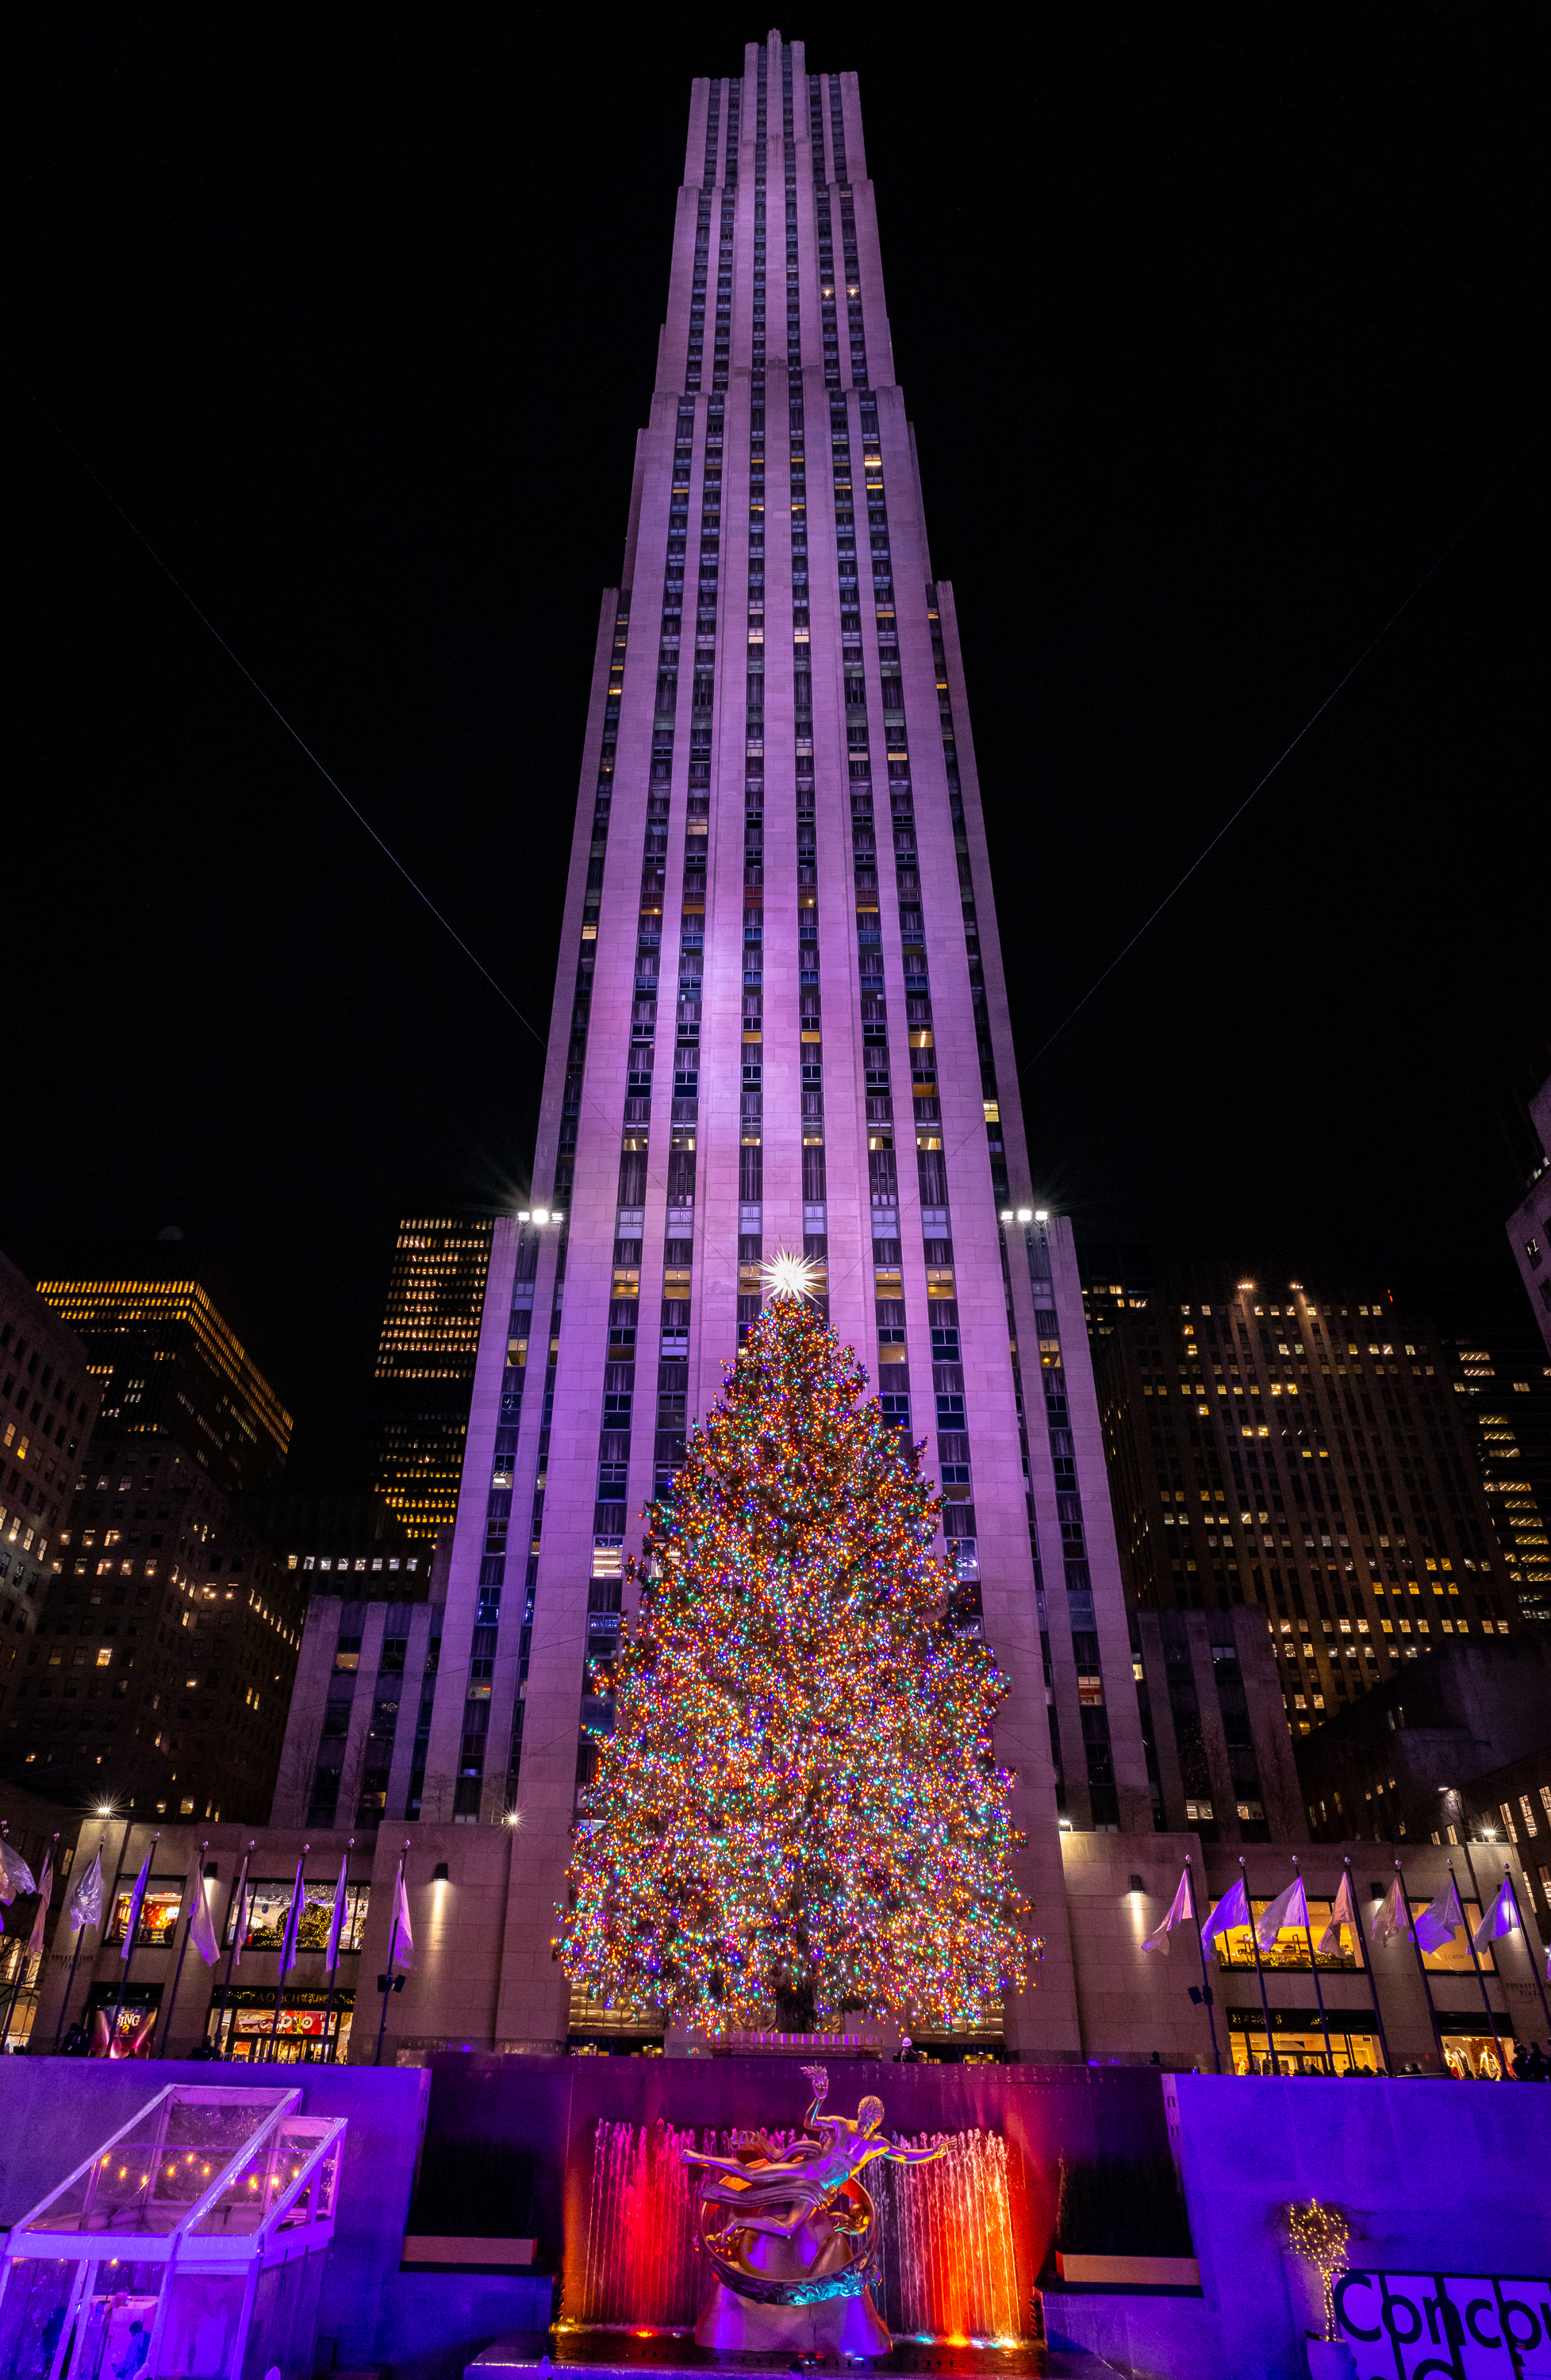
1/90th sec @ f/8 ISO 3200
1/160th sec @ f/8 ISO 3200
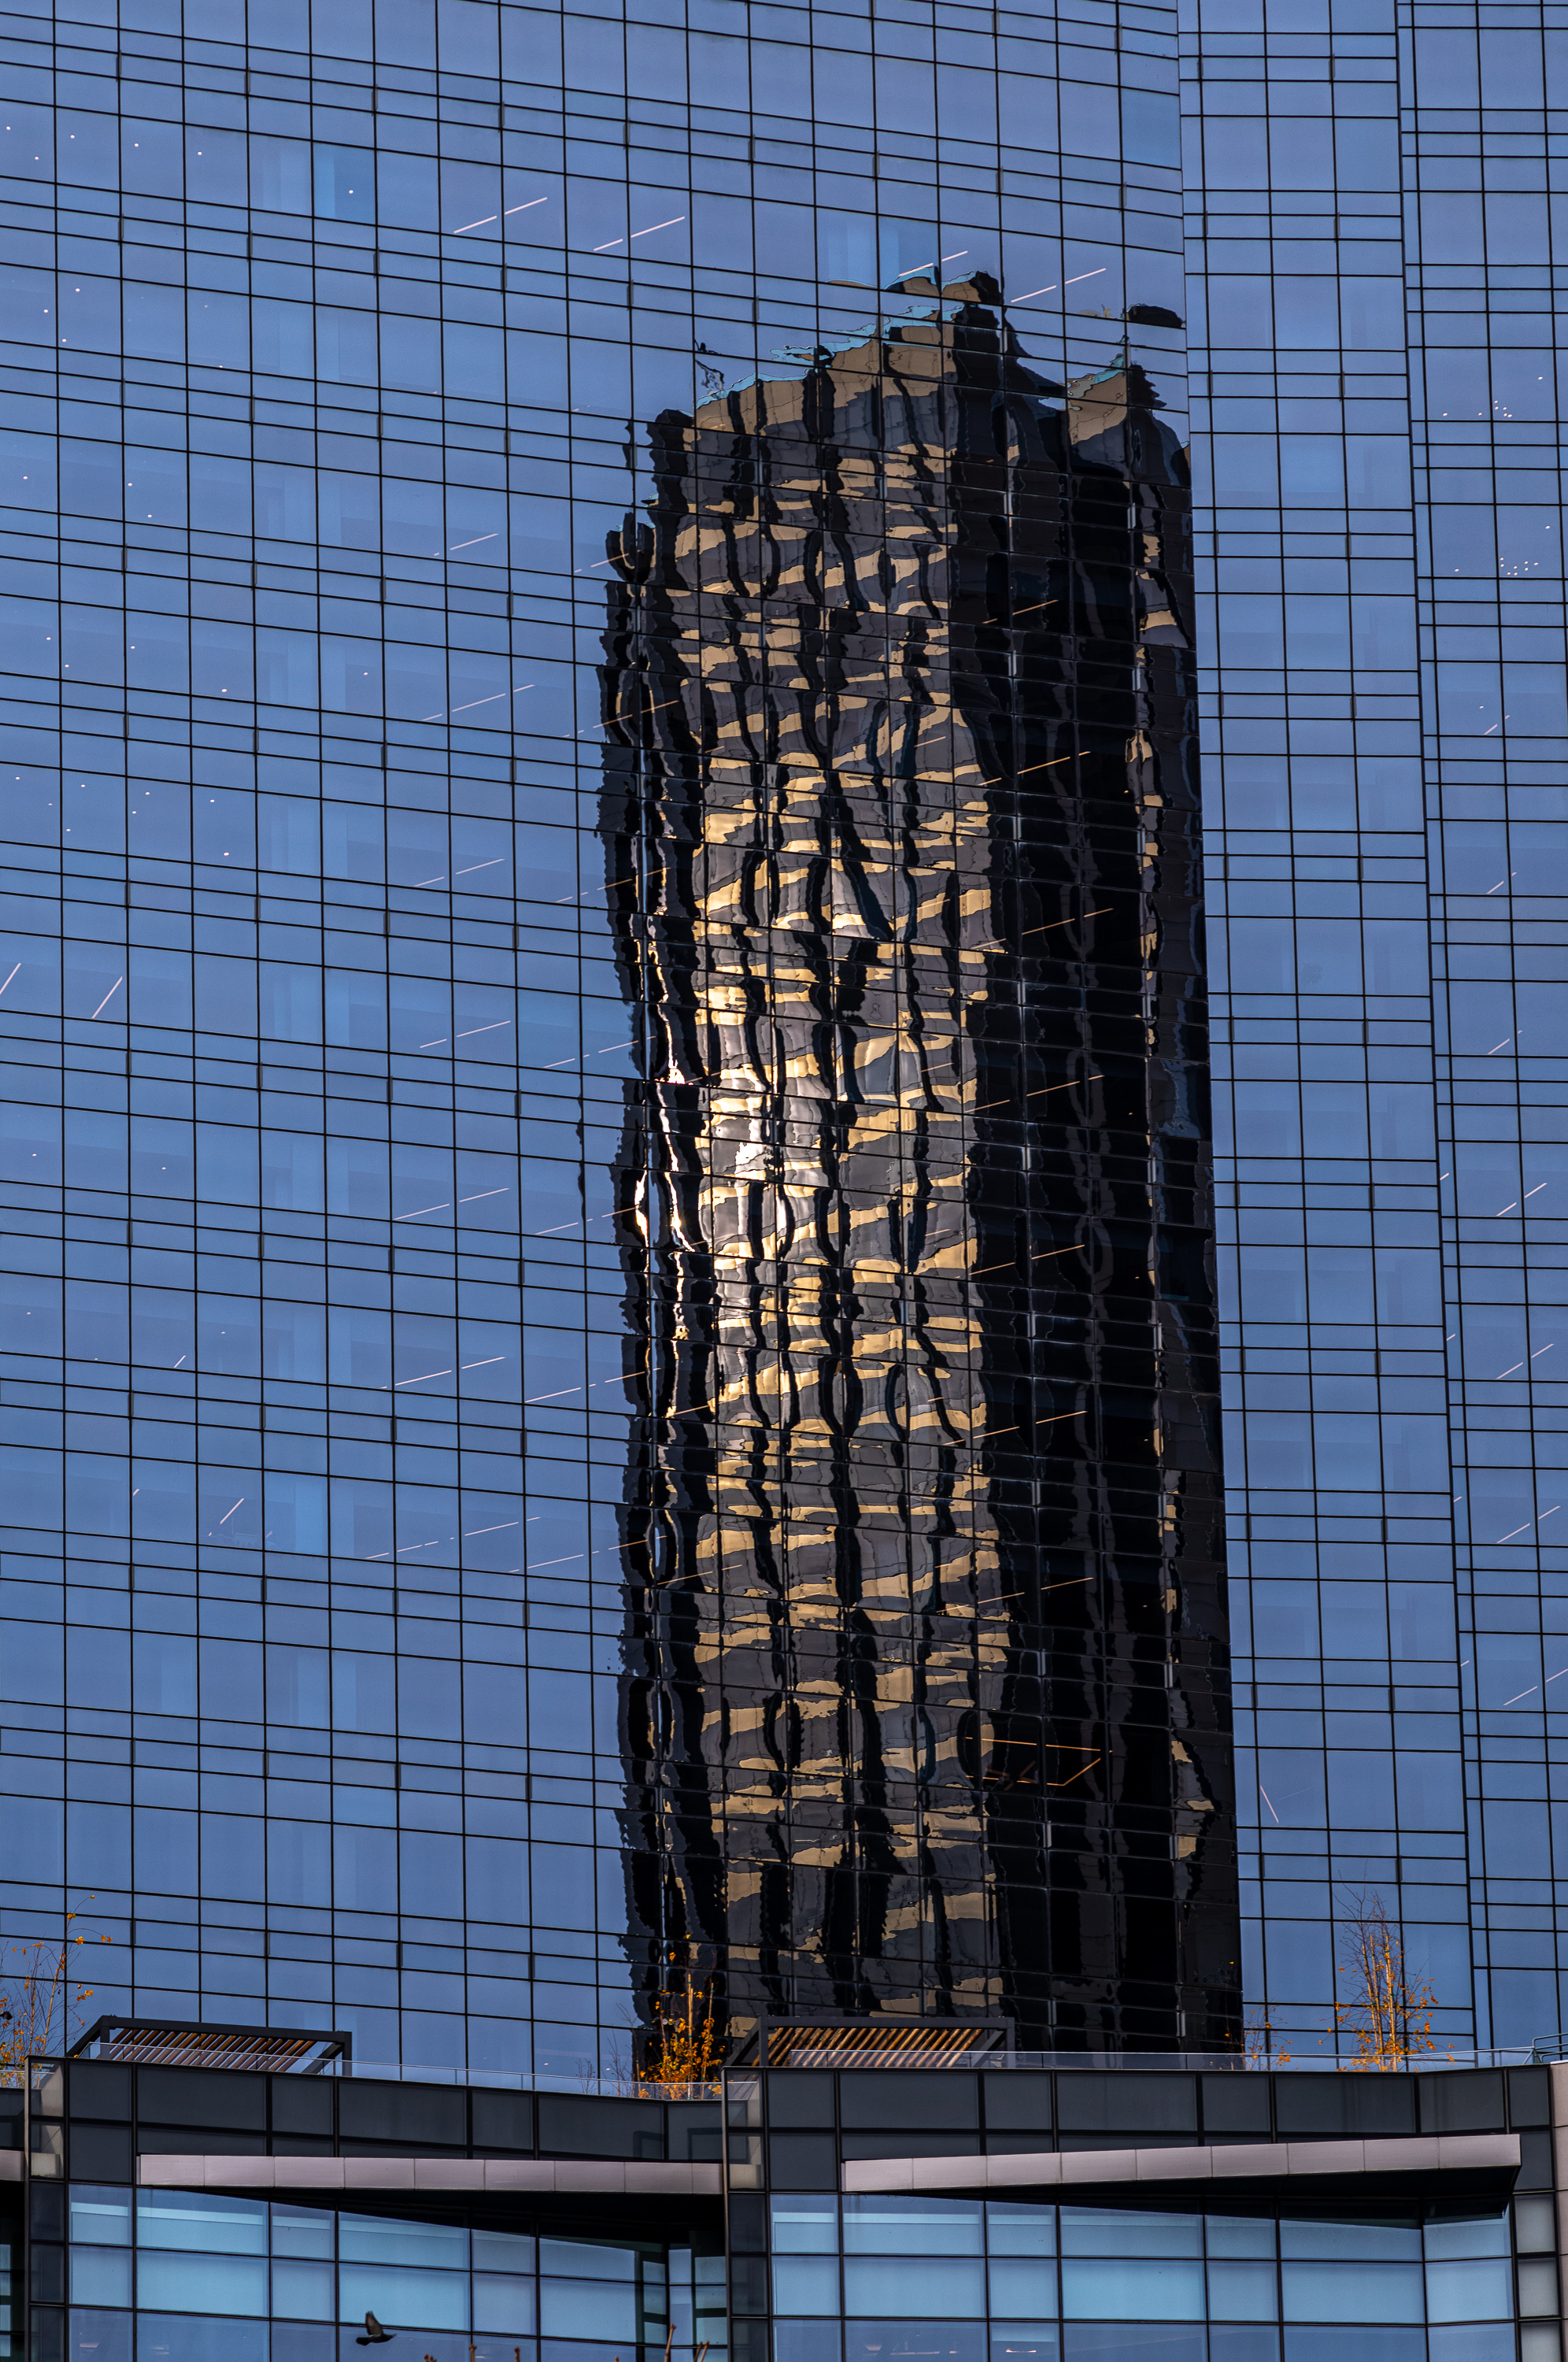
While most are familiar with the rink at the Rock from movies, TV and pop culture, the one a few blocks away at the Winter Village at Bryant Park is much larger and easier to photograph. For starters, you don’t have to fight through a hoard of people just to get in position. The modern skyscrapers rising all around create an interesting juxtaposition that I like.
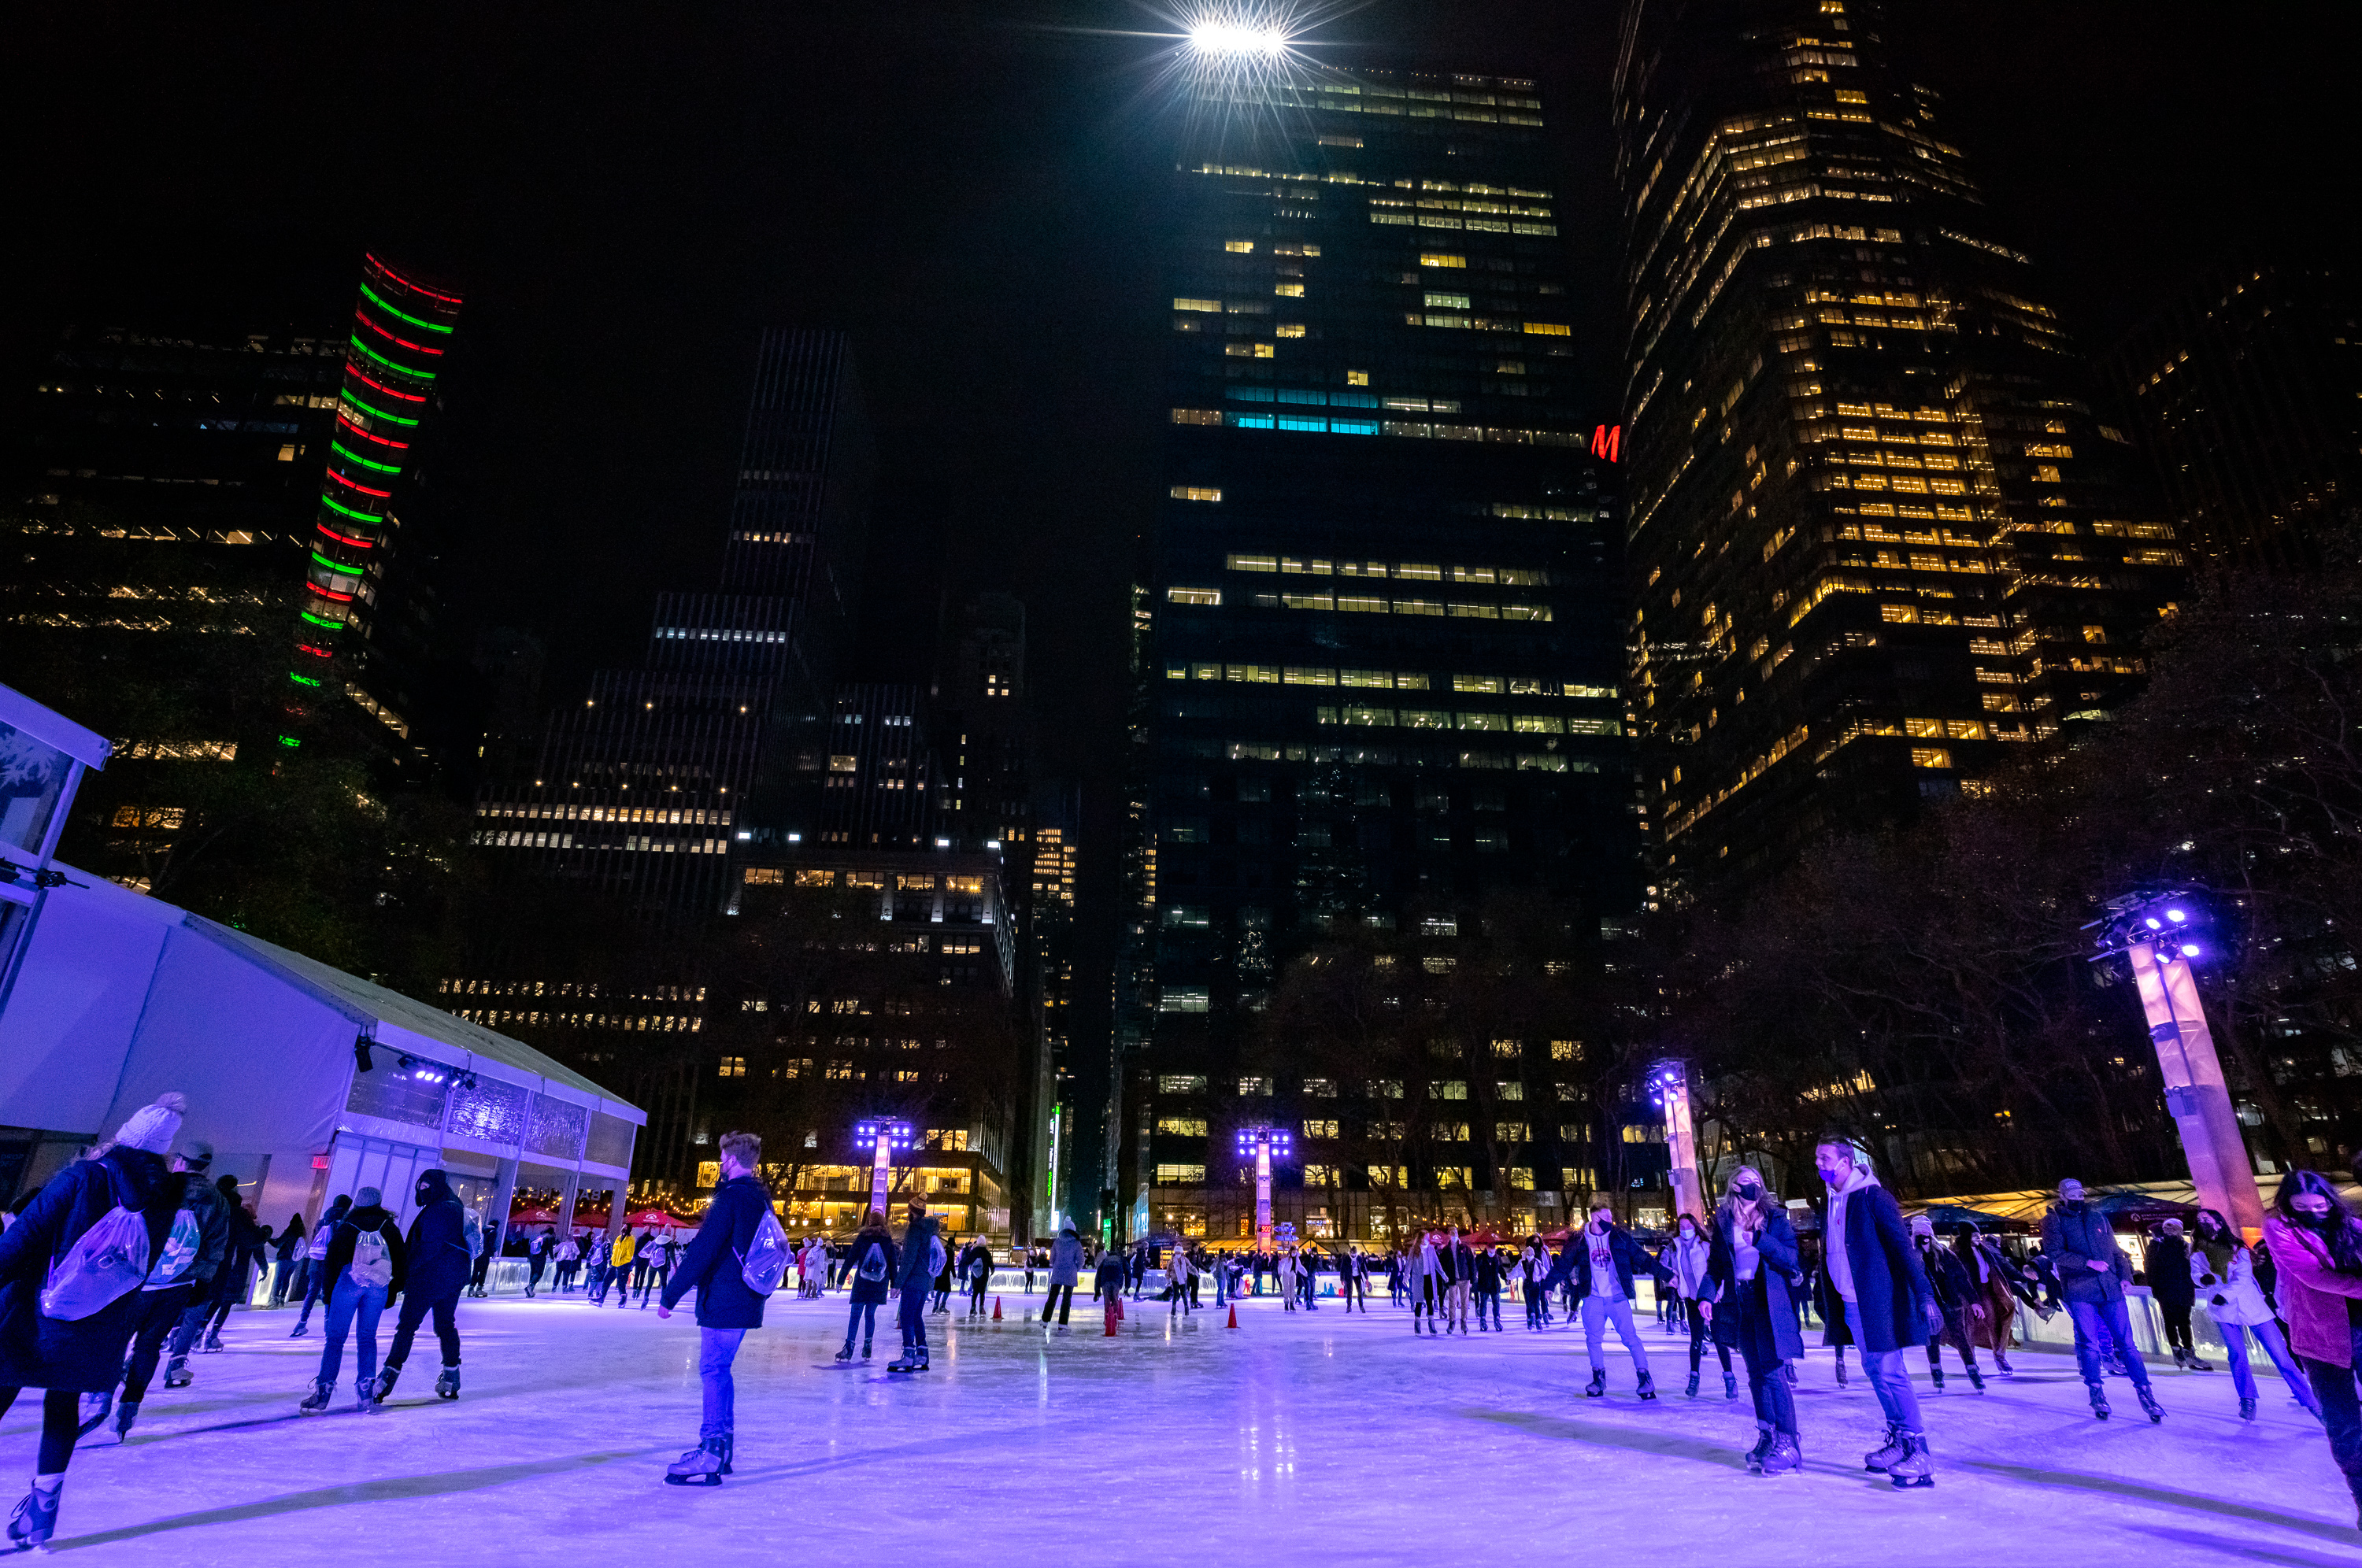
1/320th sec @ f/8 ISO 6400
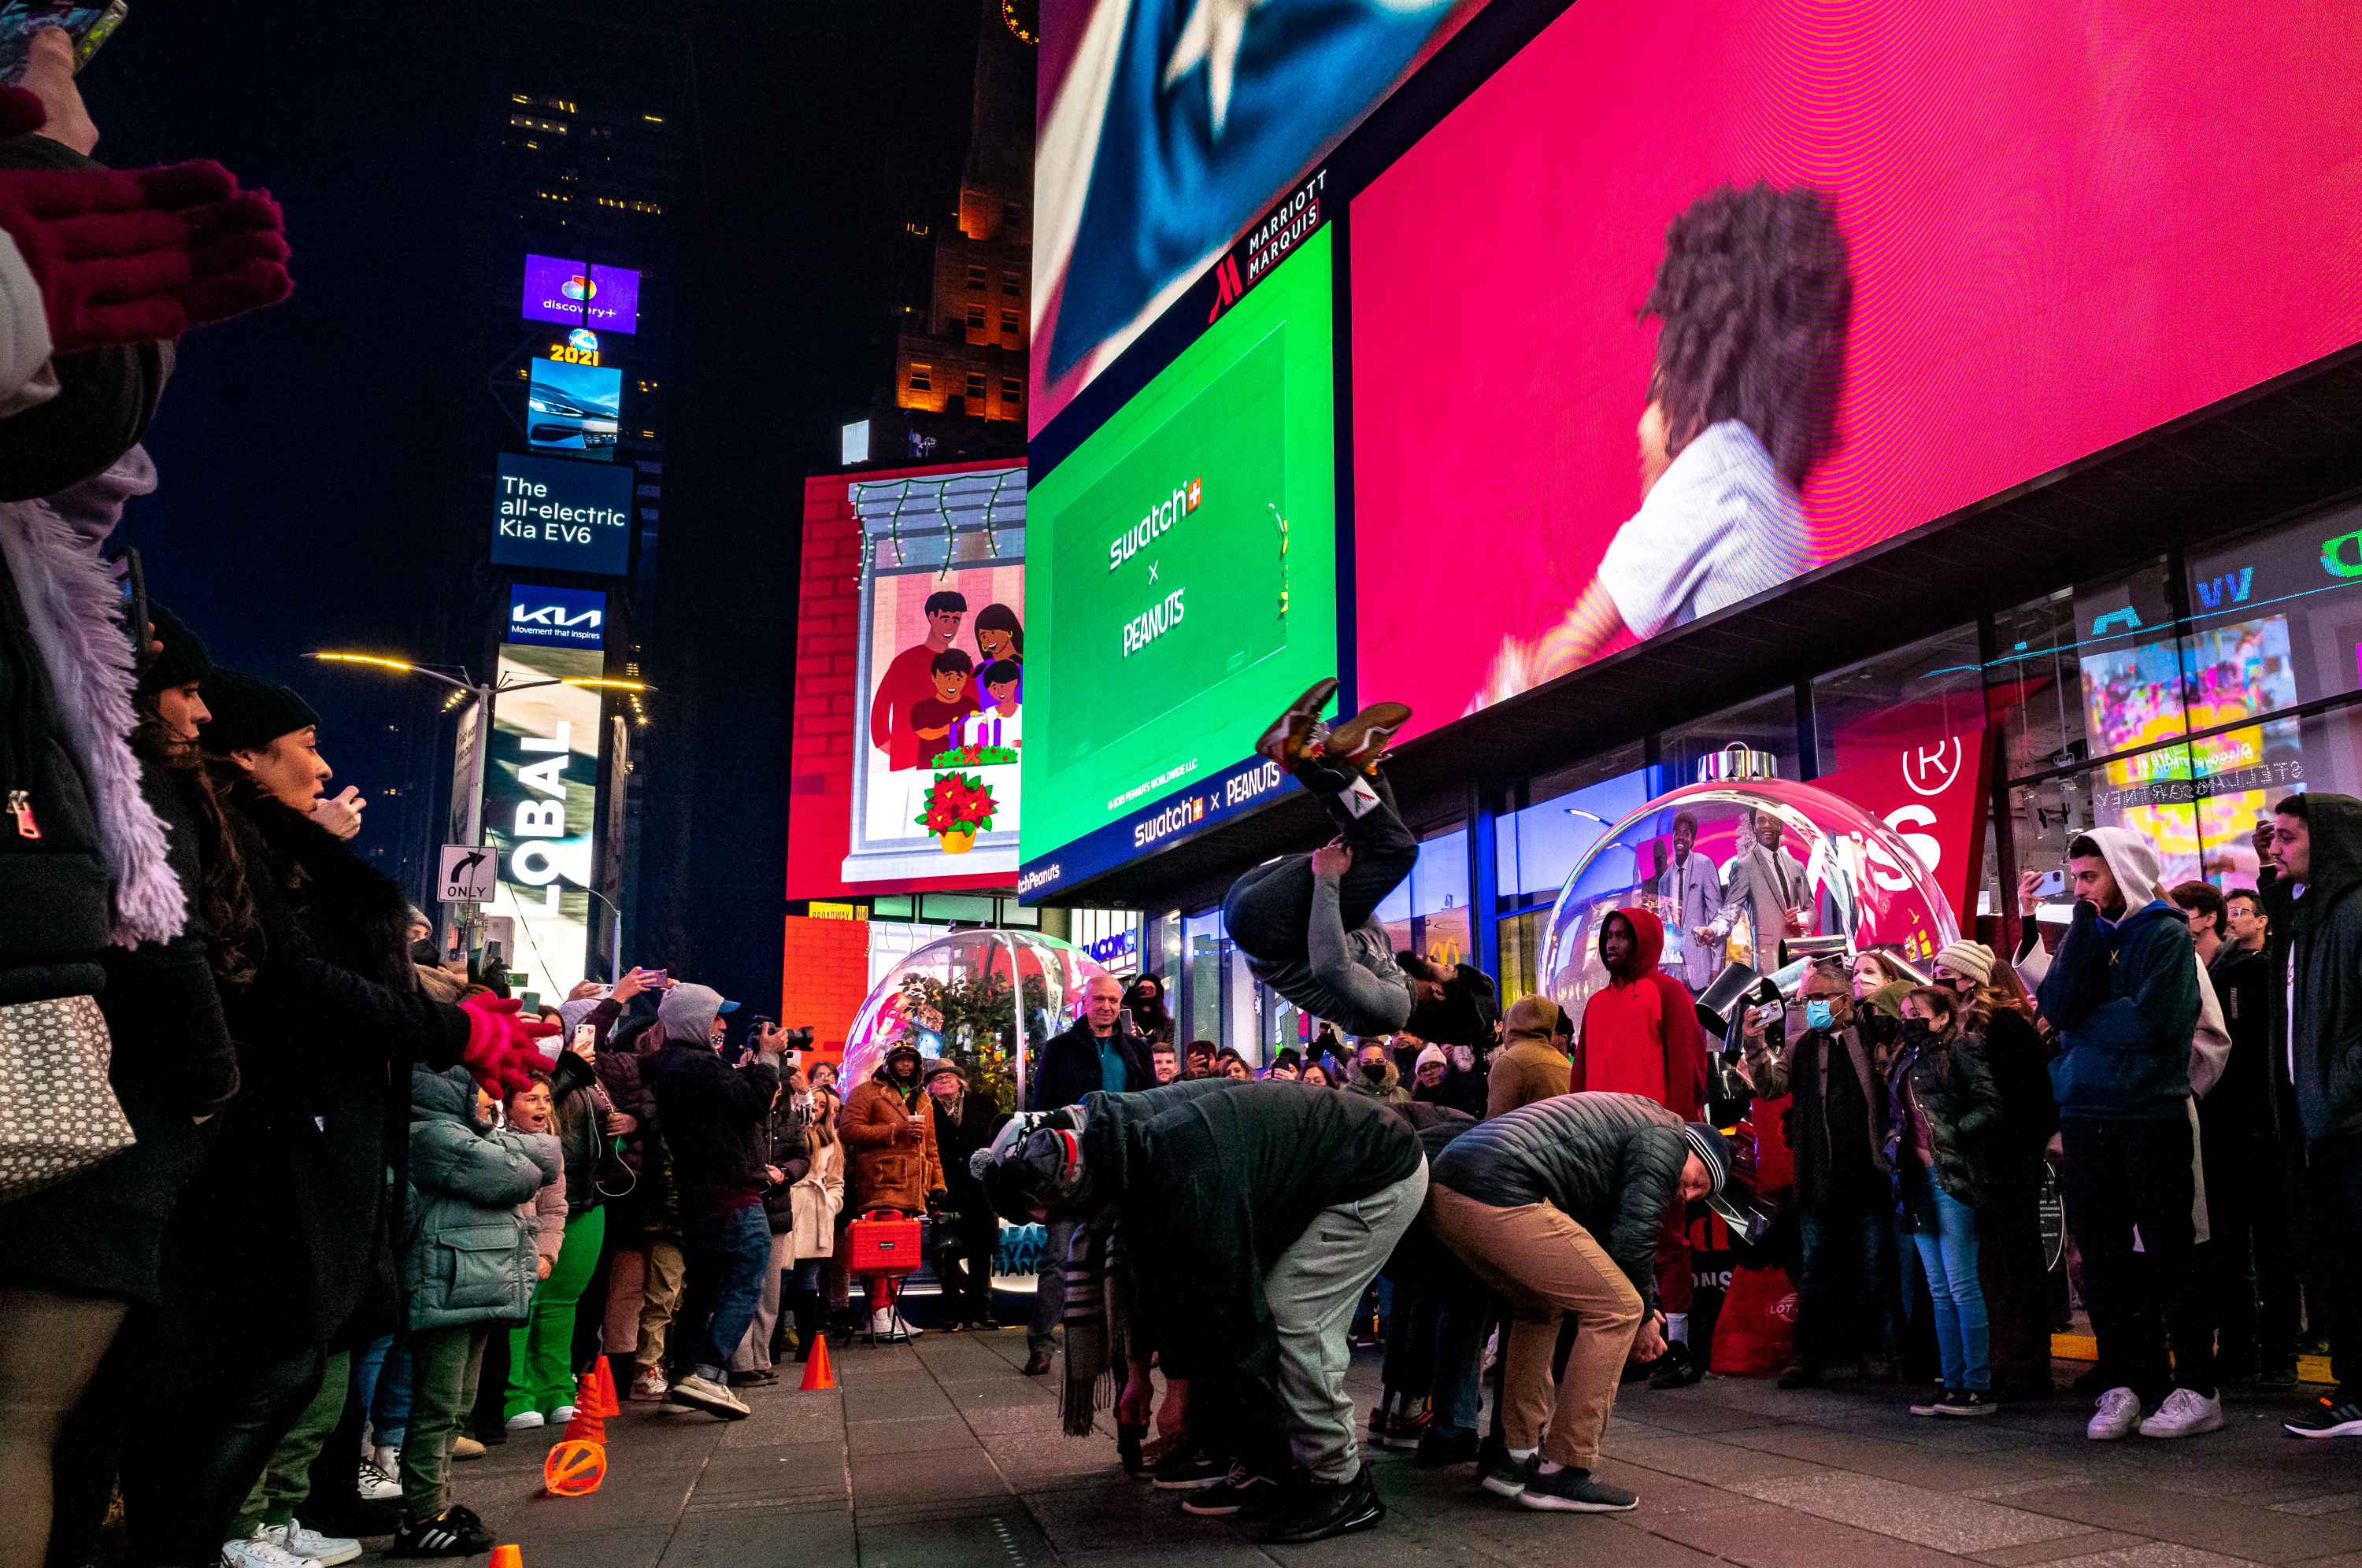
To top off the evening, I walked one block west to Times Square. An audacious display of lights regardless of time of year, this temple to in-your-face advertising is also home to street performers and tourist fodder.
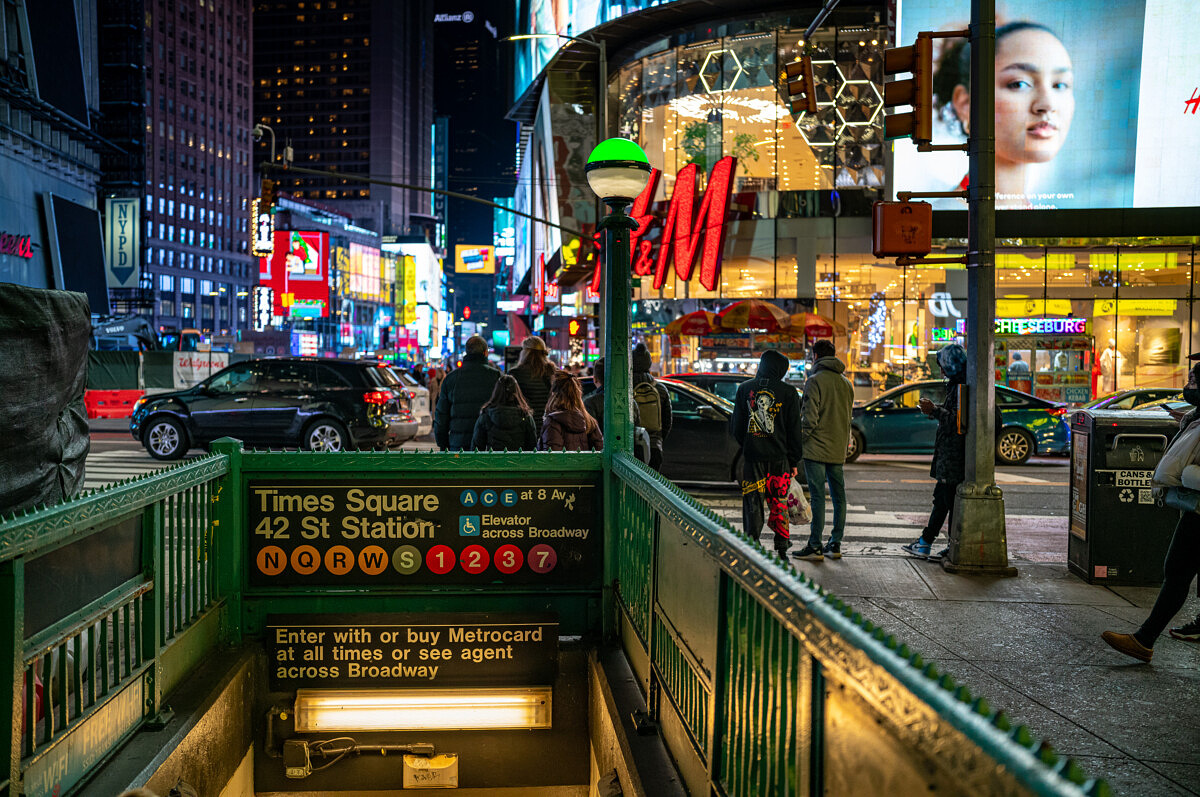
1/320th sec @ f/2.8, ISO 400
One such troupe was putting on their nightly routine for an impressively large audience. After waiting to photograph the grand finale where one of the acrobatic performers would jump and flip over six people, which I captured employing some high-speed burst shooting, it was time to head back to the hotel and rest up for the next day.
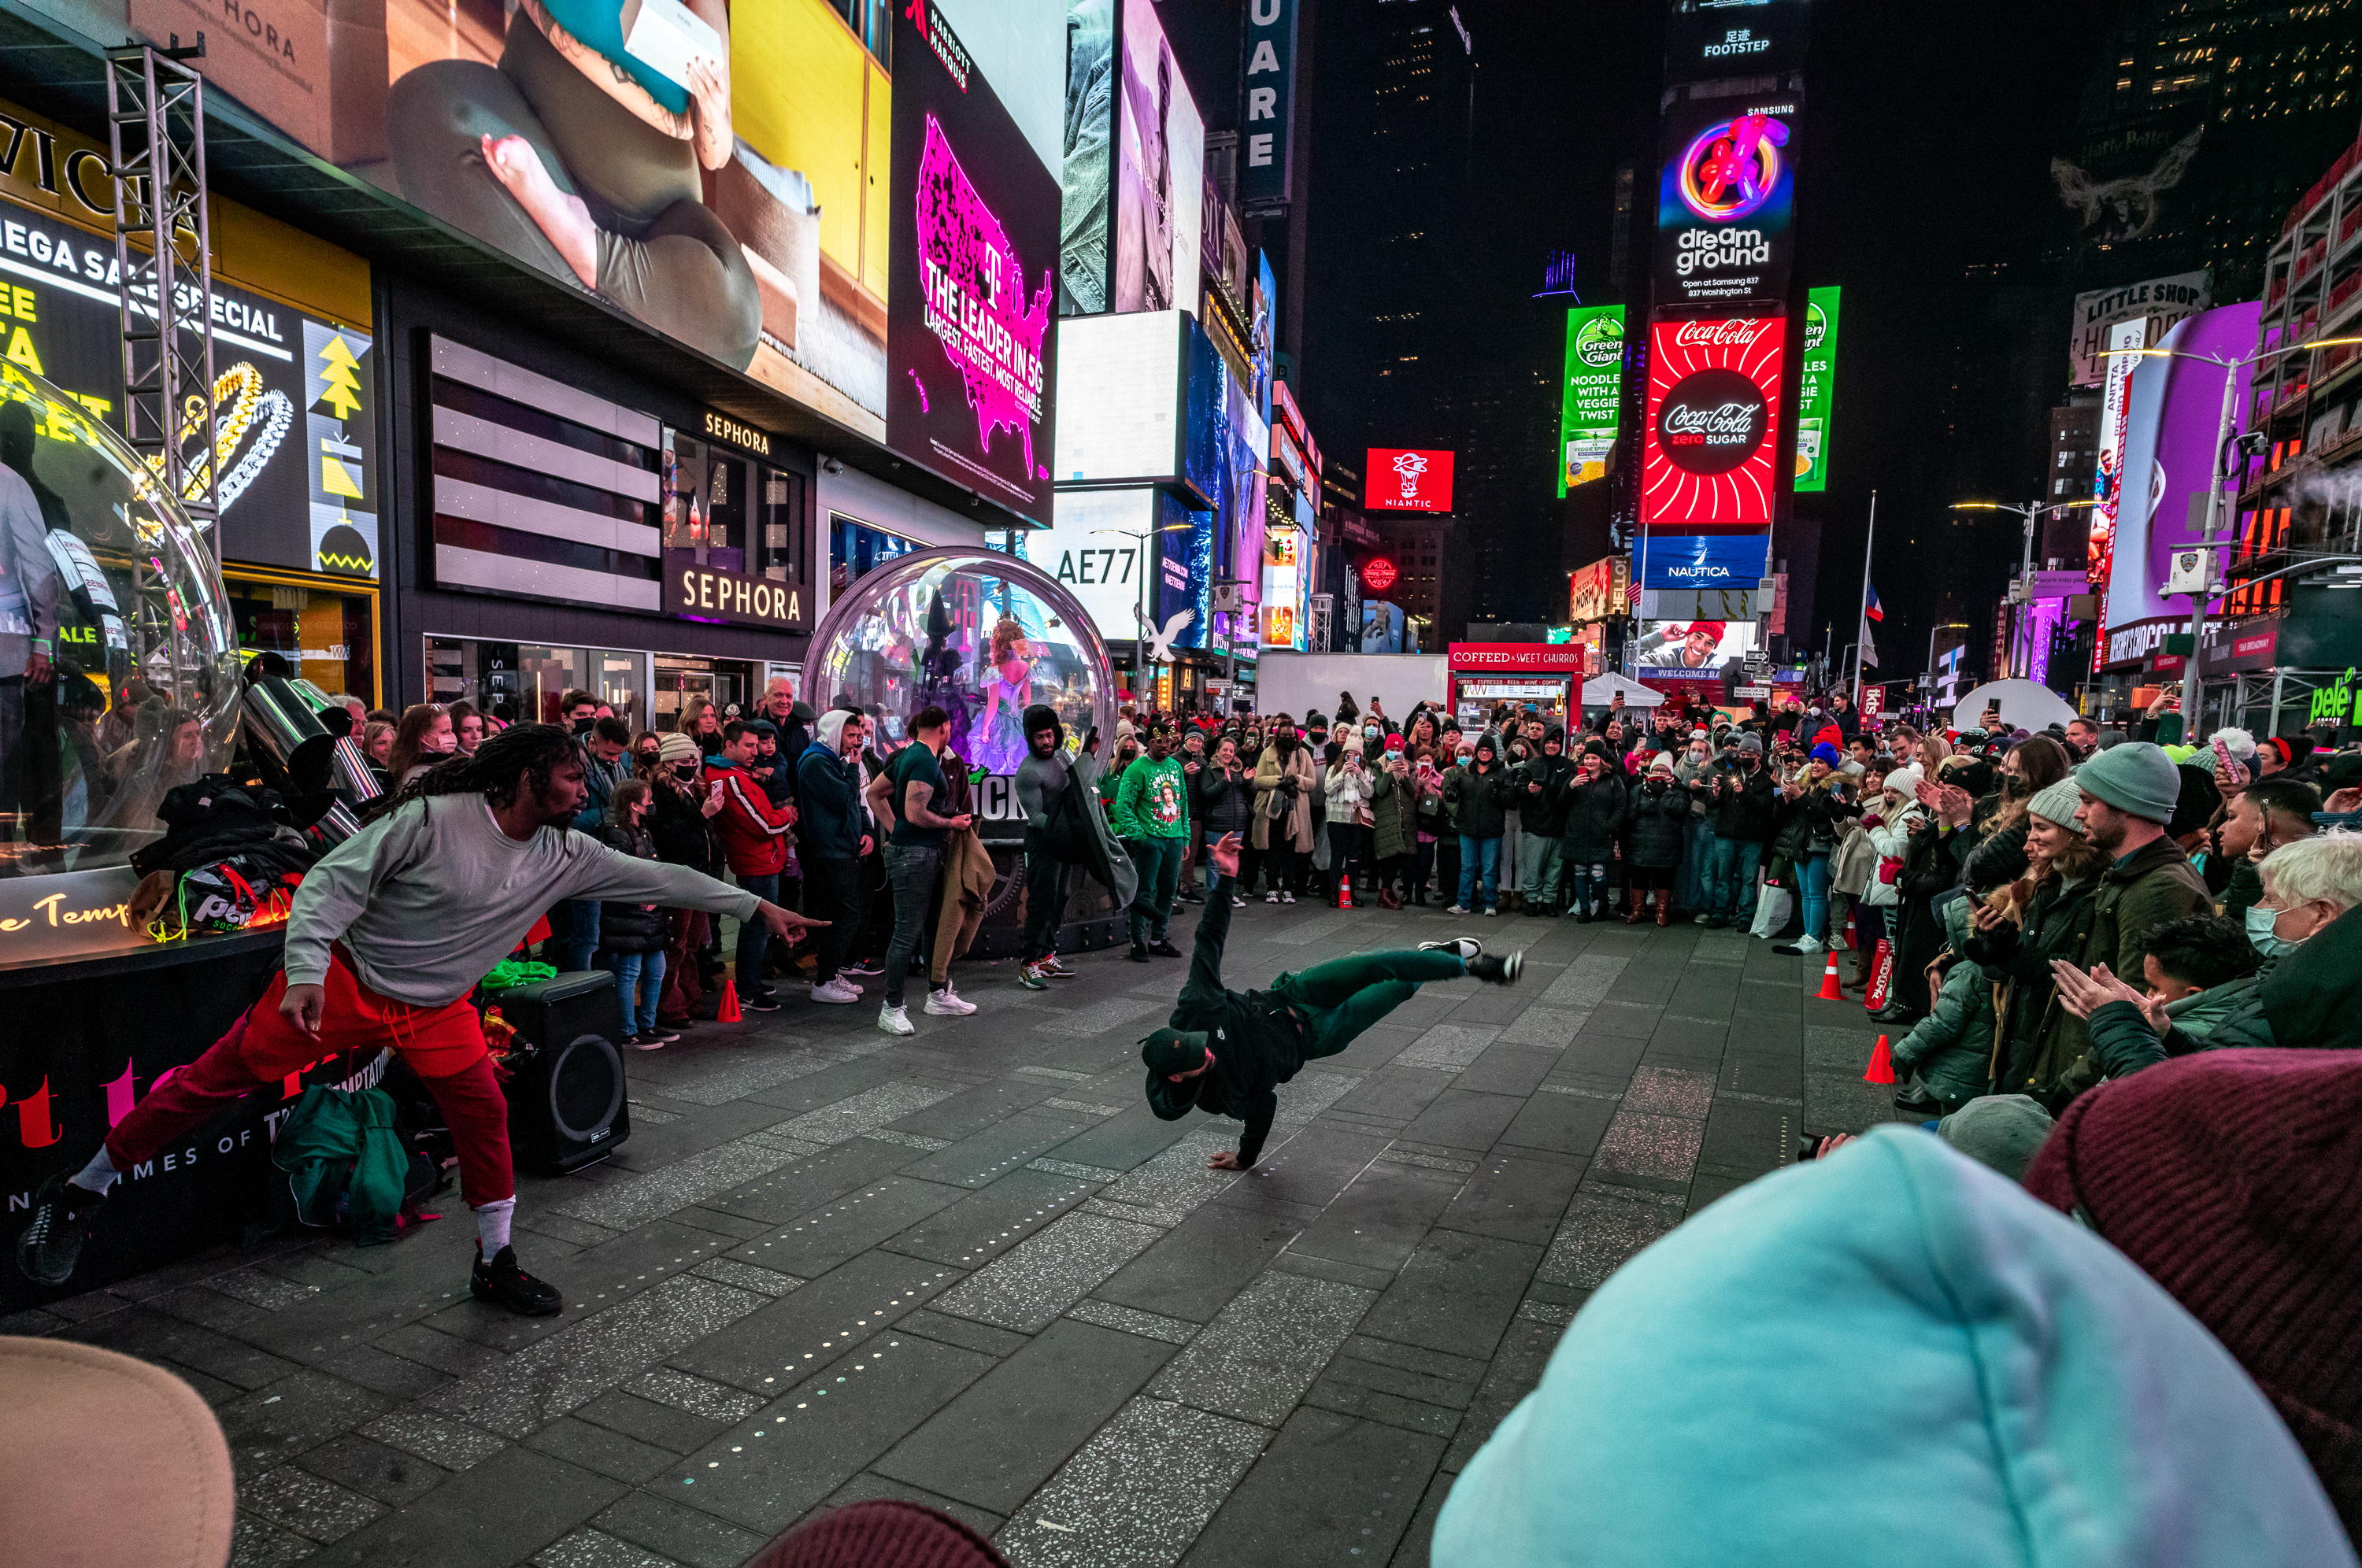
1/320th sec @ f/8 ISO 1250
1/320th sec @ f/8 ISO 800
Even after four or five more hours of shooting, the battery still had some fight in it. I hadn’t been back to my hotel since leaving 12 hours earlier that morning. Sure, I cheated a bit using the power pack, but I probably could have covered all that shooting without it. Not bad for a first day with the new camera.
1/320th sec @ f/8, ISO 3200
1/320th sec @ f/4, ISO 4000
First look at the M11 files
Of course, I couldn’t shoot 500 pictures with a new camera and not peek at the results. I had let the import into Lightroom run the previous night, so bleary-eyed, I sipped at my morning coffee and dove into some of the finest image quality to ever come across my screen. The SL2 is my regular go-to and sets a ridiculously high standard for file quality. Yet, even with just preliminary and rudimentary processing, the M11 images were just mind-boggling. I was taken aback by the boldness of the night shots and their striking color rendering as well as with the subtlety of detail in pictures from Central Park with overcast light.
1/160th sec @ f/8 ISO 6400

1/320th sec @ f/2, ISO 64
Easily matching the resolution of the SL2, the M11 was able to succeed where that camera falls a bit short – high ISO. ISO 10,000 on the M11 was on par with the M10-R. With only a couple more days of playing, I pried myself away from the laptop, wiped the drool from my screen and got ready for another go-round with this awesome machine.
1/160th sec @ f/8, ISO 10000
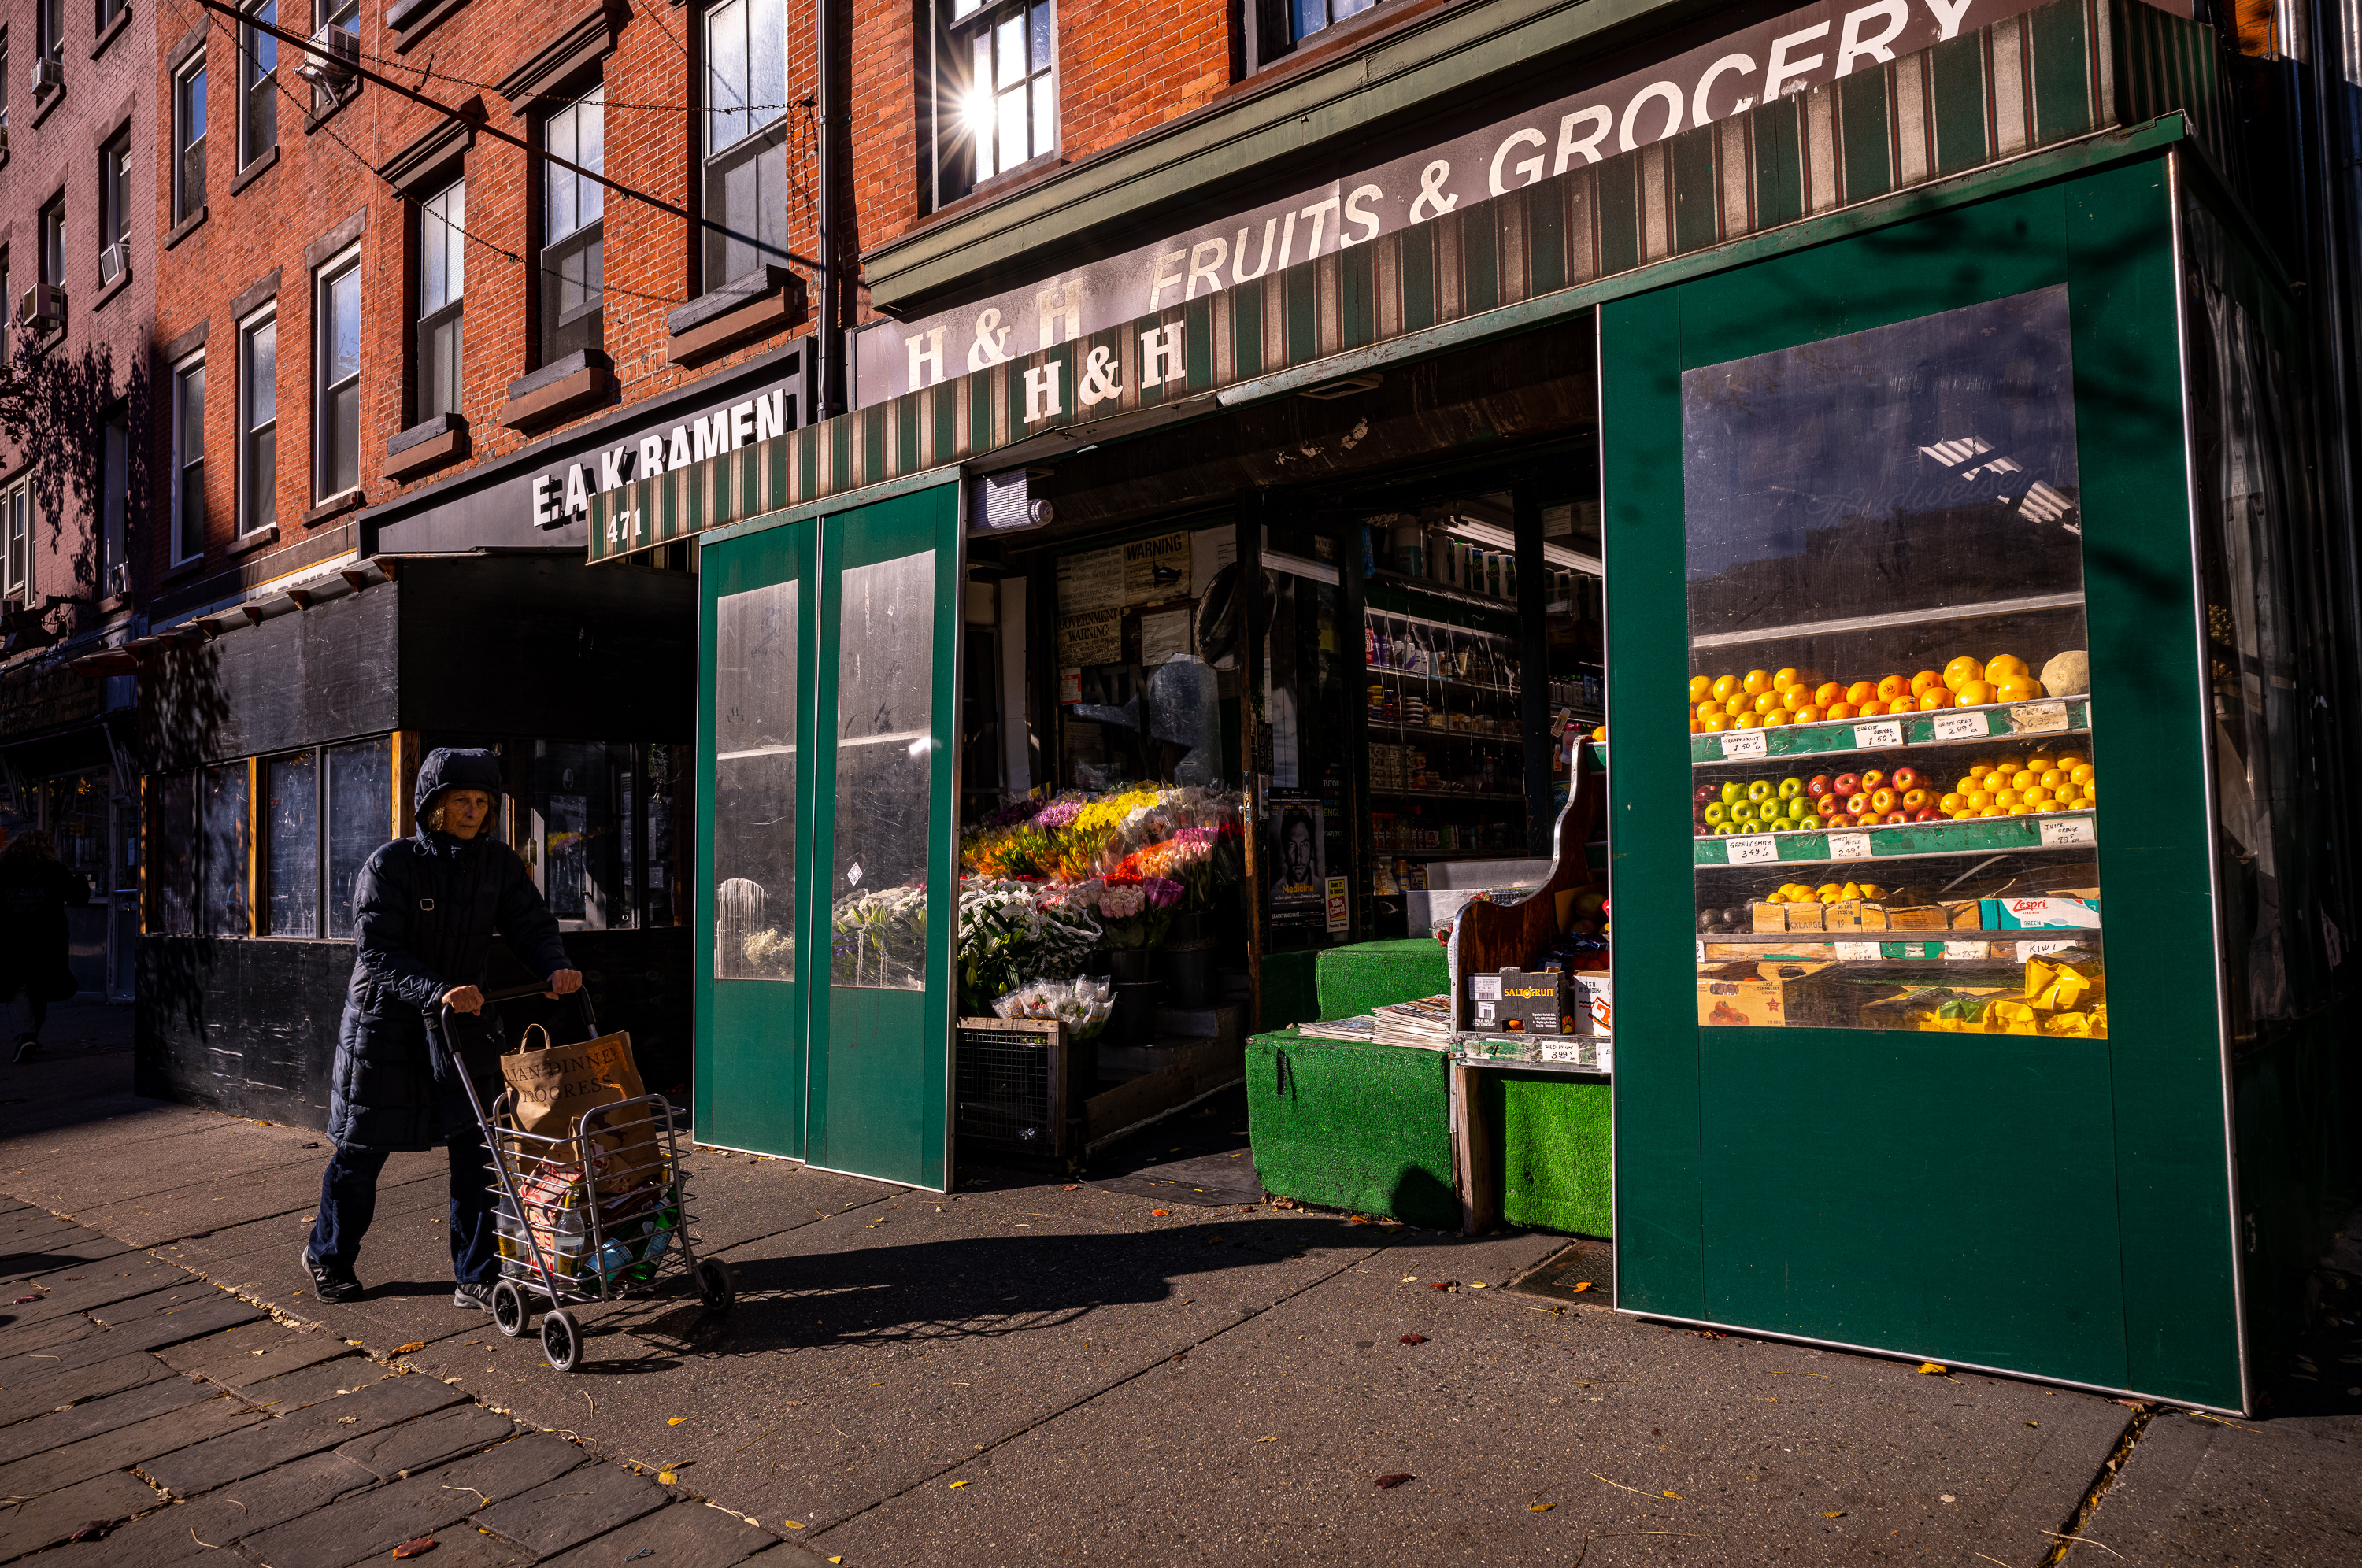
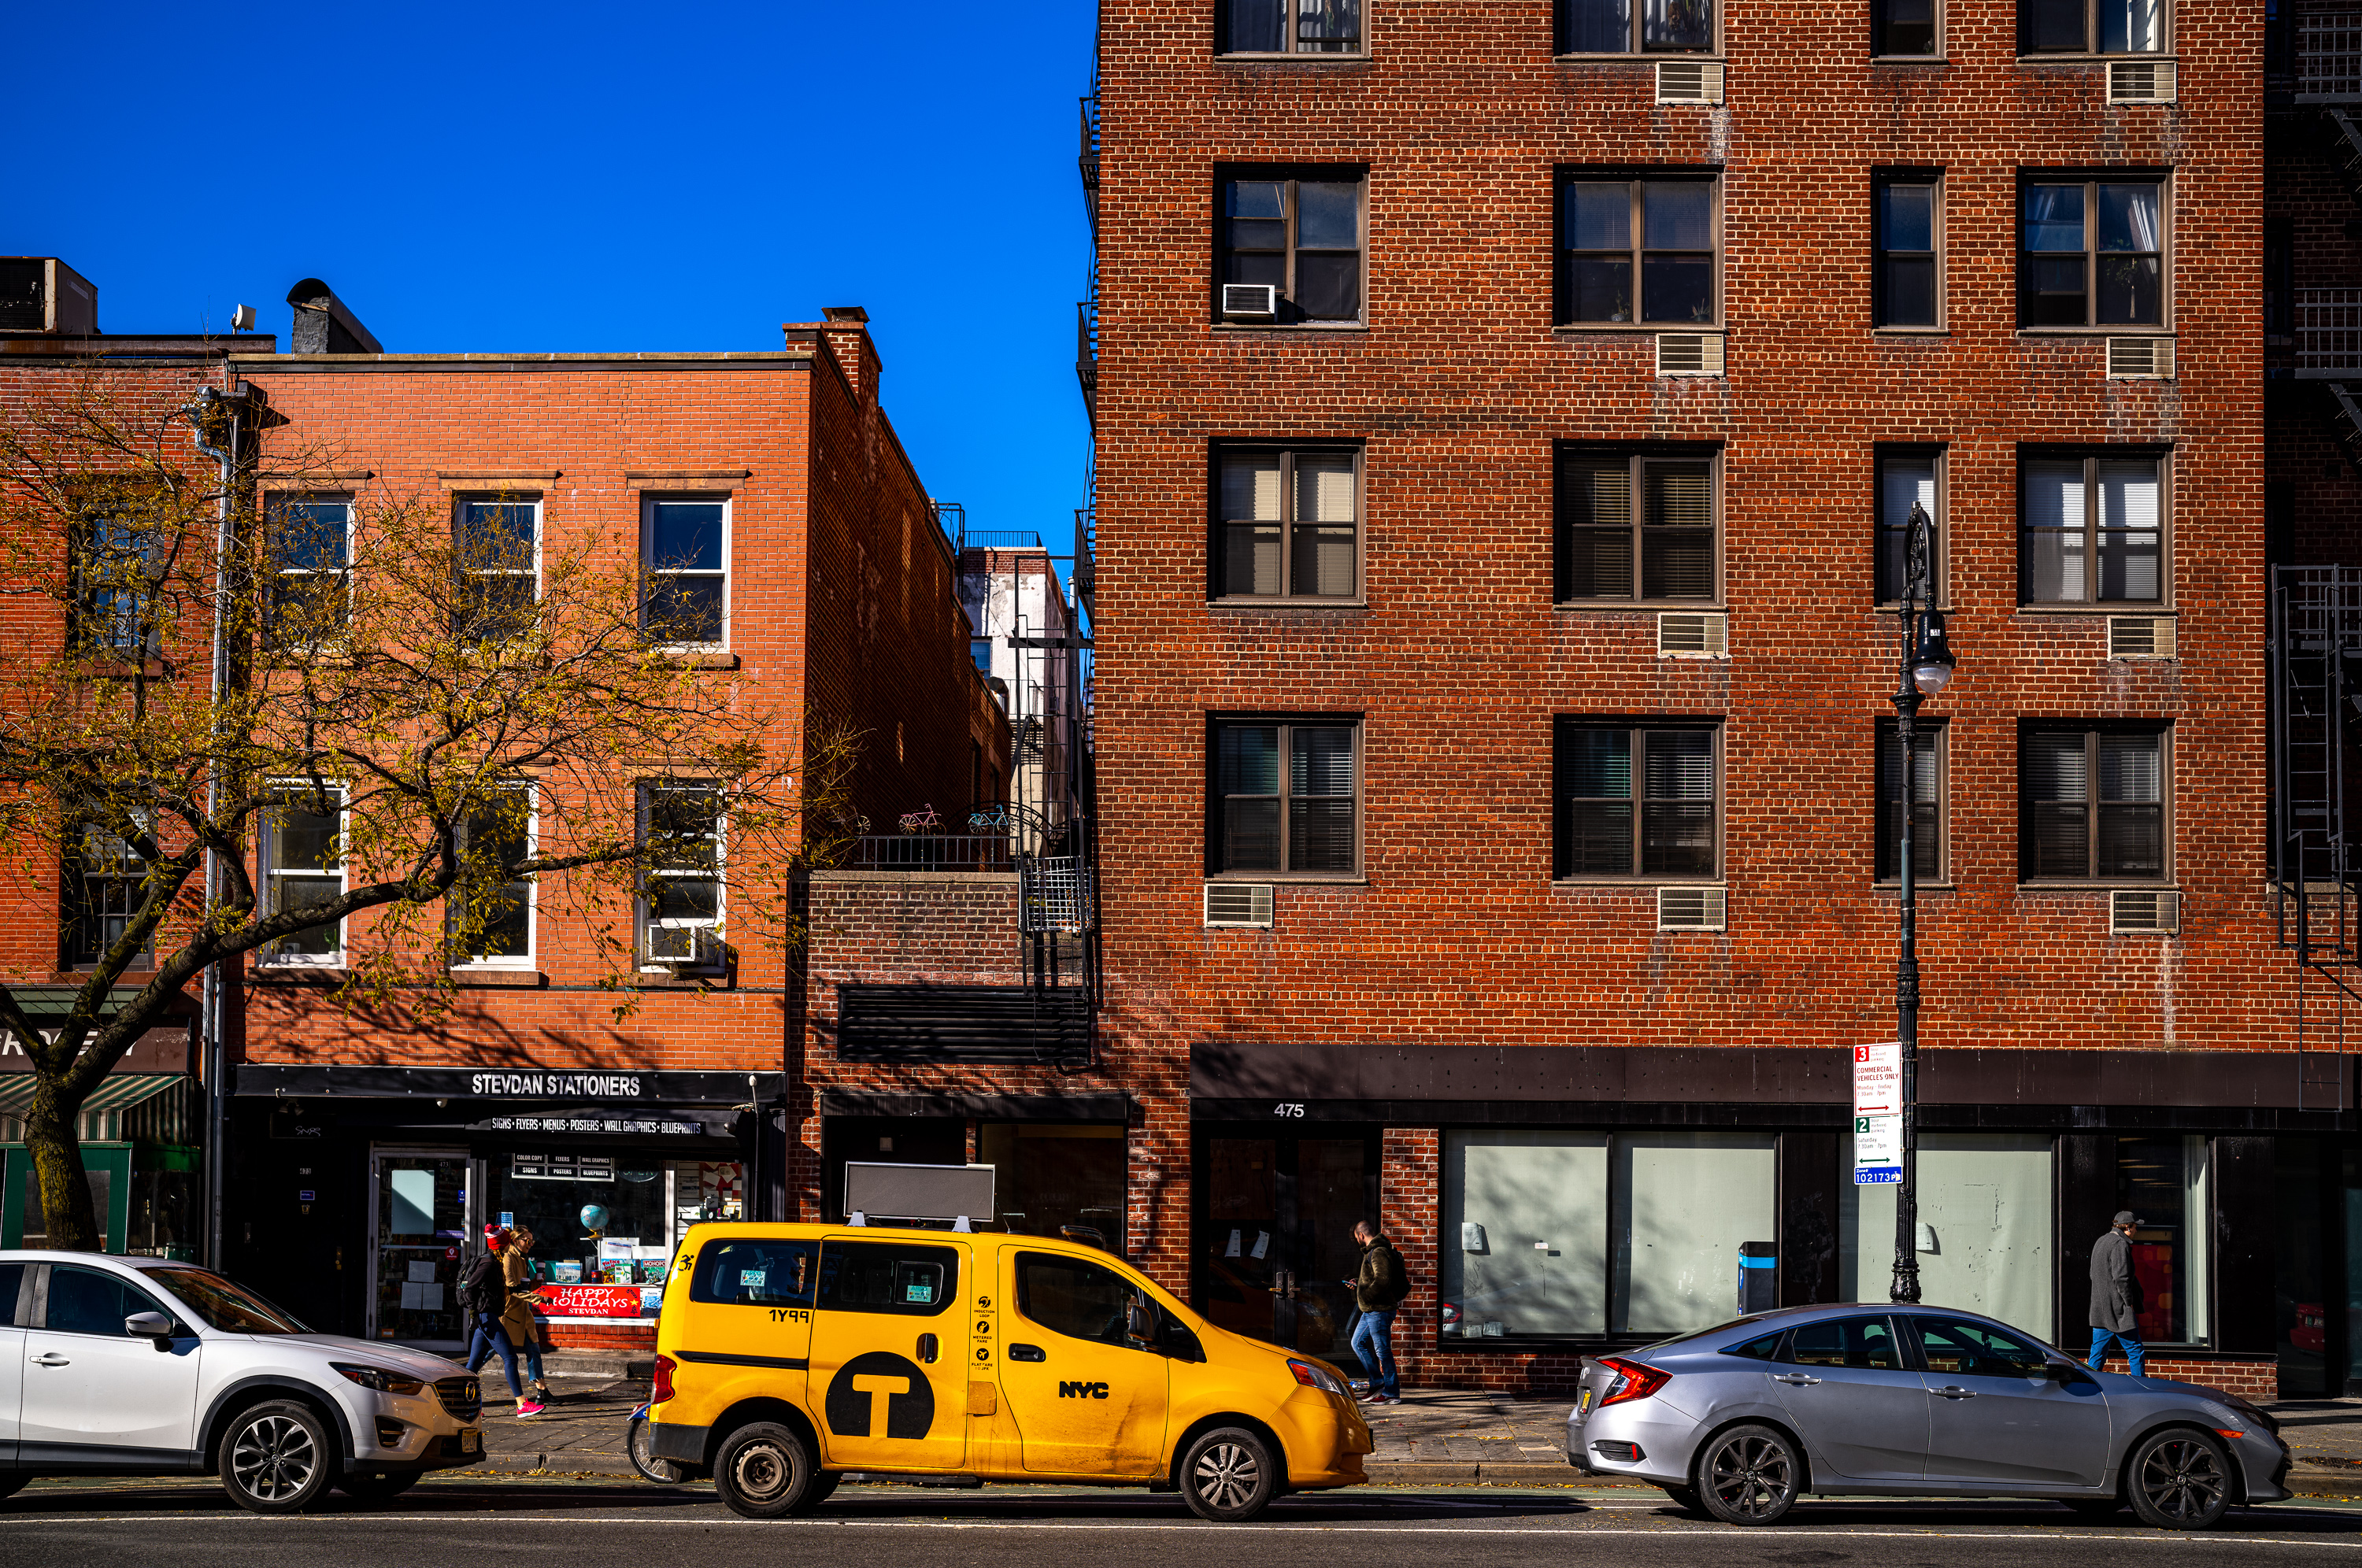
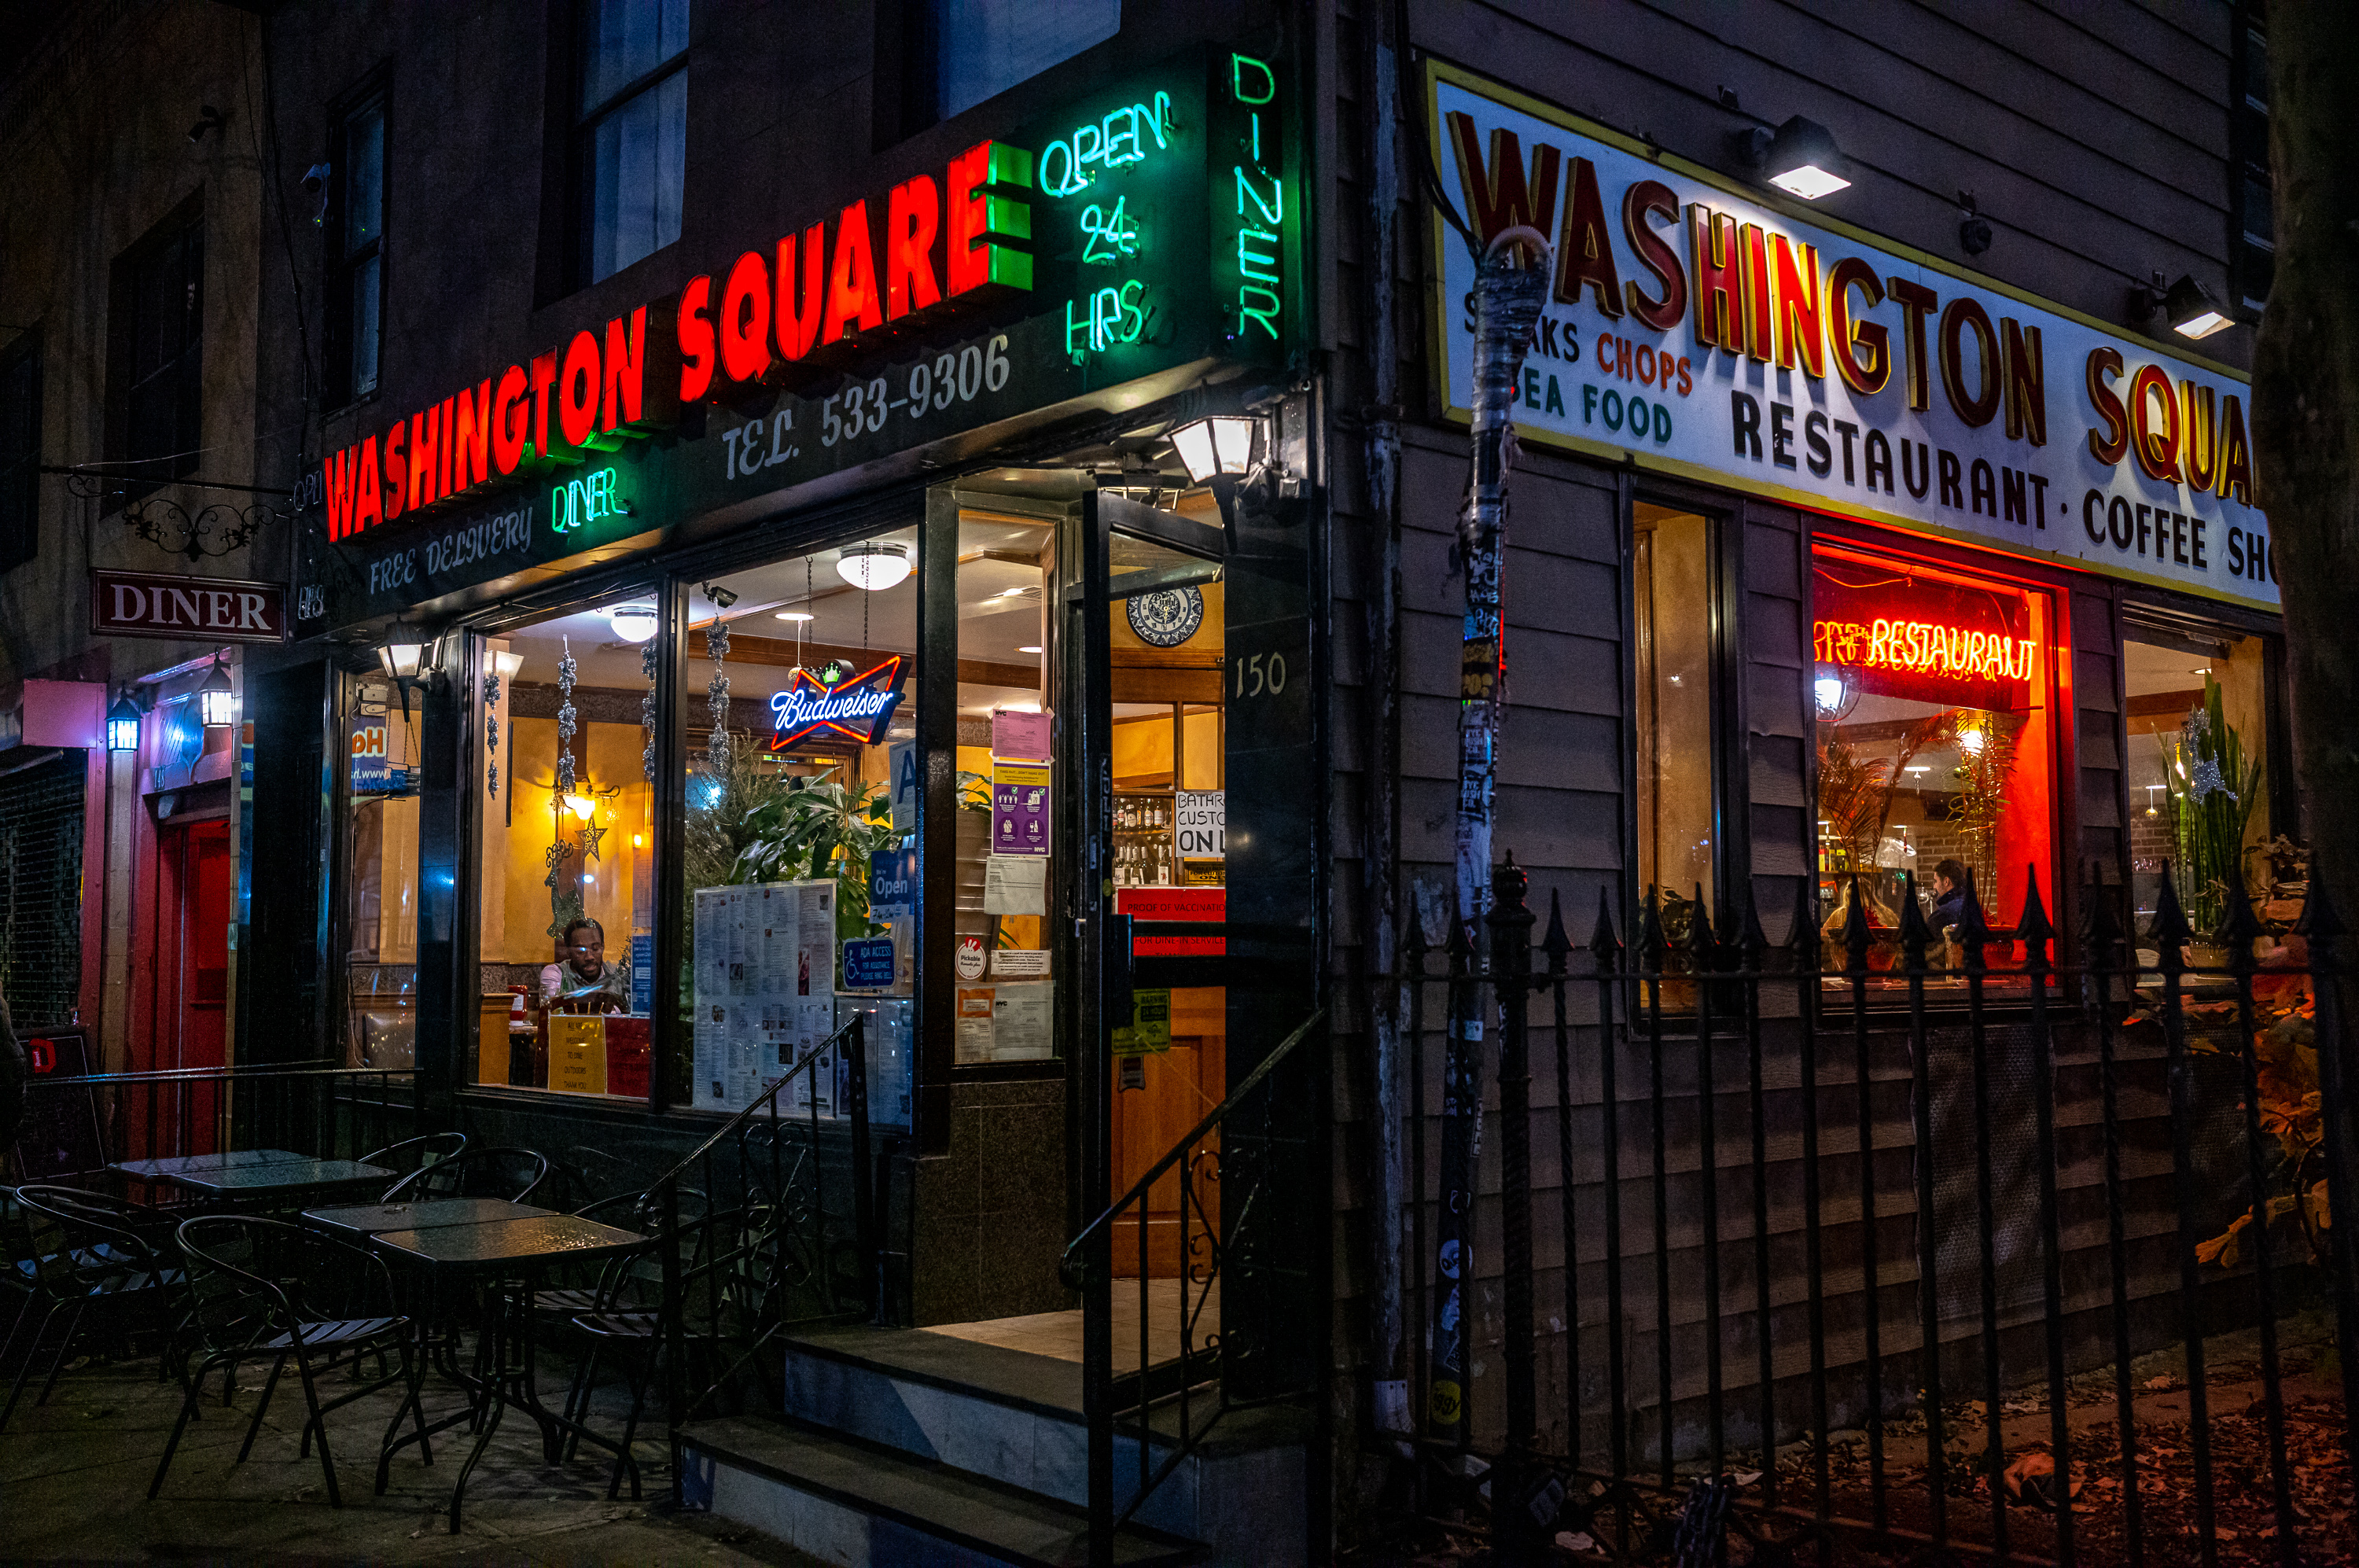
The charm of the West Village
New York is a city of neighborhoods, each with its own character…and characters. Just stay in Midtown and you’ll be missing so much. One of my favorite photographic spots is Greenwich Village and even more so, the West Village.
1/320th sec @ f/5.6, ISO 1250
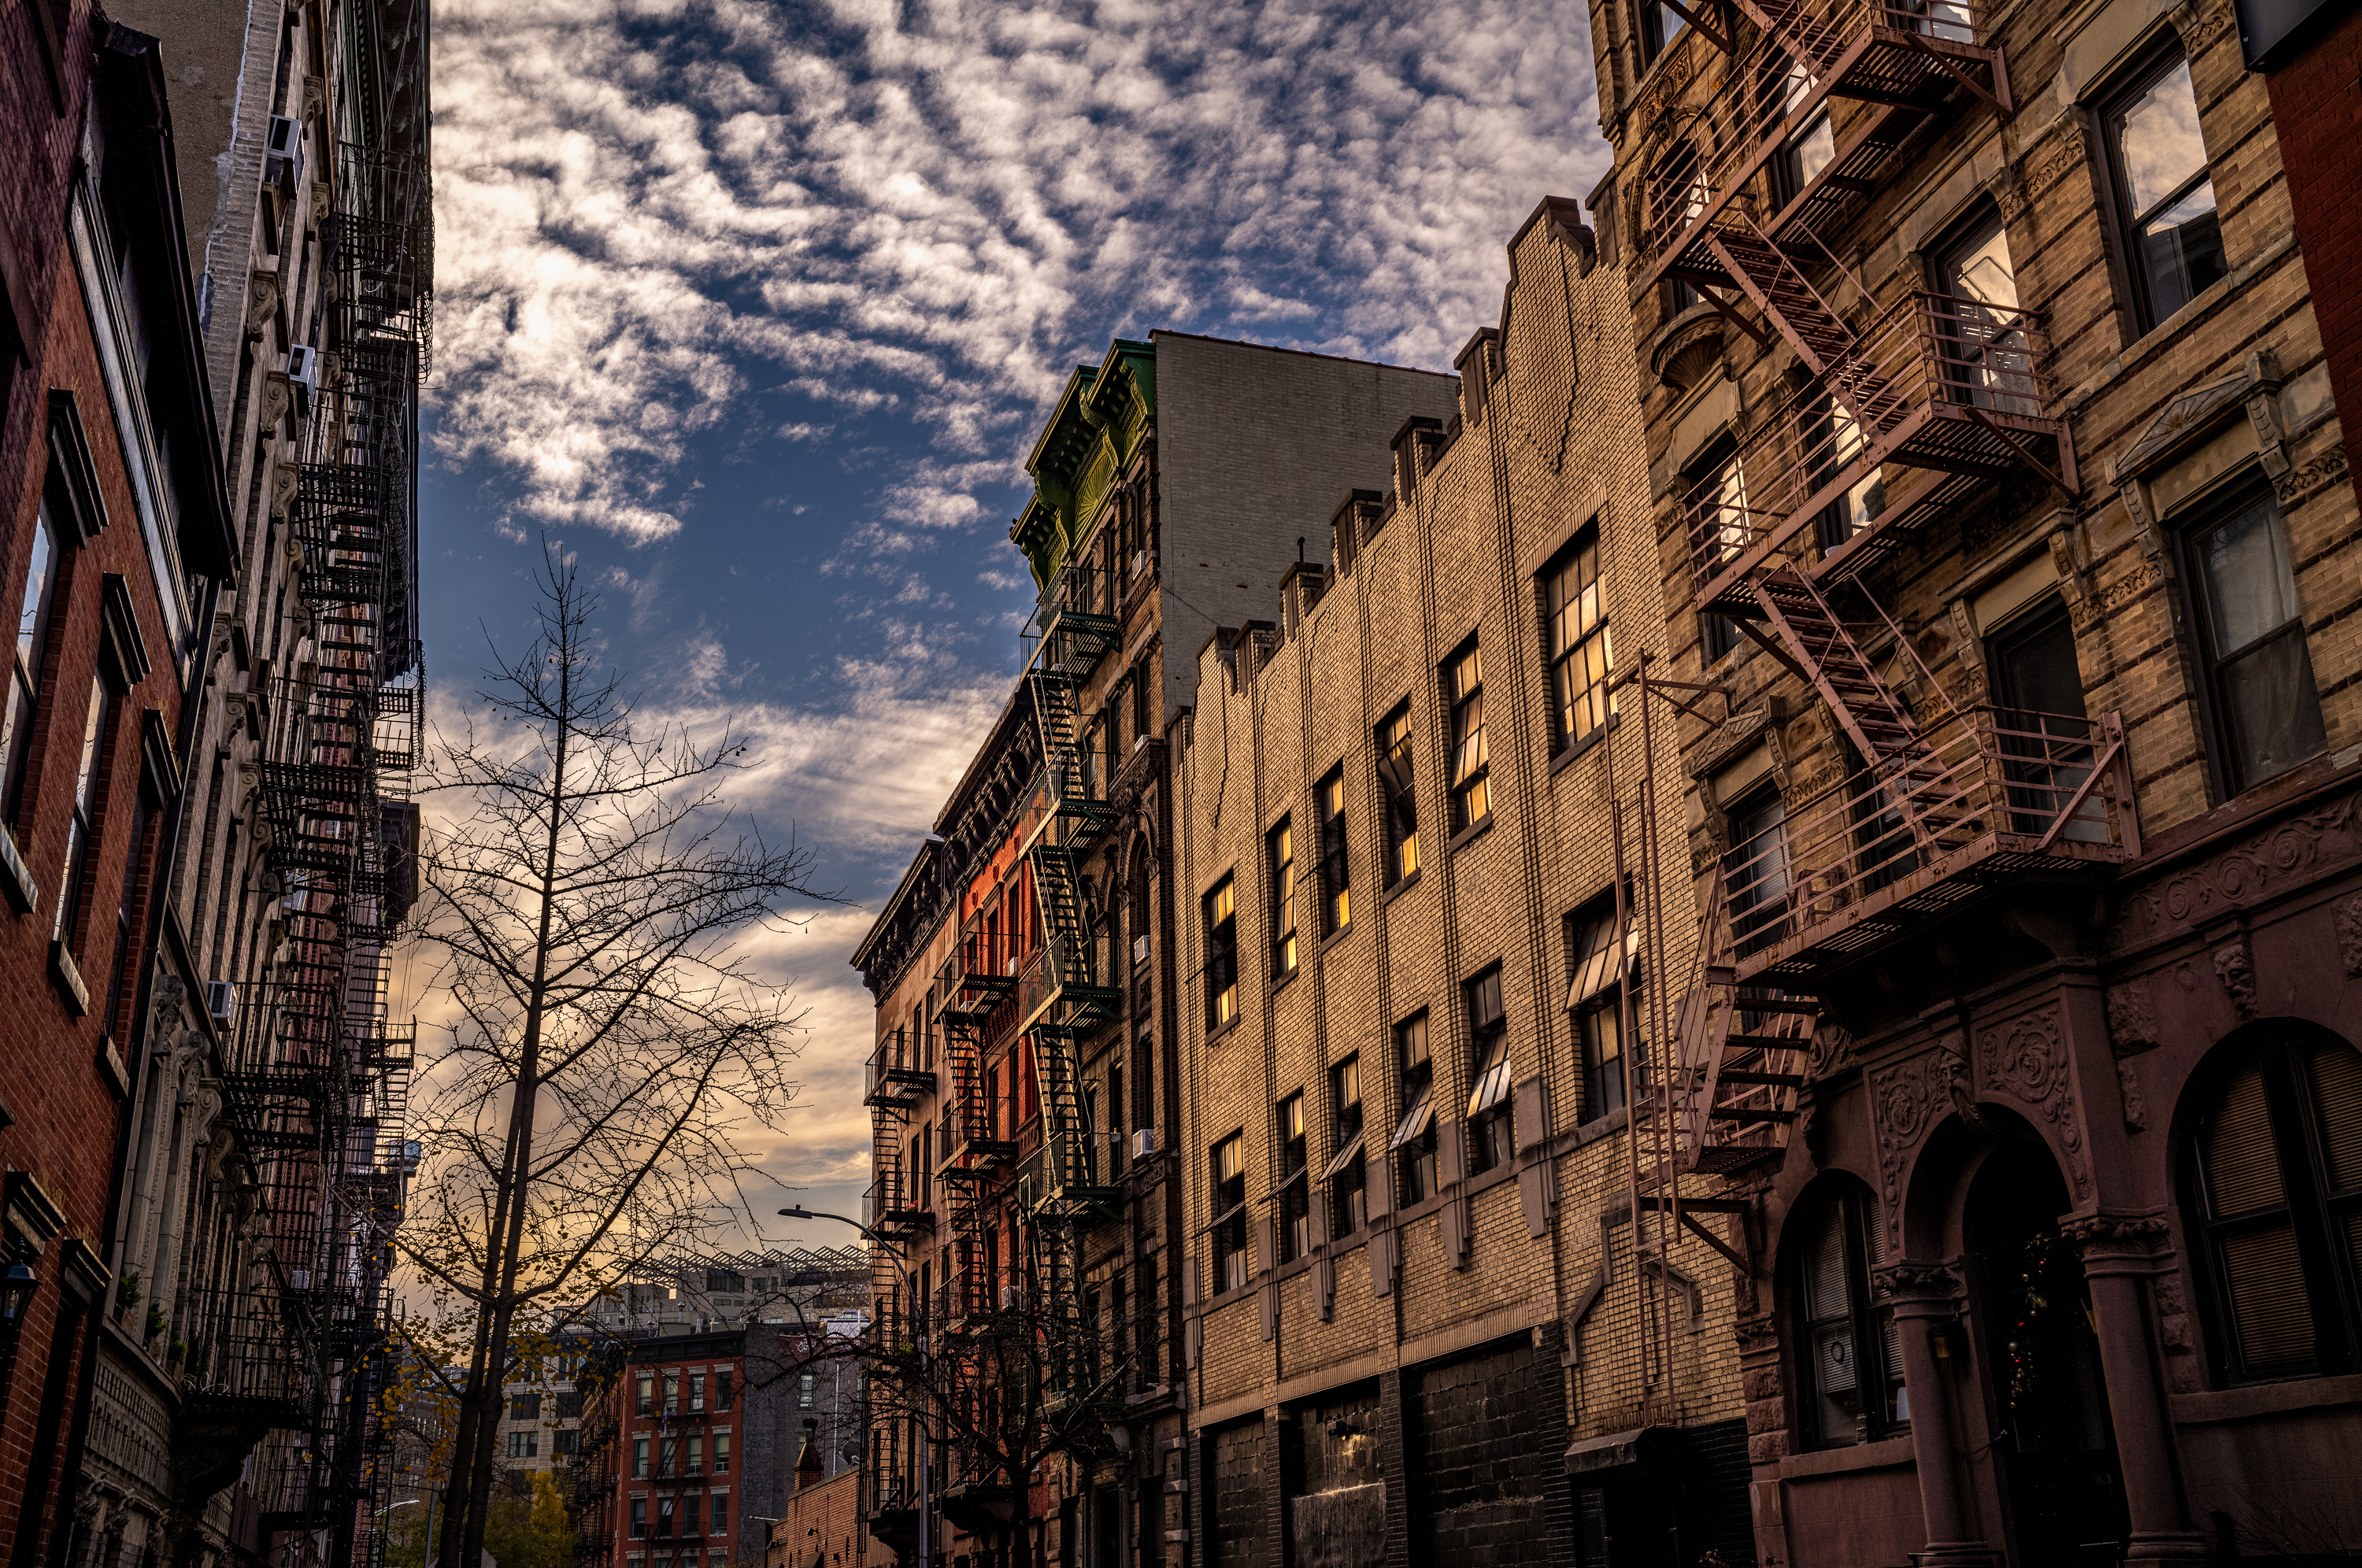
Walk around the narrow tree-line streets and you could easily mistake it for, well, a village. No skyscrapers here, just low-rise brick apartment buildings, eclectic shopfronts and cute cafes. Hard to believe such a different New York is just fifteen minutes by train.
1/320th sec @ f/2, ISO 320
1/320th sec @ f/8, ISO 800
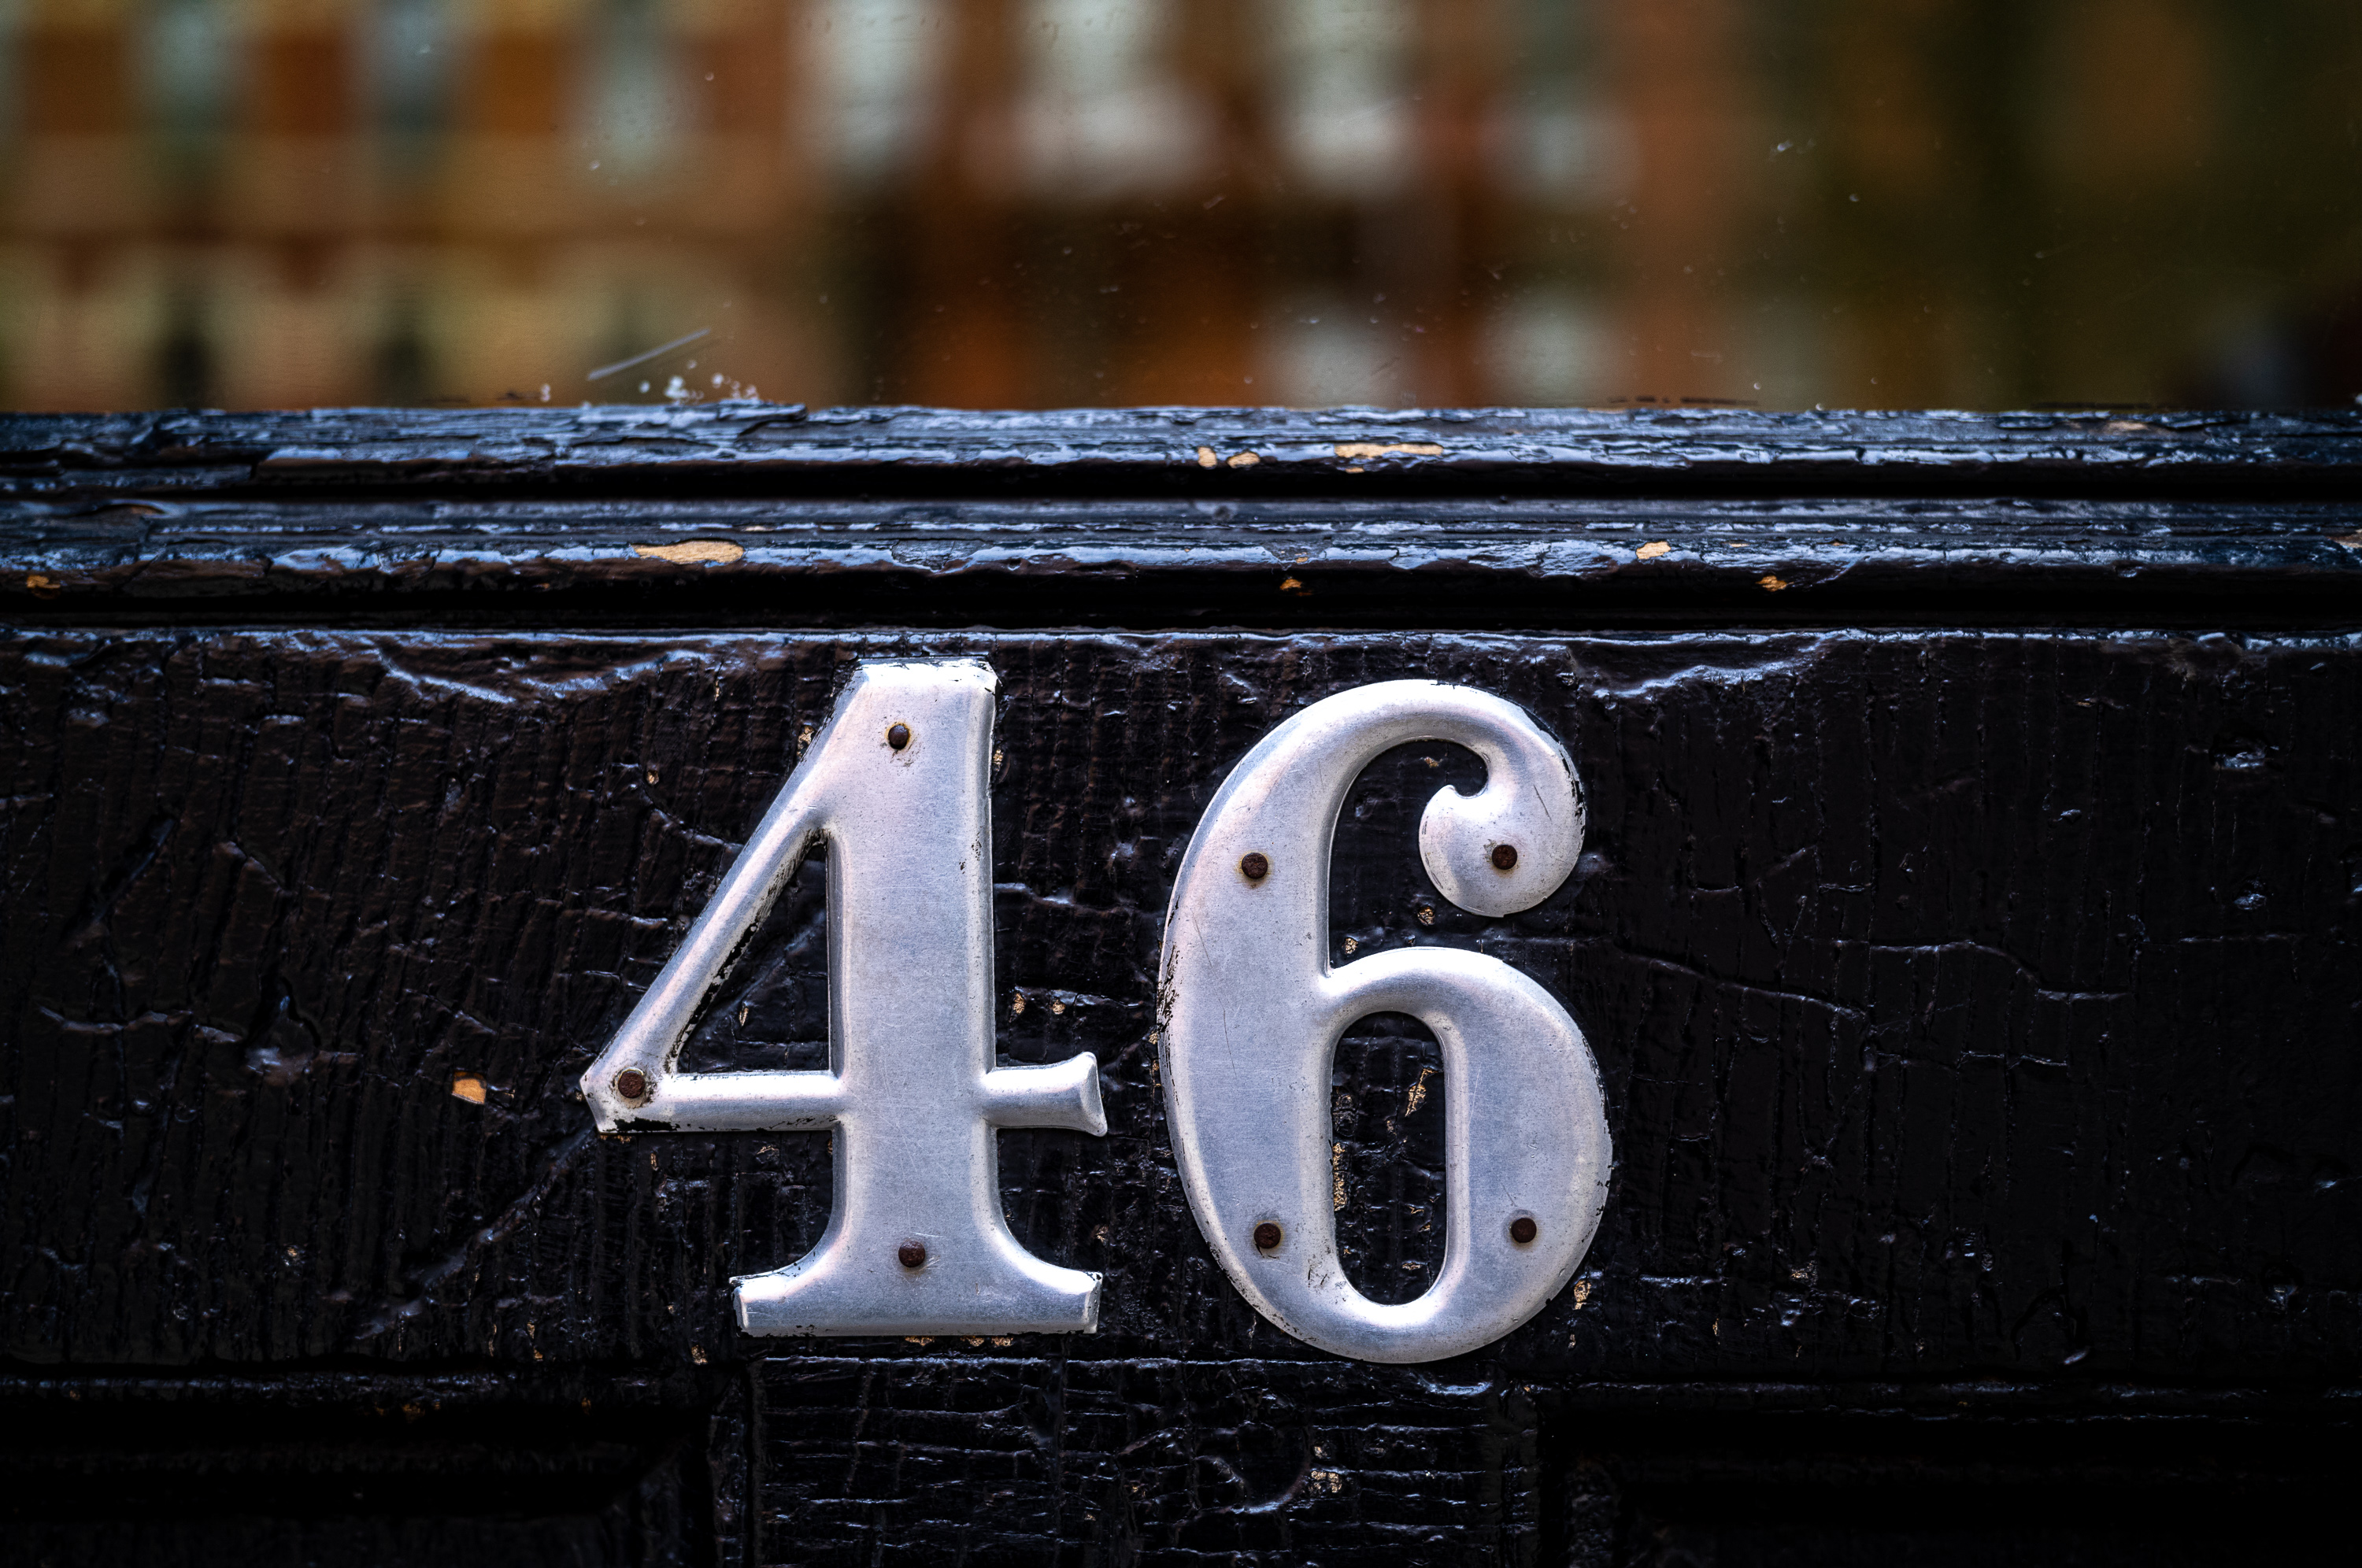
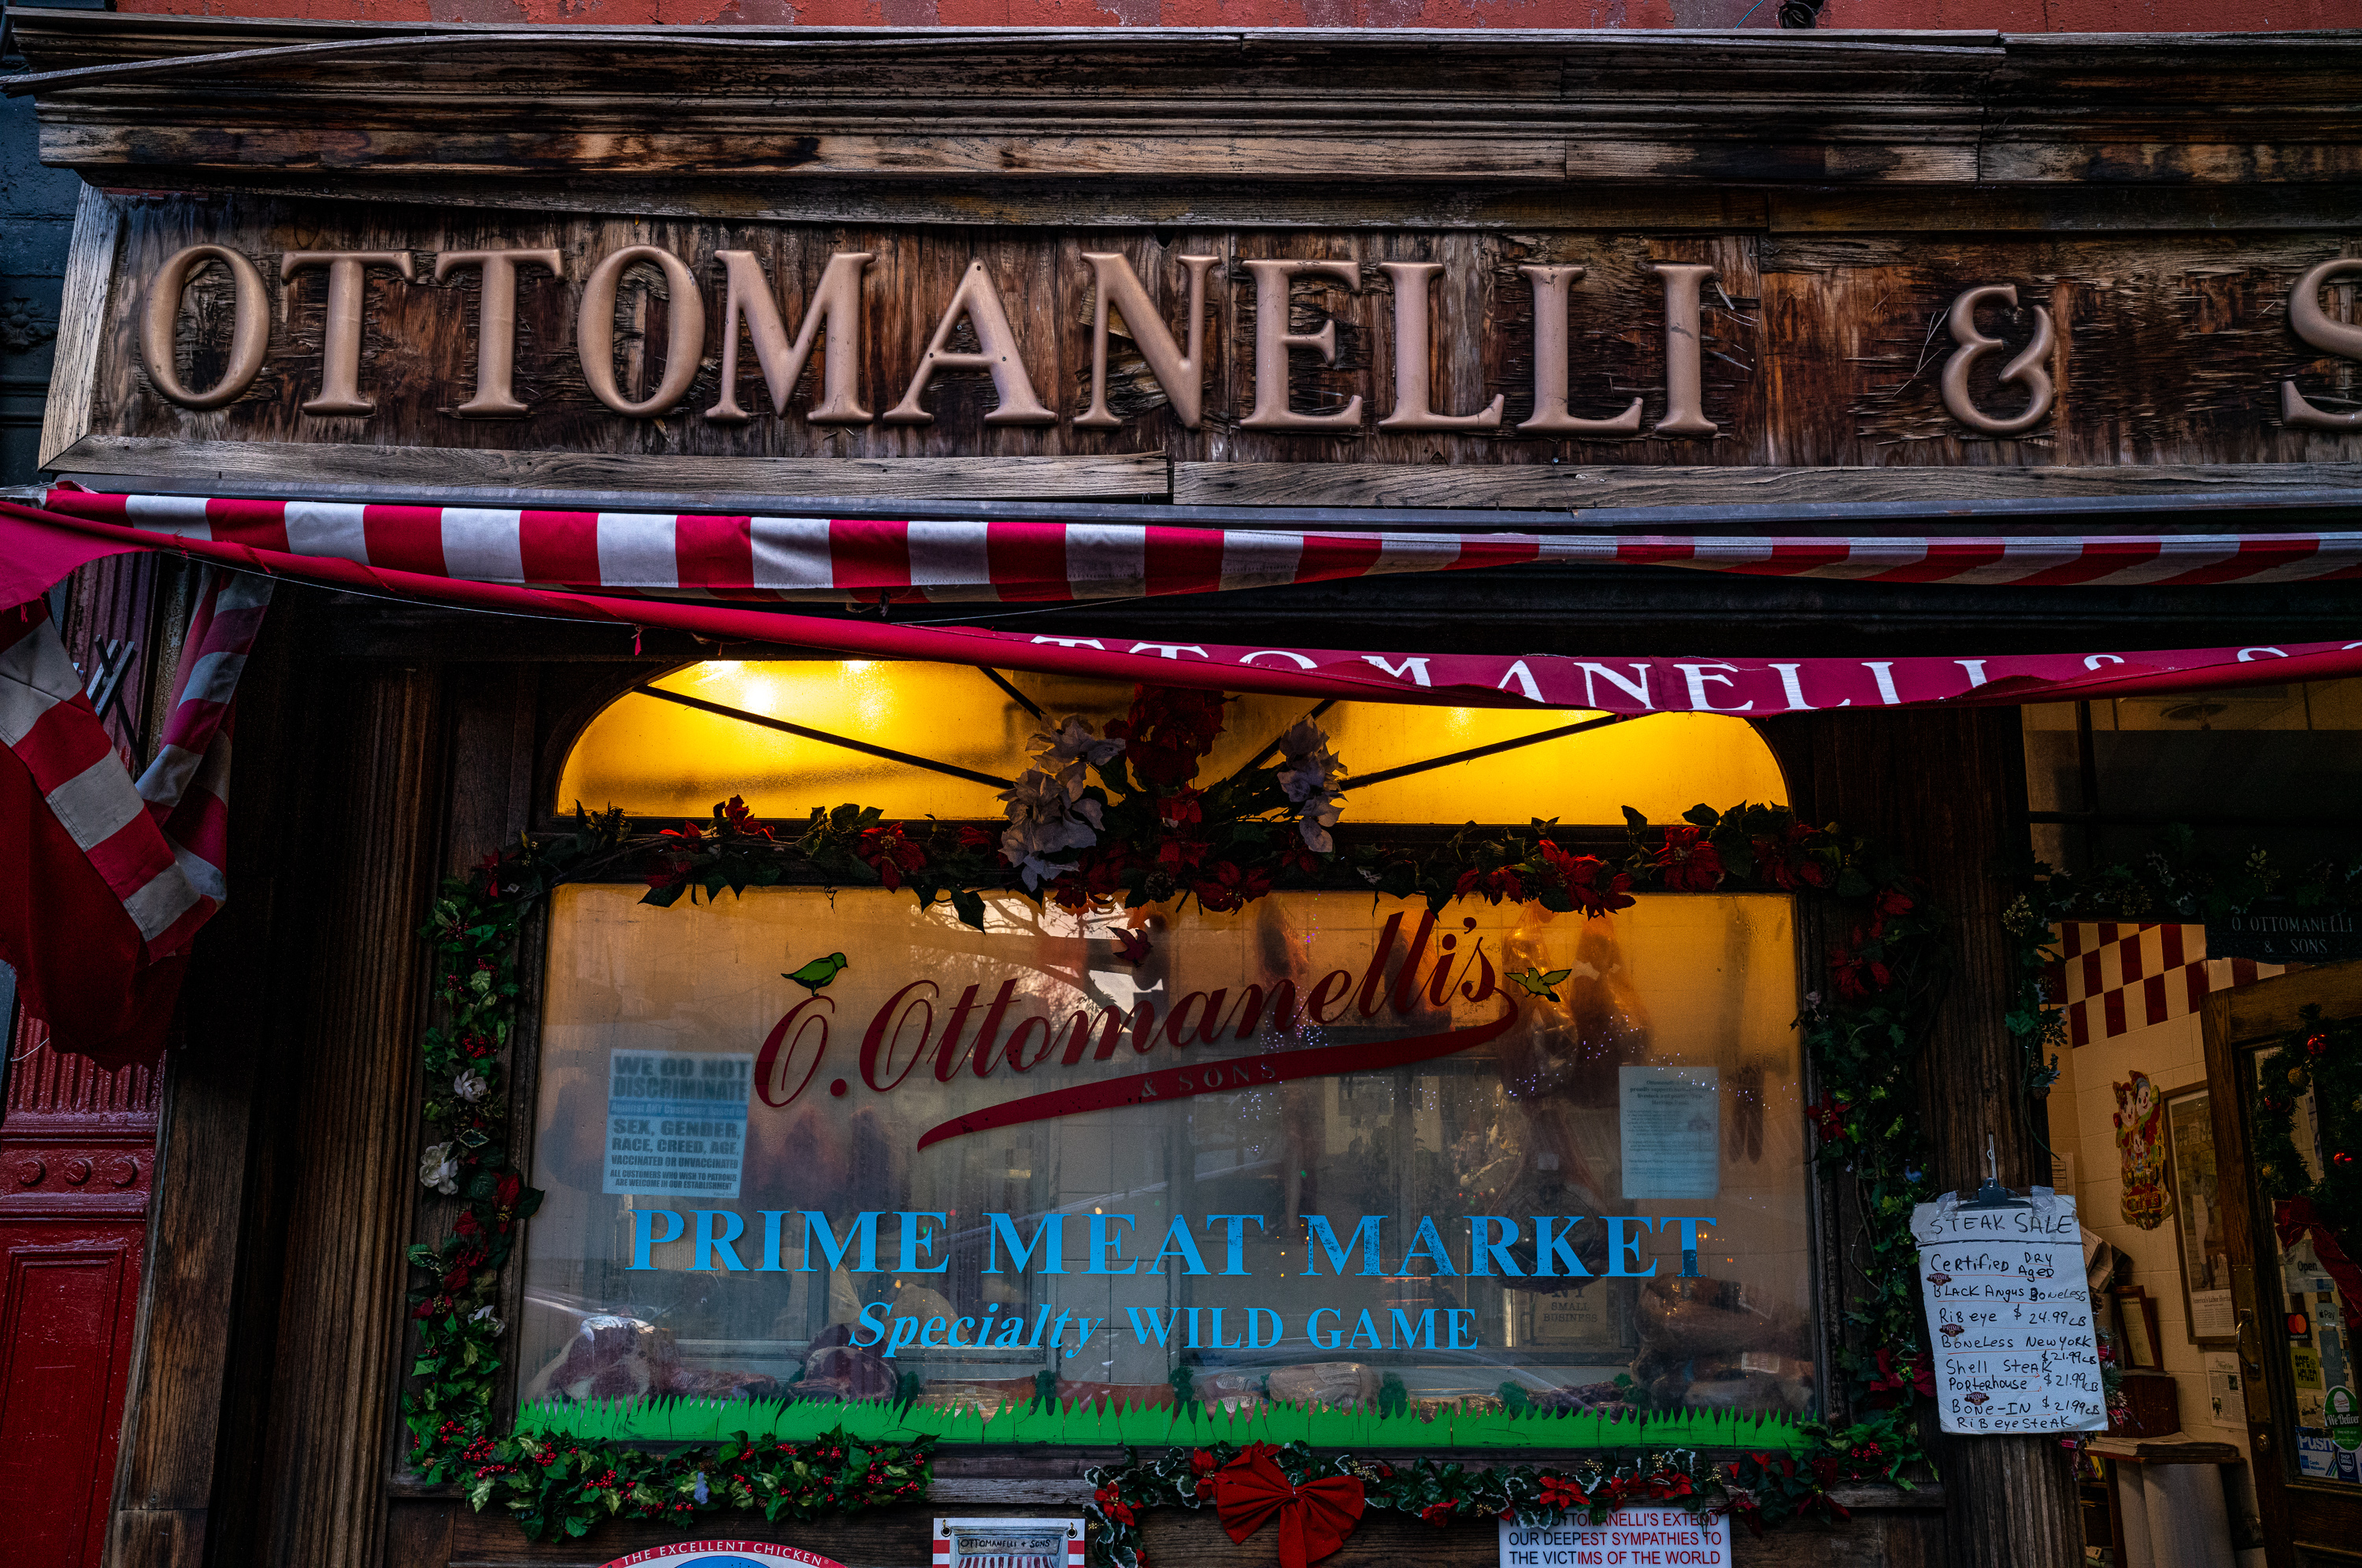
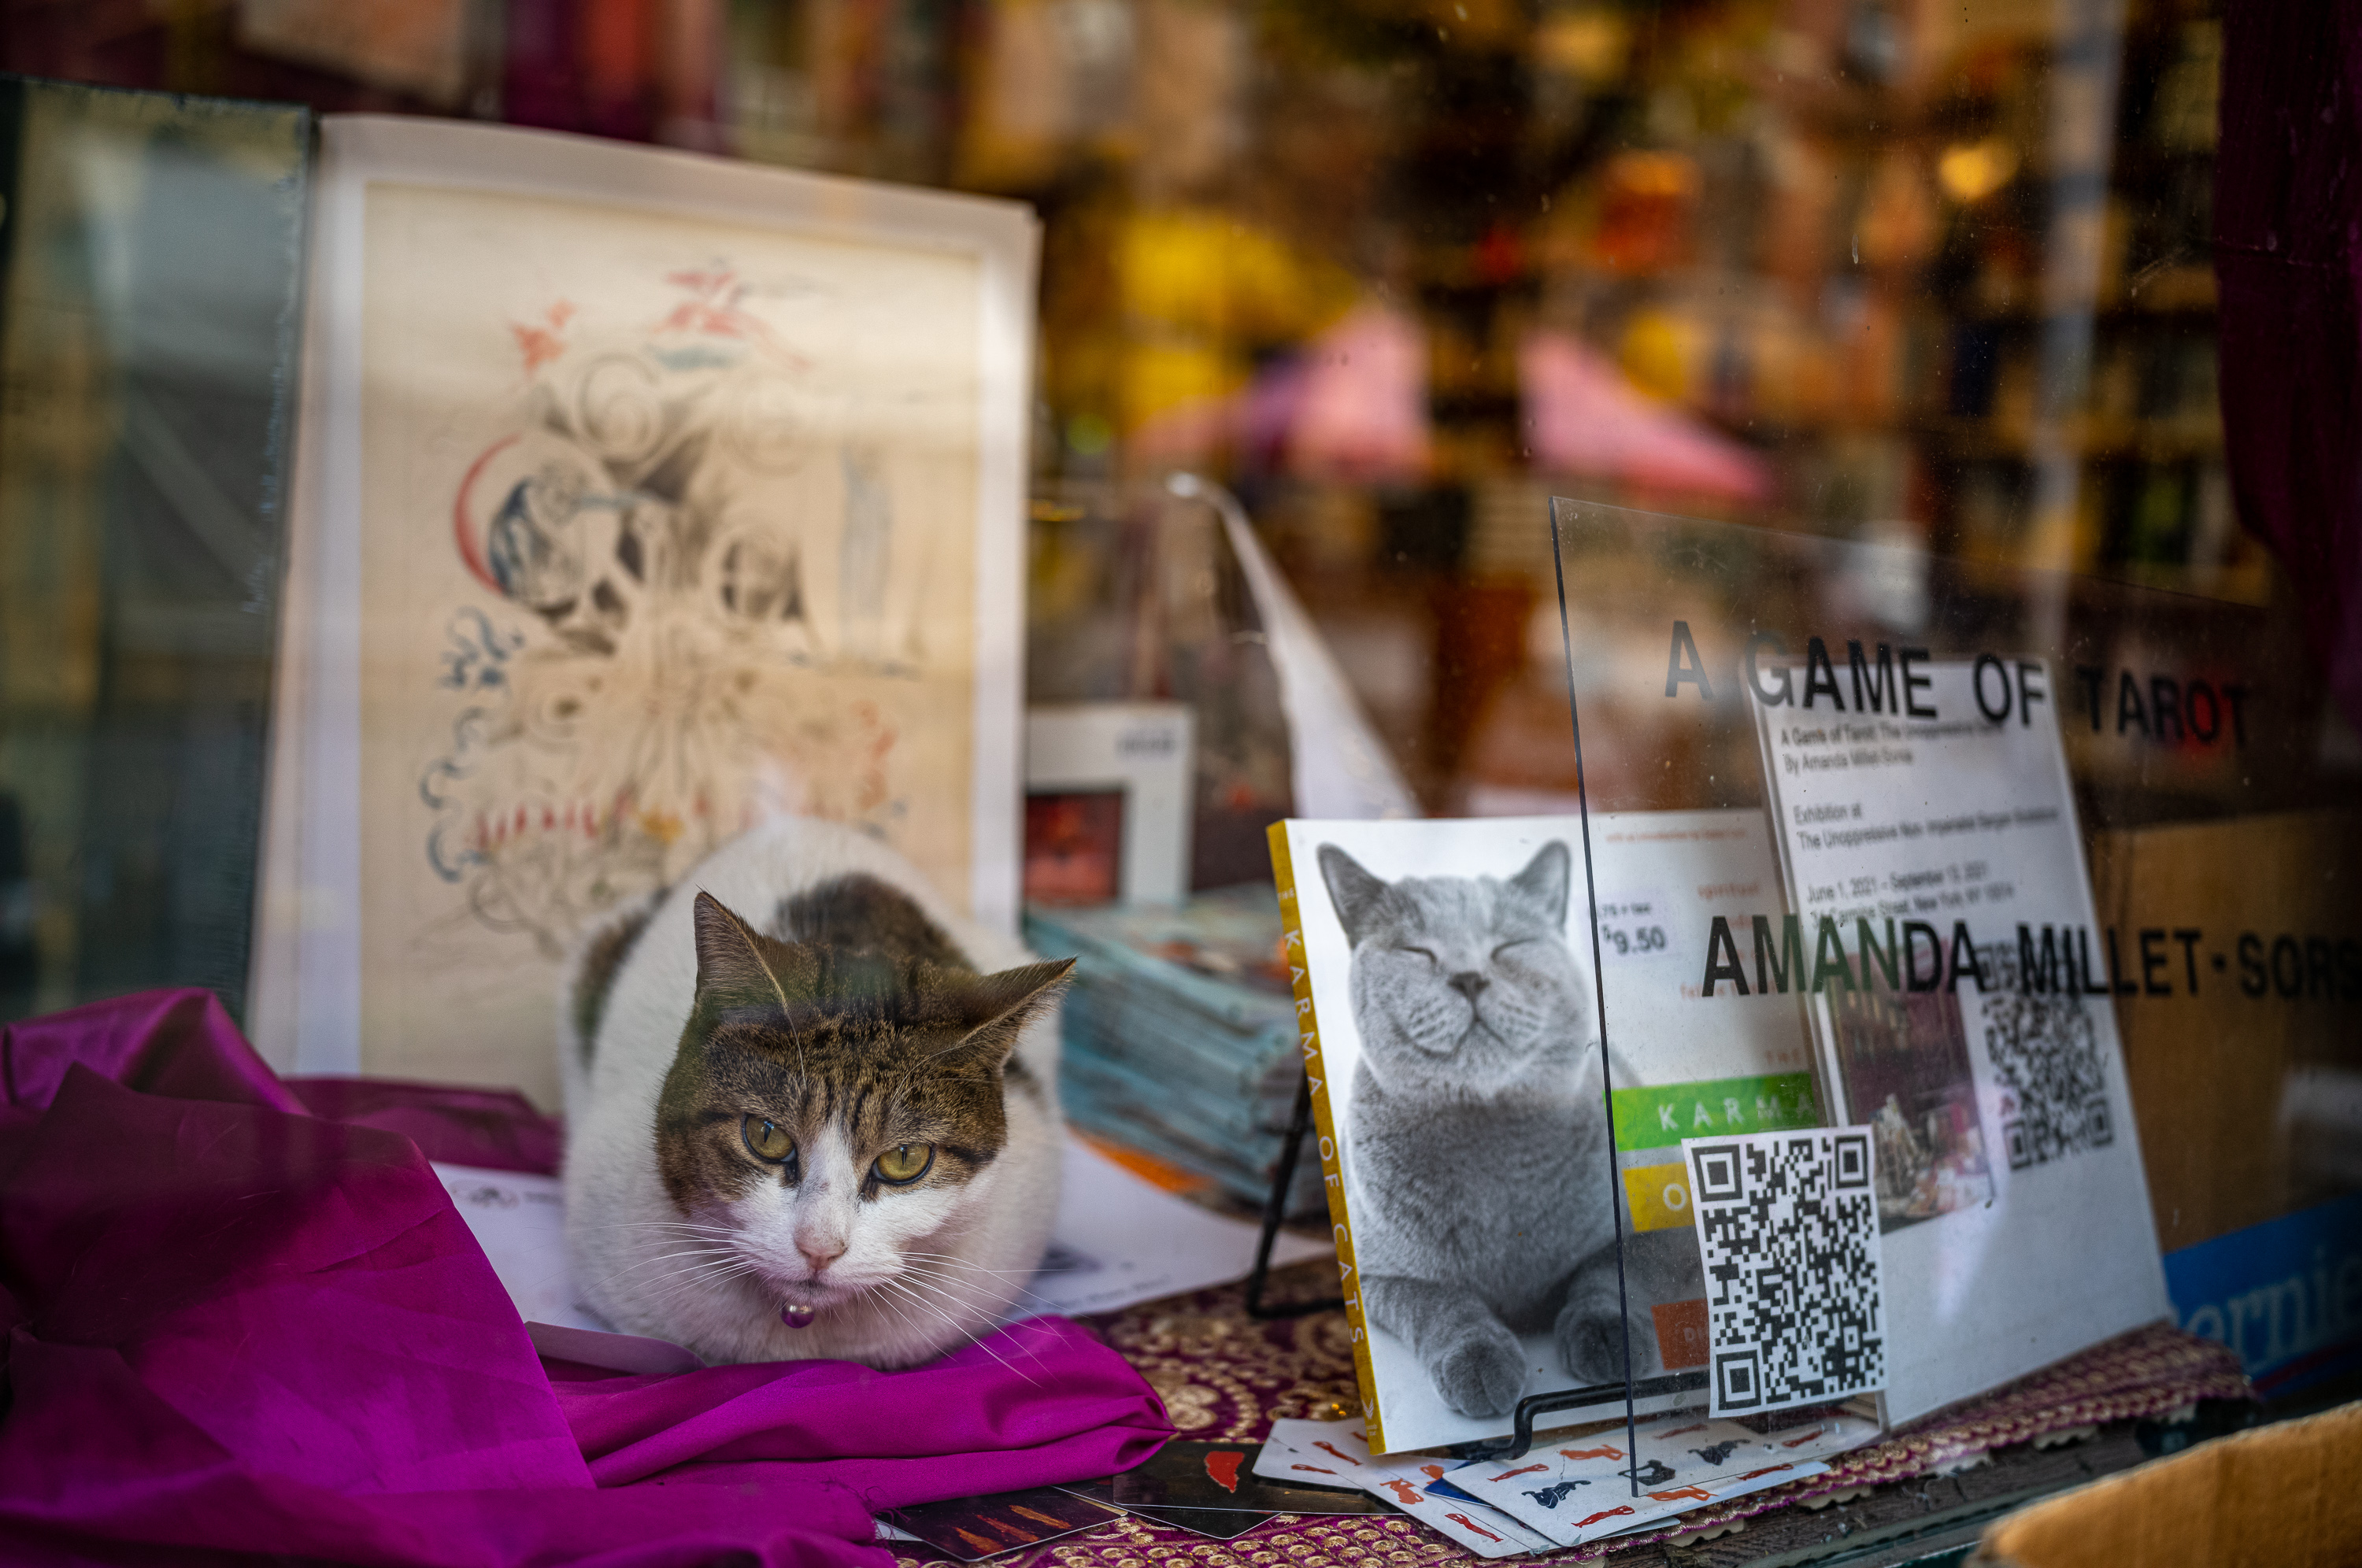
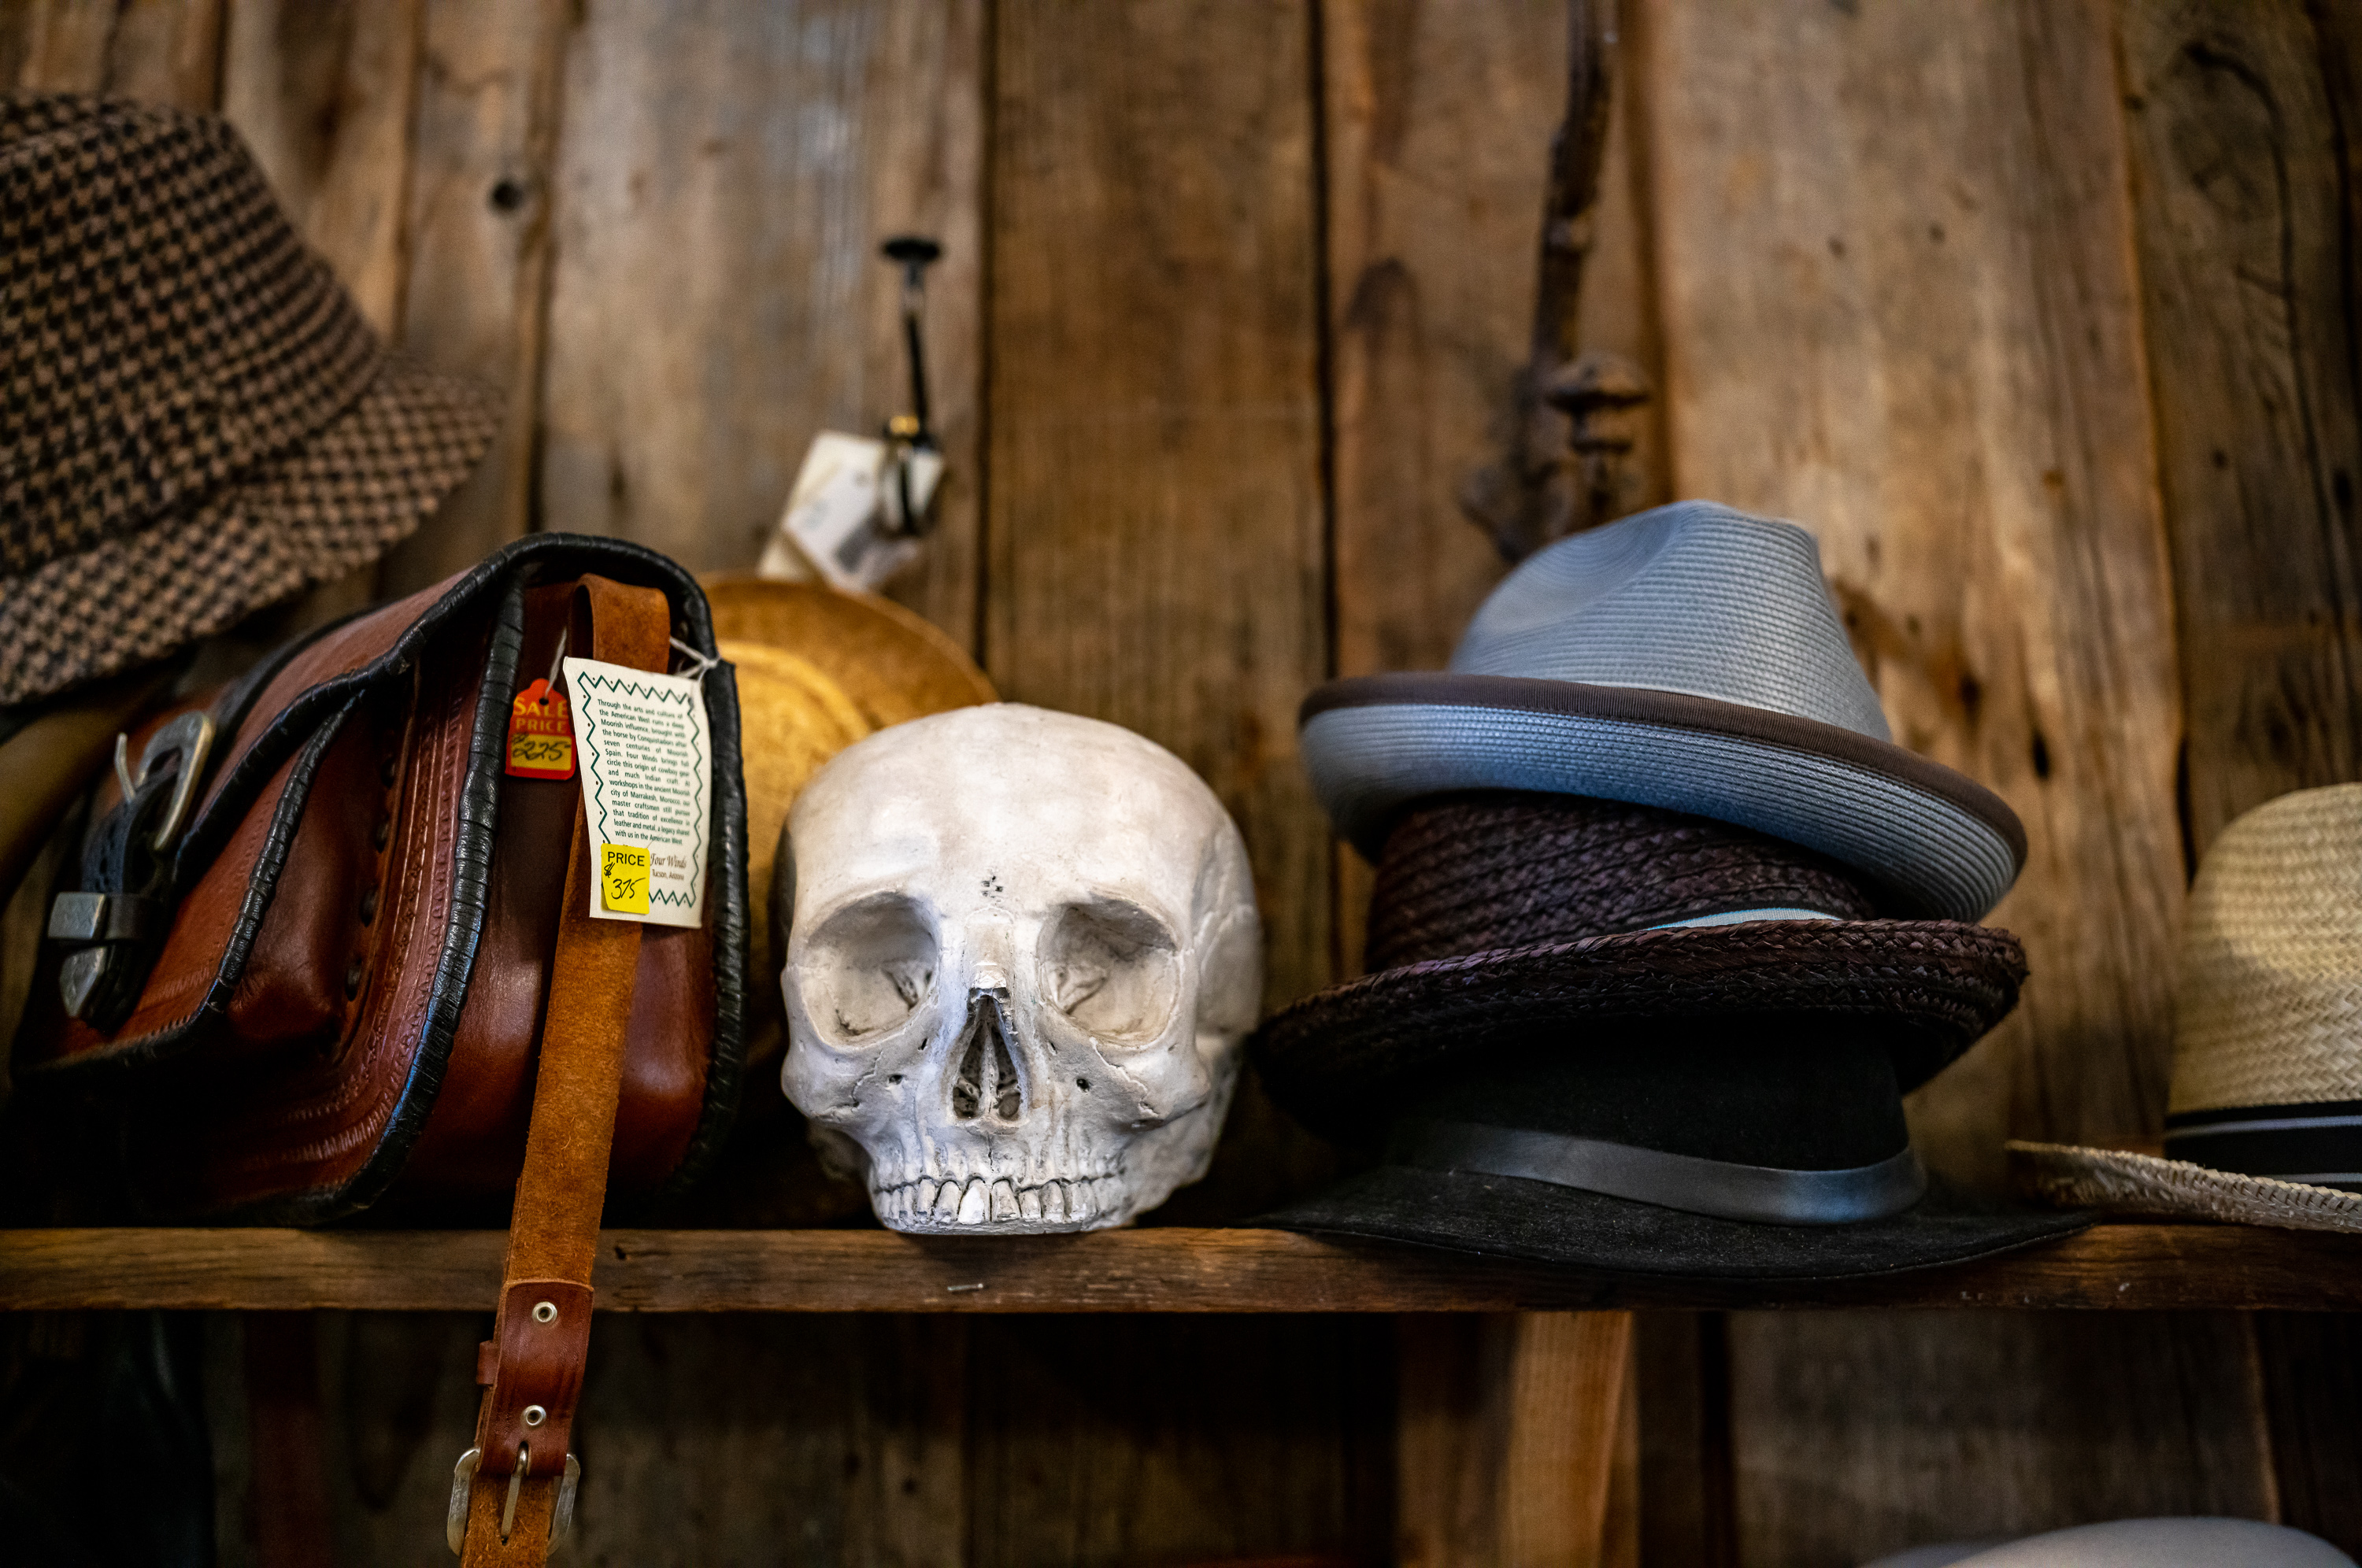
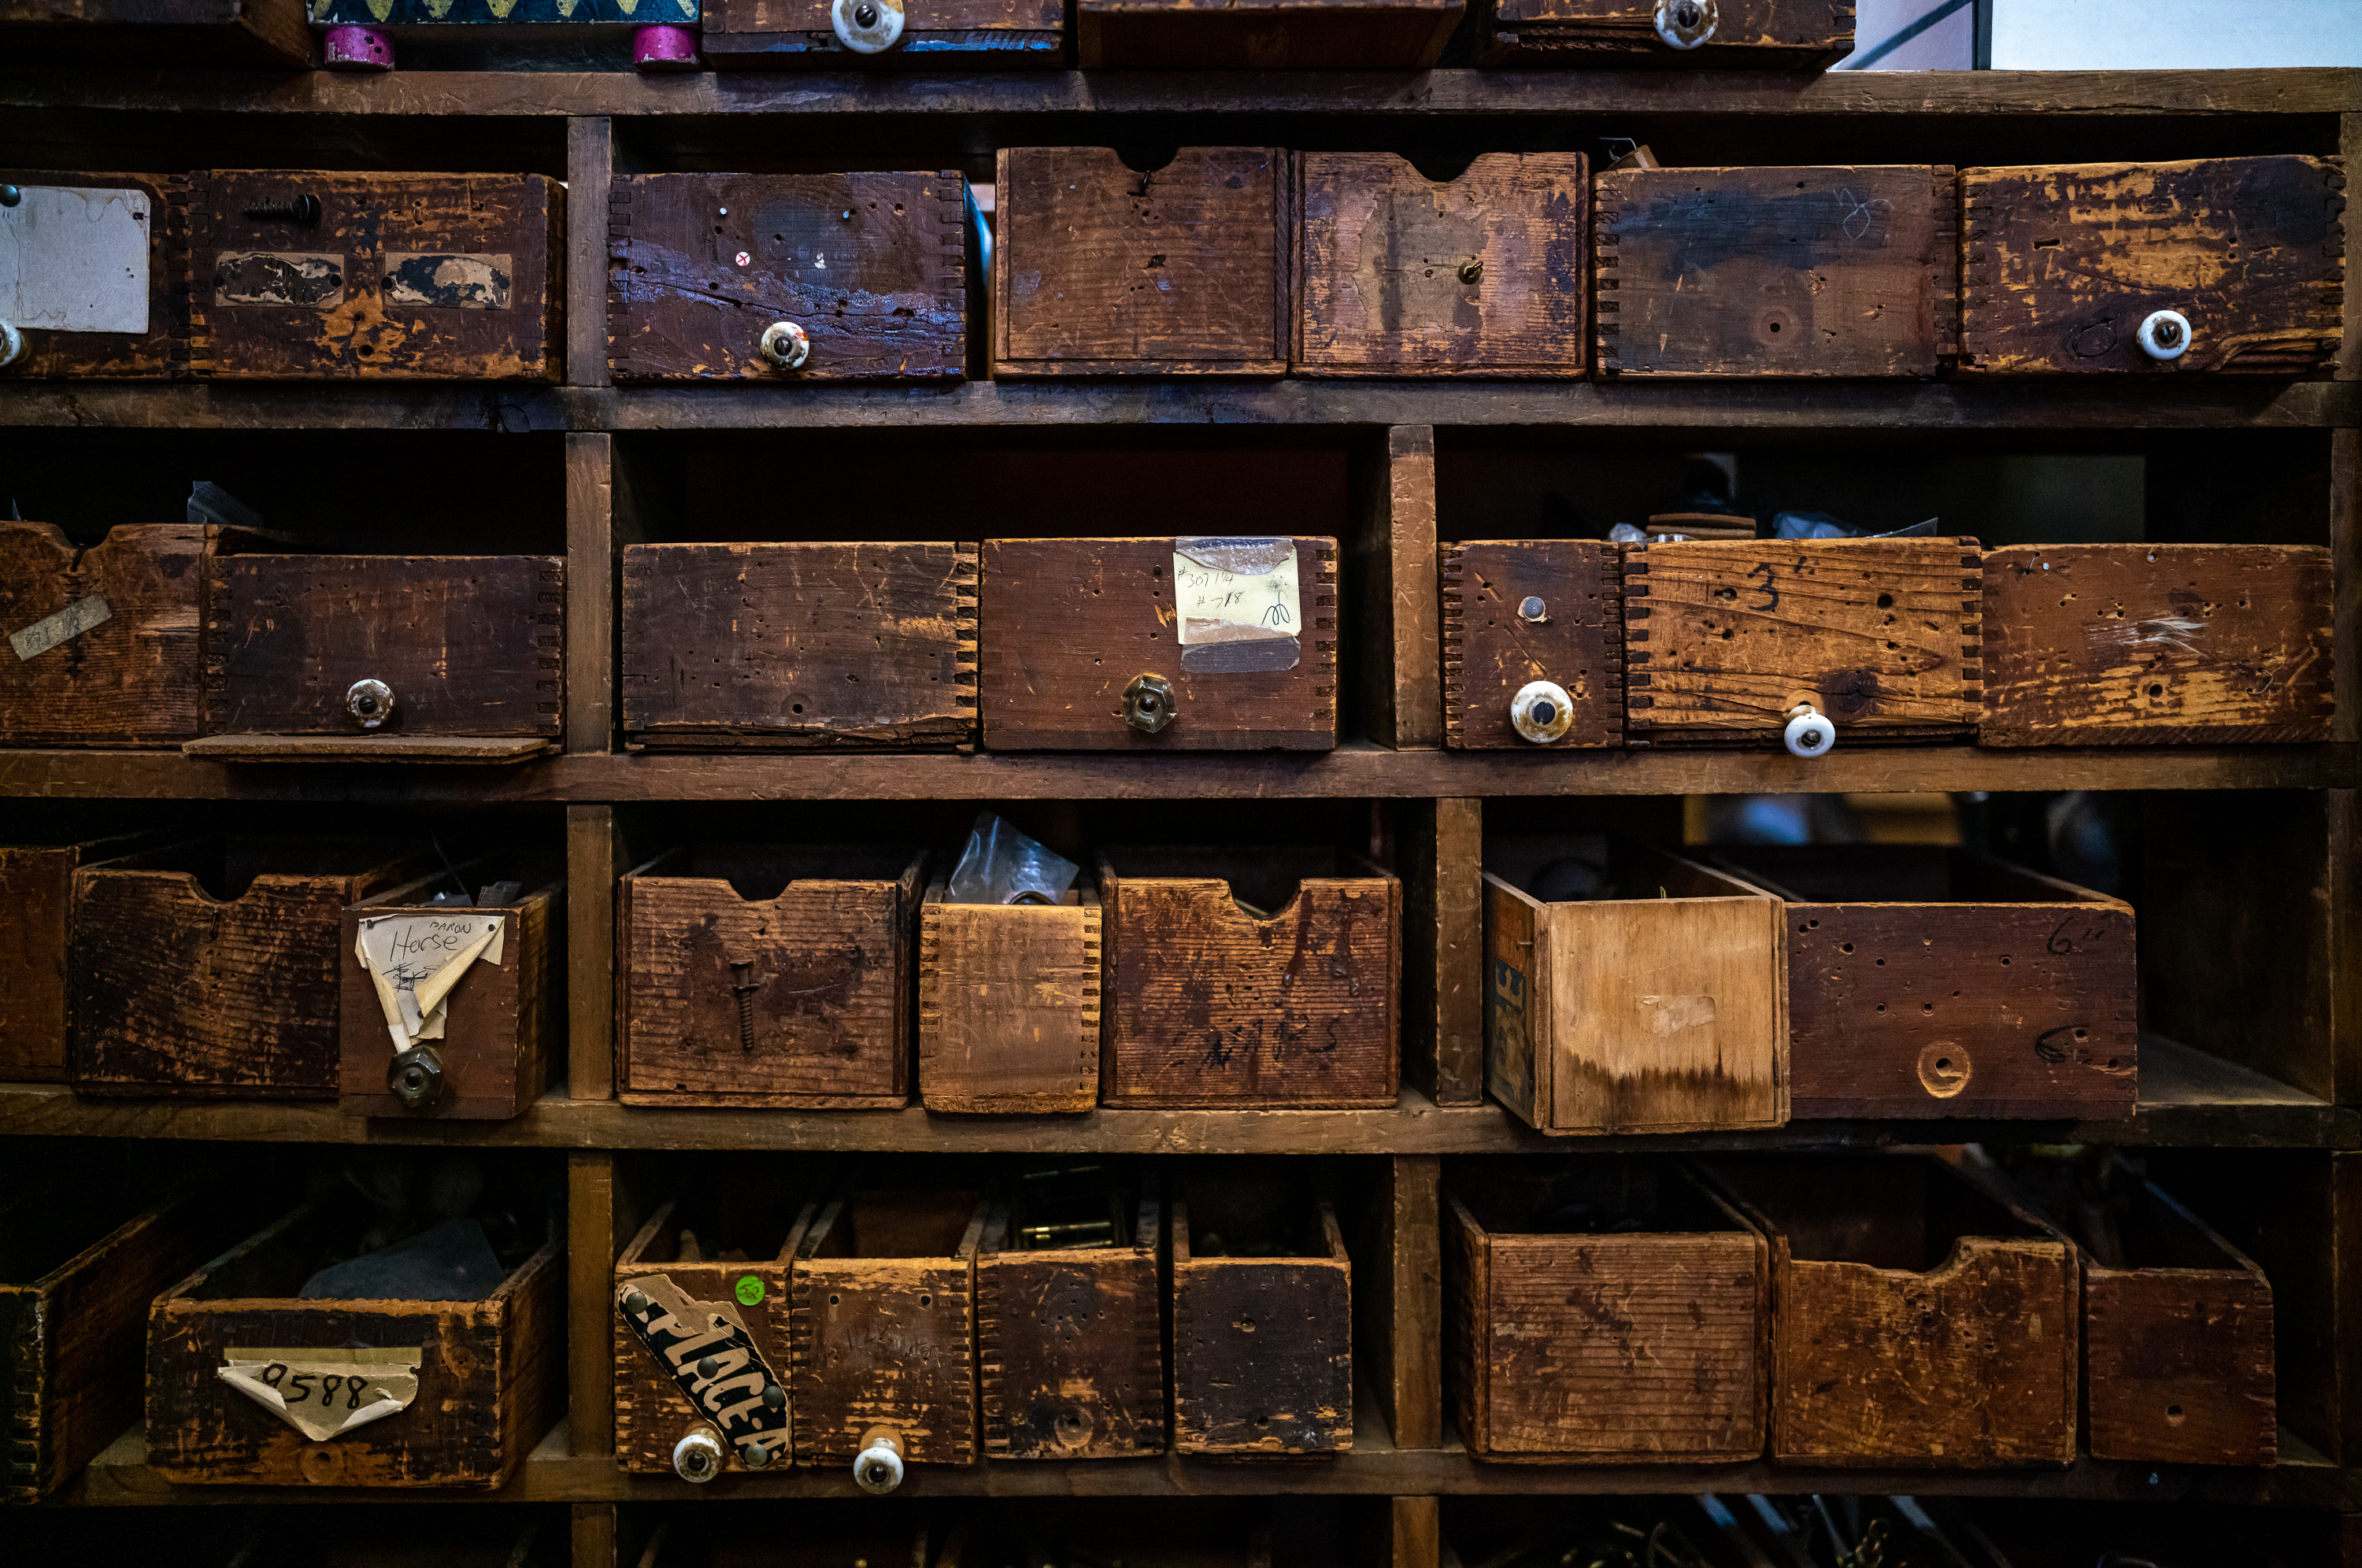
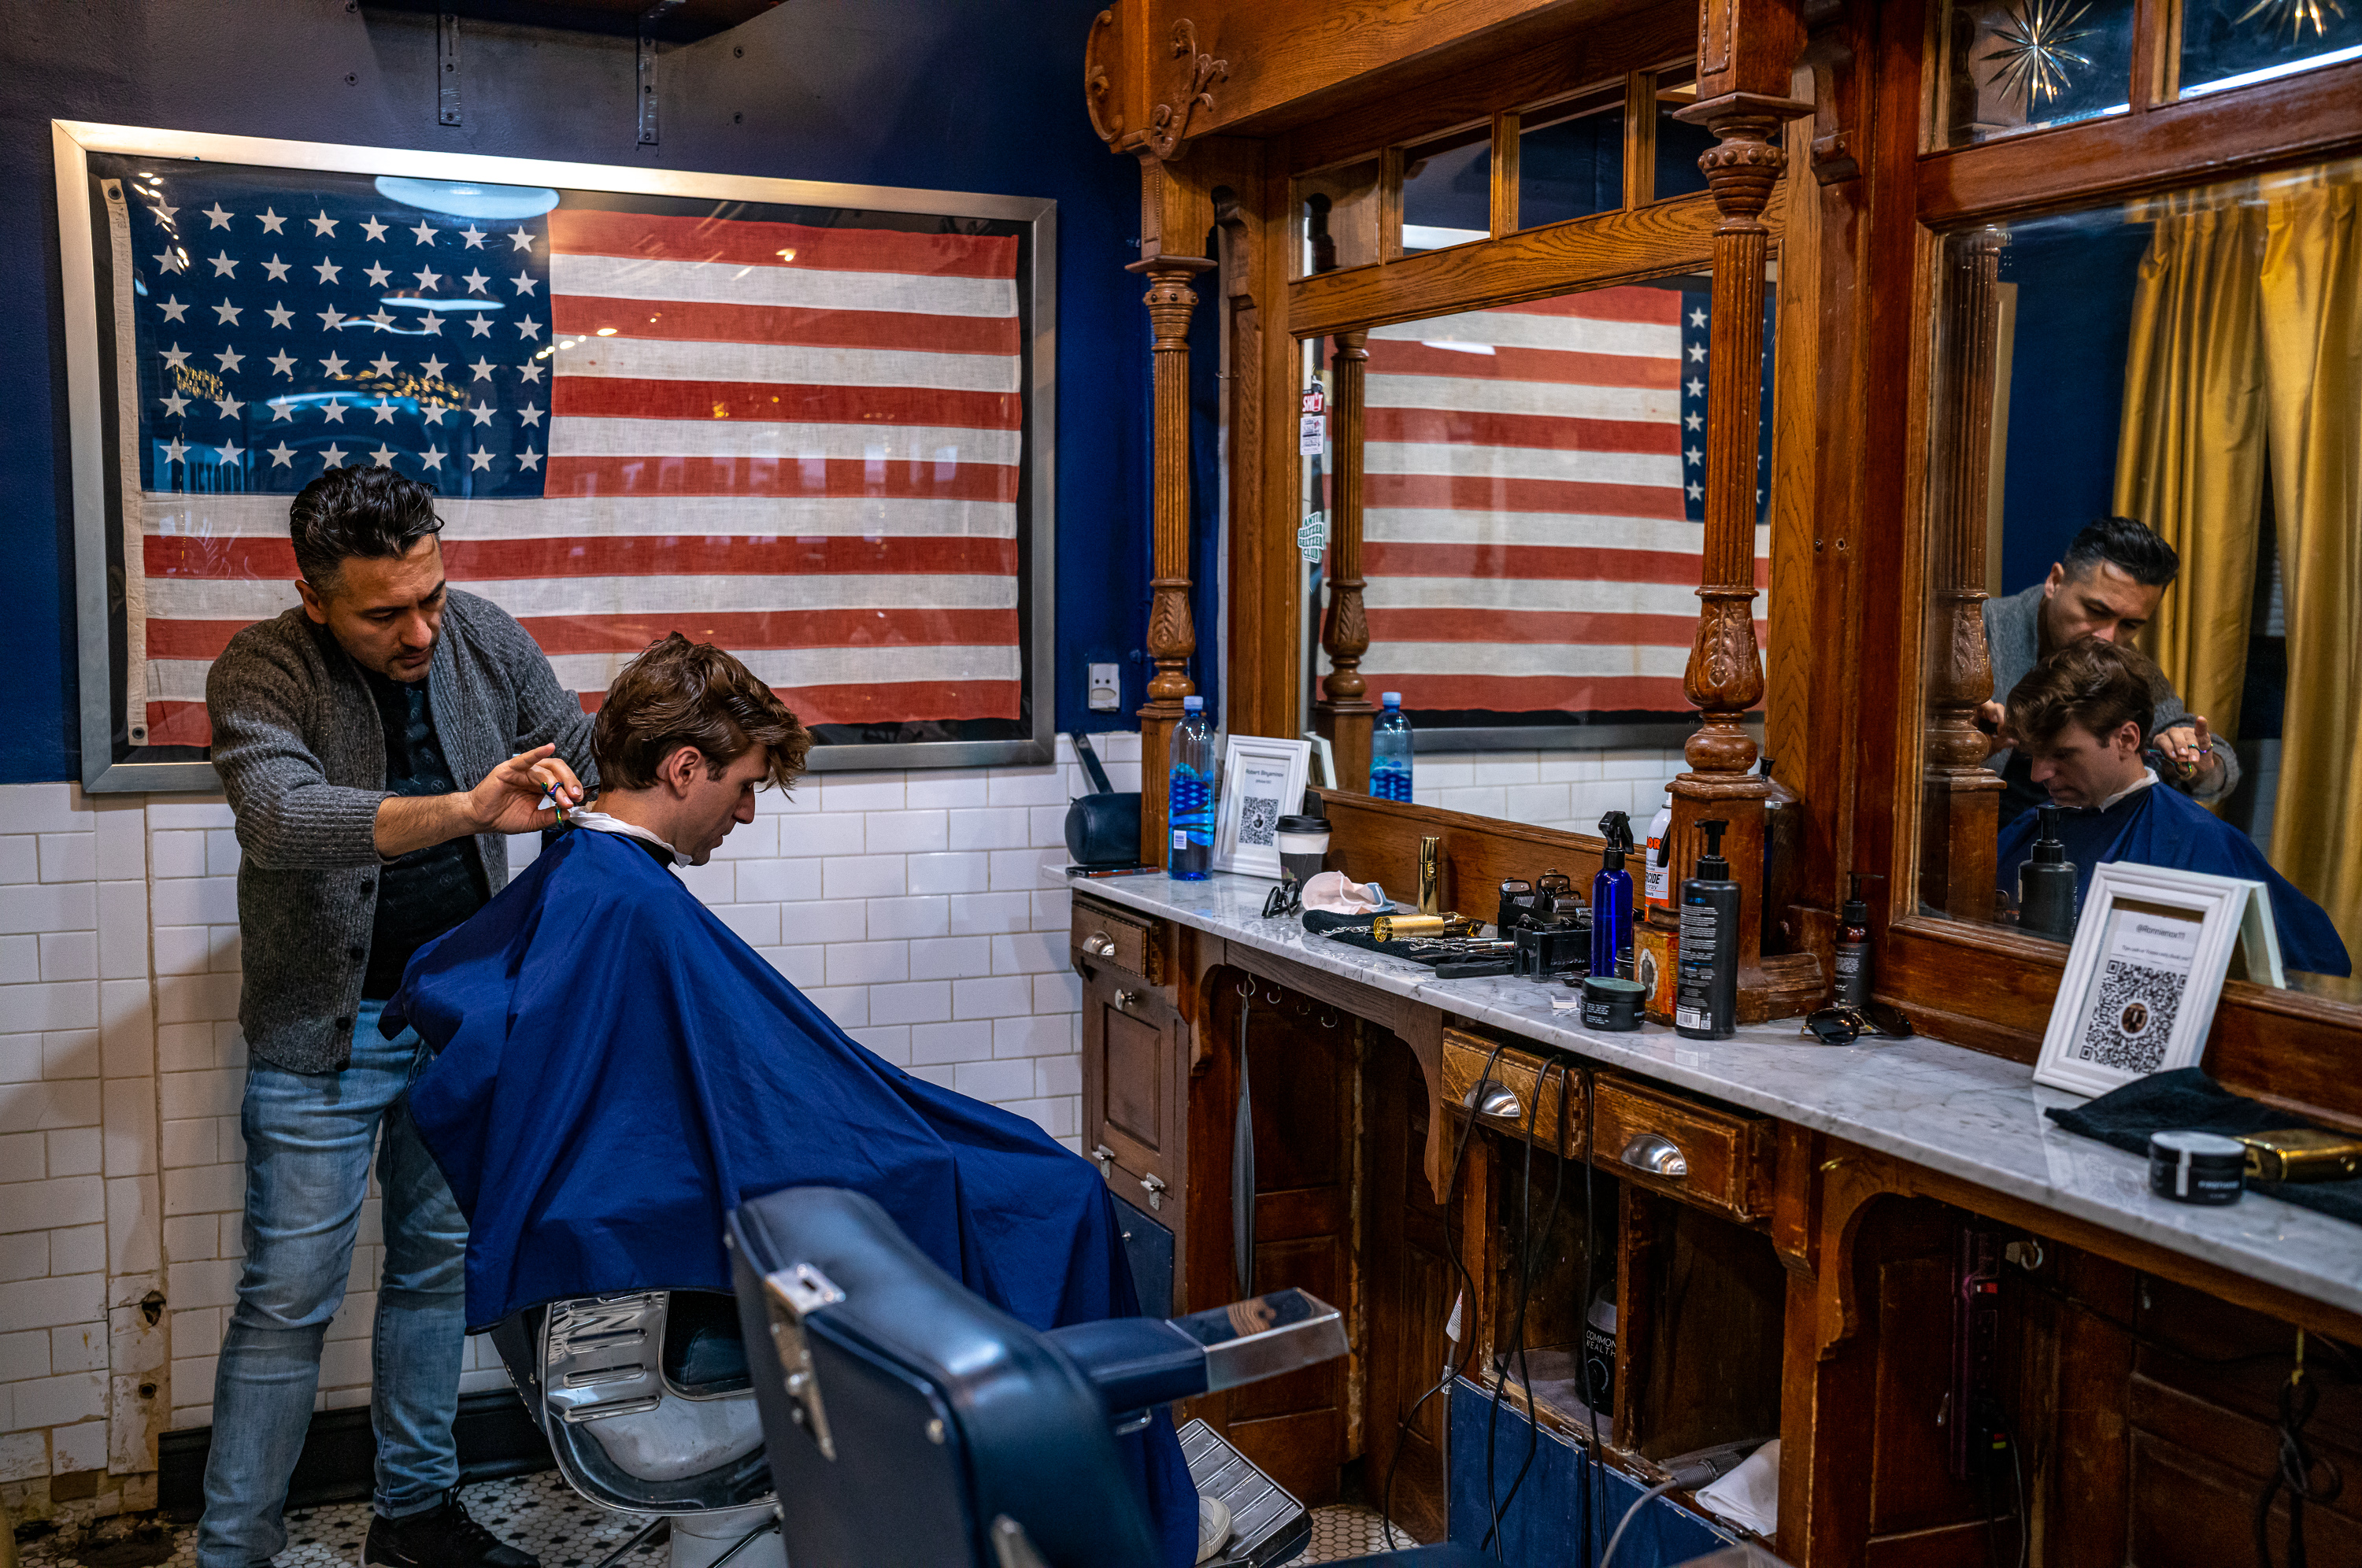
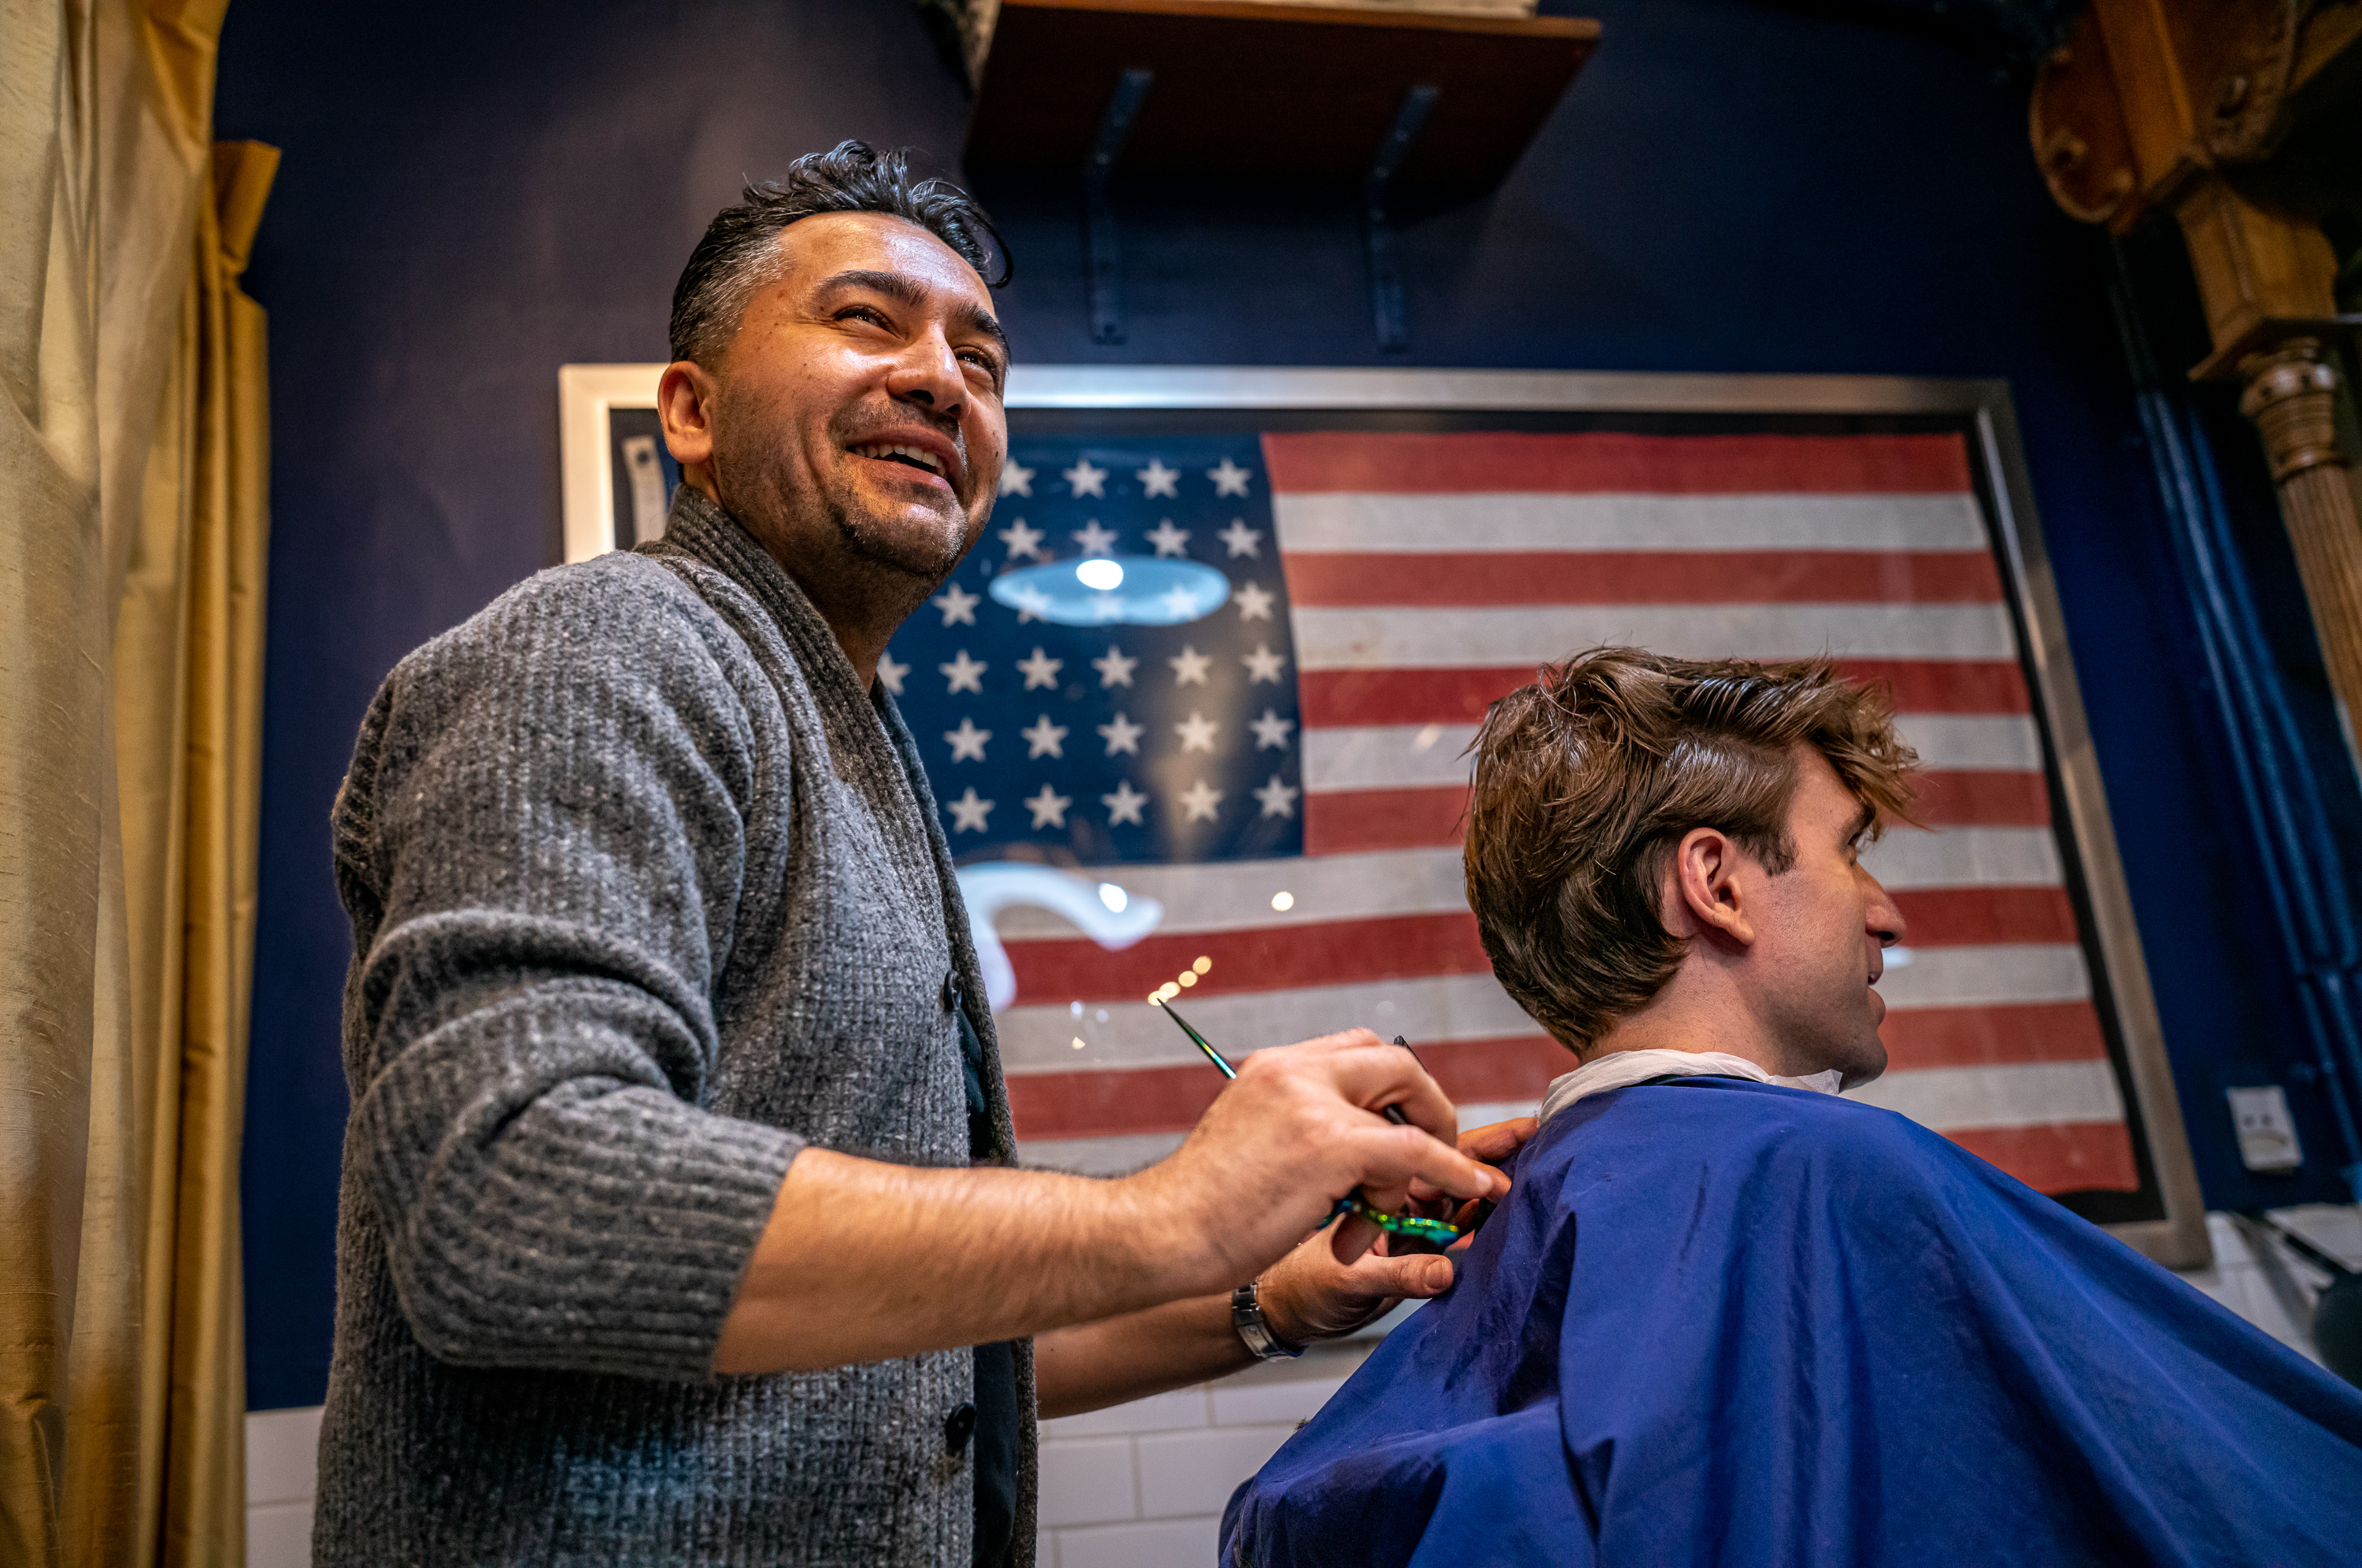
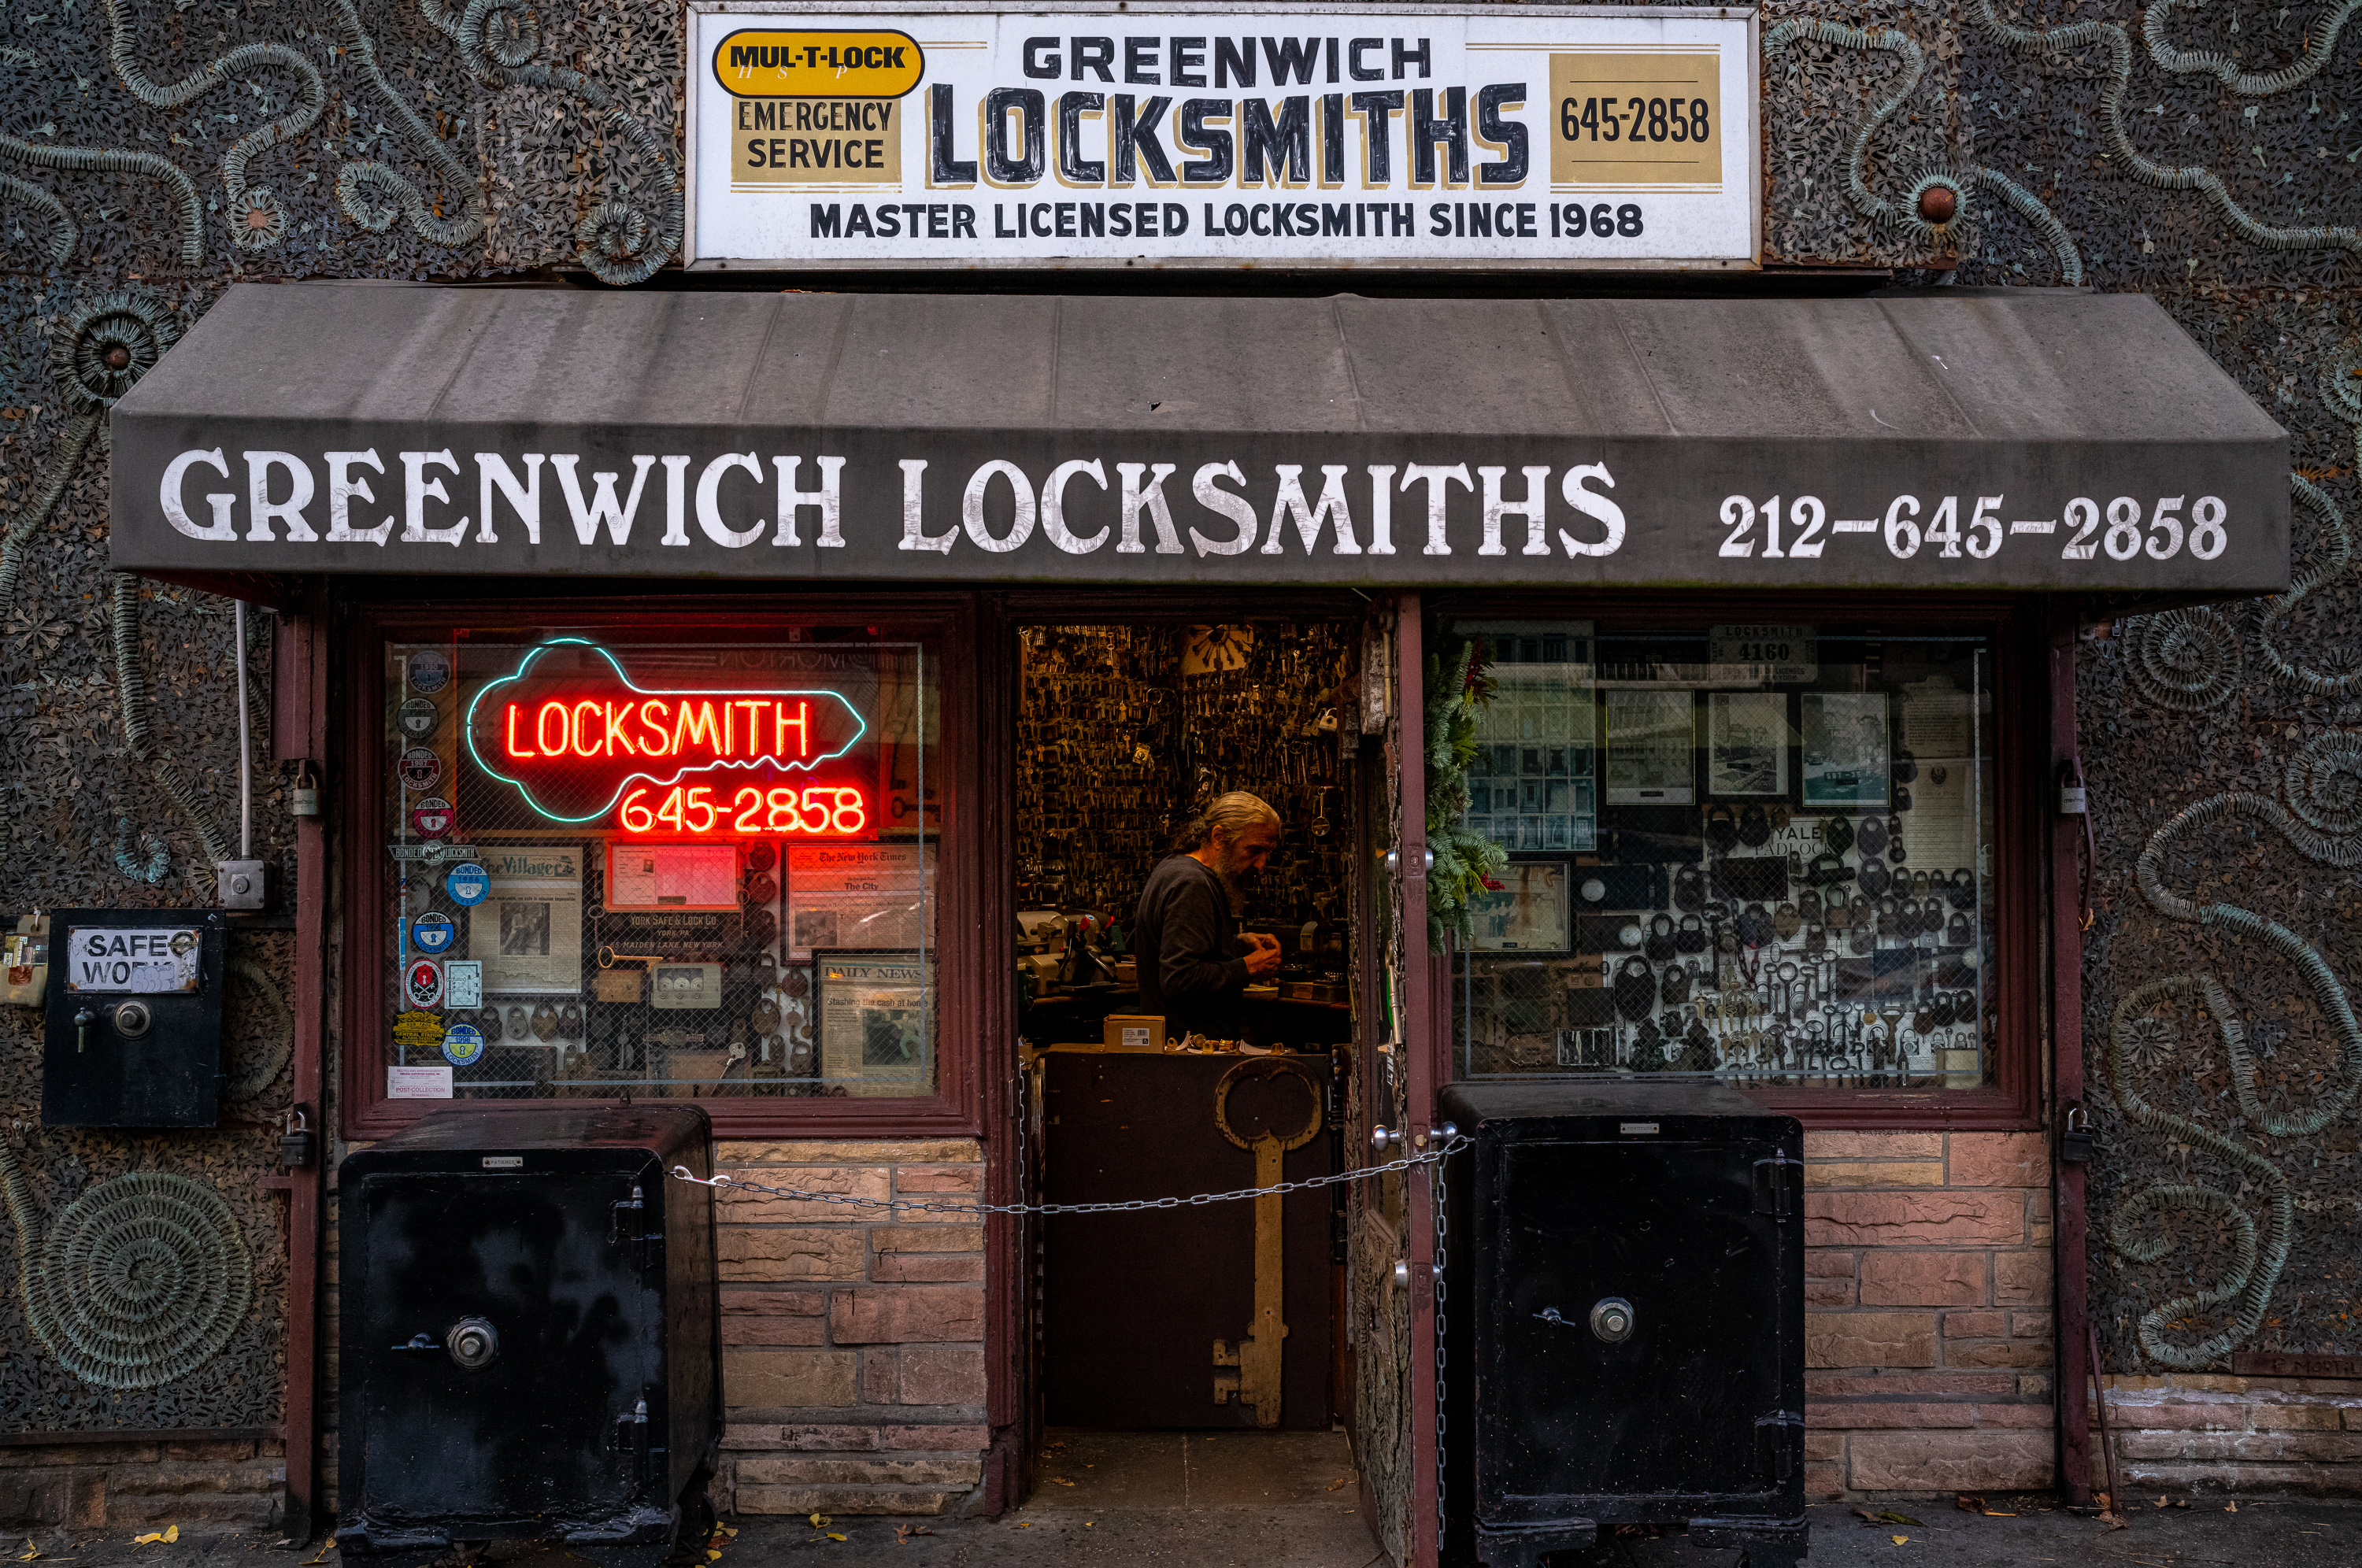
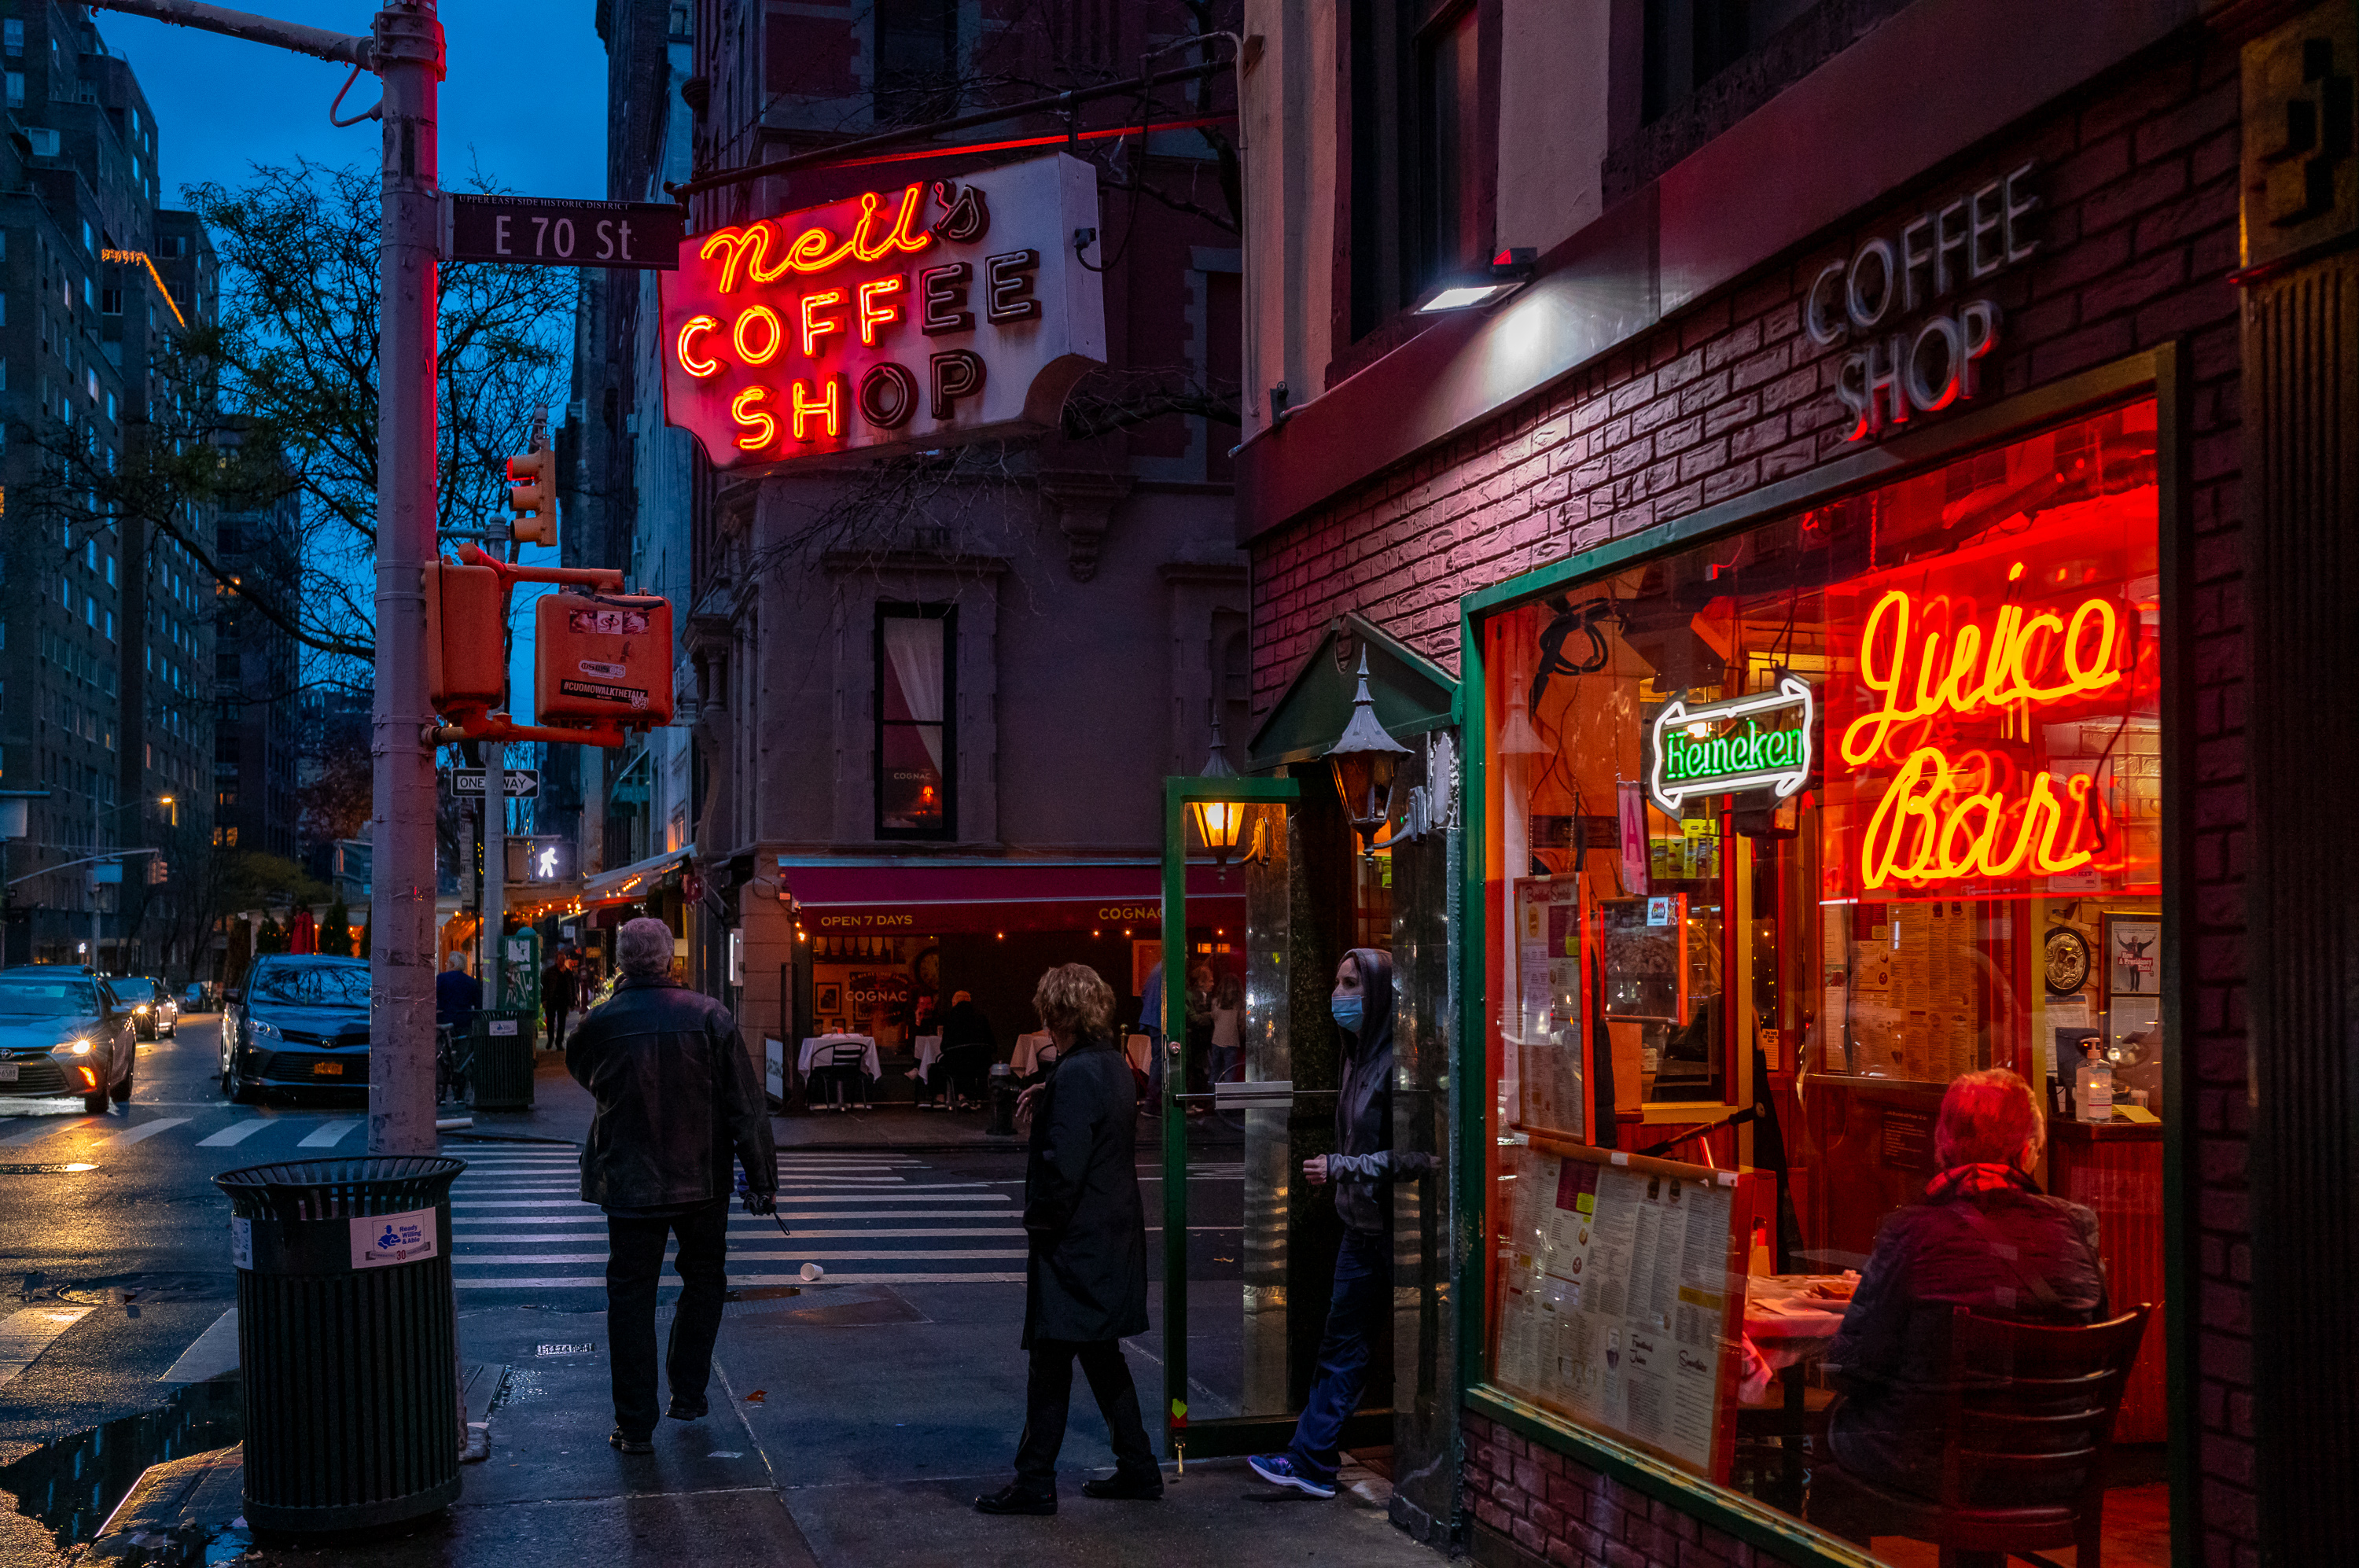
After ducking into a few shops along Carmine Street and grabbing a quick bite, I meandered around the crooked, short blocks of the Village on the lookout for photo ops. On Bedford, I strolled past a cool-looking, old-school barber shop, the Neighborhood Cut and Shave. I paused, considered popping my head and snapping off a few frames, but hesitated and kept on moving.
1/320th sec @ f/2, ISO 200
1/320th sec @ f/2, ISO 1600
1/160th sec @ f/2.8, ISO 10000
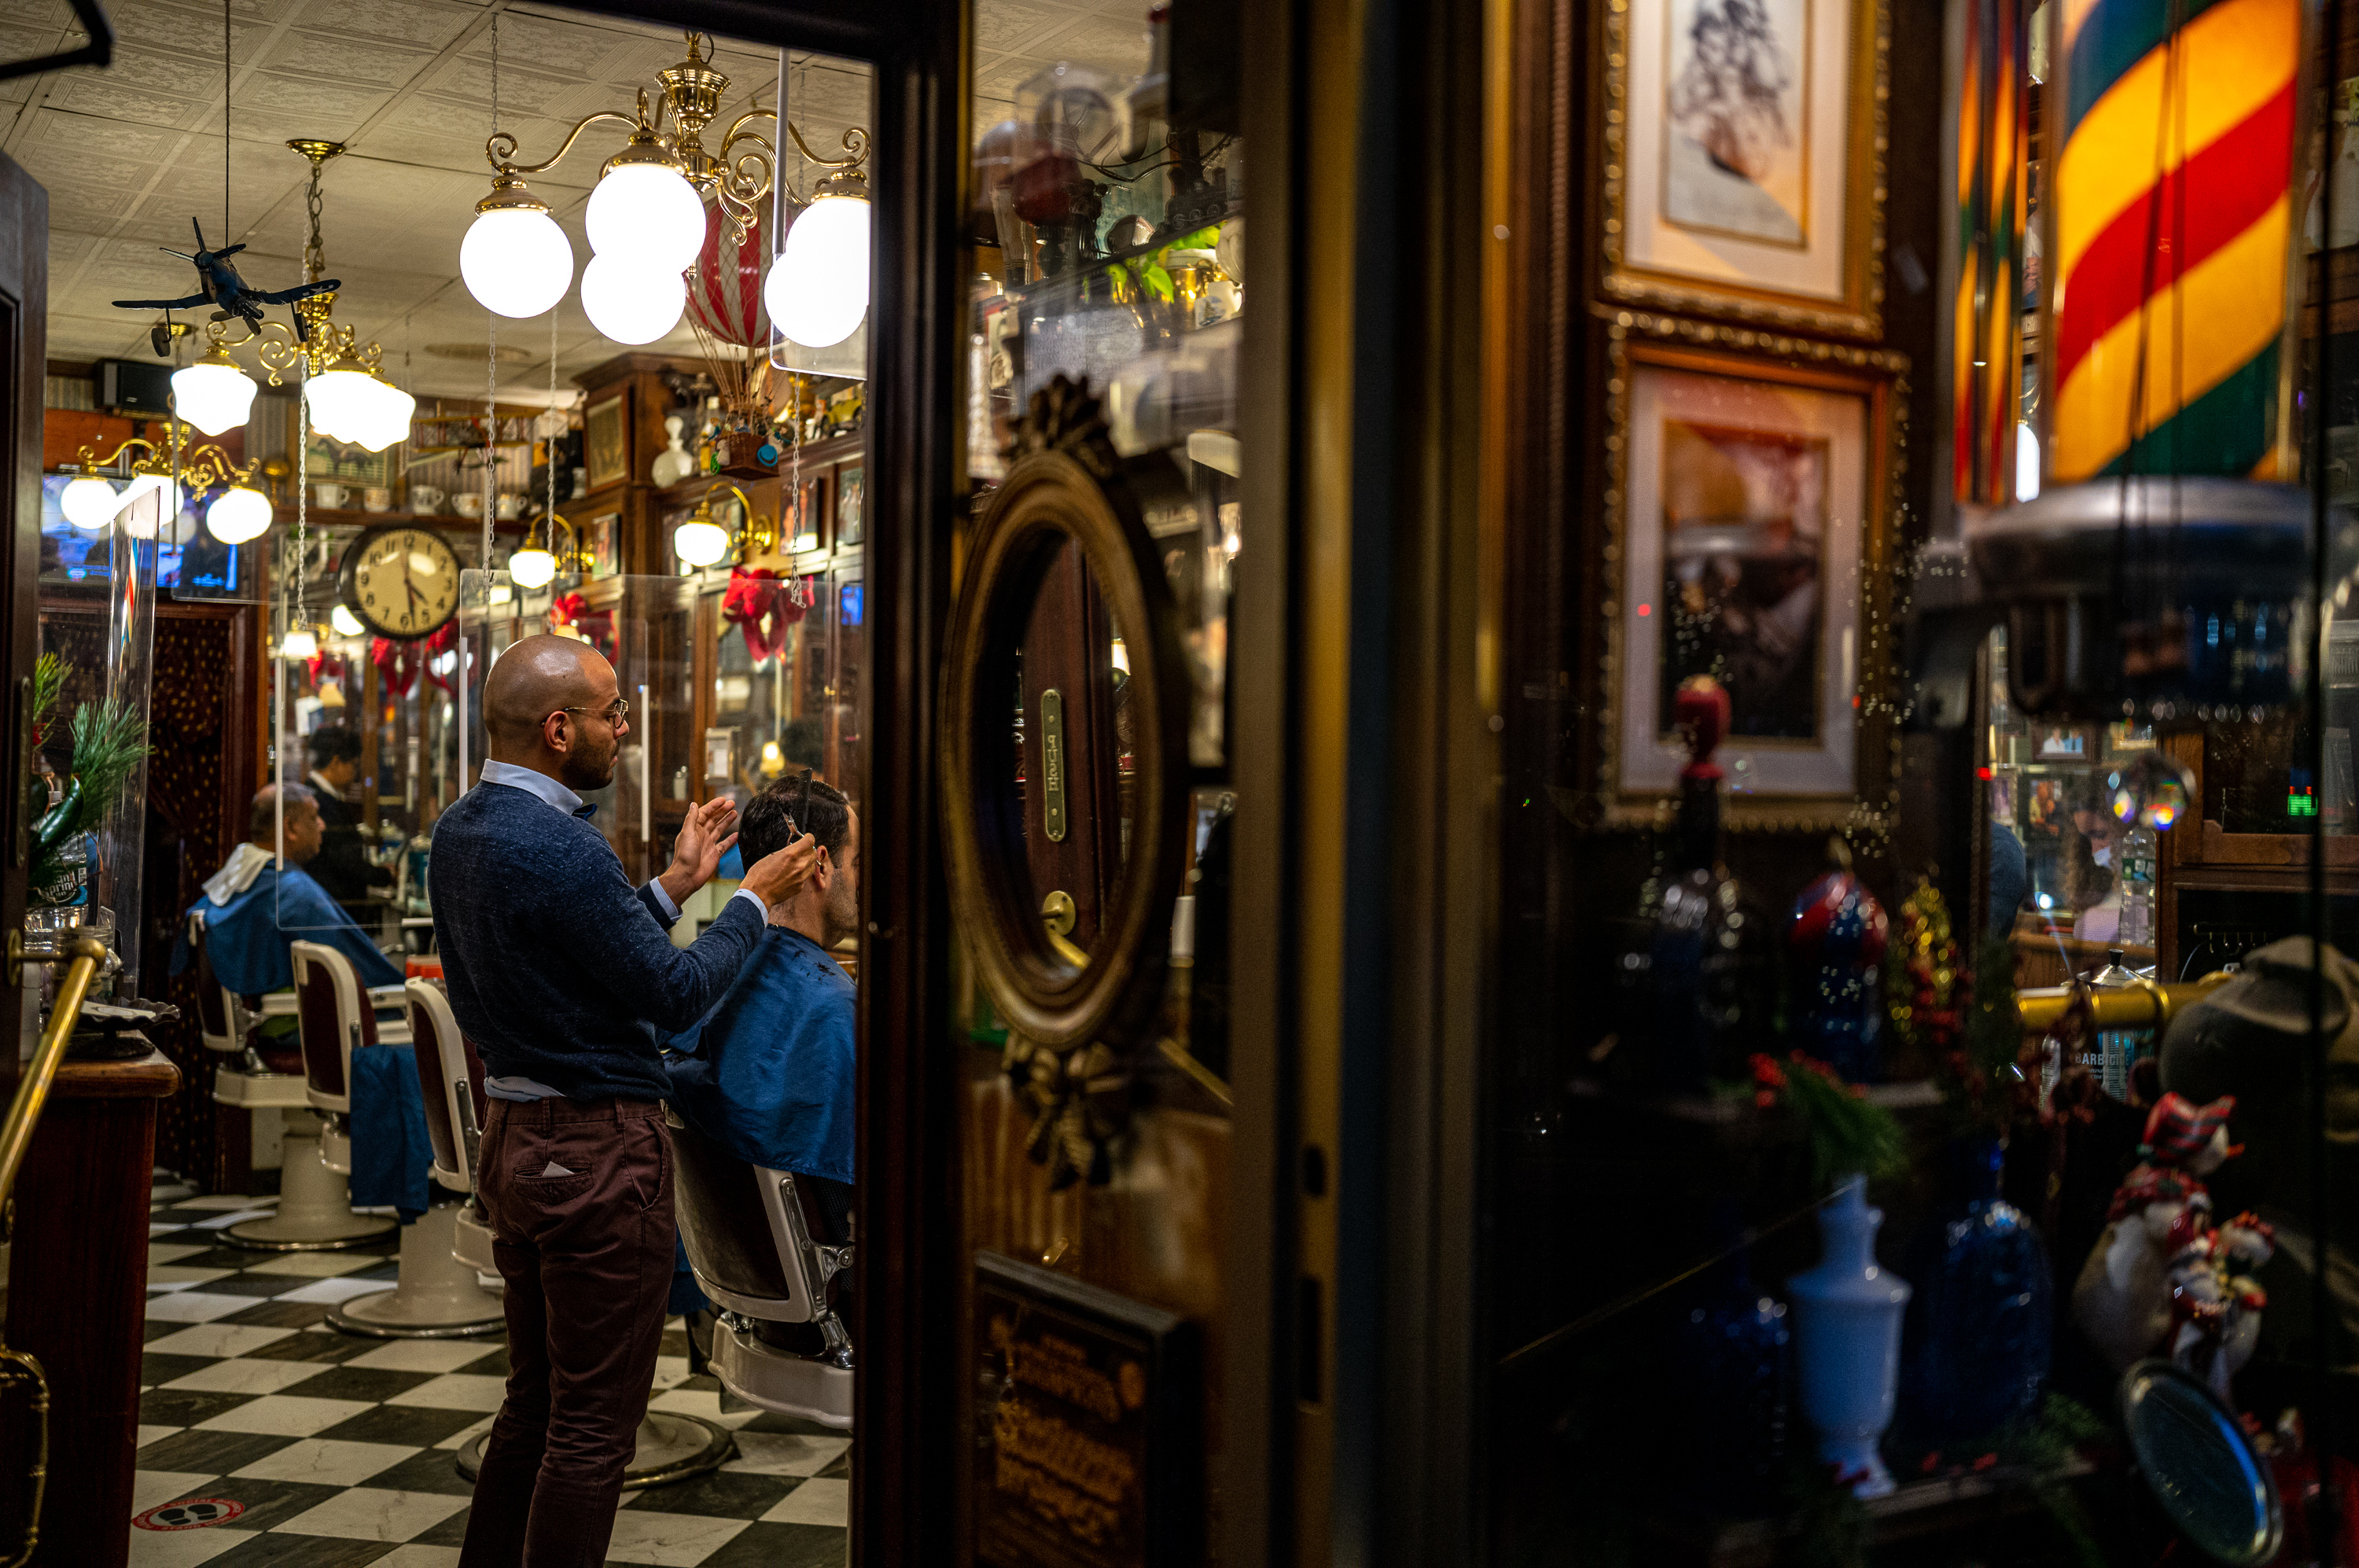
Funny thing about this type of photography. You never regret the pictures you take, only the ones you didn’t. So, after a few blocks, I doubled back, approached one of the barbers on a break outside and asked him about taking some pictures in the shop. “Yeah, for sure. Go on in.” The guys were super nice and welcoming. So glad I went back.
1/320th sec @ f/4, ISO 1600
1/320th sec @ f/4, ISO 1250
The overcast skies that had hung over the city for most of the day started to clear, the sun breaking through thinning clouds and bathing the buildings in a warm afternoon glow. The conditions were perfect for some more shooting, but I had somewhere else to be. Sneaking in another shot or two, I hurried off to catch an uptown train back to Rockefeller Center.
1/320th sec @ f/8, ISO 64
1/320th sec @ f/5.6, ISO 2000
First time at Top of the Rock
With all my trips to NYC both with family growing up and traveling there for work in more recent years, I had never been to Top of the Rock, the observation deck at Rockefeller Center. I generally shun typical touristy activities in favor of more purely photographic ones.
1/160th sec @ f/8, ISO 2000
But with the weather forecast that evening calling for what could be a nice sunset, it looked like I was about to do both. The idea of standing in line for two hours wasn’t too appealing and was about to give up on the whole idea, until I discovered the elusive Express Pass. Turns out if you pay twice as much as a standard ticket, you can skip the line, head right to an elevator and be setting up for sunset in about ten minutes. Sold.
1/750th sec @ f/8, ISO 250, 3-shot HDR (handheld)
1/320th sec @ f/8, ISO 64
1/360th sec @ f/5.6, ISO 200
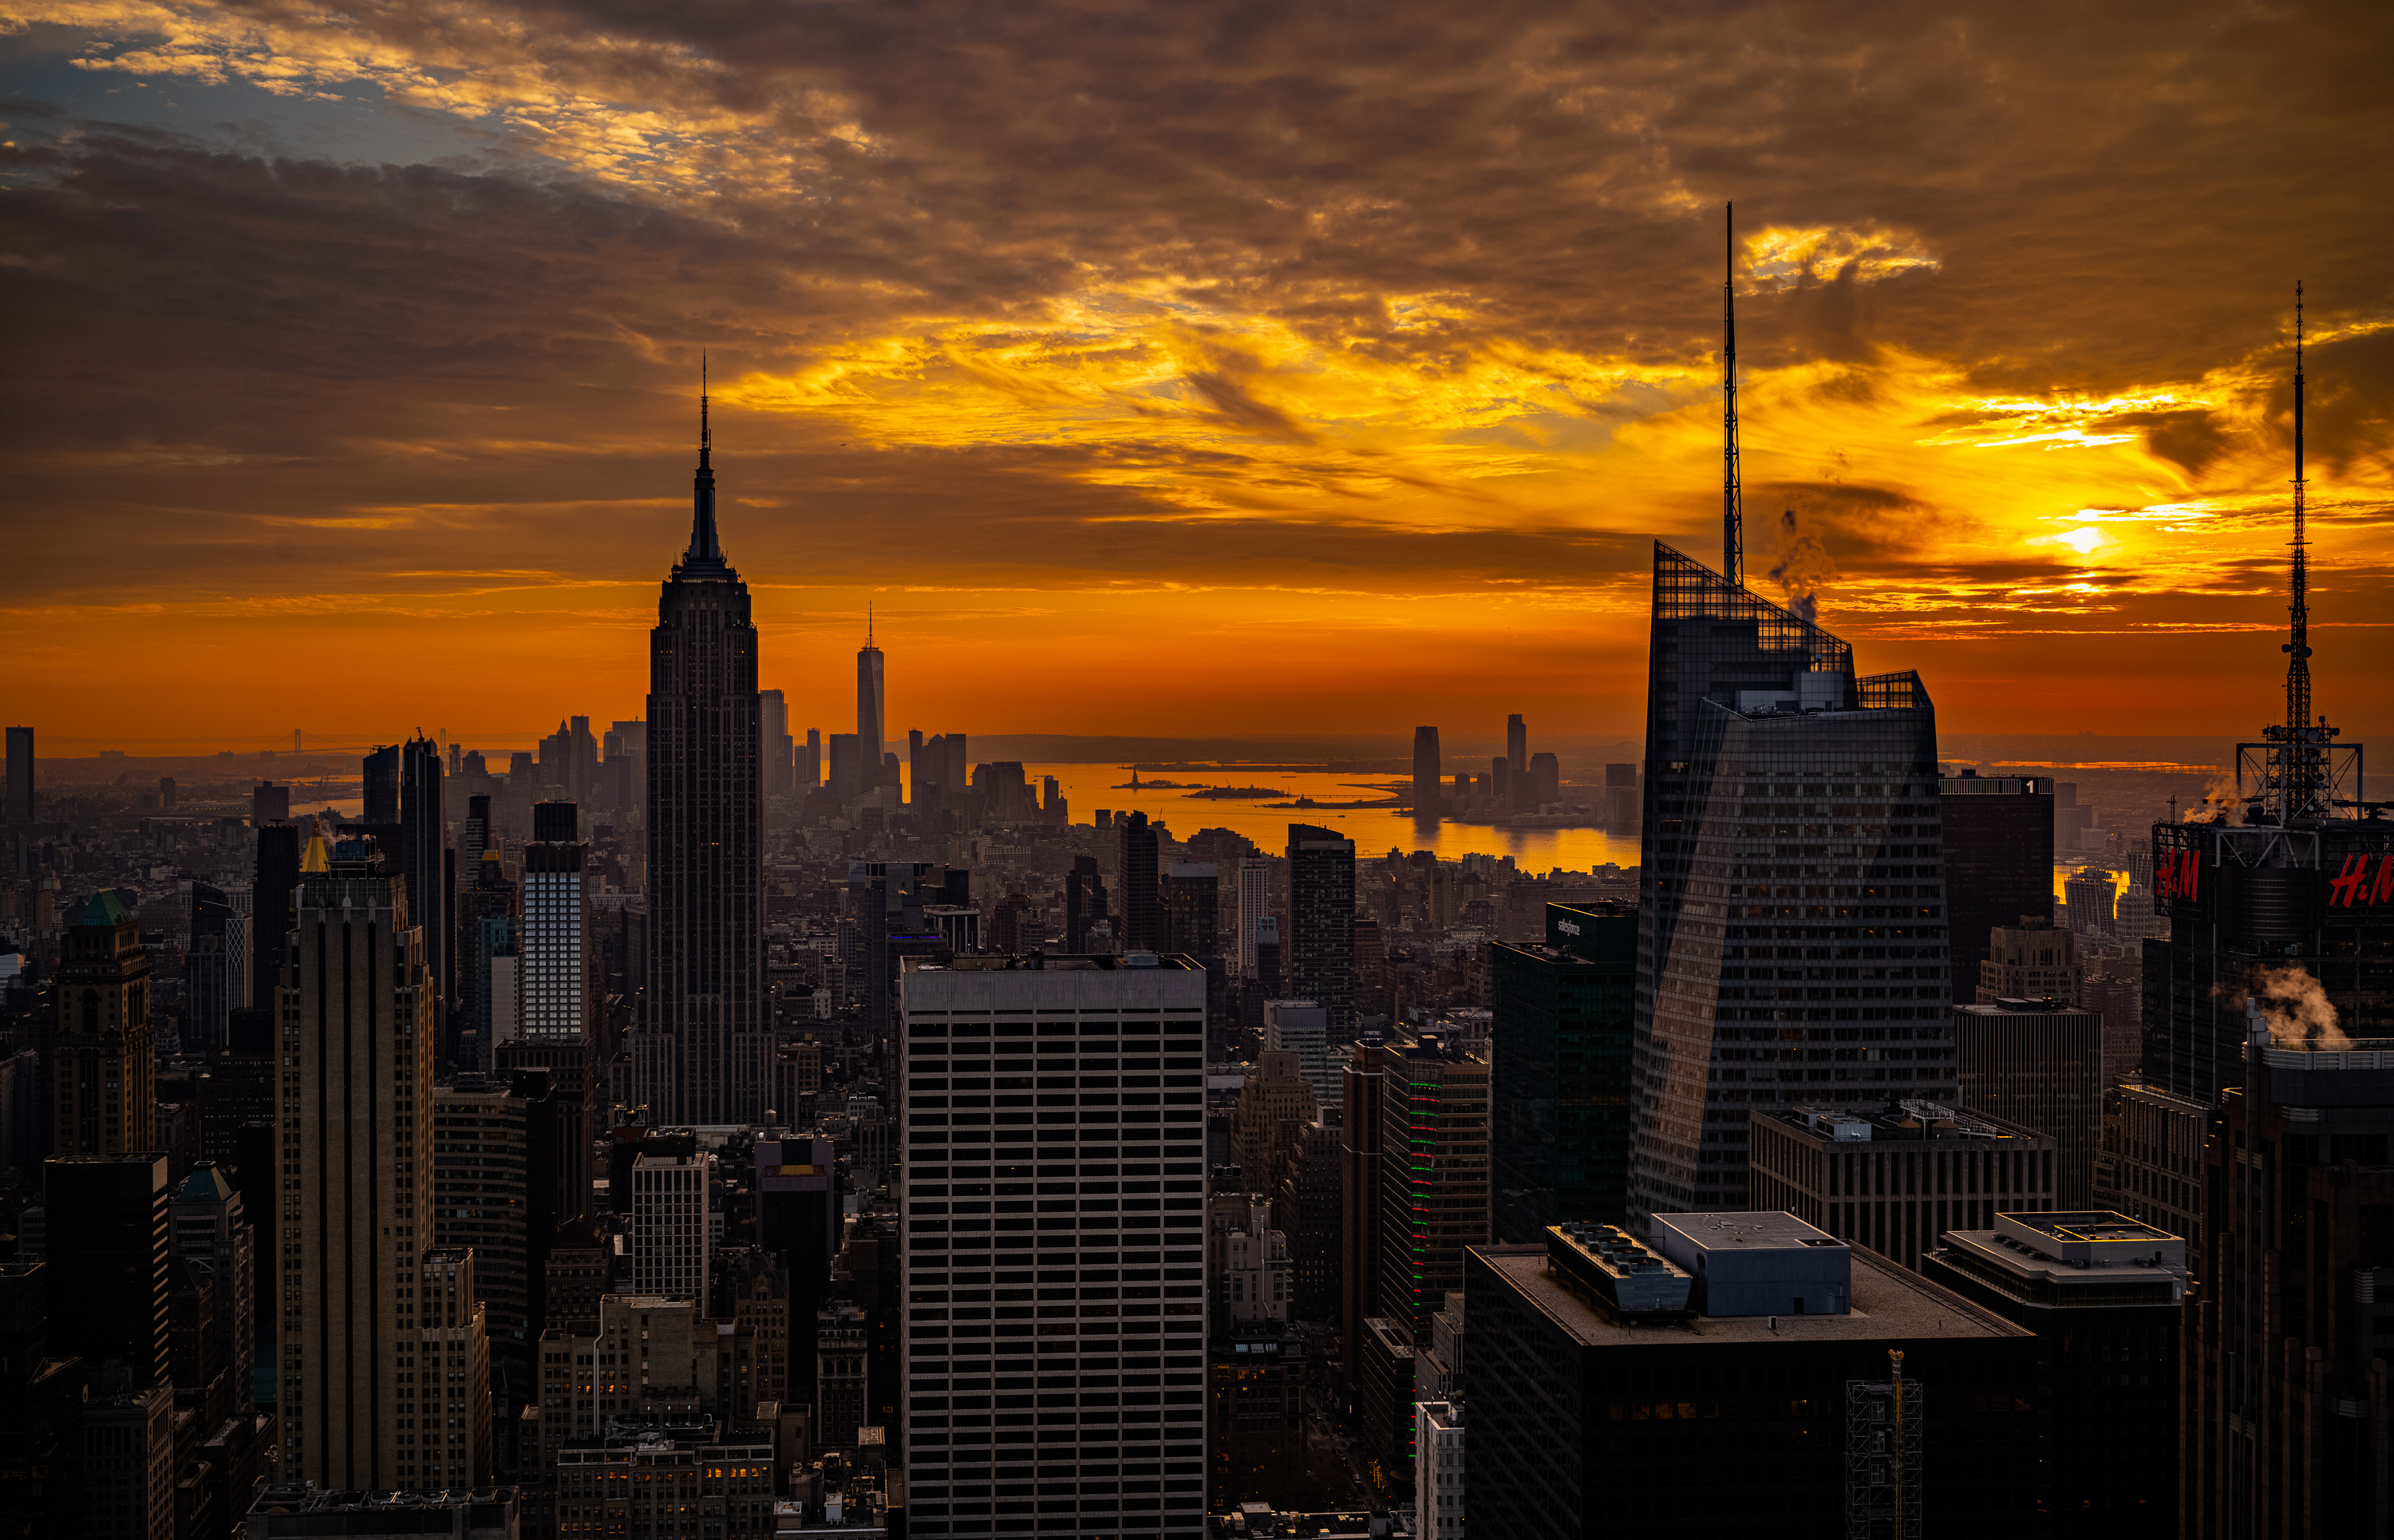
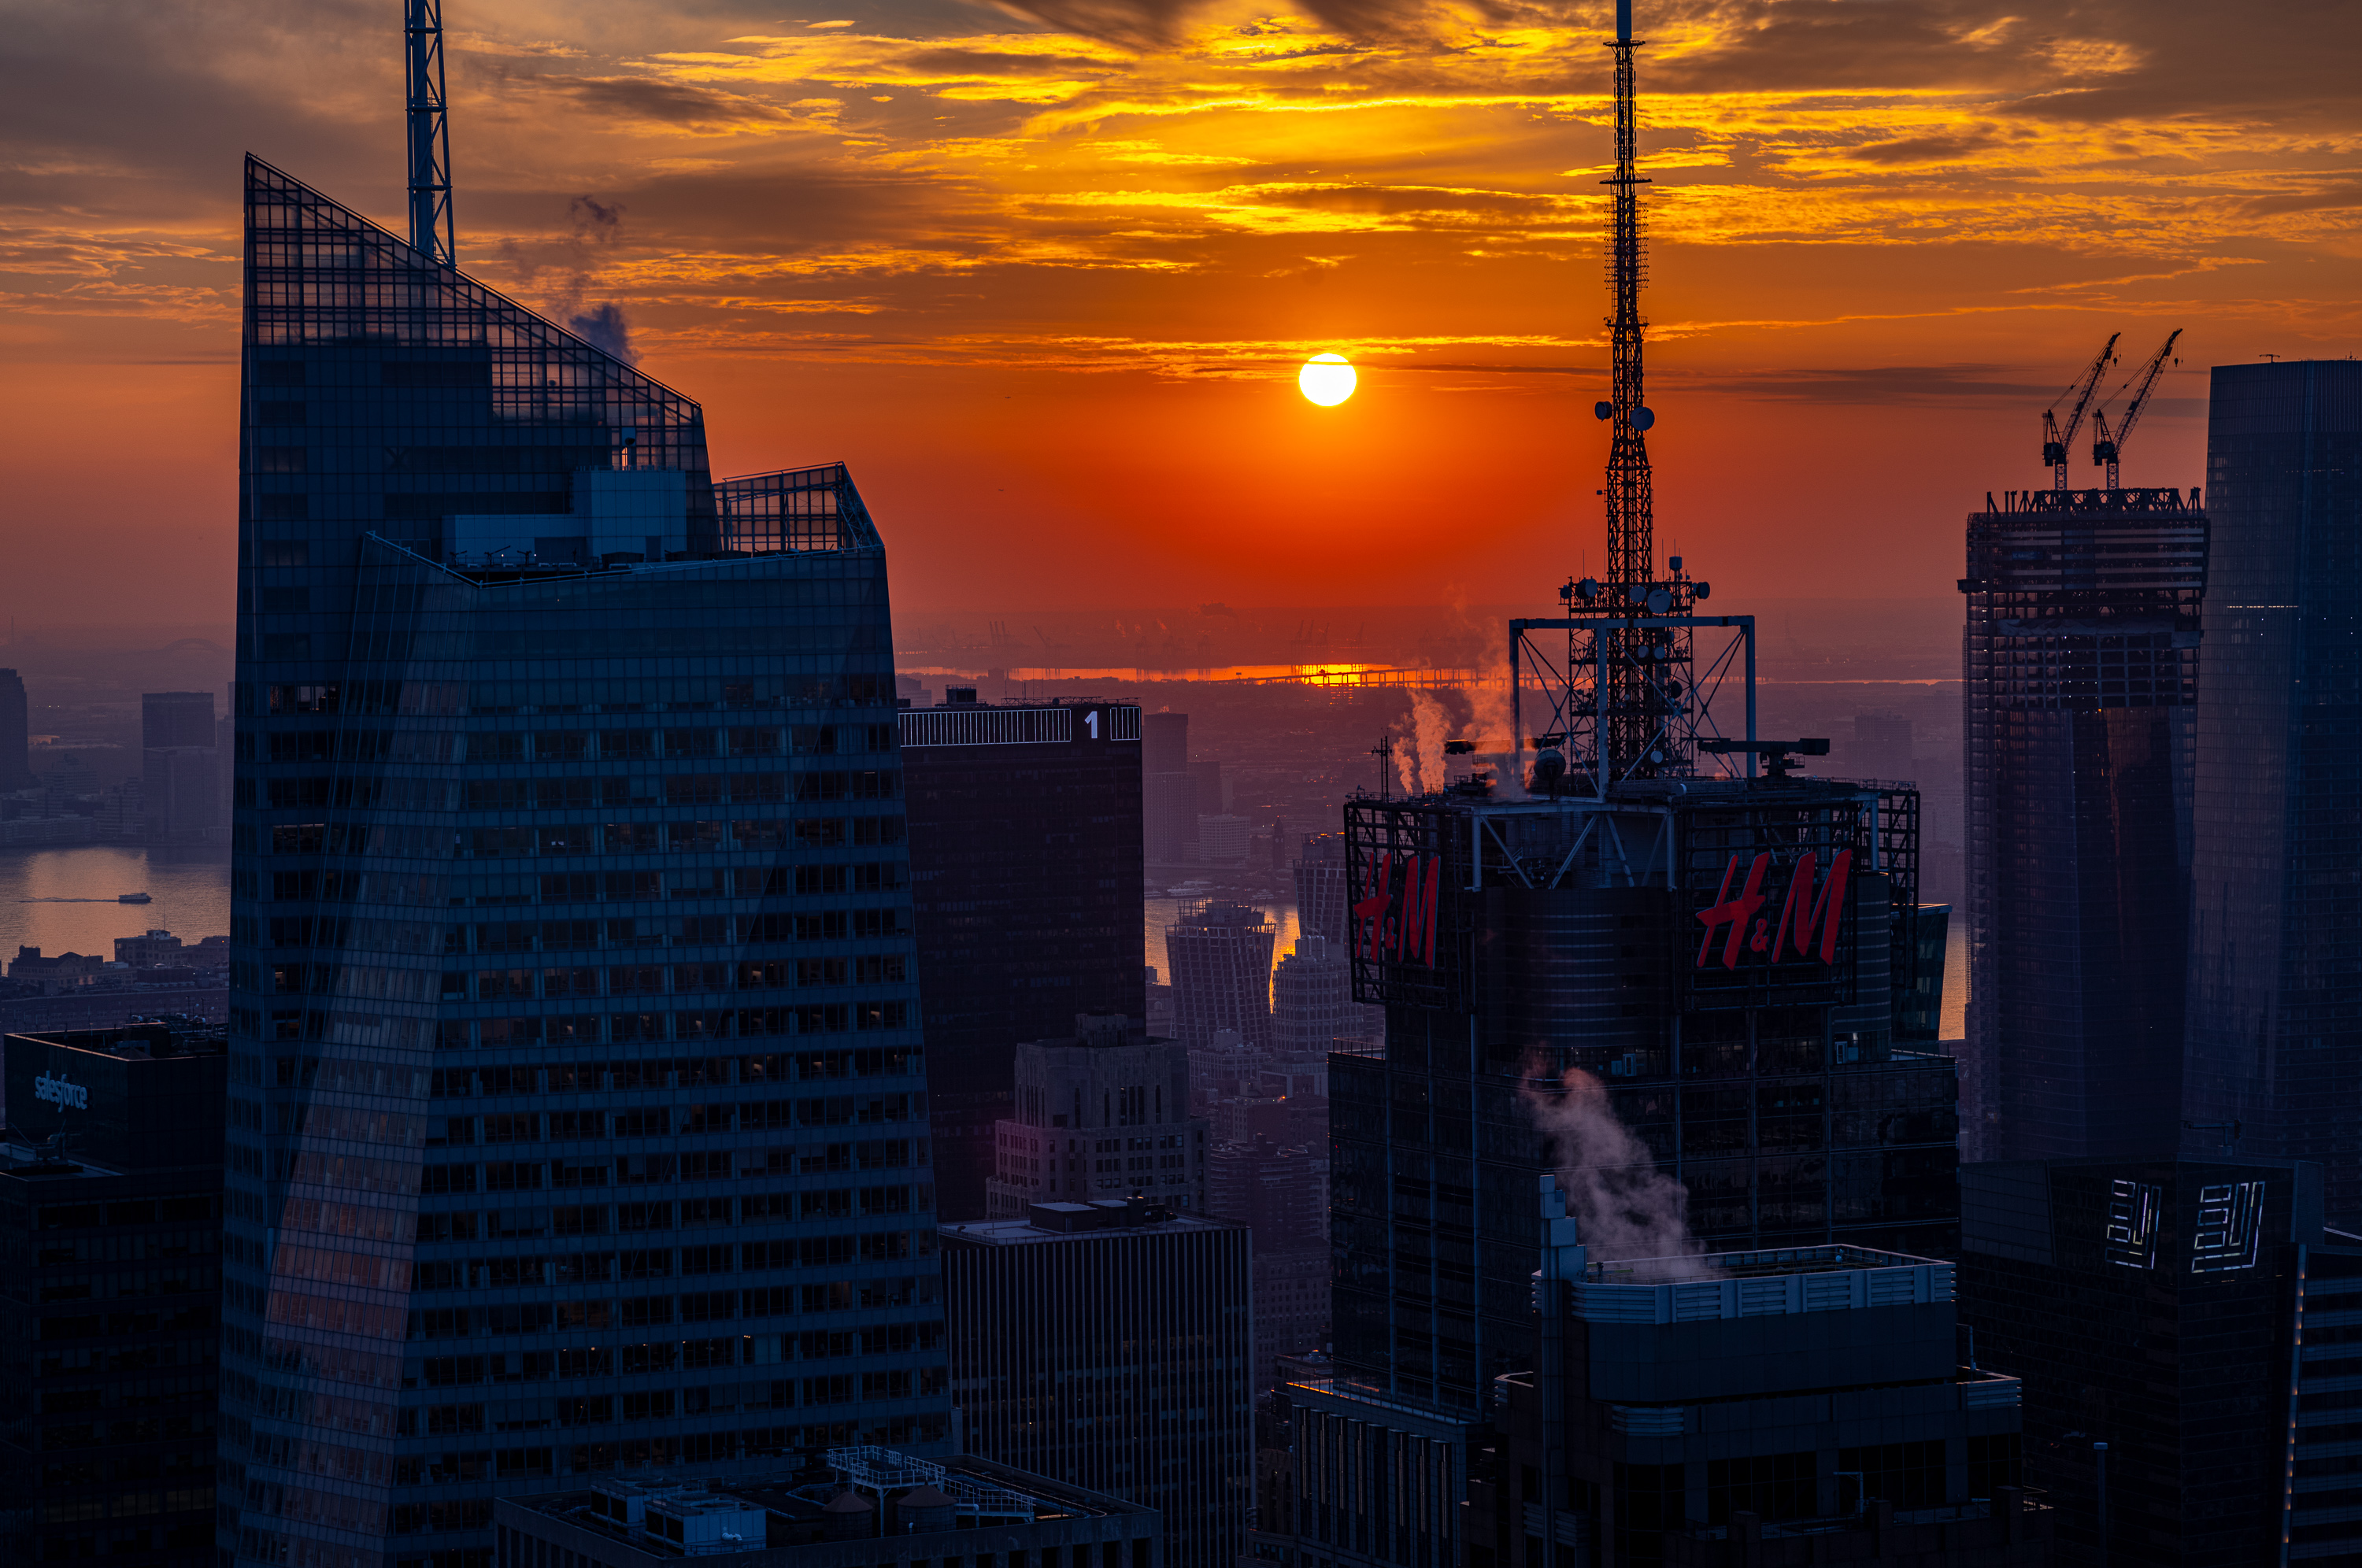
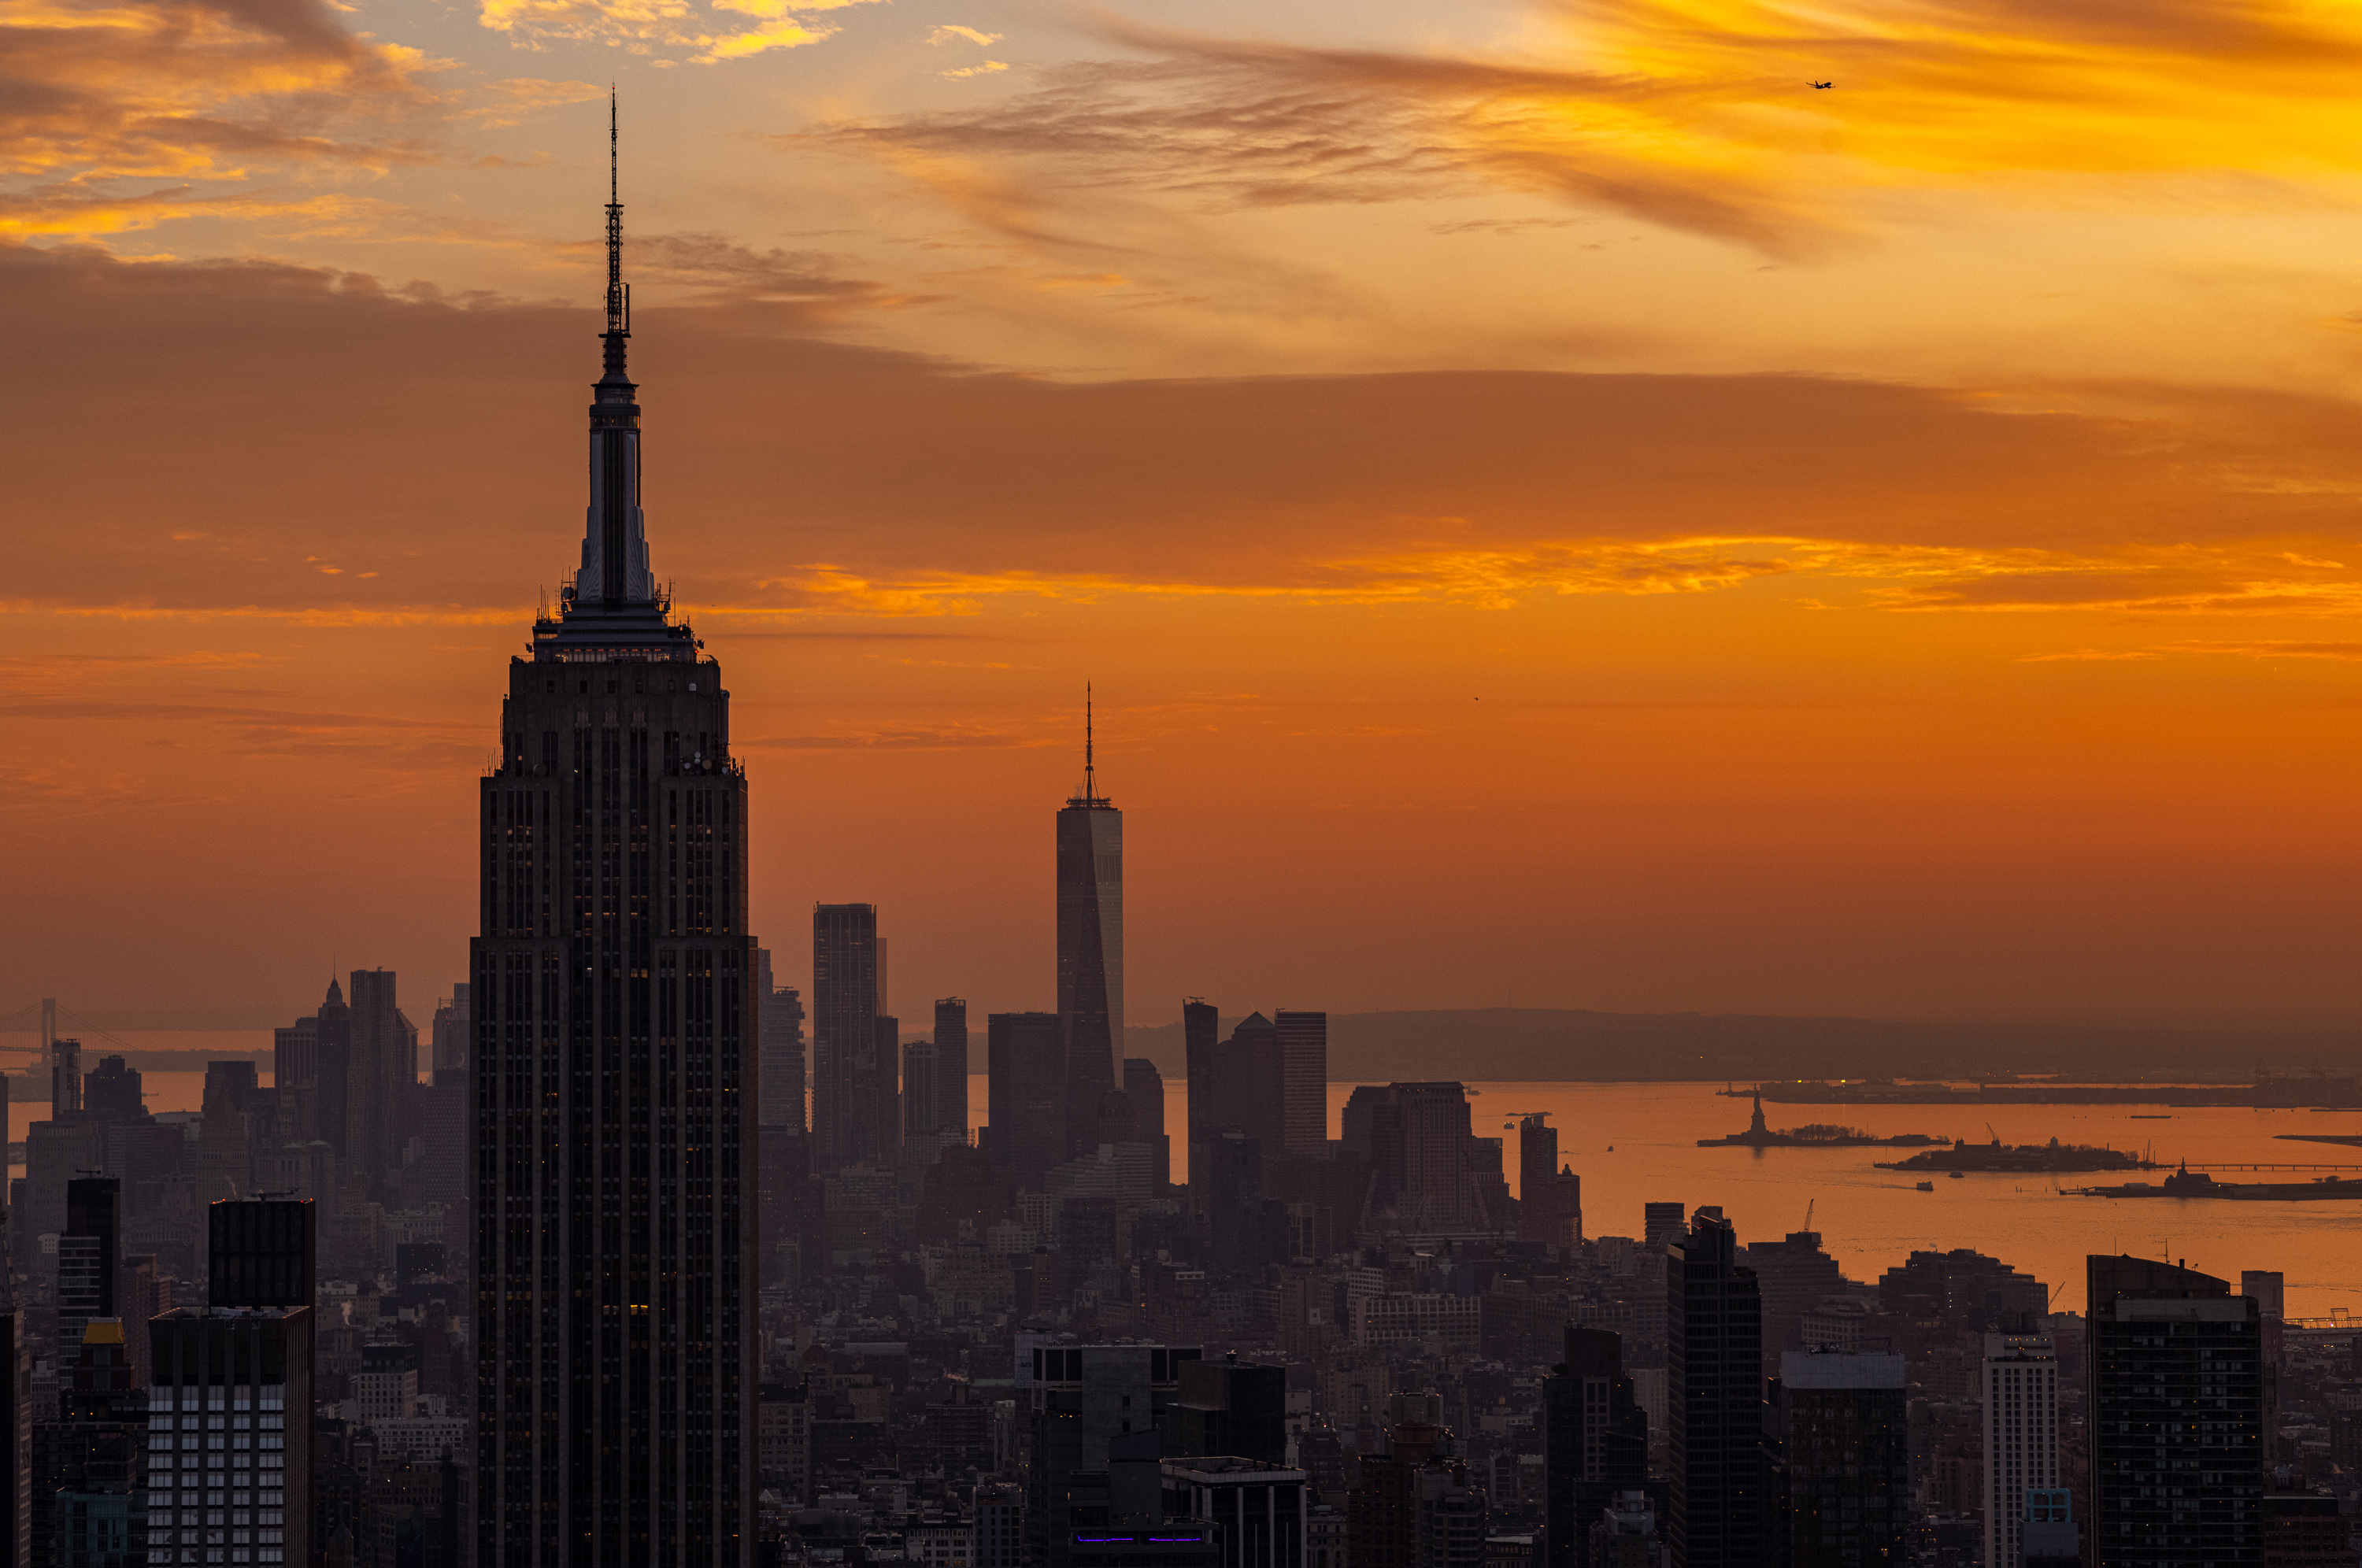
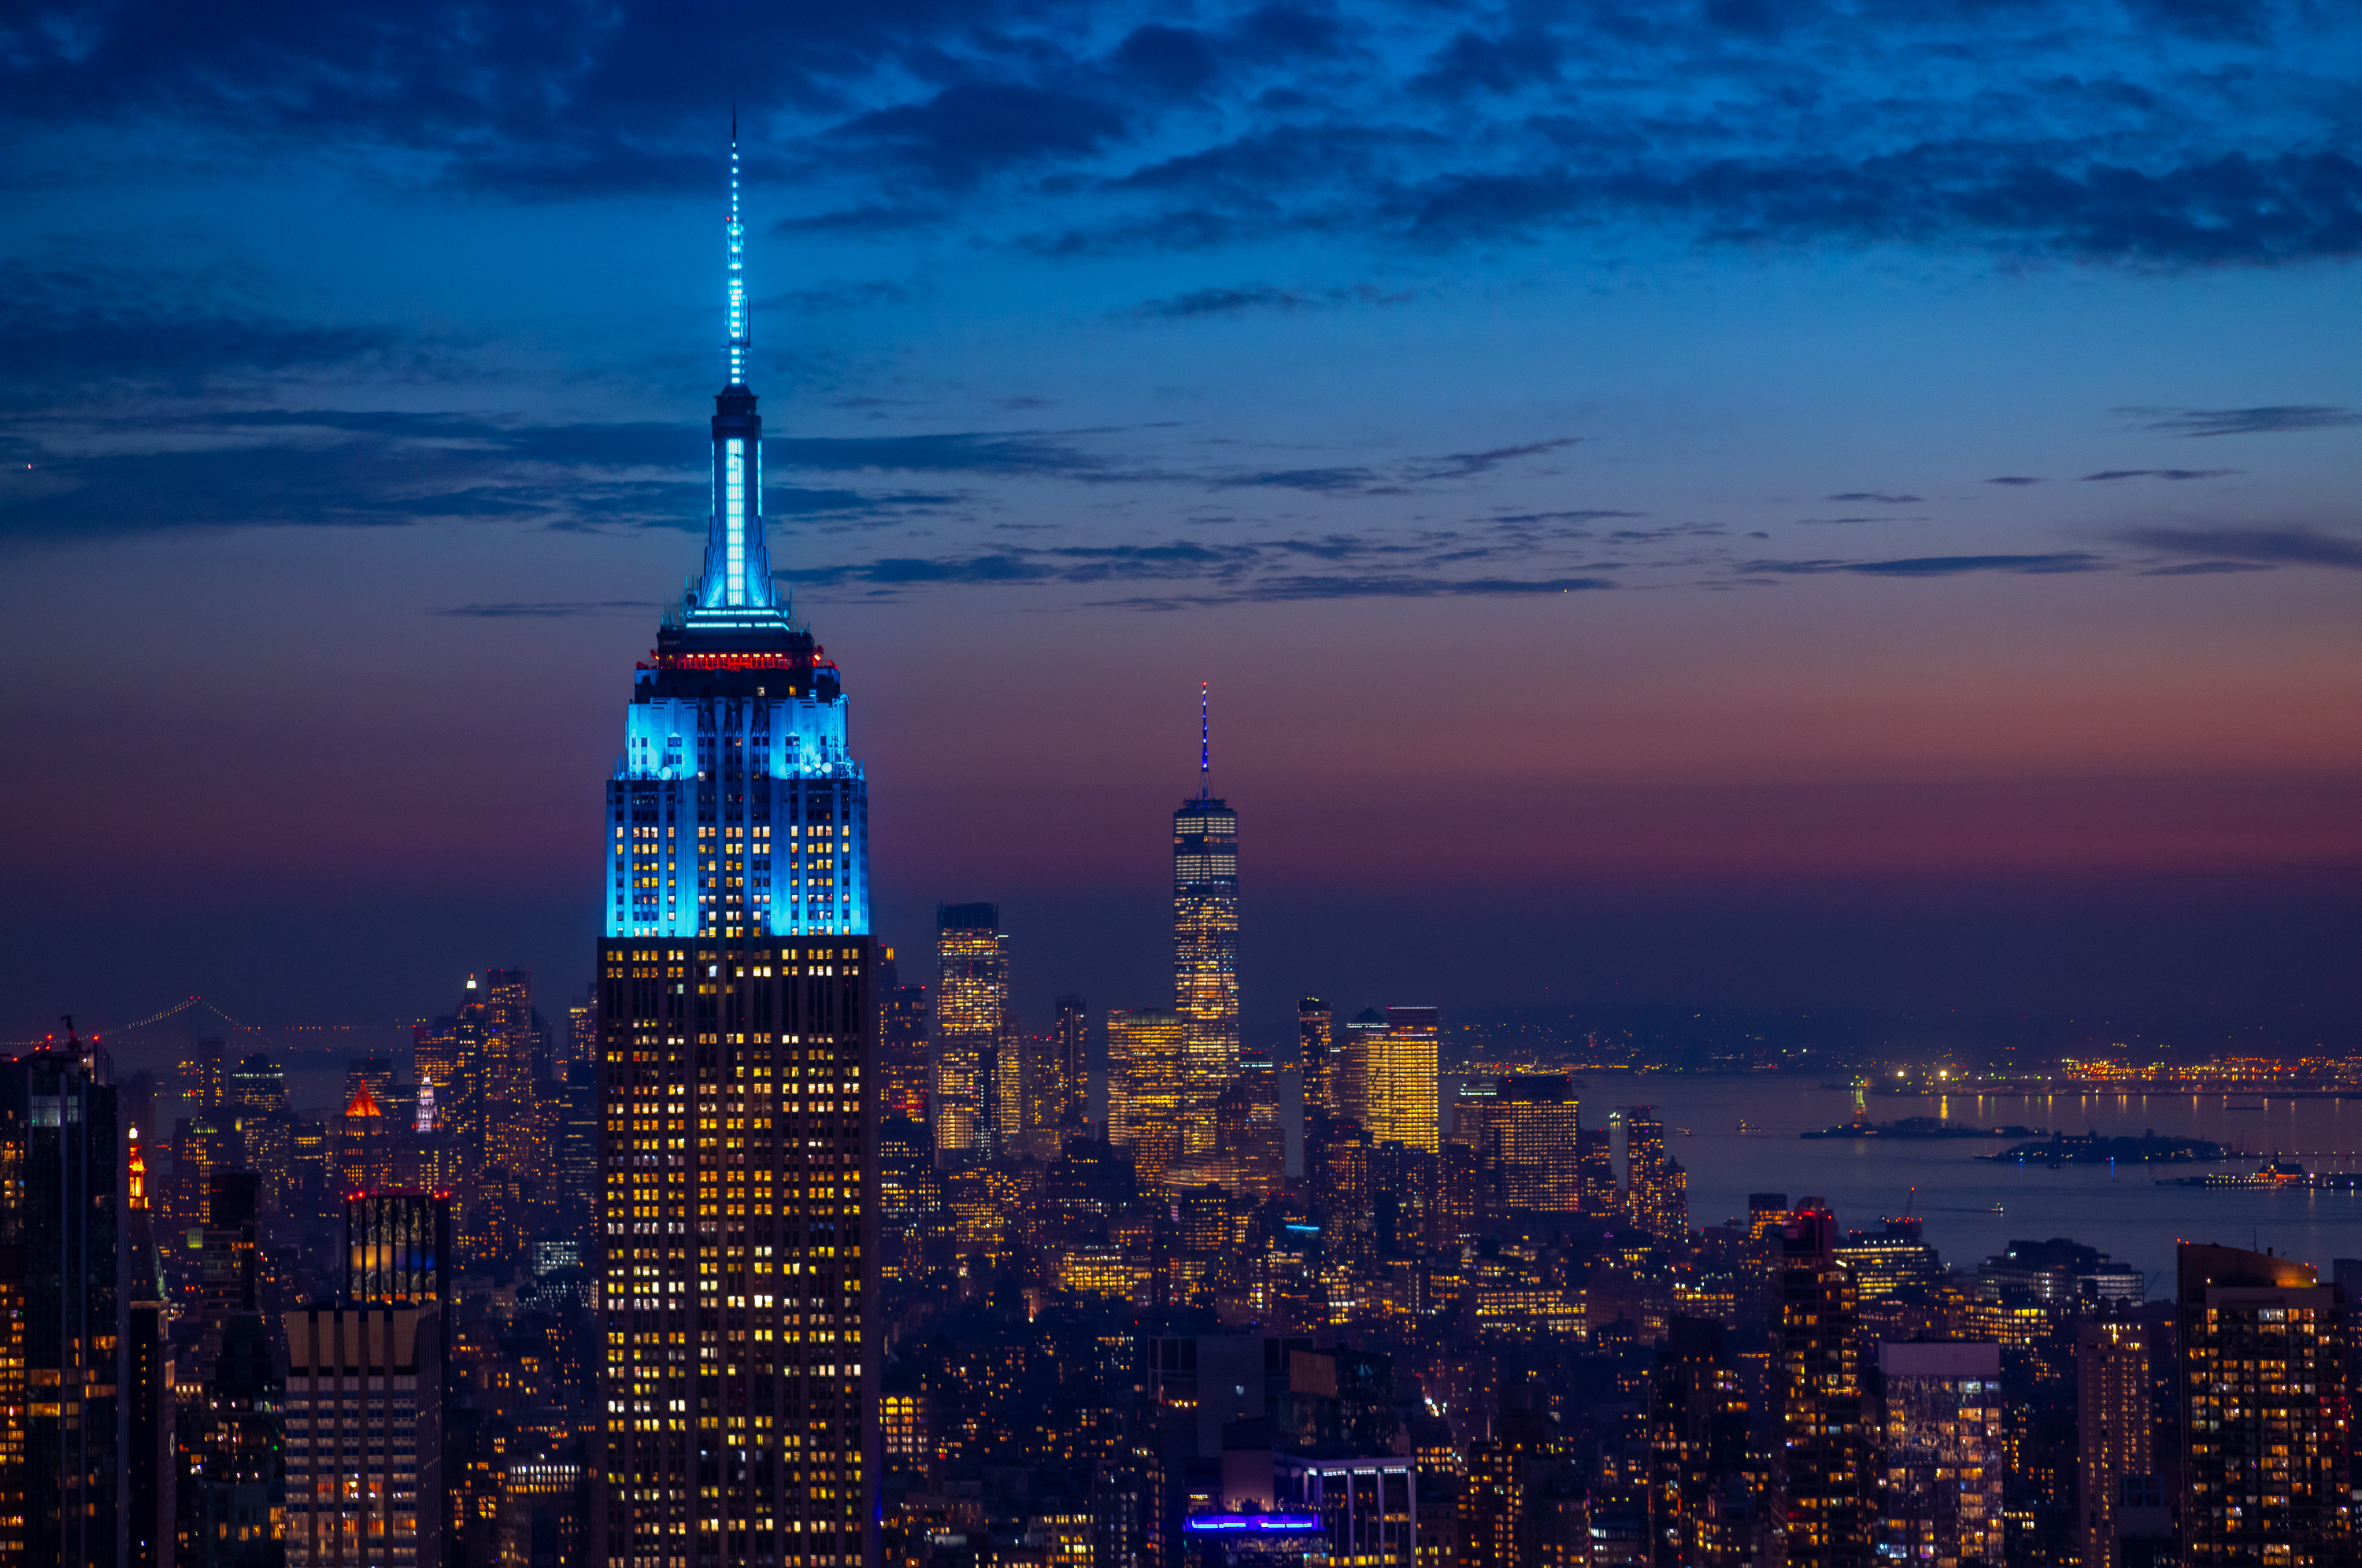
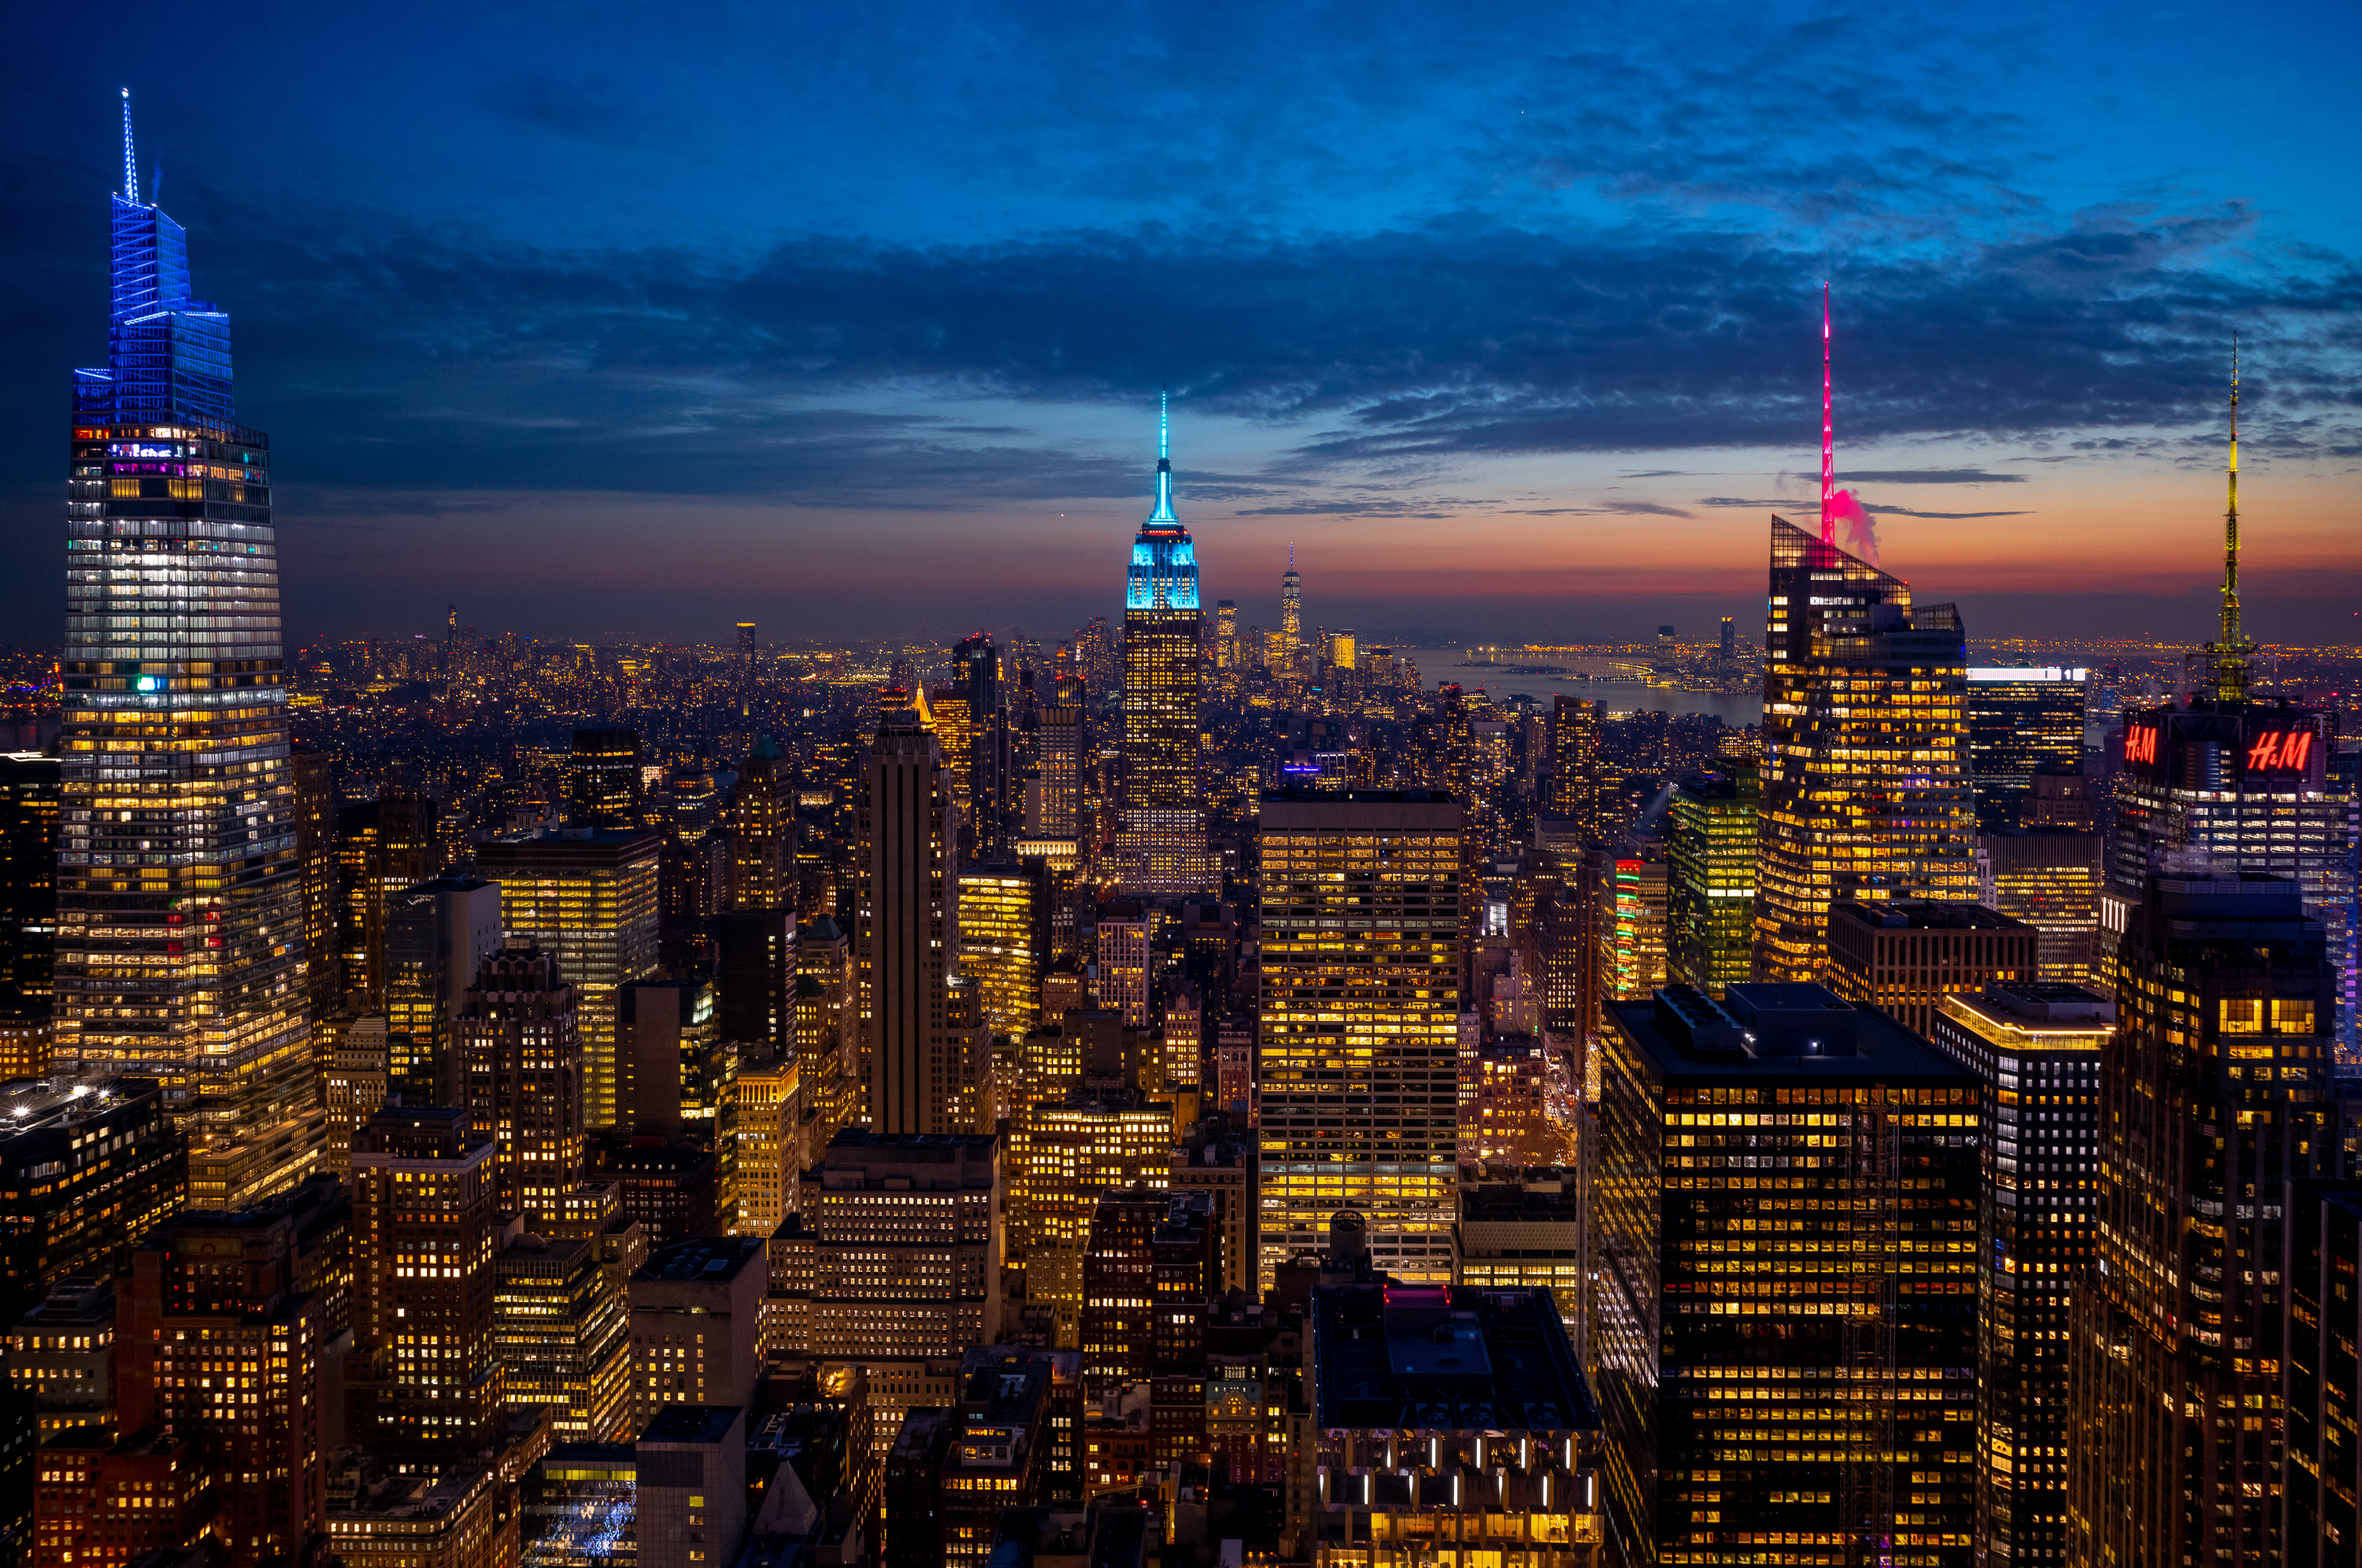
Once at the top, you have easy access to multiple observation decks that span two levels. Despite the long lines to get in, the viewing areas weren’t crowded at all. With large vertical breaks between the glass walls, finding an ideal shooting location was a piece of cake. I was concerned that I might have arrived too late, but the timing worked out perfectly. Almost immediately, I was rewarded with a breathtaking sunset over the New York skyline. Wasting no time, I fired away, as the intense golden glow of sunset turned to the more subtle orange and purples of dusk.
1/160th sec @ f/5.6, ISO 8000
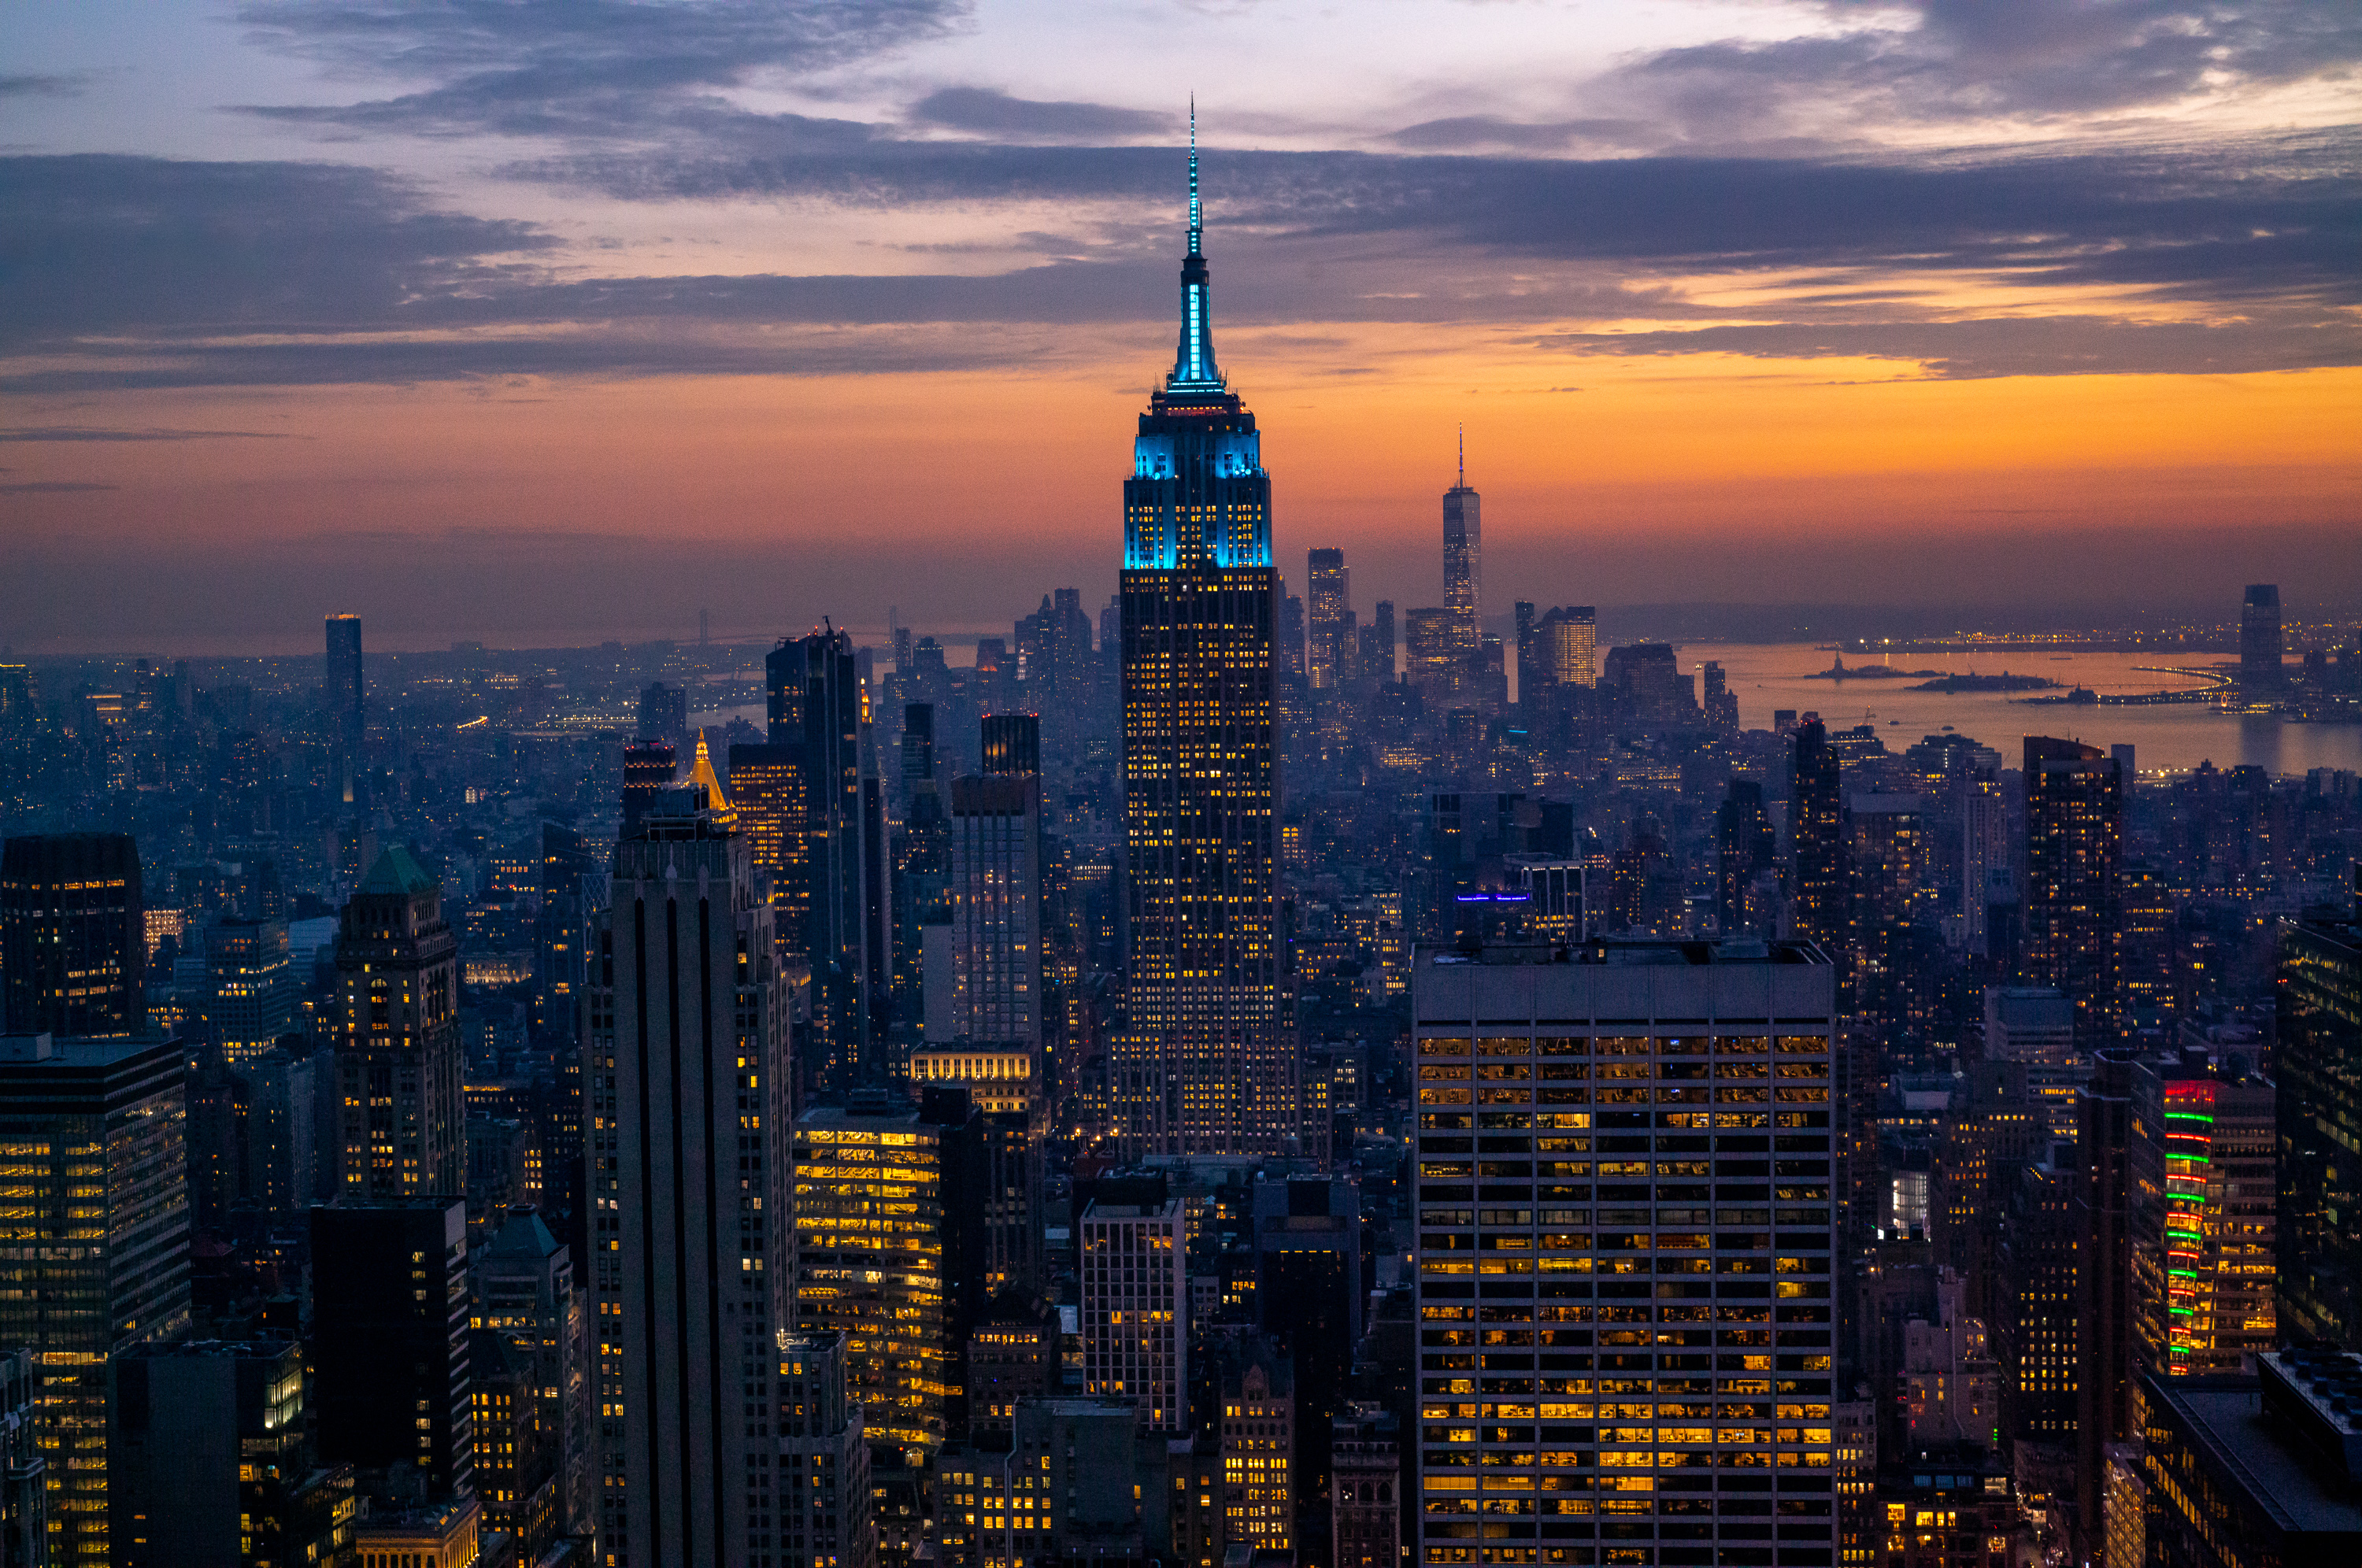
But that wasn’t the end. Especially in urban landscapes, the real party starts well after the sun has dropped below the horizon. There’s a magical window about 20 minutes after sunset when city lights turn on and contrast wonderfully against the still intense colors of the sky at the height of the blue hour. Far too many people leave early. Stick around longer than everyone else and you will get the pictures they didn’t.
1/15th sec @ f/4, ISO 1600, Handheld using electronic shutter
But even my fancy Express Pass wouldn’t grant me use of a tripod – they have strict rules forbidding that essential piece of photo gear. As that magical time approached, my ISO values continued to climb all the way to 10,000. The results were nice, but a scene like that deserved to be treated properly, with the best possible image quality. So, I tested out a hunch. What if I used the electronic shutter to eliminate all internal vibration? Could I get sharp pictures at a slower shutter speed and lower ISO? When combined with a 2-second self-timer, the answer turned out to be a resounding yes. I managed to achieve critical sharpness at 1/10th of a second with the 35 and an even more impressive 1/6th at 24mm, allowing me to shoot at ISO 1600 instead of 10,000.
1/6th sec @ f/5.6, ISO 1600, Handheld using electronic shutter
Smalls Jazz Club
Riding high after such a lovely sunset from an amazing vantage point, I considered my next move. Turn in early for the night or get some more low light photos in Lower Manhattan? The responsible thing to do would have been to call it day. But that’s not how you make photographic opportunities. If you want pictures, you need to show up. A short train ride later, I was back in the Village, this time meeting up with an old friend.
1/125th sec @ f/2.8, ISO 2000
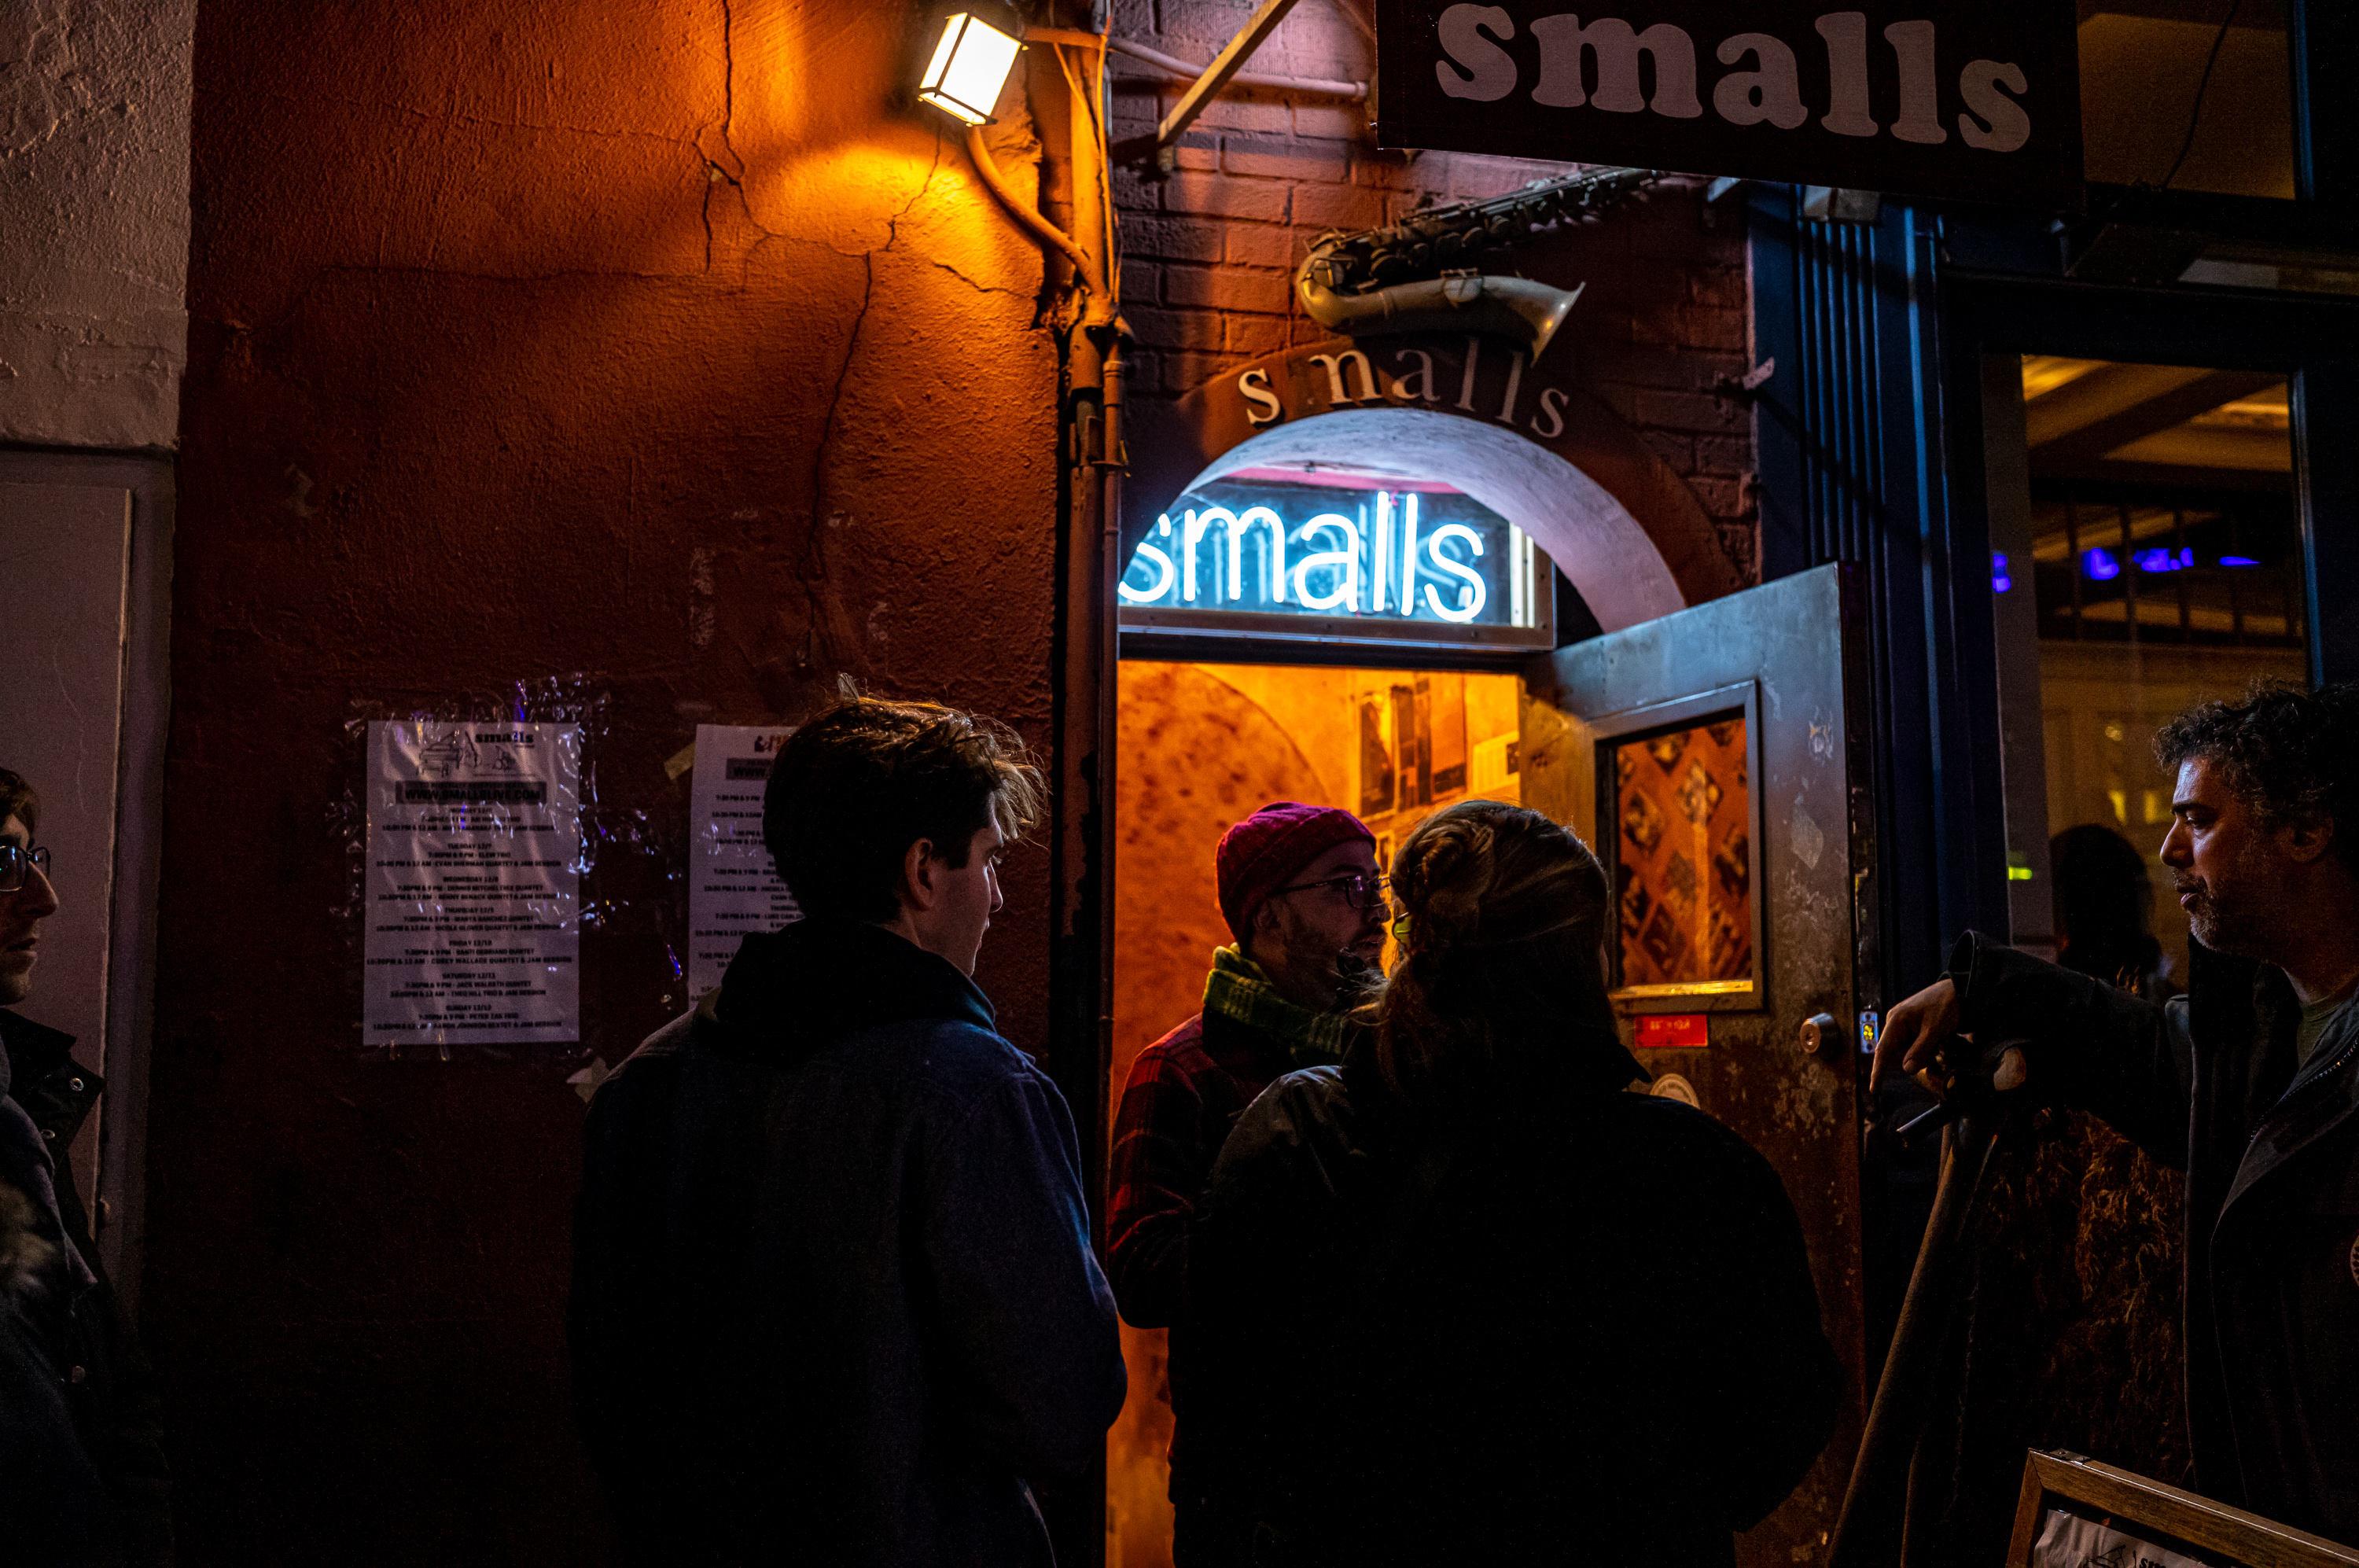
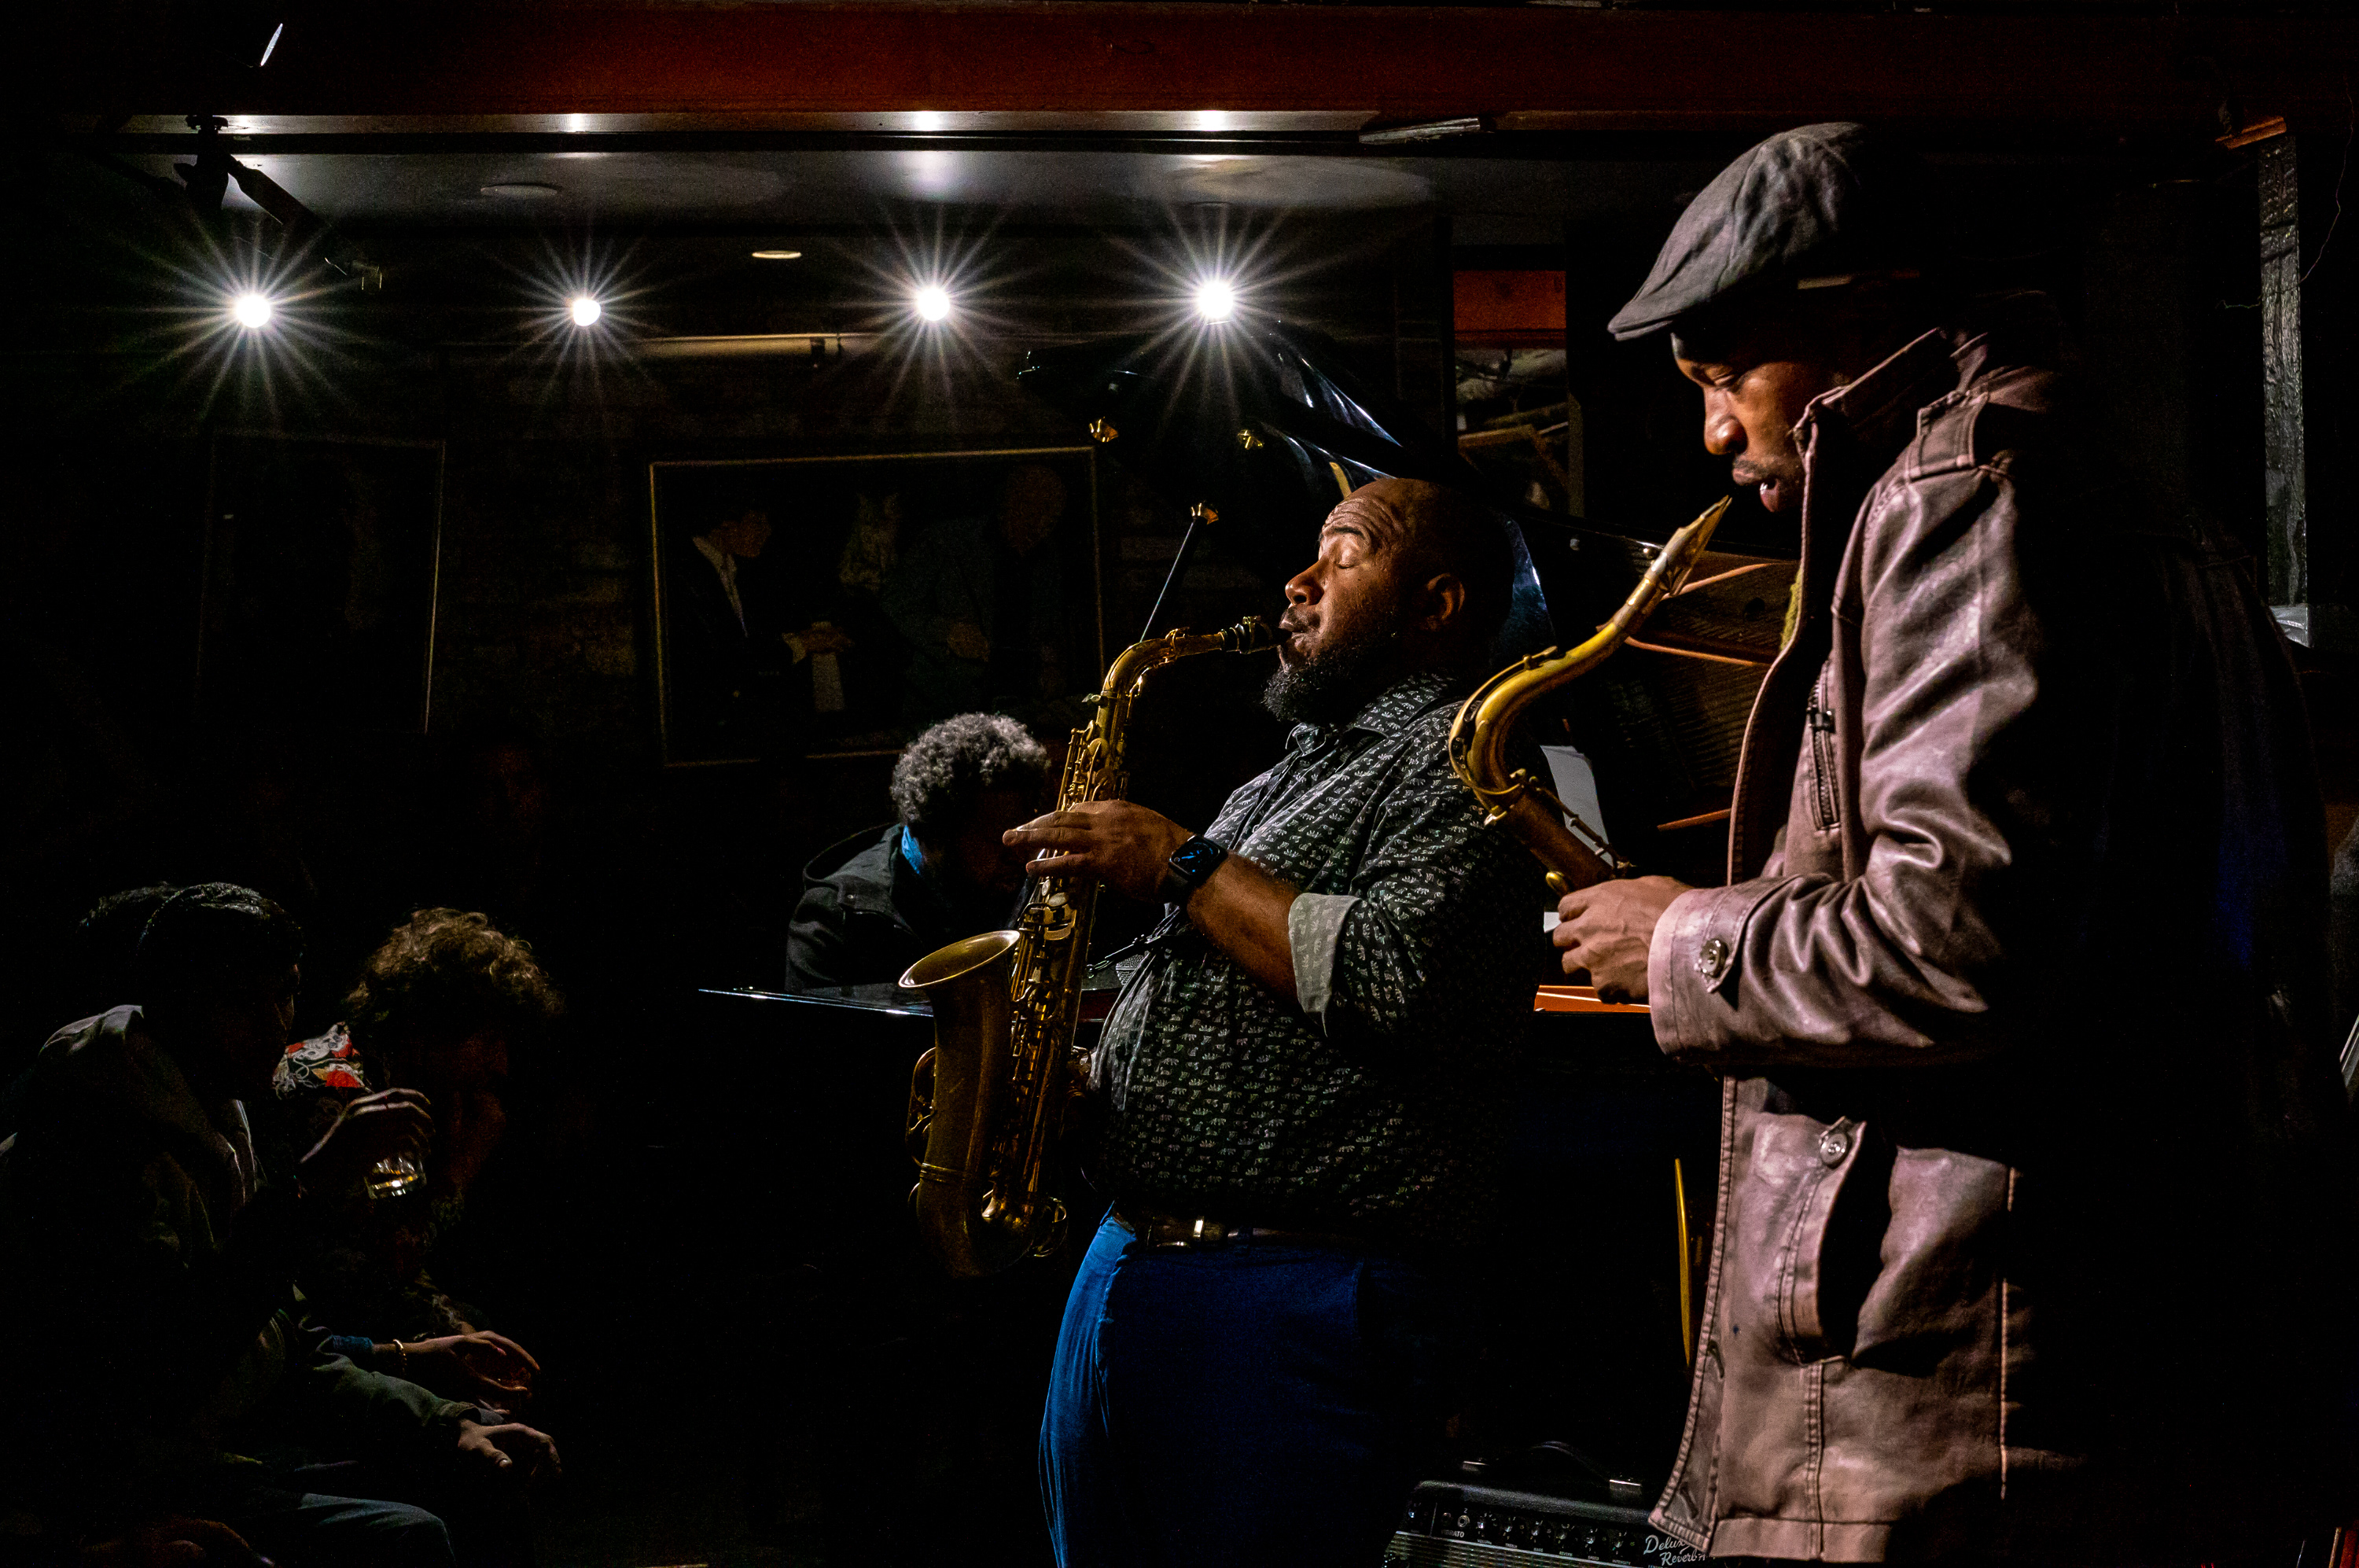
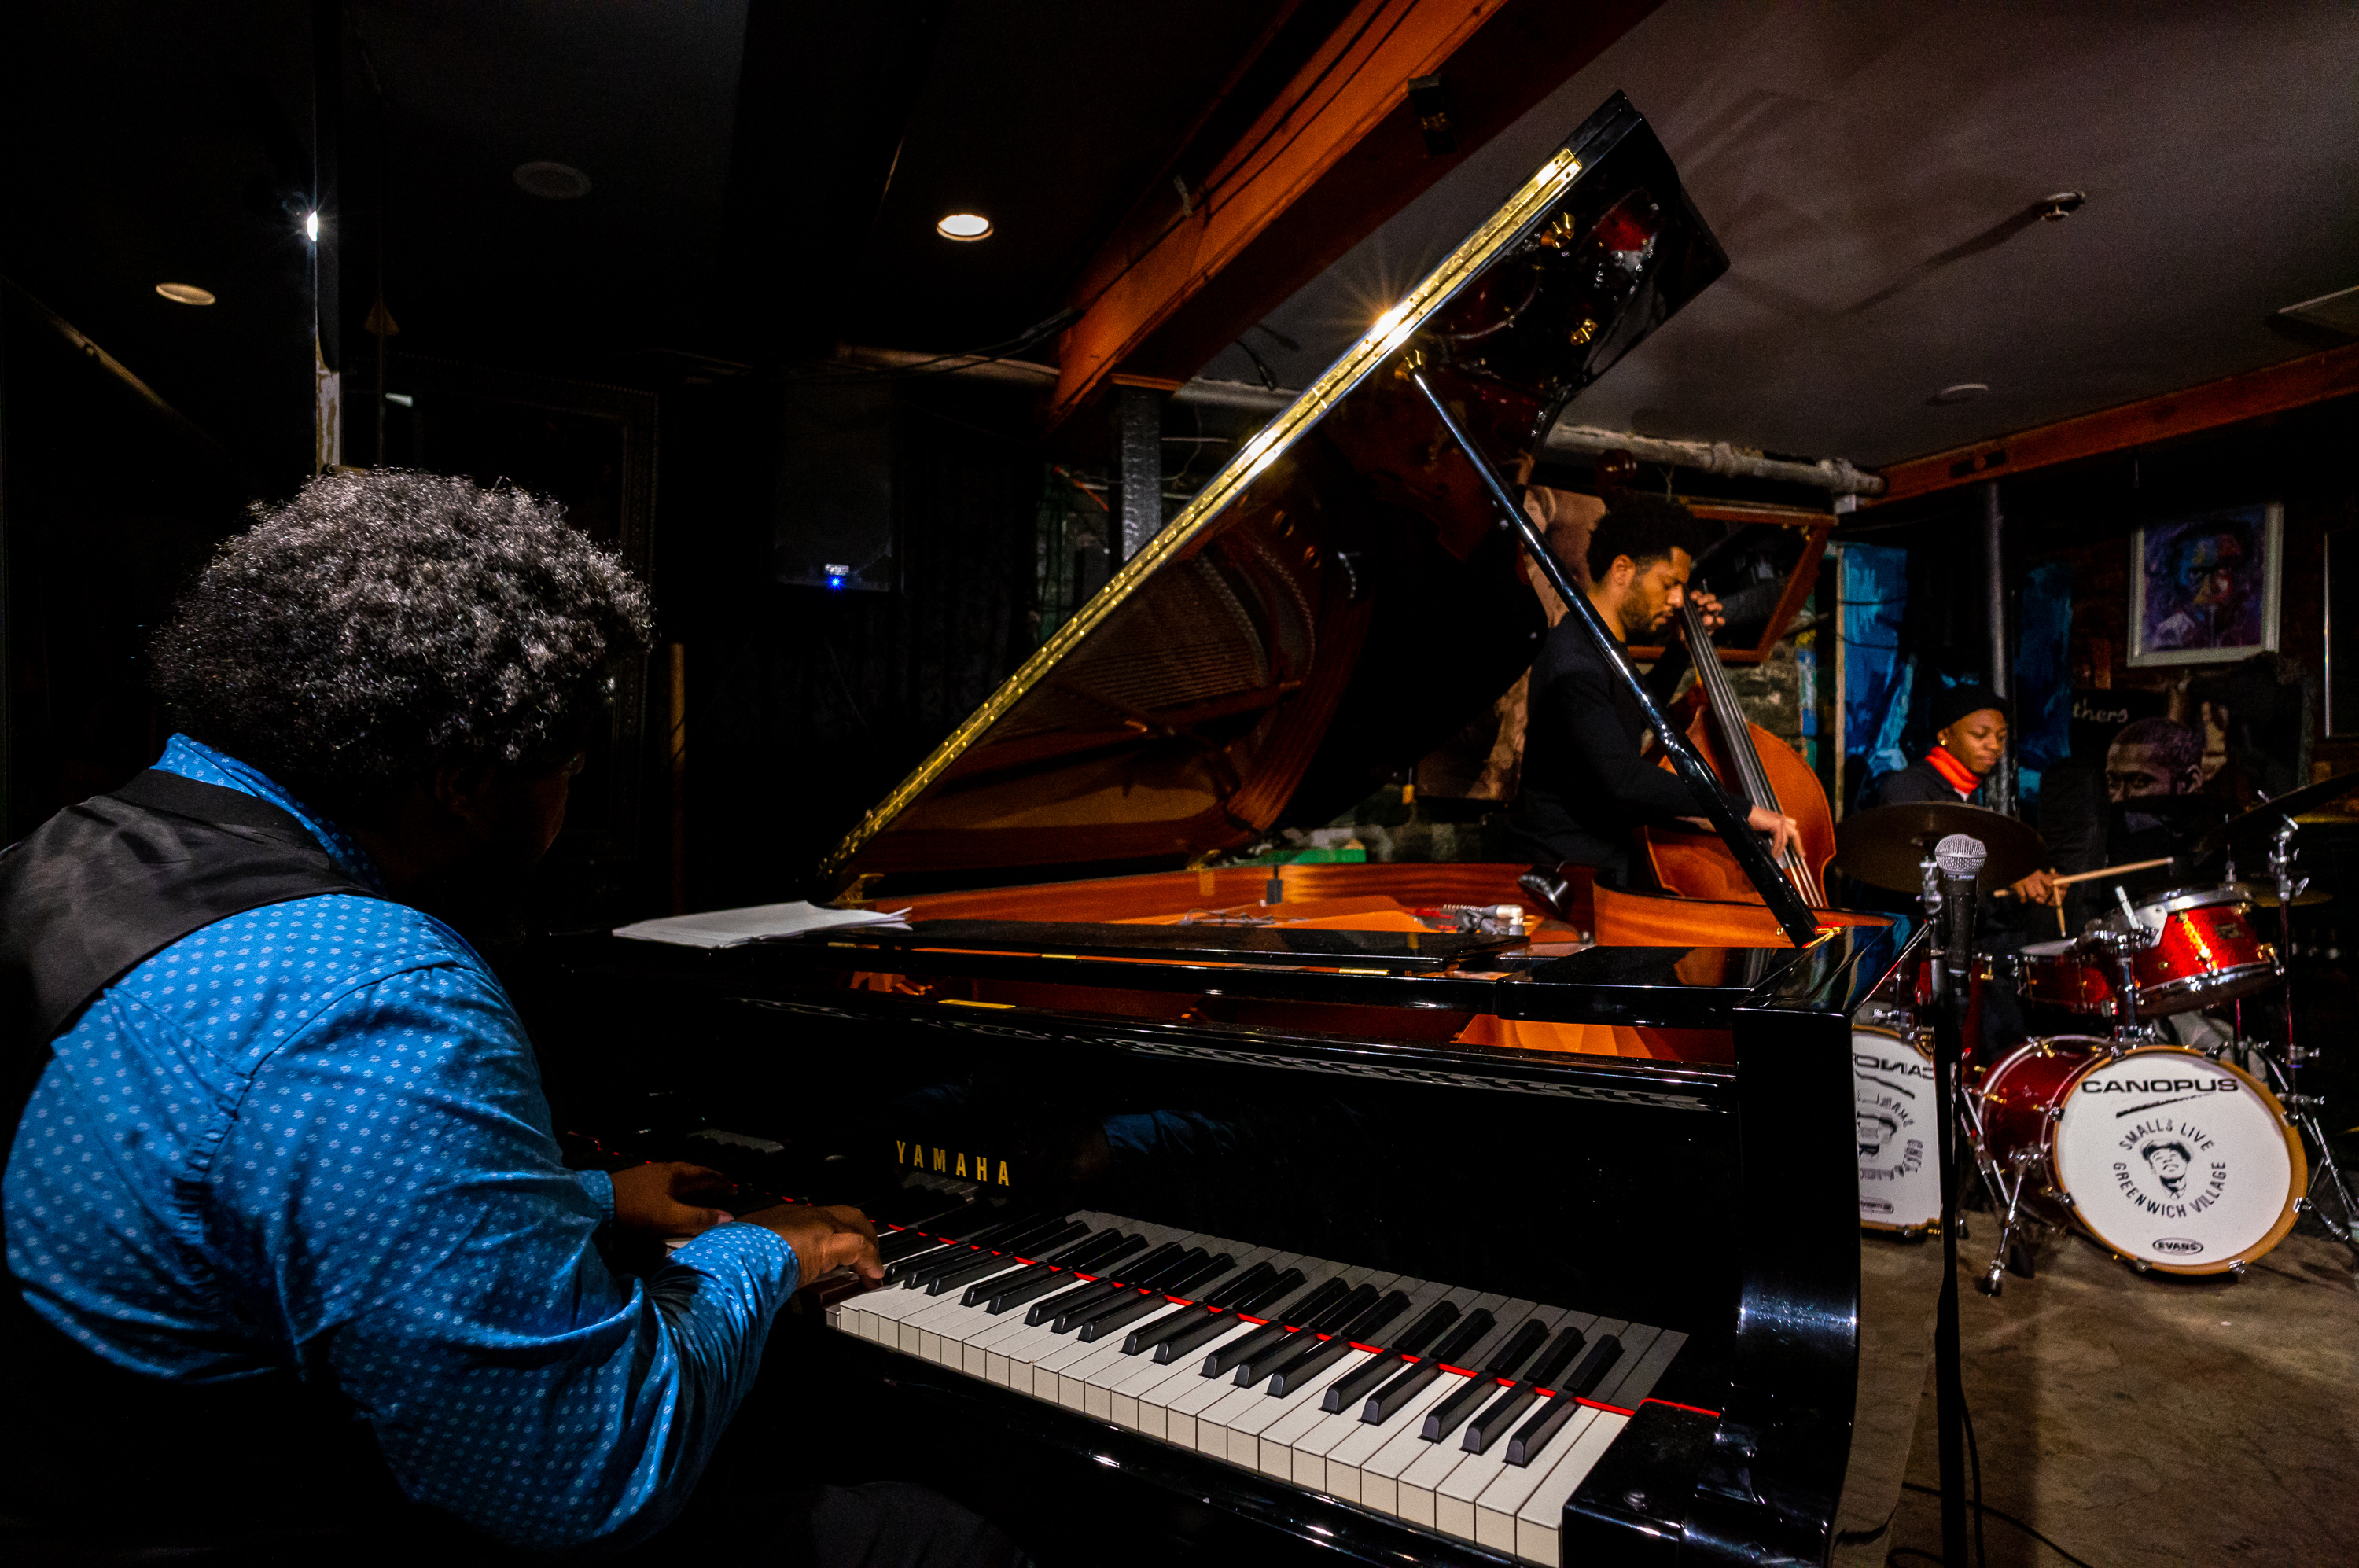
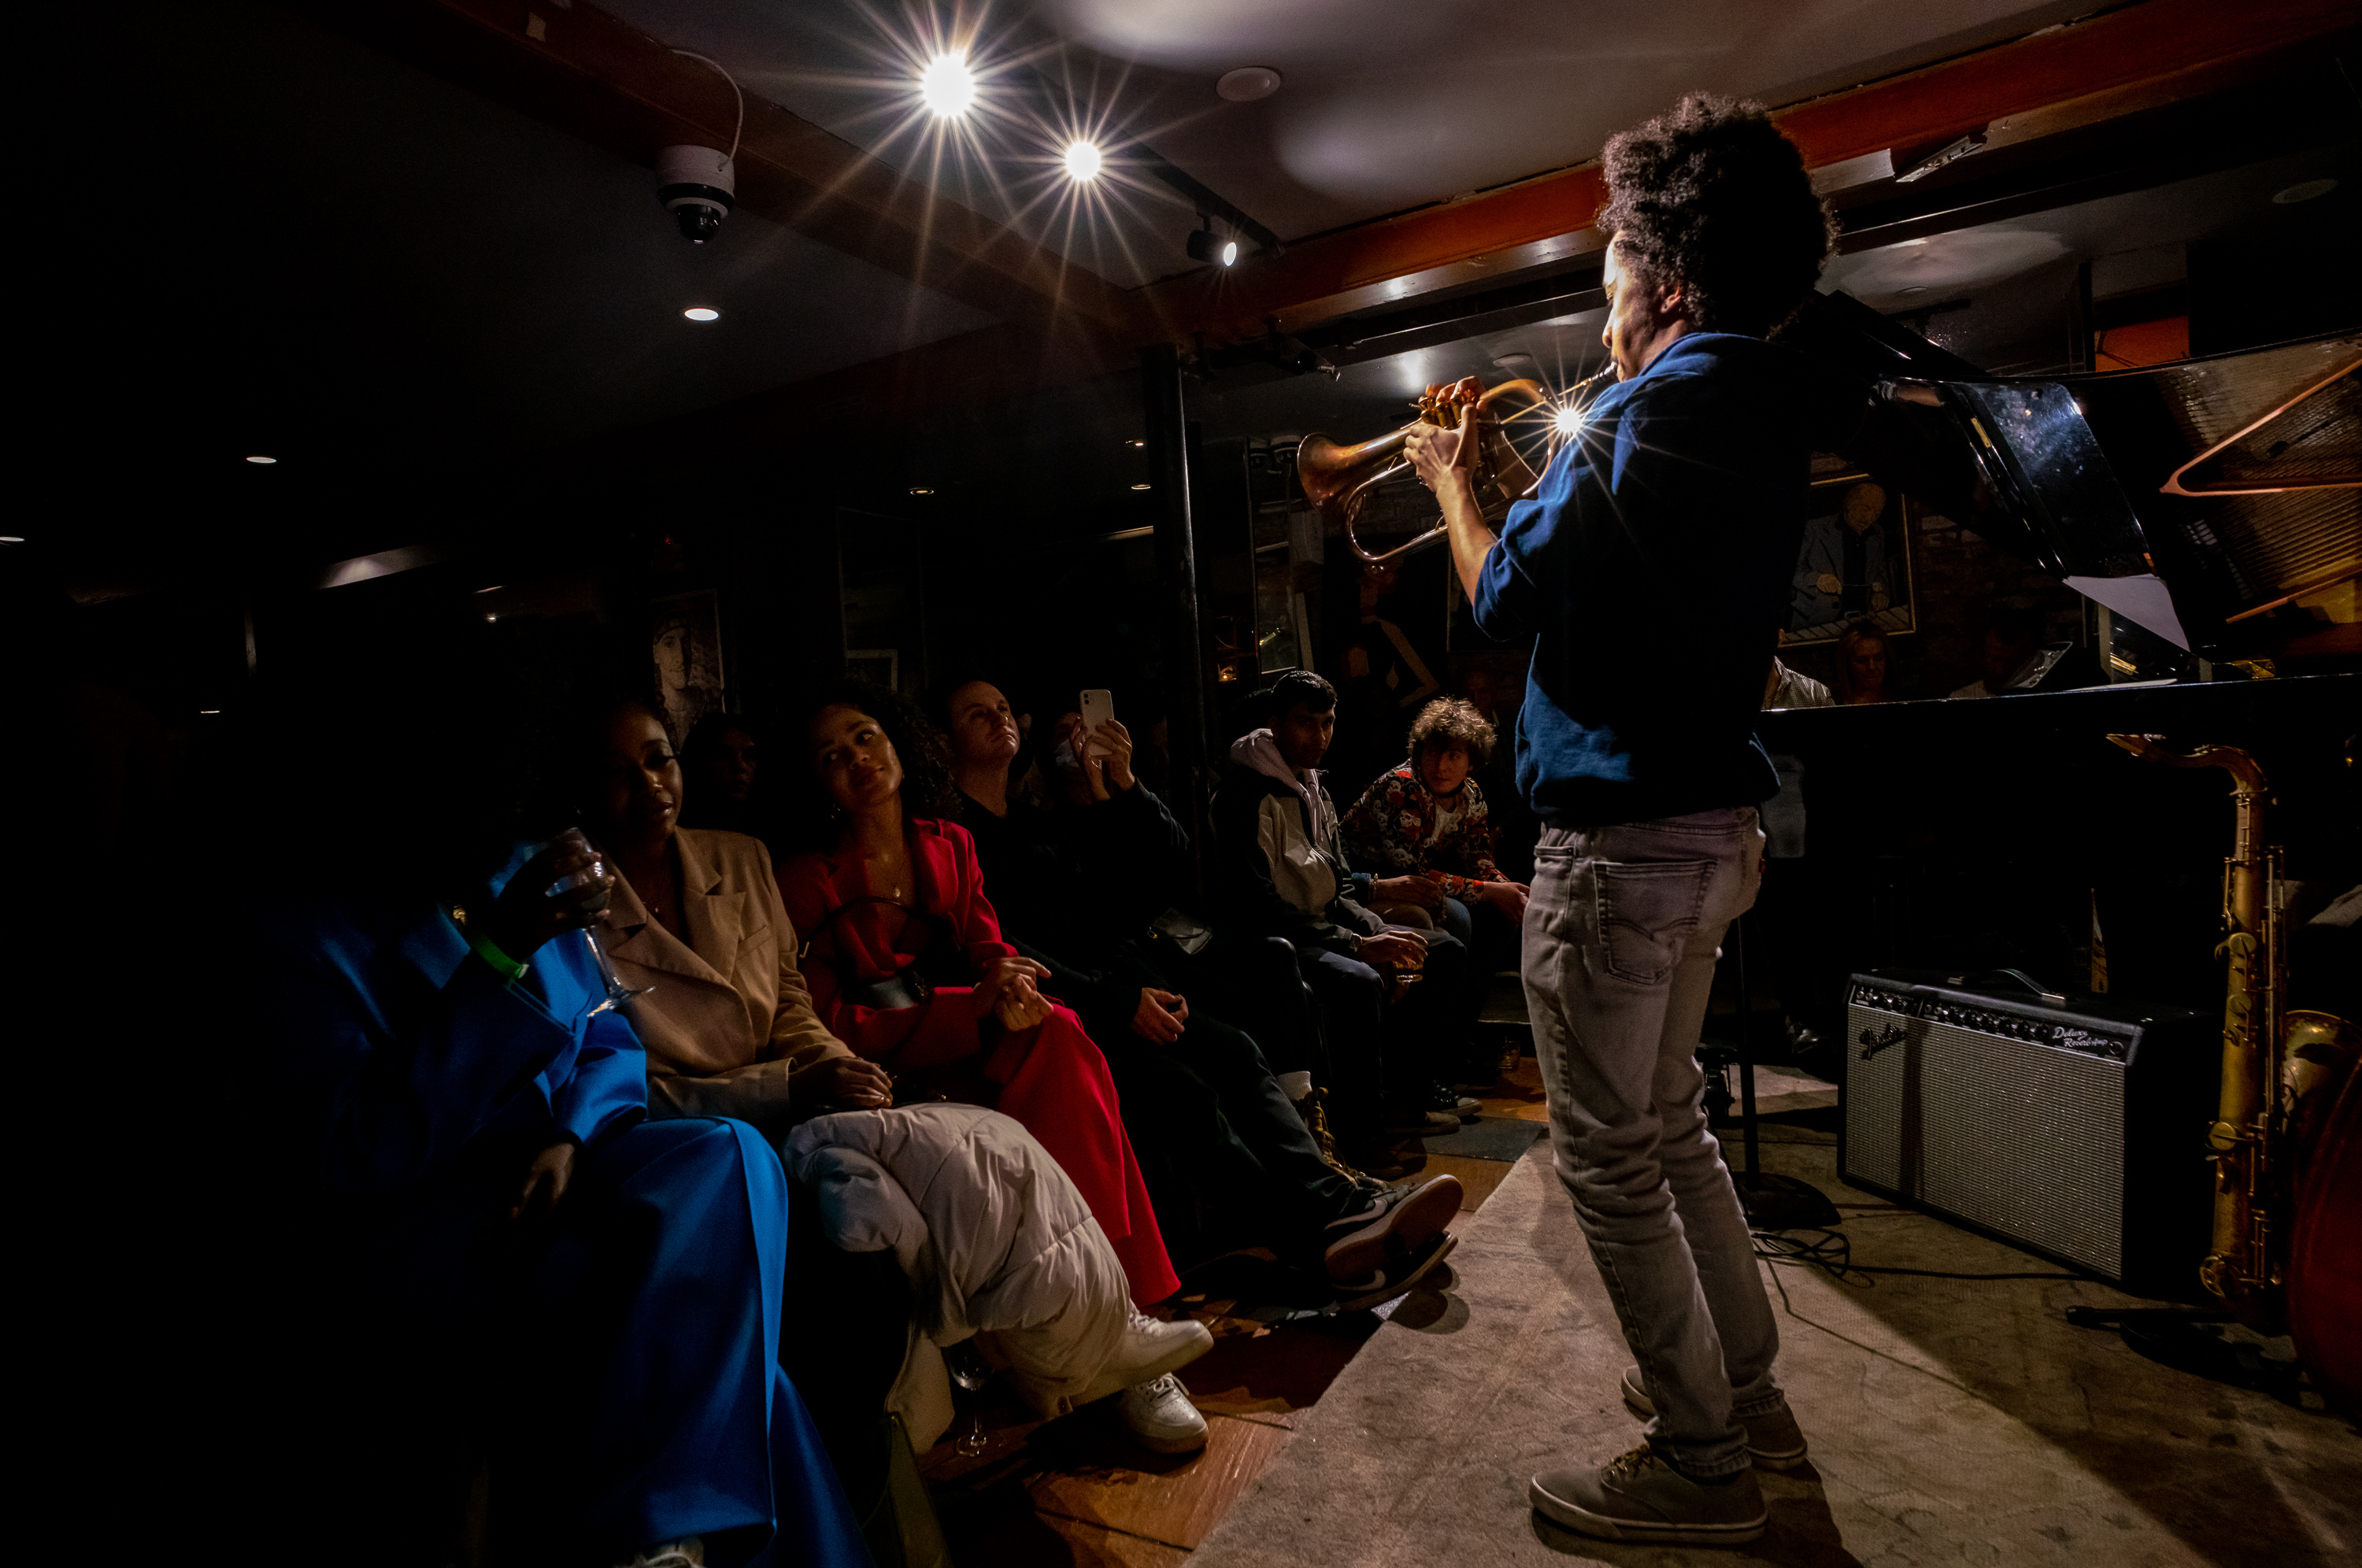
He took me to Smalls Jazz Club, a venerable Village institution. Established in 1994, the intimate 60-seat basement music club features some of the most talented jazz musicians in the city, and jam sessions that can go all night.
1/160th sec @ f/3.4, ISO 2500
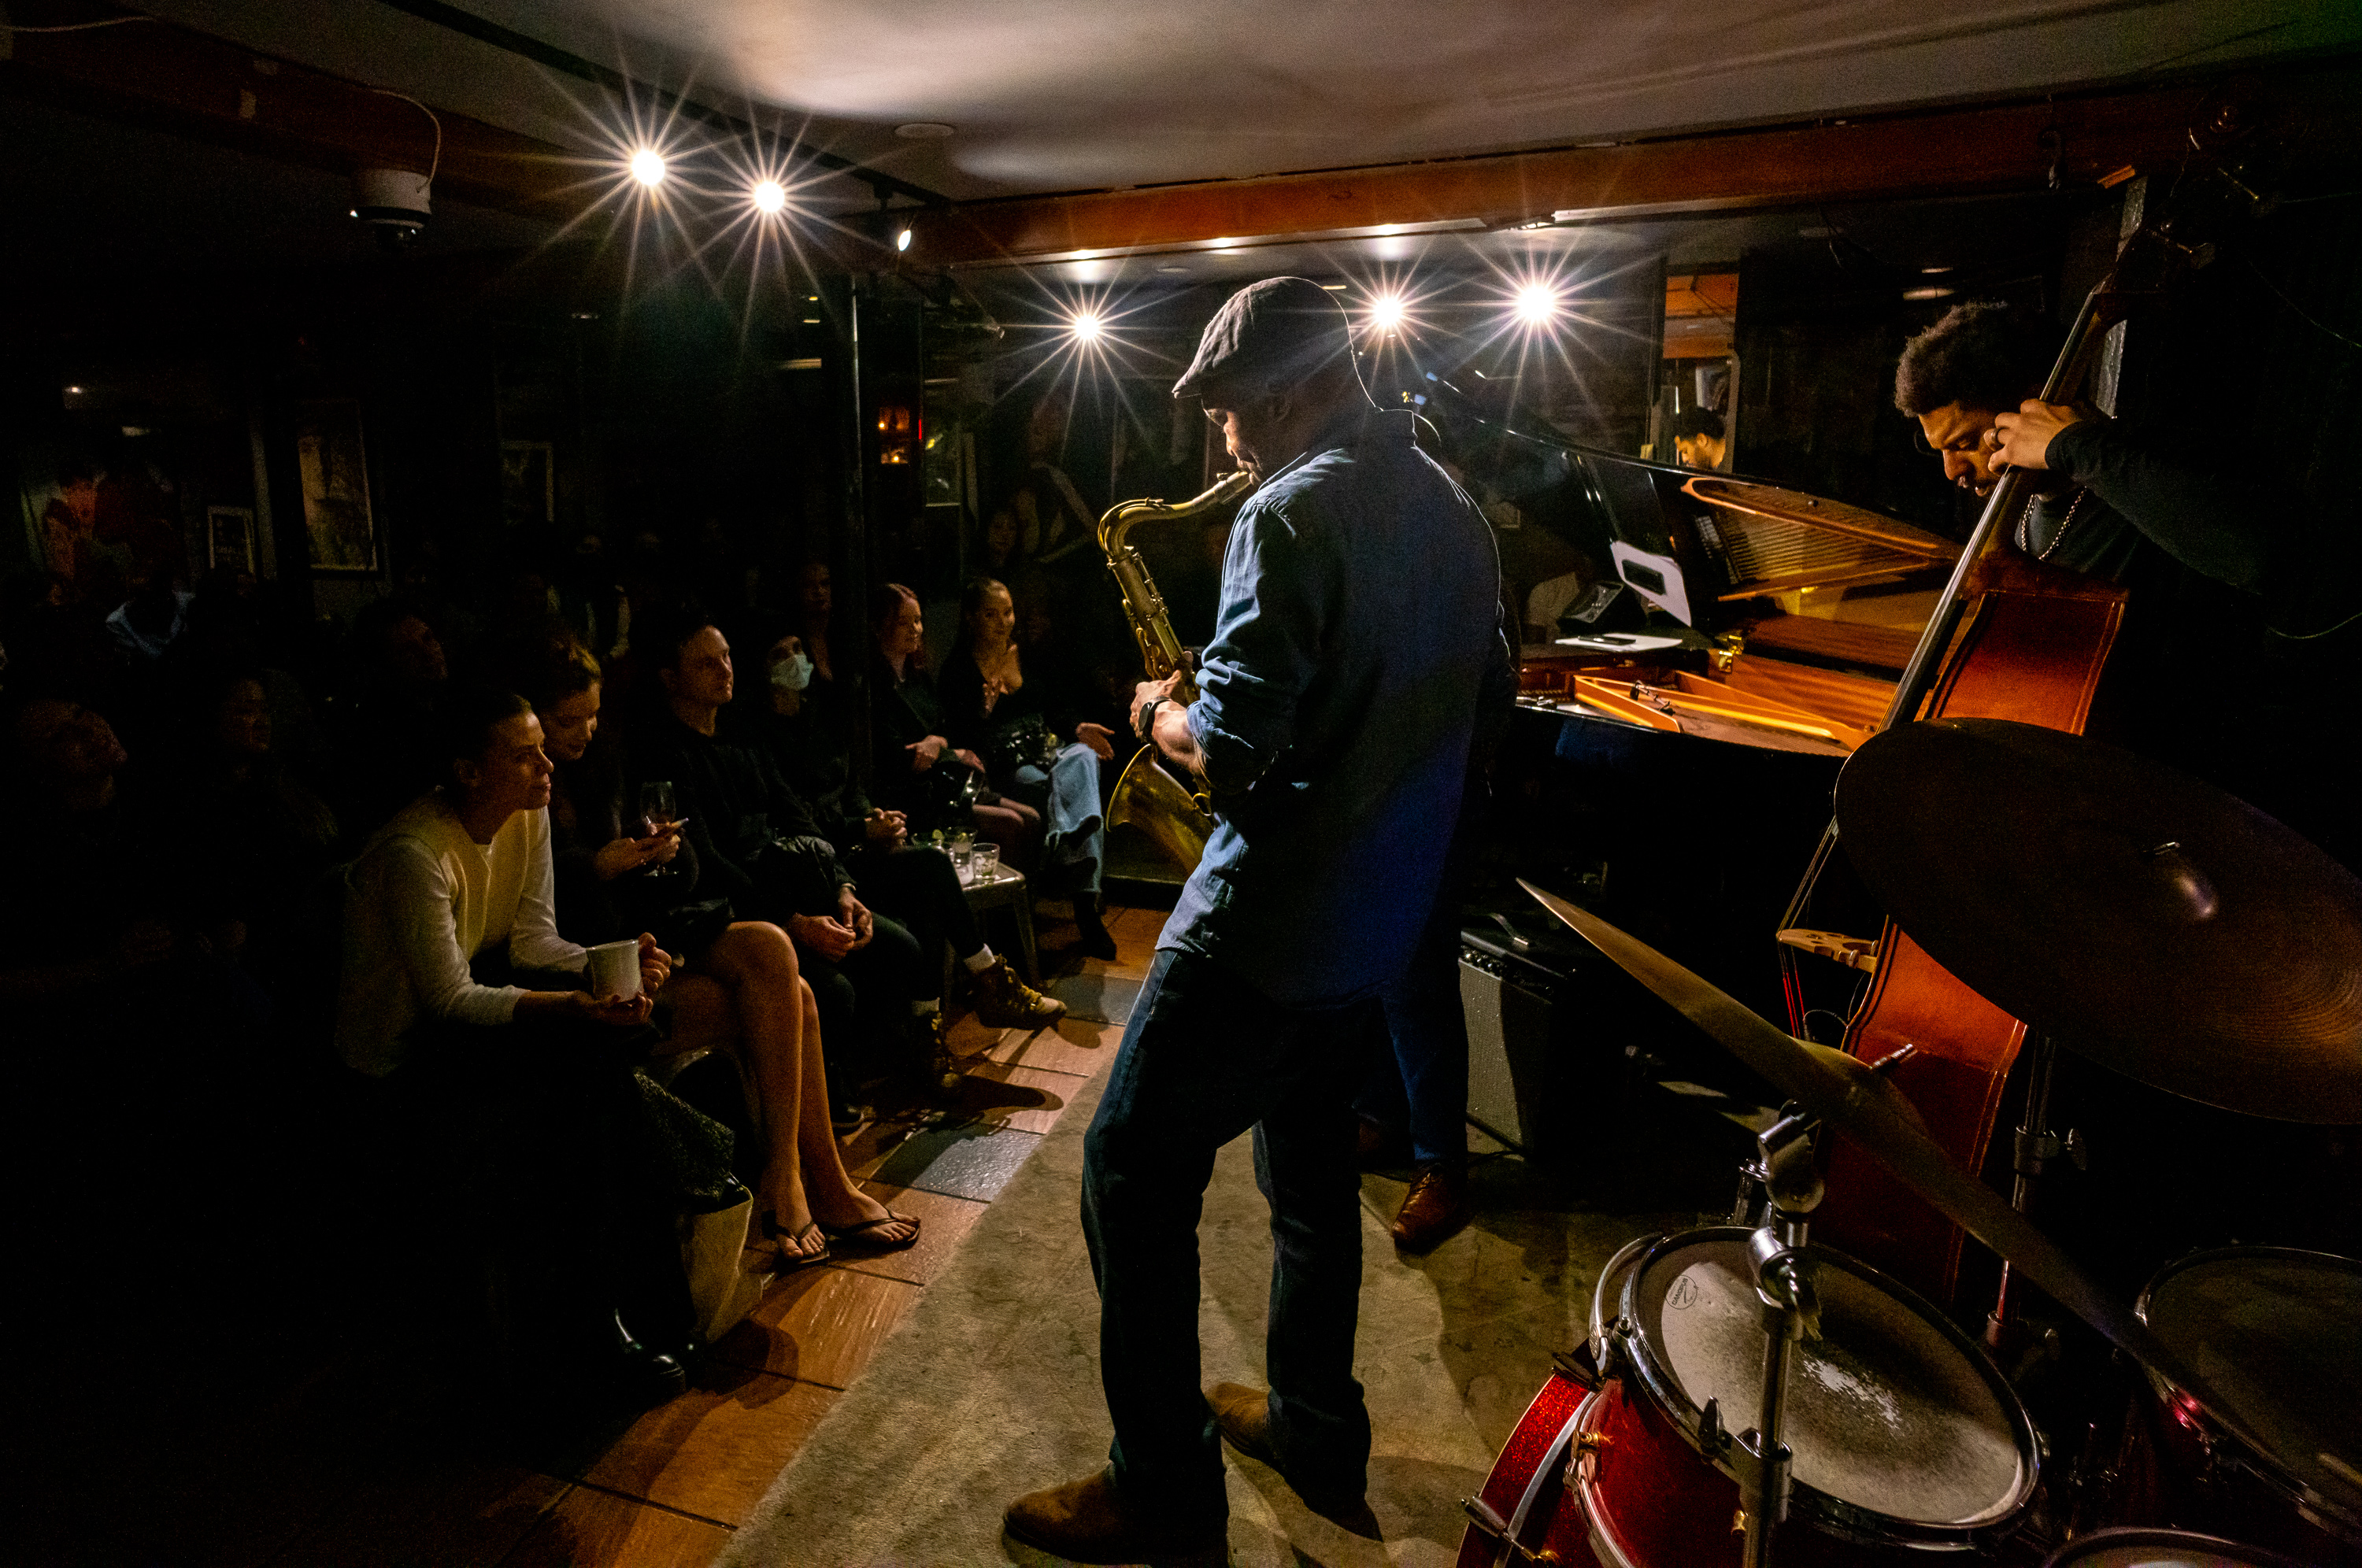
In a scene straight out of Goodfellas, we made a beeline to the front of the line, exchanged some pleasantries with his friend manning the door, who also happened to be the club owner, then were promptly welcomed inside and directed to make ourselves comfortable right next to the stage.
1/250th sec @ f/5.6, ISO 10000
My Express Pass at Top of the Rock was one thing, but having carte blanche to shoot a live performance from anywhere and as close as I wanted was quite another. During the set break, a few of the audience members even asked if I shot often for the club, or if I was with the band.
1/320th sec @ f/5.6 ISO 8000
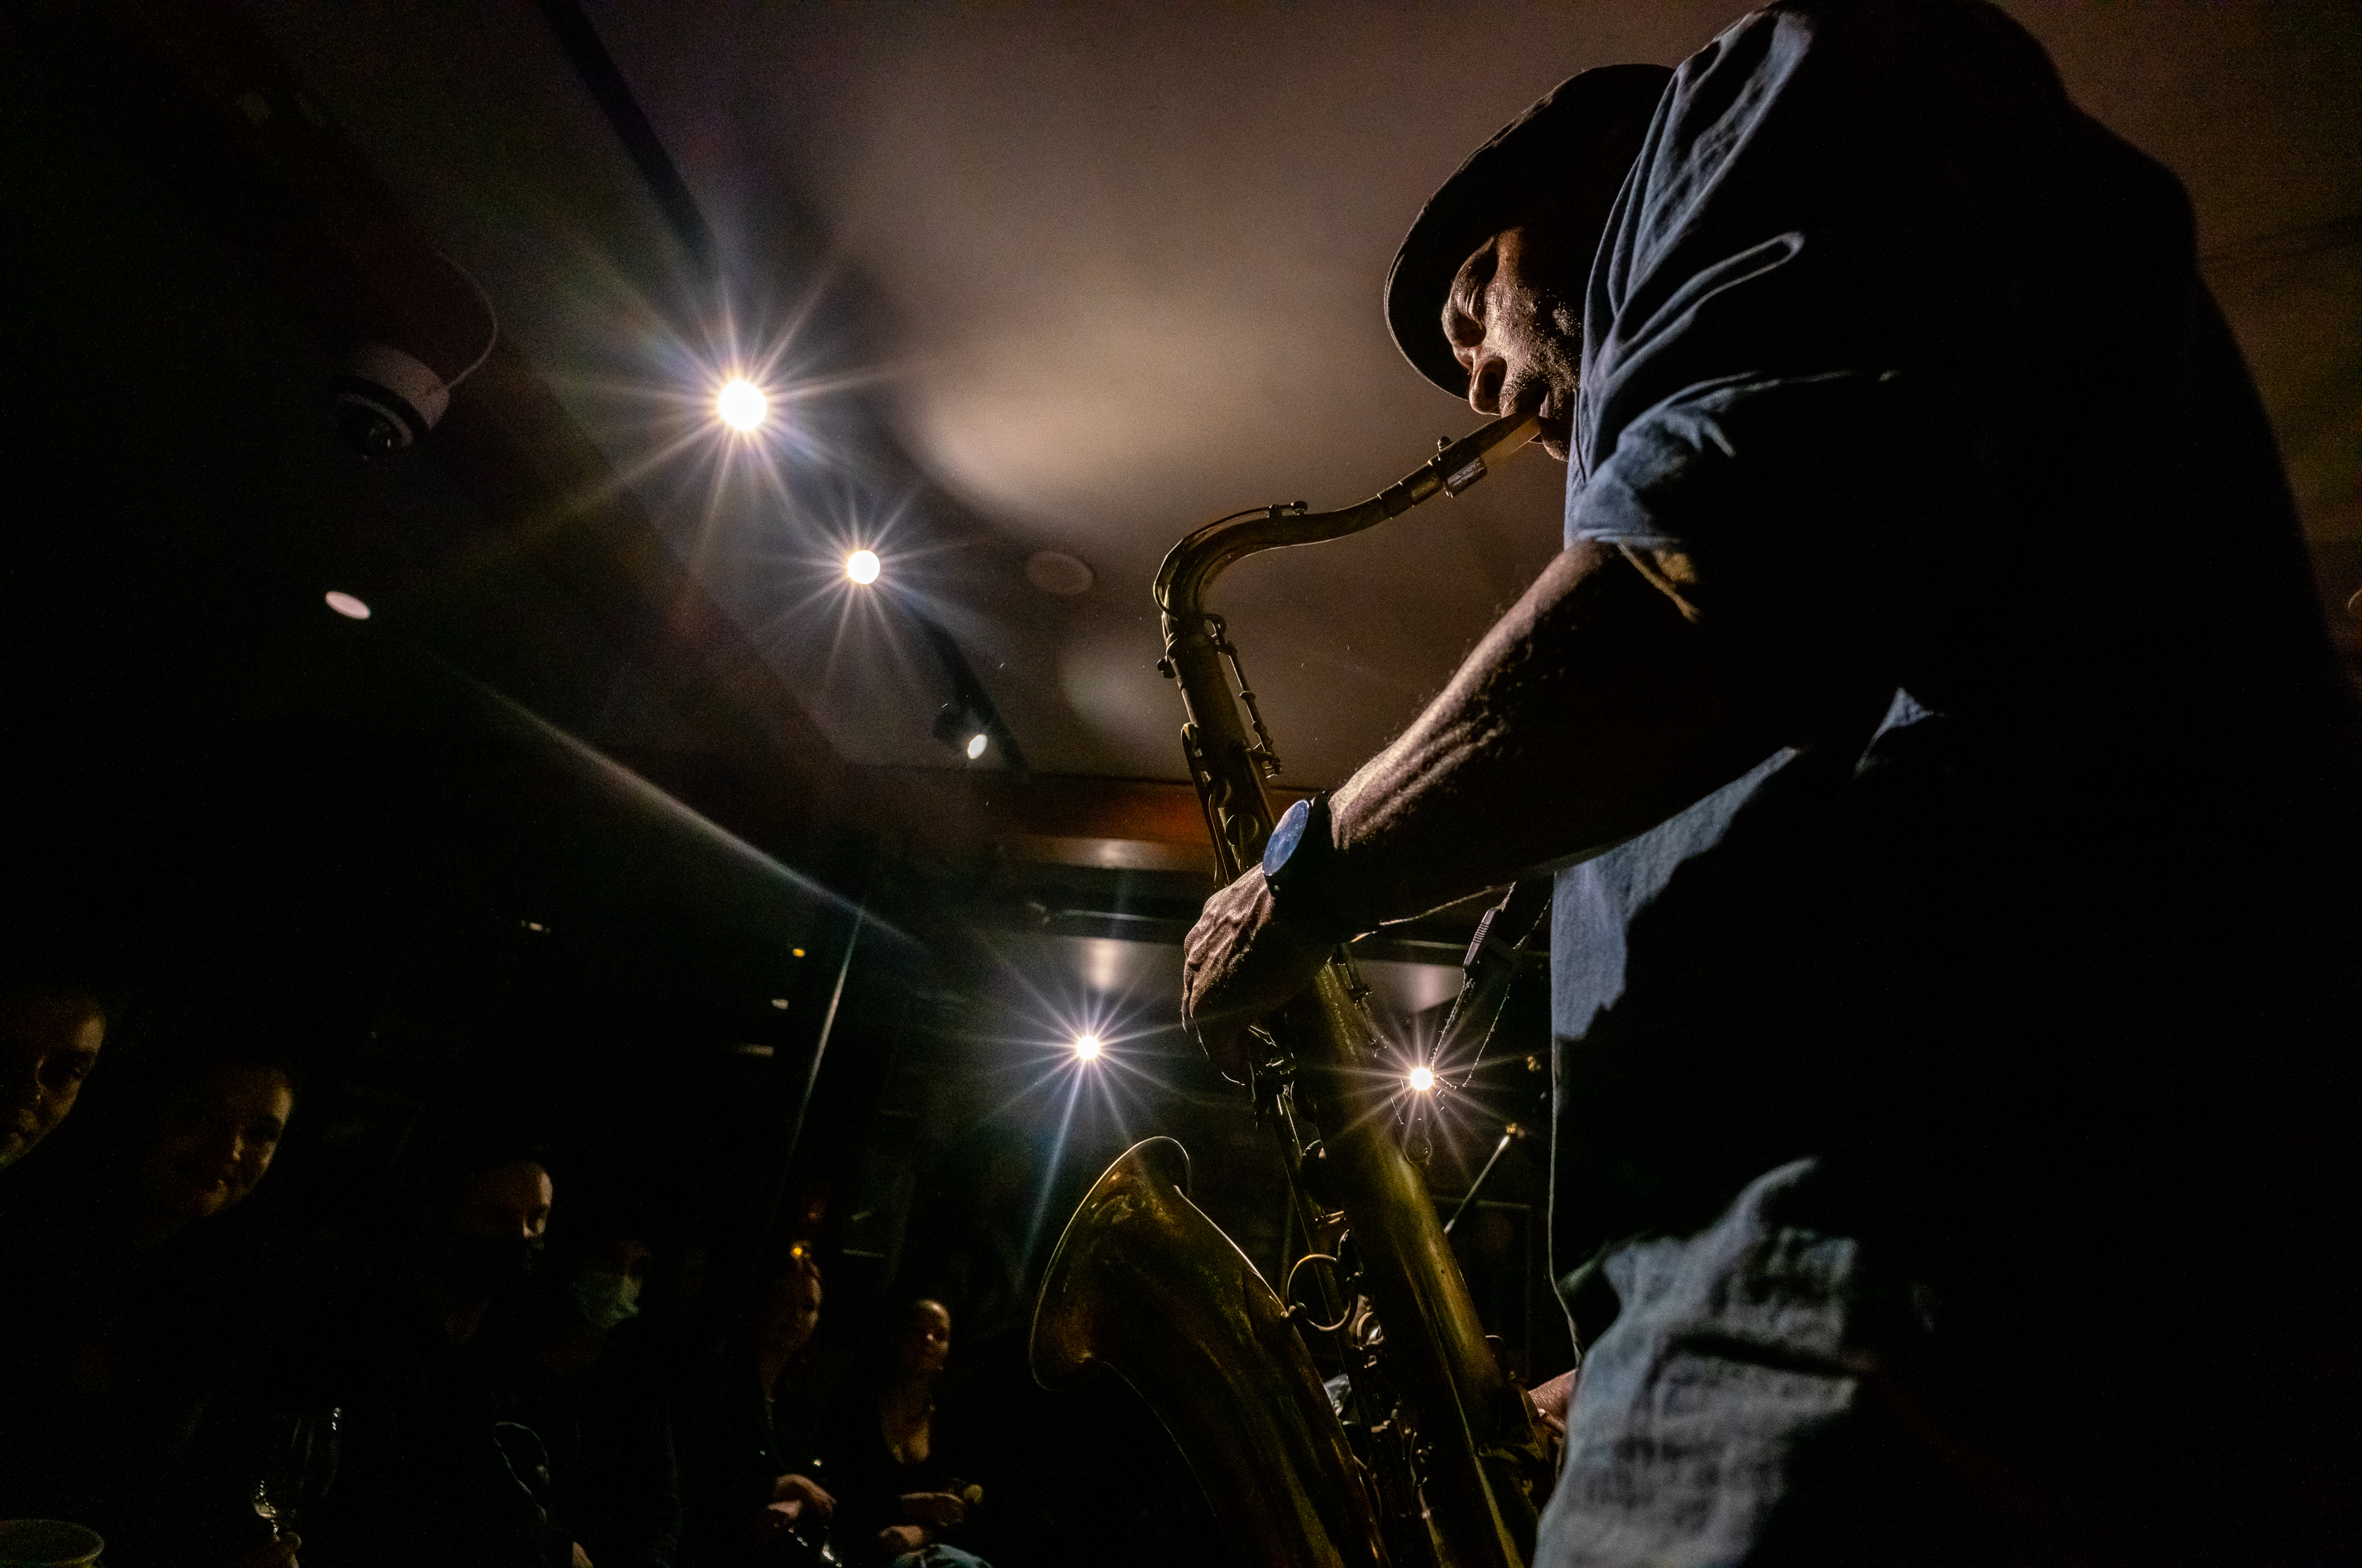
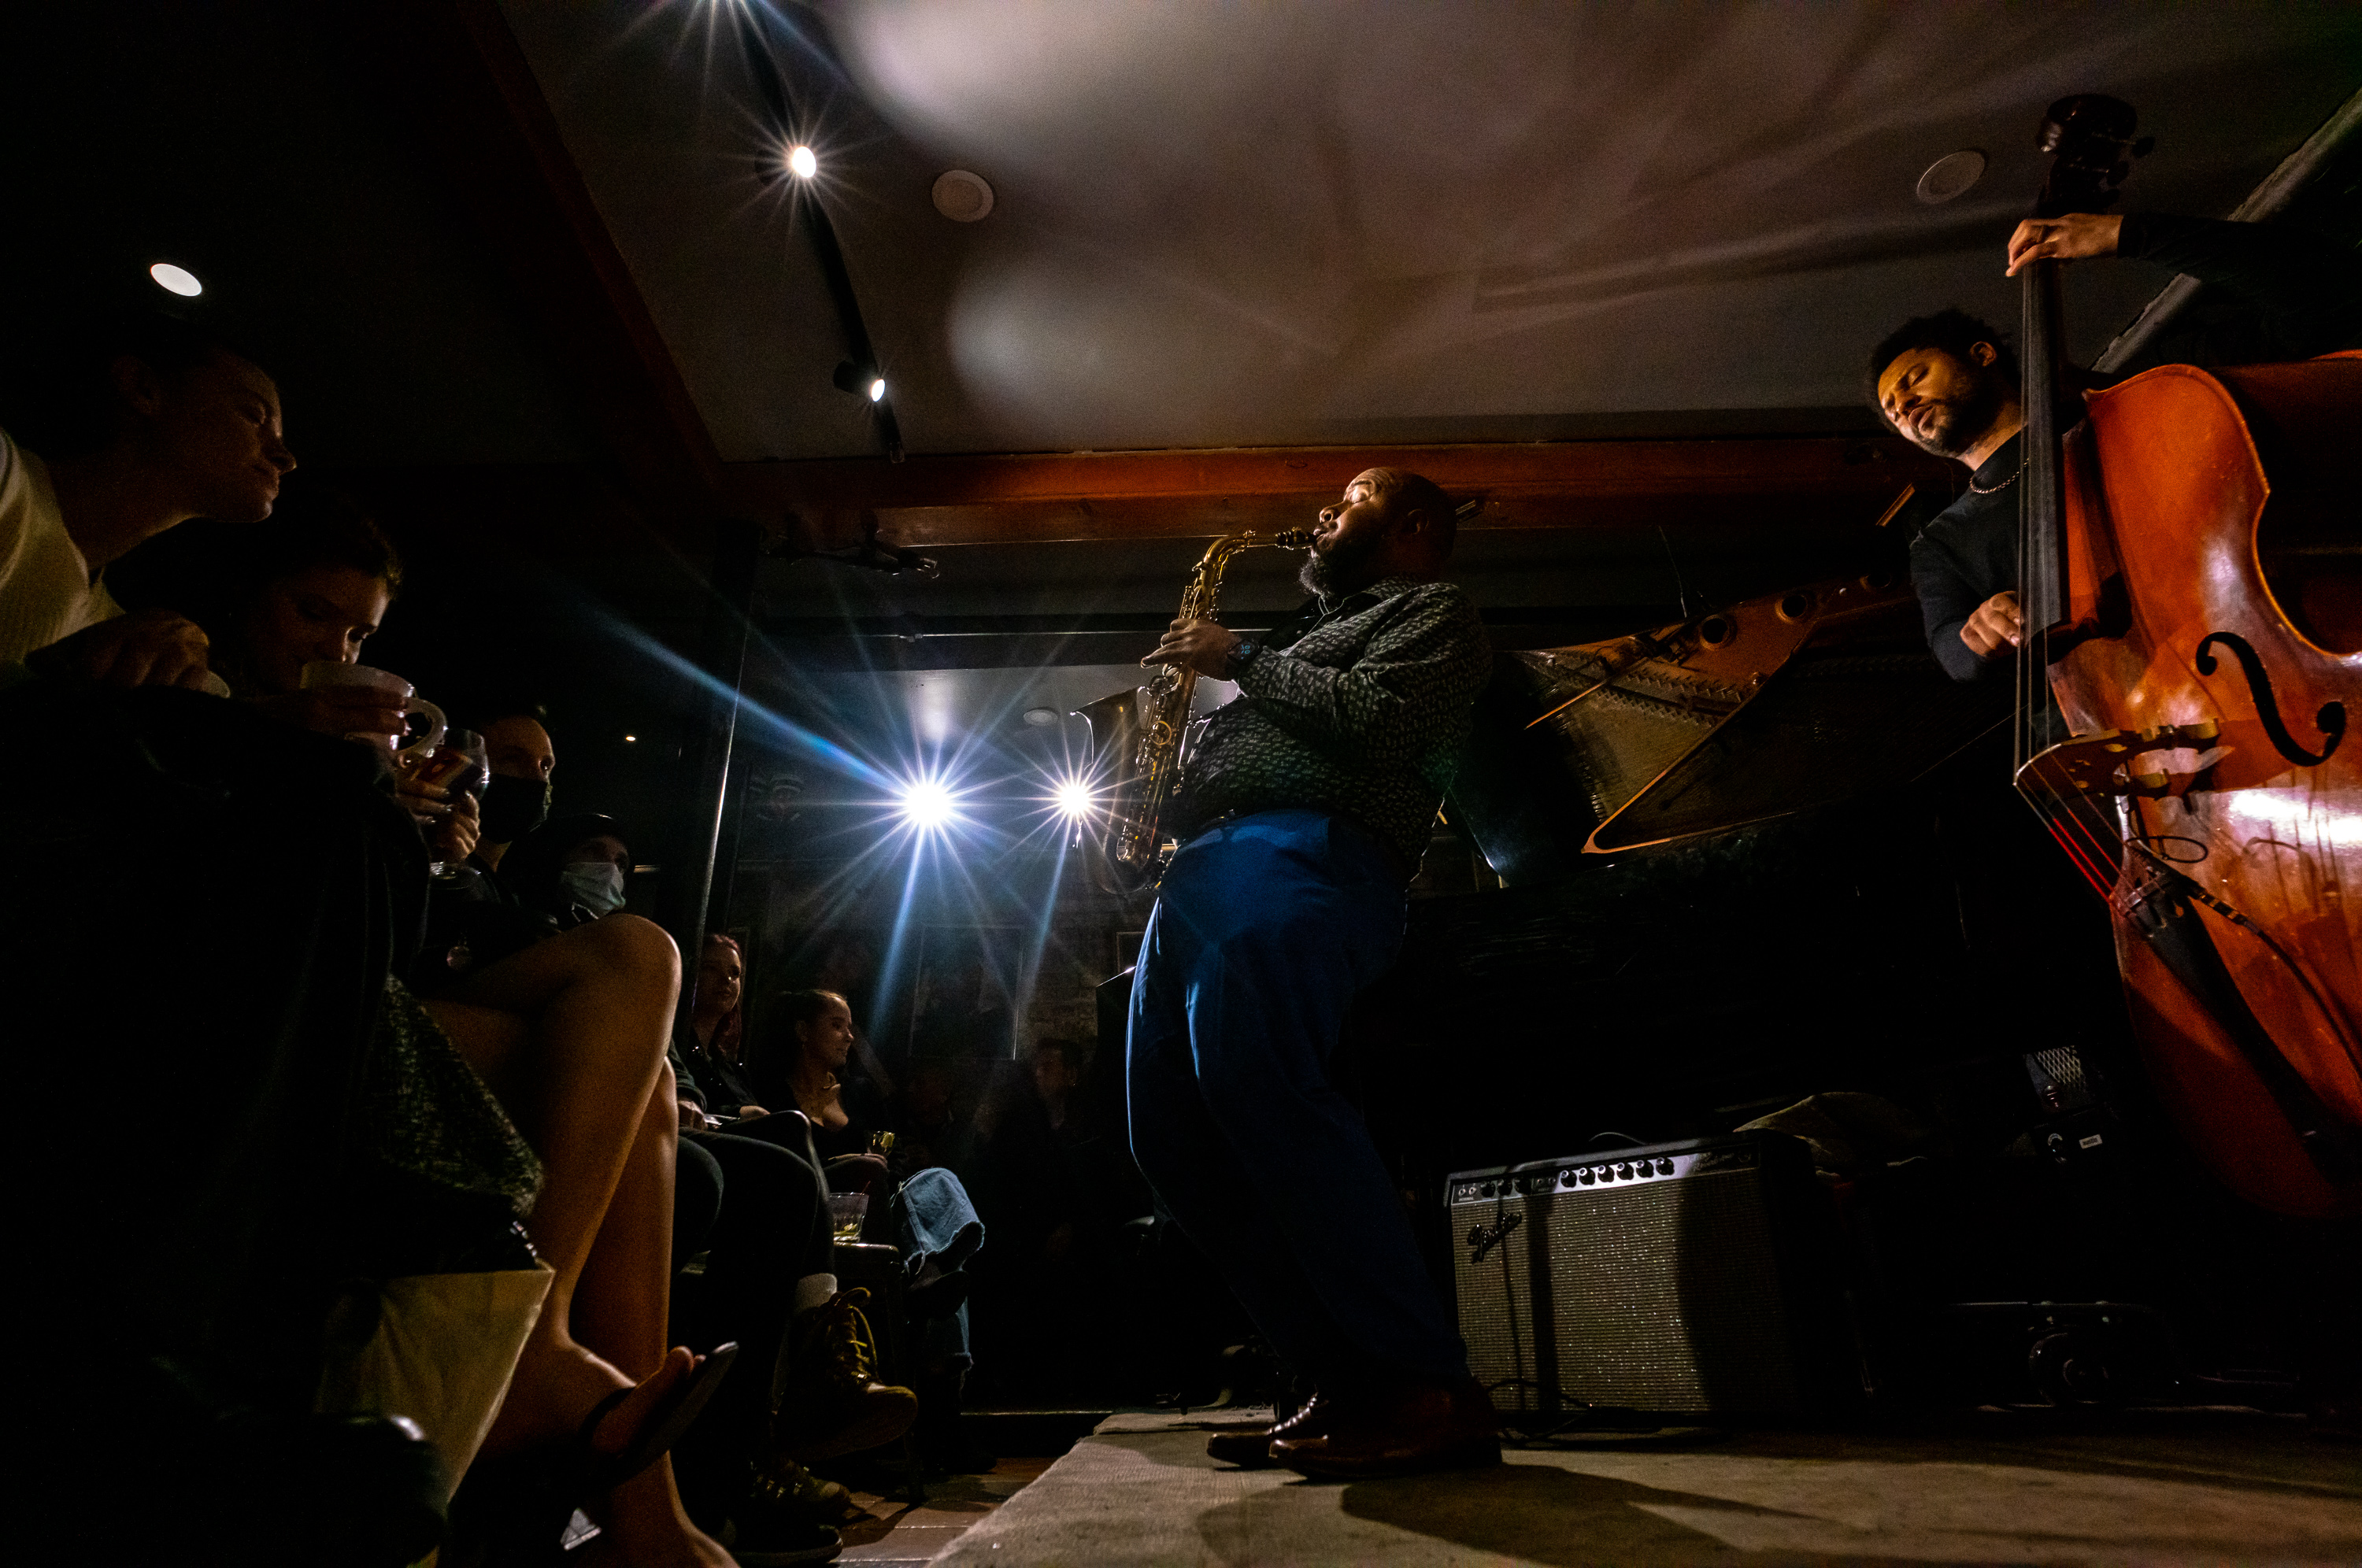
I took full advantage of the opportunity, cycling through my M lenses and experimenting with different angles. The 35 and 50 were great for getting tighter shots, but oh that 18 Super-Elmar. Man, that lens was just the trick in that intimate venue. And being able to get within inches of the performers afforded me some incredible creative possibilities, for sure. The glorious starbursts from the spotlights just elevated the images to another level.
1/125th sec @ f/8 ISO 10000

1/160th sec @ f/5.6 ISO 10000
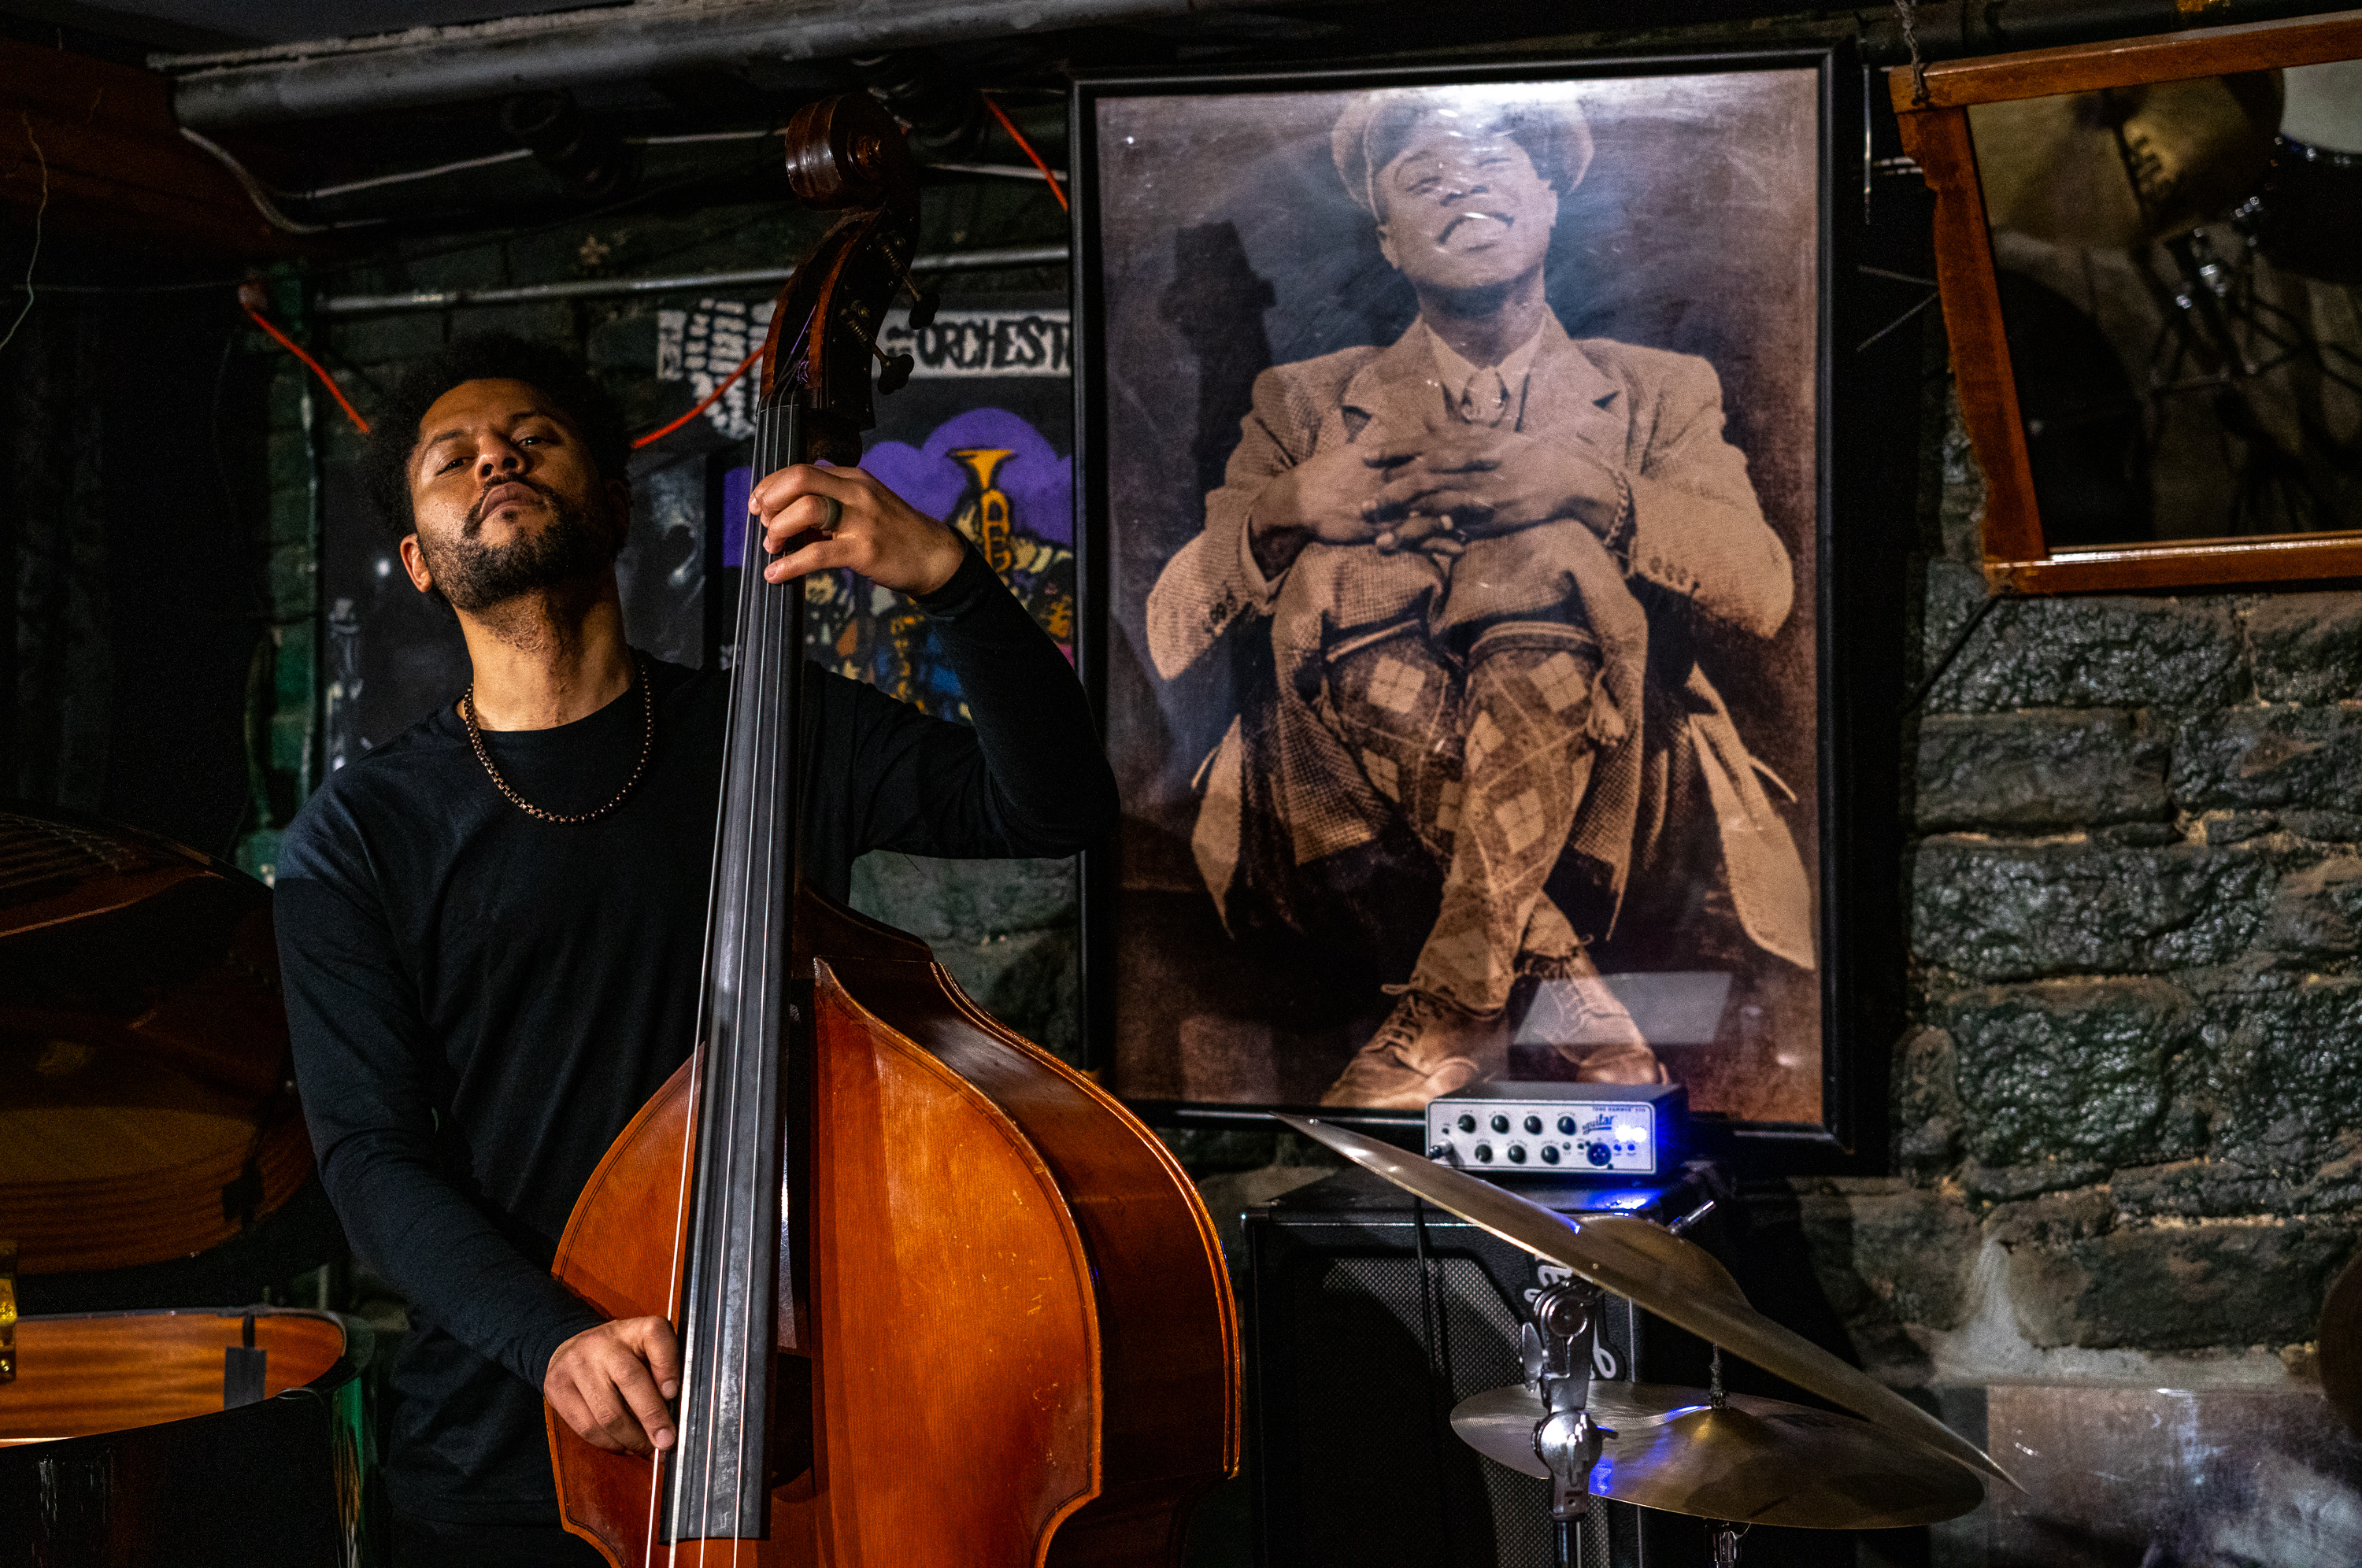
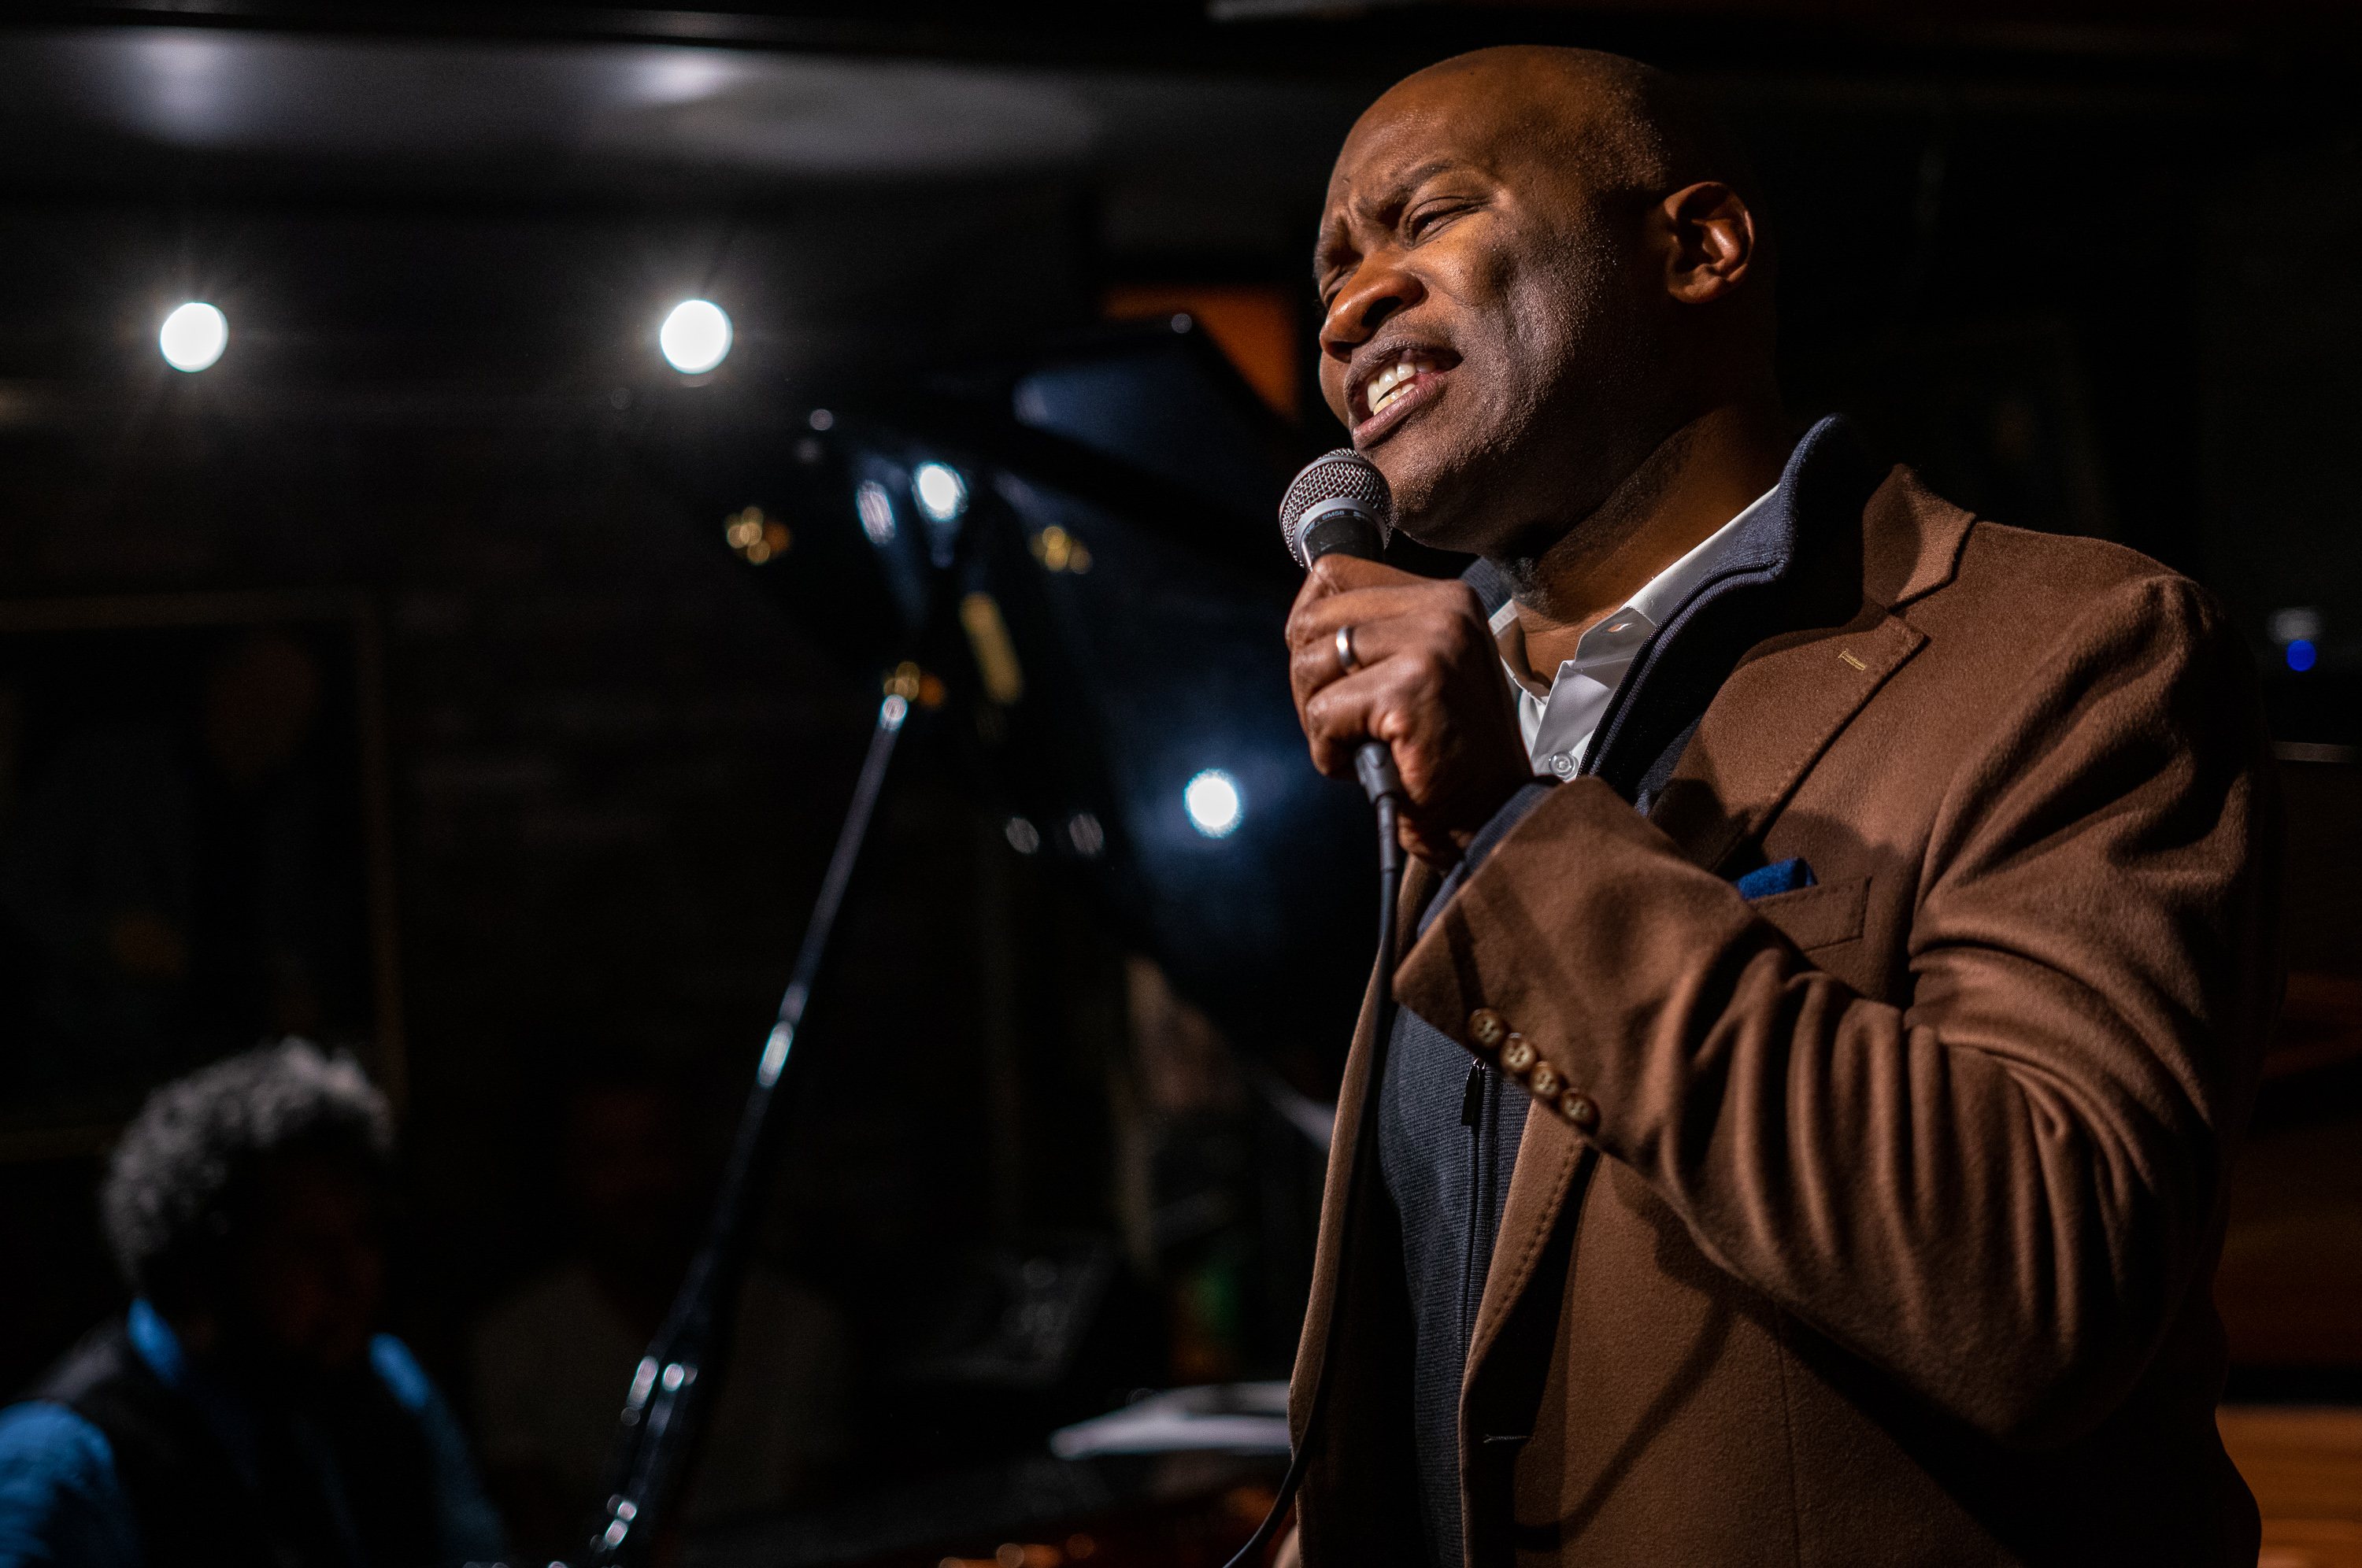
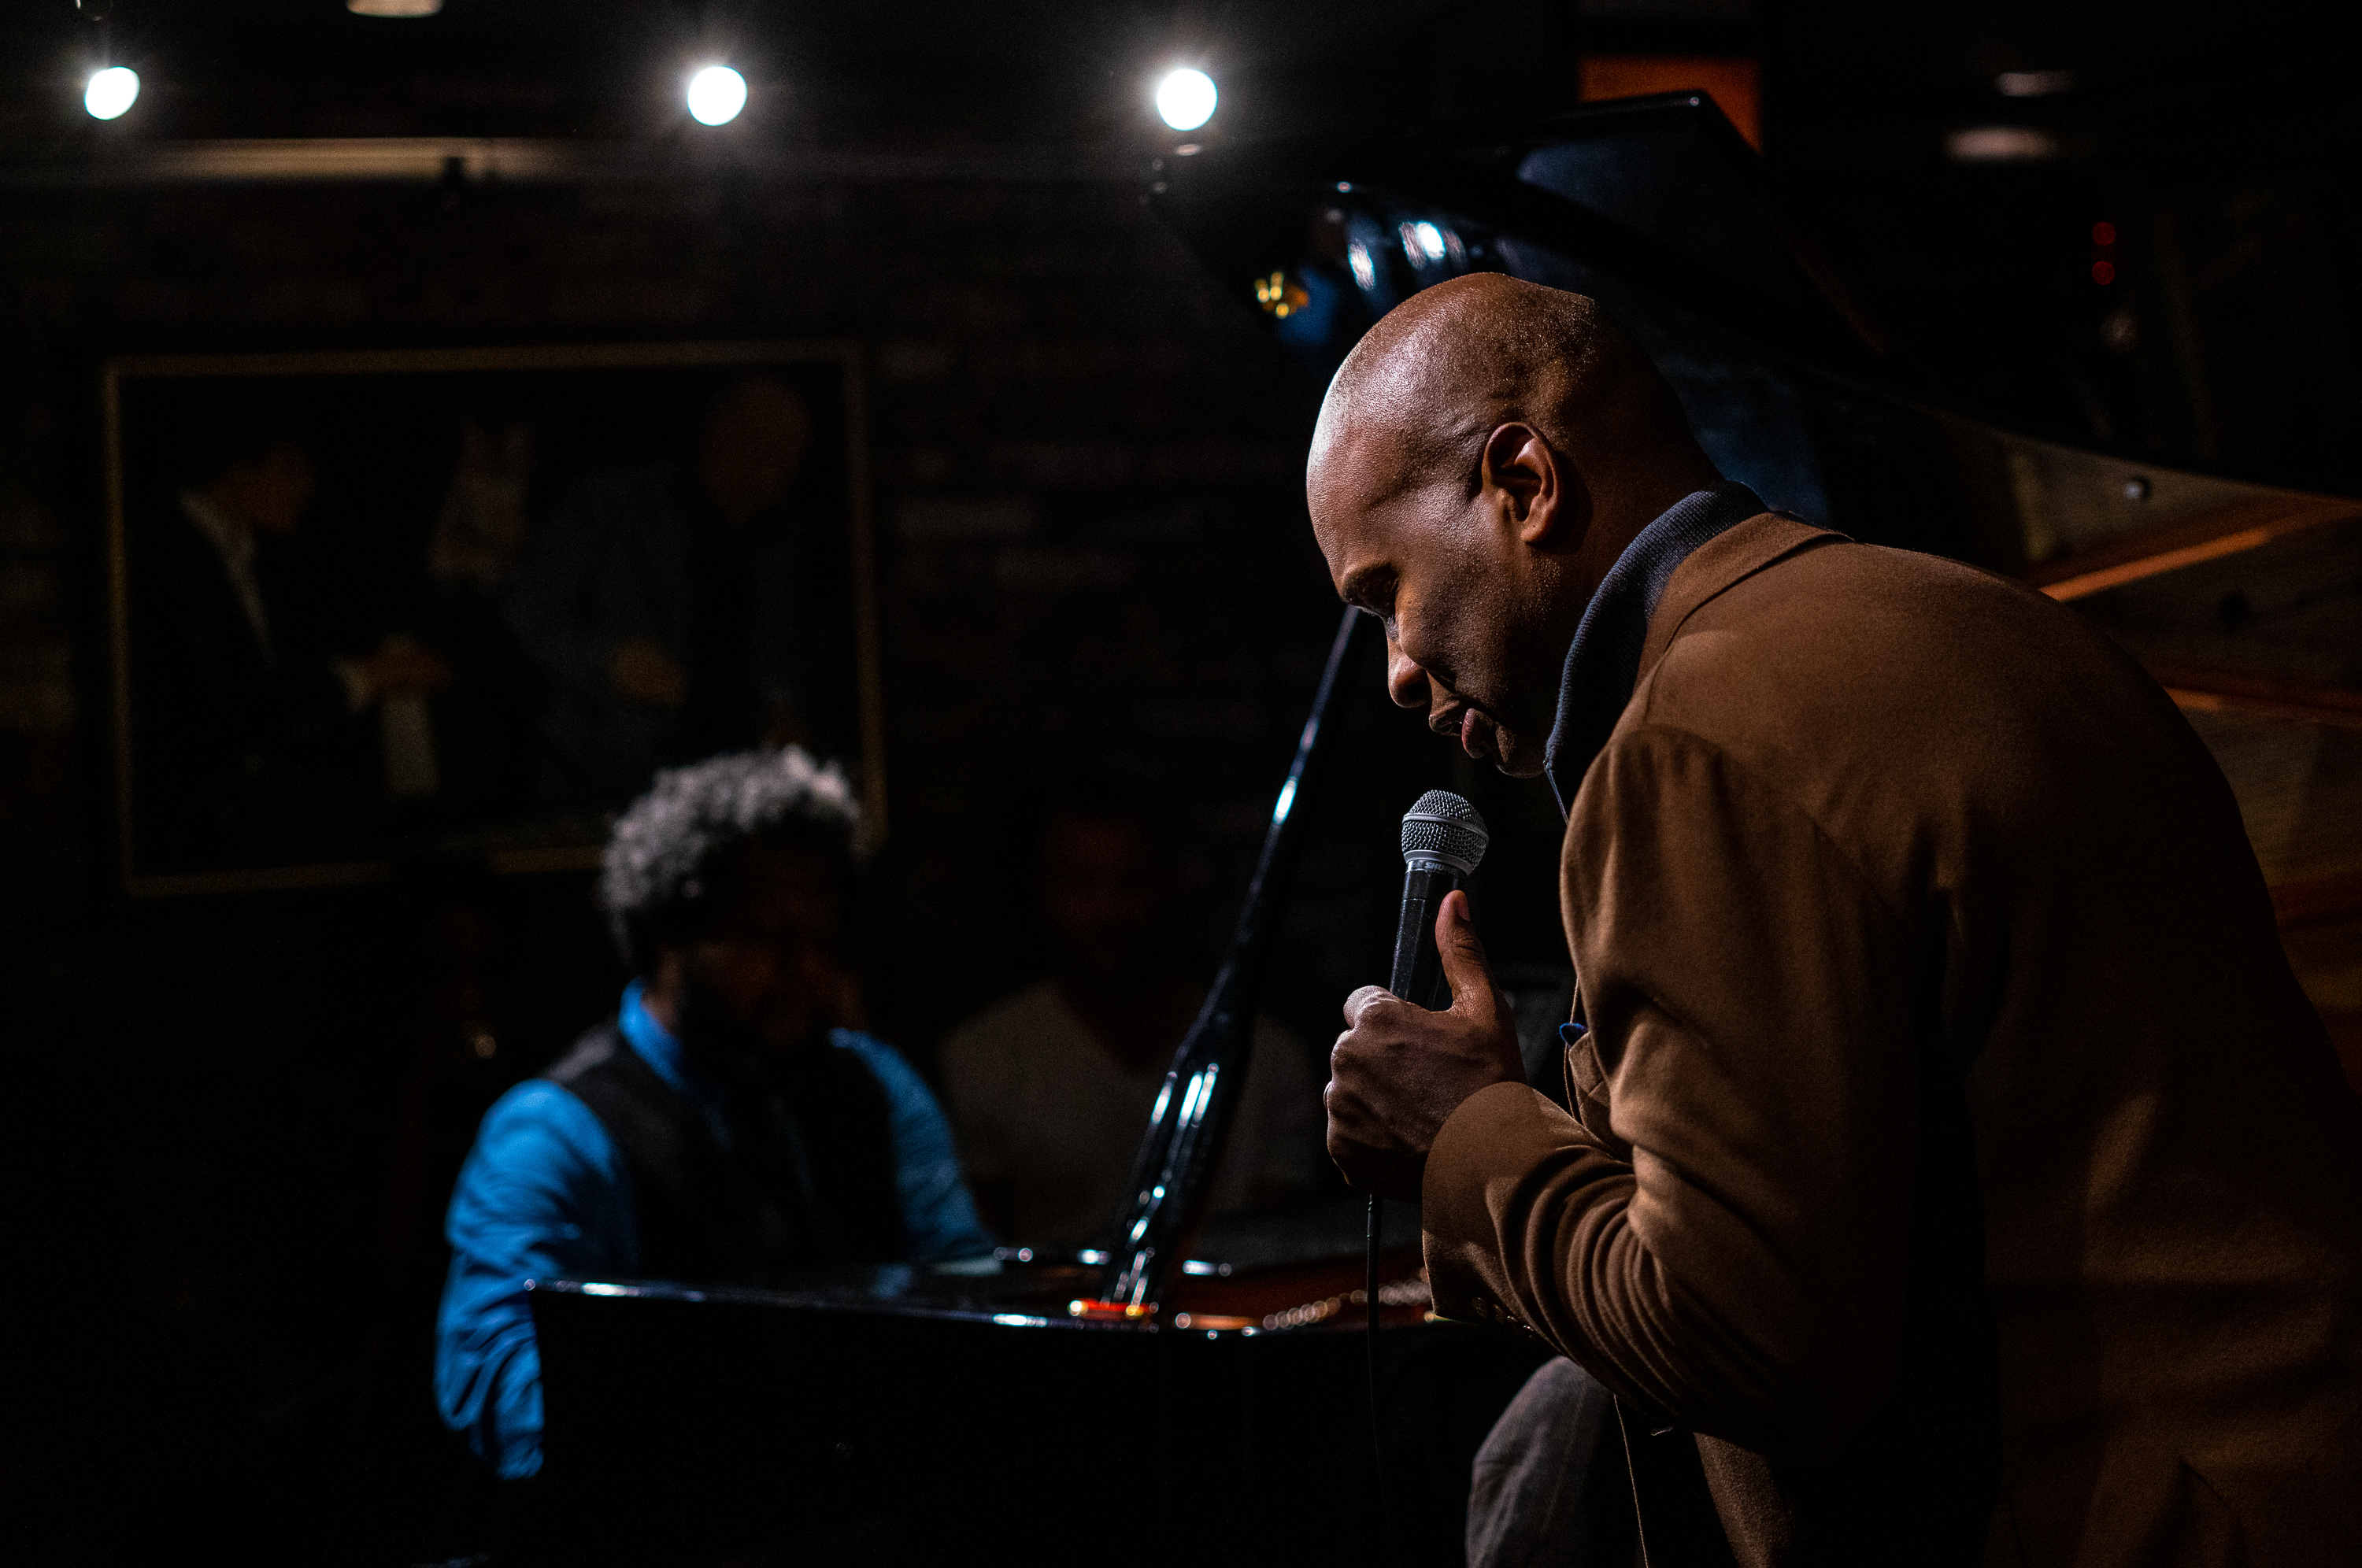
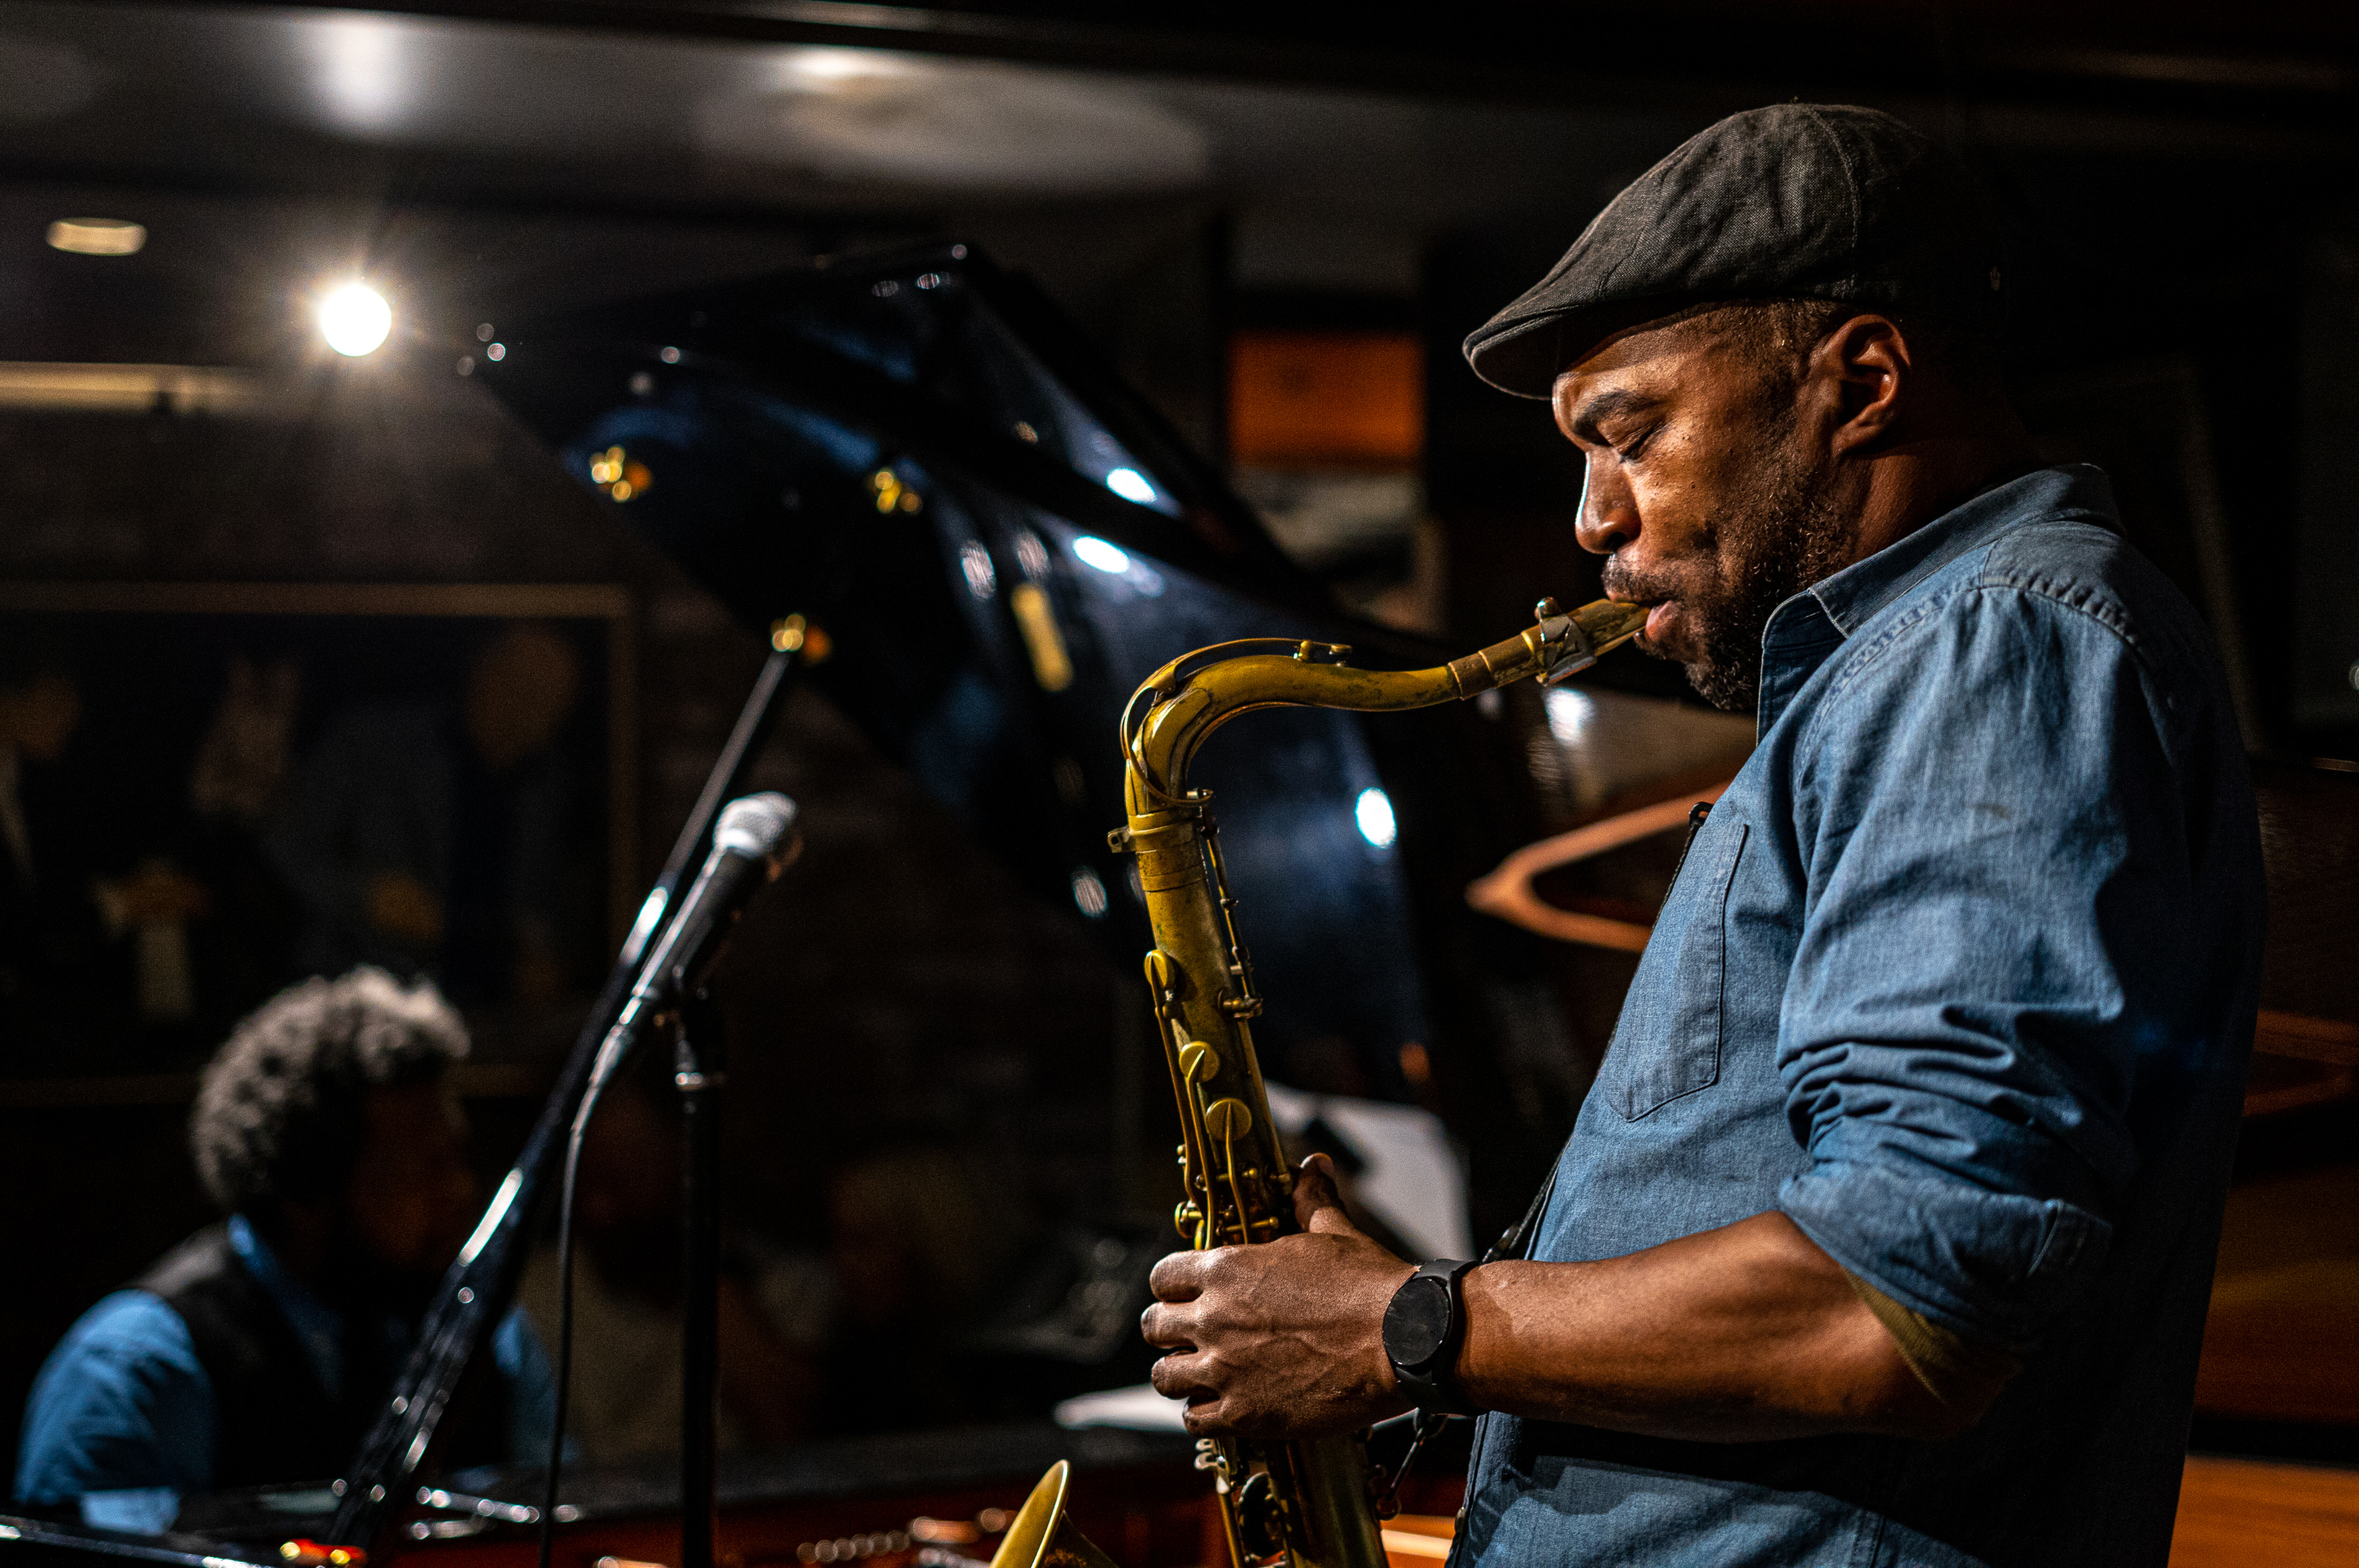
The show was fantastic. Christopher McBride acted as front man, emcee and played a mean alto sax. Stacey Dillard killed it on tenor sax, with Willerm Delisfort on the keys, Barry Stephenson on upright bass and Darrian Douglas moving the beat along on drums.
1/320th sec @ f/5.6, ISO 5000
Midway through the first set, vocalist John Dokes came on stage to belt out You don’t know what love is. His booming but silky baritone was dripping with emotion and heartache. I switched up to the 50 APO to attempt to capture the nuance of his visceral performance.
1/320th sec @ f/2 ISO 2500
1/250th sec @ f/2, ISO 4000
Taking advantage of the unrestricted access and great subject matter, I experimented with both M-DNG and L-DNG, seeing how they handled the challenging lighting situation and high contrast of the club. I also pushed the camera past my usual comfort level of ISO 10,000 up to more eye-watering 25,000.
1/90th sec @ f/5.6 ISO 10000, M-DNG

1/125th sec @ f/8 ISO 25000, M-DNG
And while definitely not as clean as ISO 10,000, ISO 25,000 was surprisingly usable here. Once processed similarly, with noise reduction applied, the results from both M-DNG and L-DNG were roughly on par at every ISO I tested. Knowing what I do now, I’d probably leave the camera set to L-DNG most of the time for this kind of shooting.
1/125th sec @ f/5.6 ISO 10000
1/160th sec @ f/2.8, ISO 3200
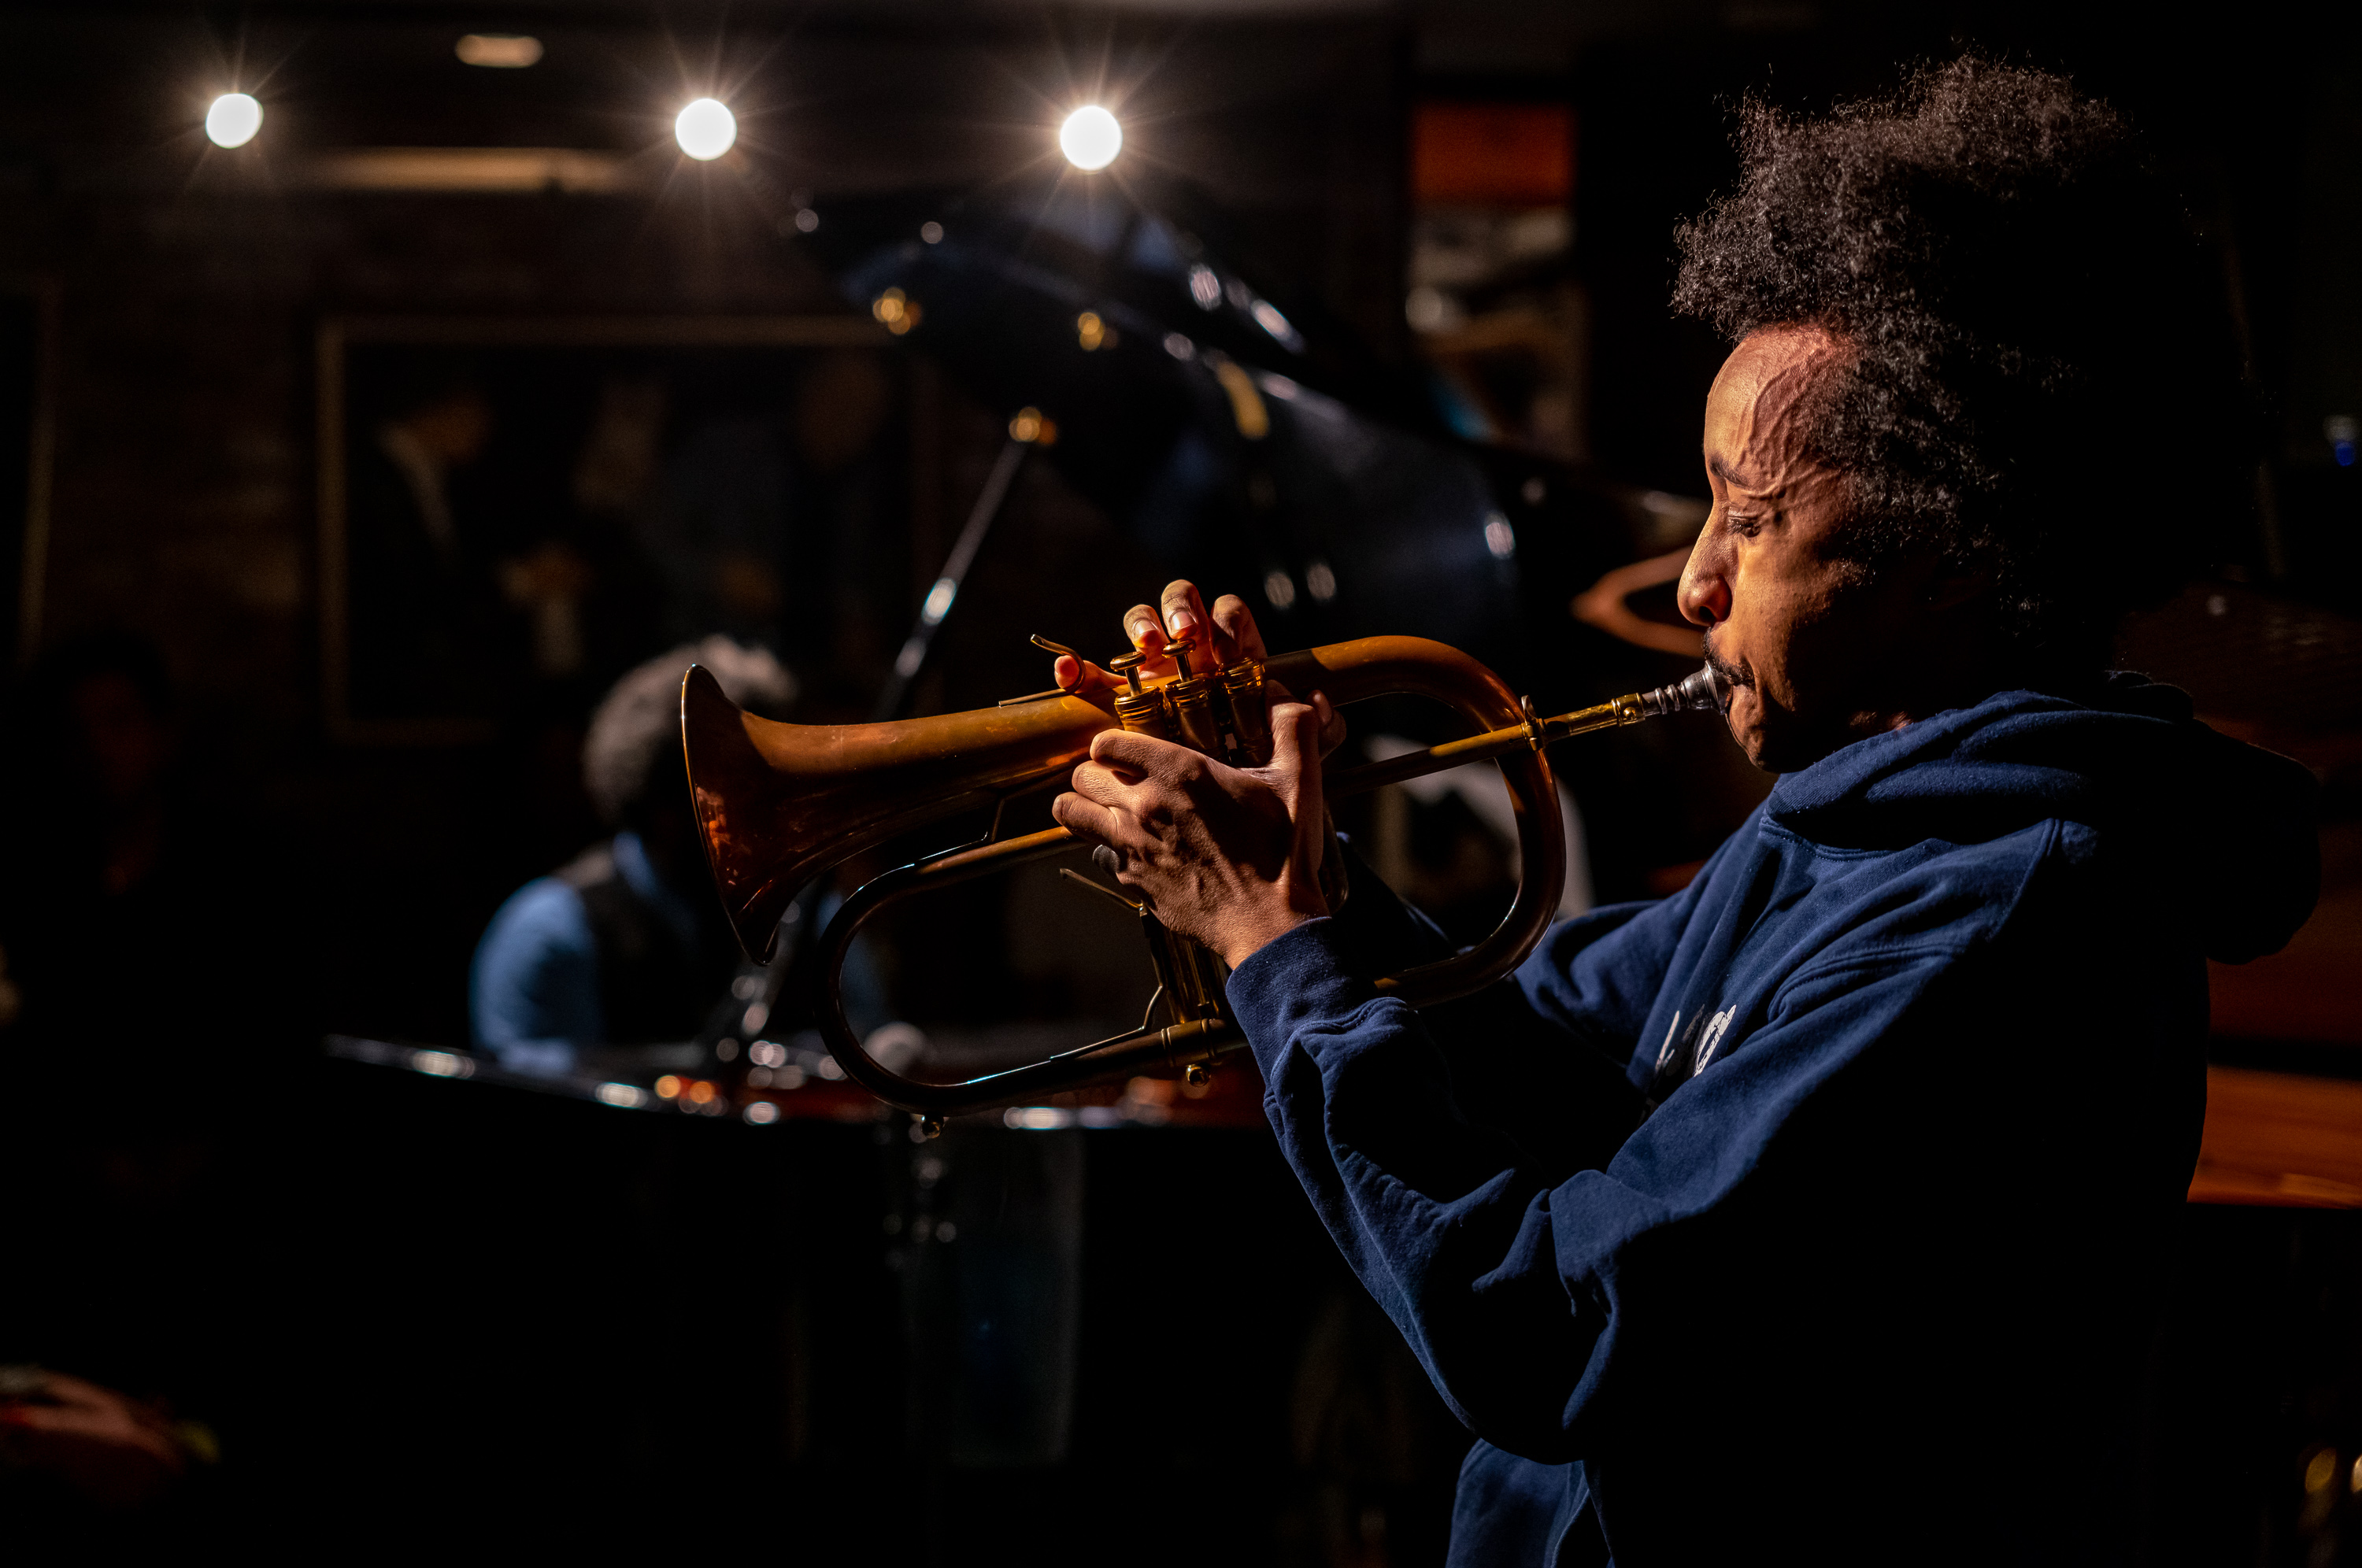
Following two sets with the main band, the club opened the stage to young local musicians. A meandering jam session ensued with players lining up along the bar waiting their turn, with bass players, pianists, drummers and trumpeters all jumping right in to keep the music going. At around 2am, I called it a night. The camera still had plenty of battery charge, but I was done.
1/320th sec @ f/2 ISO 4000

1/320th sec @ f/2.8 ISO 800
A walk on the East Side
After sleeping in a bit, I met up with my aunt and uncle for lunch and a visit. The weather was generally gloomy and gray, so if ever there was a day to take a break from shooting and spend some quality time with family, this was it. After all, the previous two days were jam packed with photography from morning to night and I was super happy with all the images coming out of the M11. So, a down day it would be.
1/320th sec @ f/6.8 ISO 2000, M-DNG
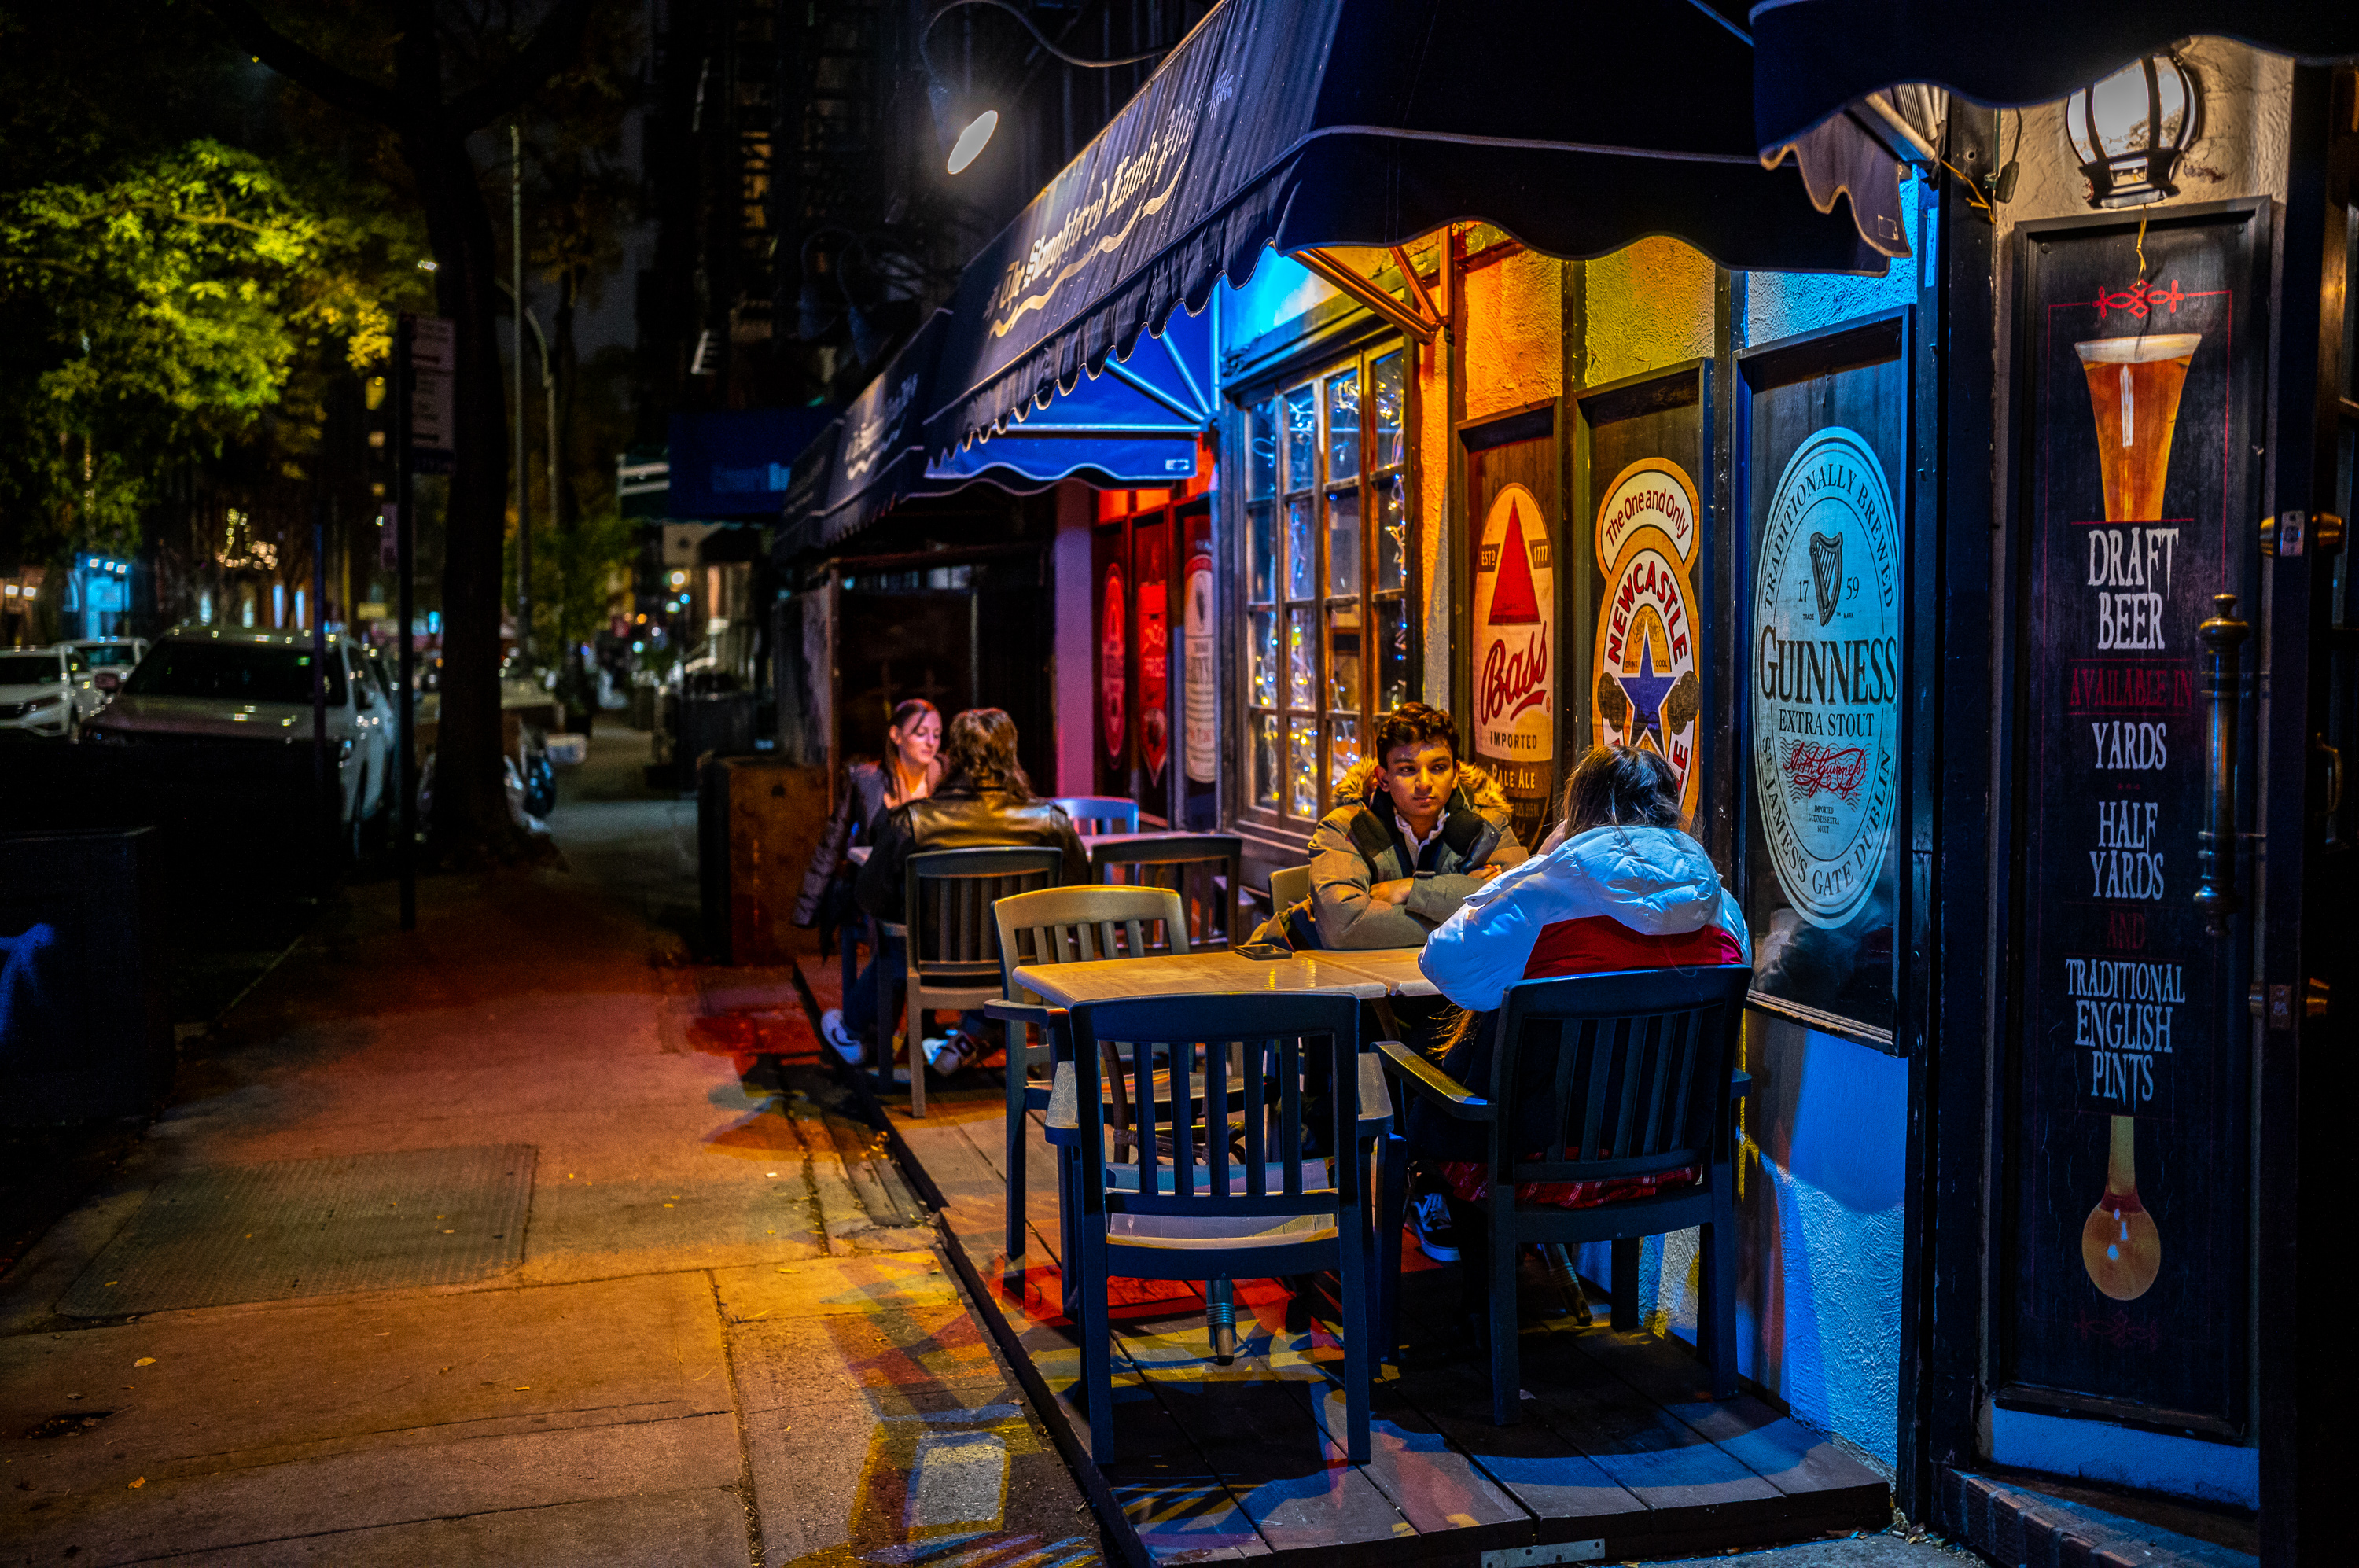
Denizens of the Upper East Side and Yorkville, my father’s siblings walk everywhere. And during the pandemic, they only go places they can walk. So, I hopped a train uptown to meet them at a sidewalk café on East 86th street, right in their neighborhood.
1/320th sec @ f/6.8 ISO 64, M-DNG
After a leisurely meal, we moseyed over to Gracie Mansion, the mayoral residence on the East River. I don’t have any pictures of said mansion, because one, there is a large fence surrounding it and two, the house isn’t that impressive. But Carl Schurz Park where it resides was quite nice. Dogs frolicking, people shooting hoops and runners huffing up and down the paths.
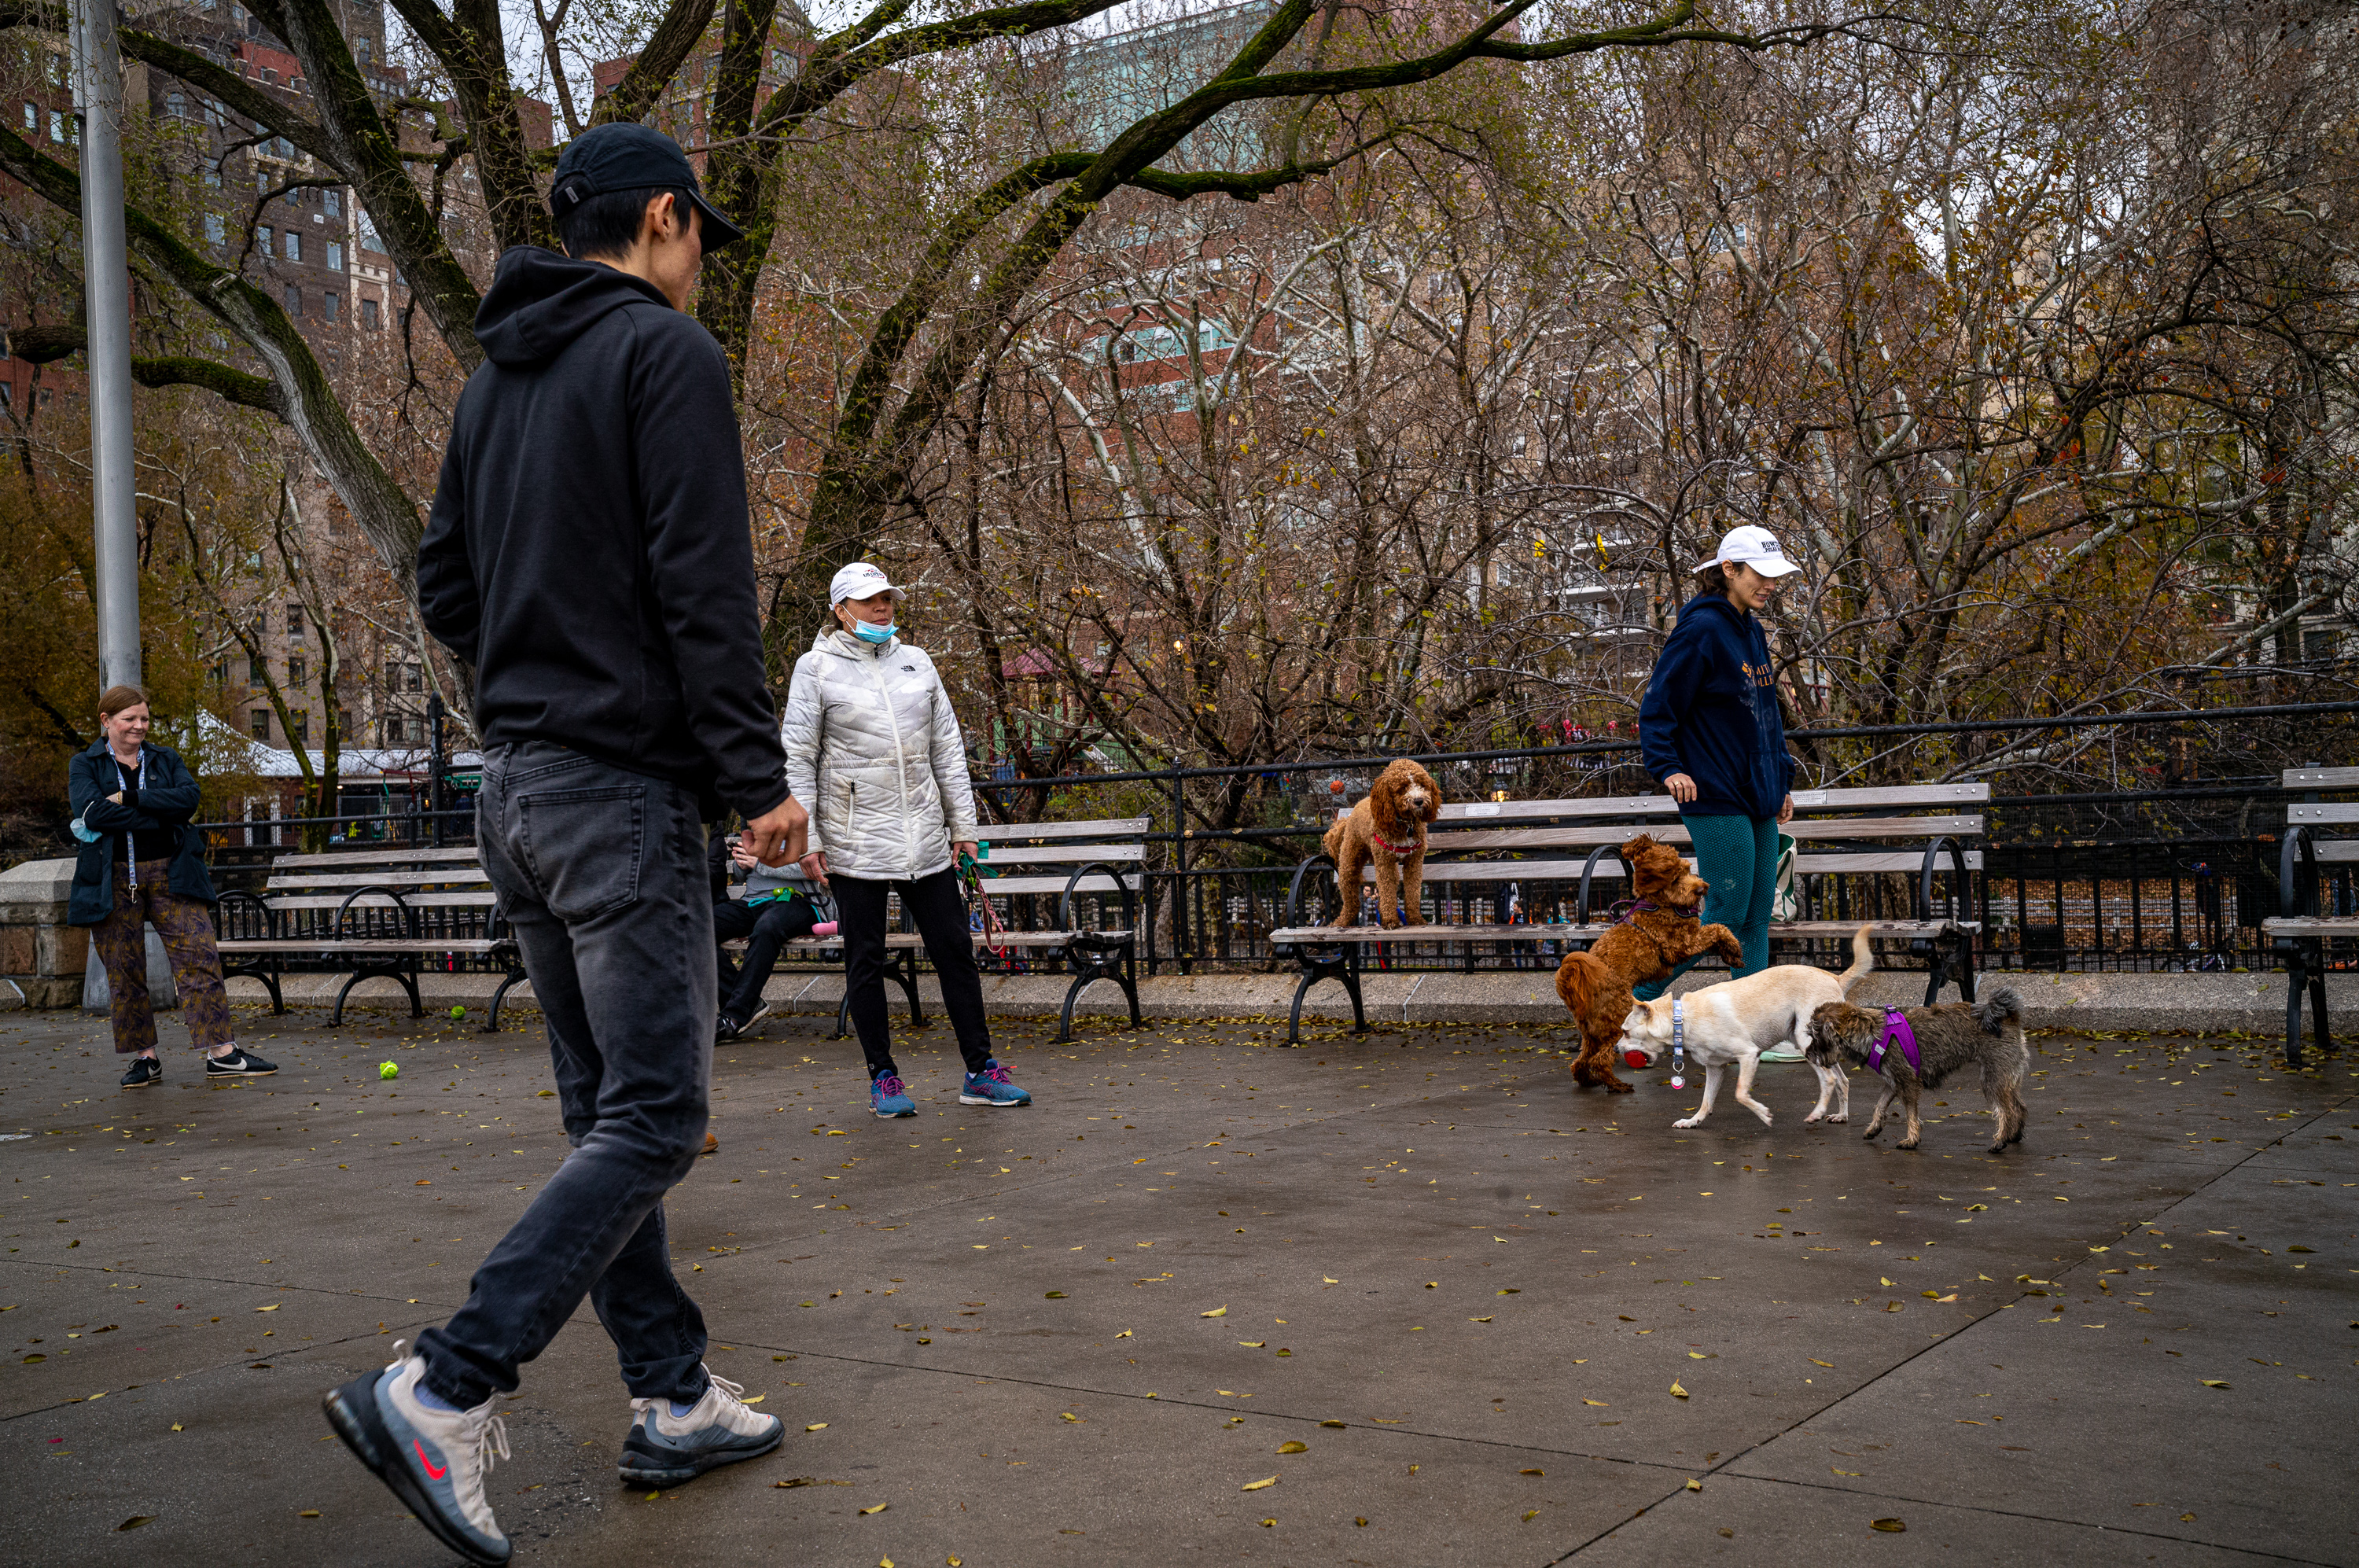
1/320th sec @ f/8 ISO 800, M-DNG
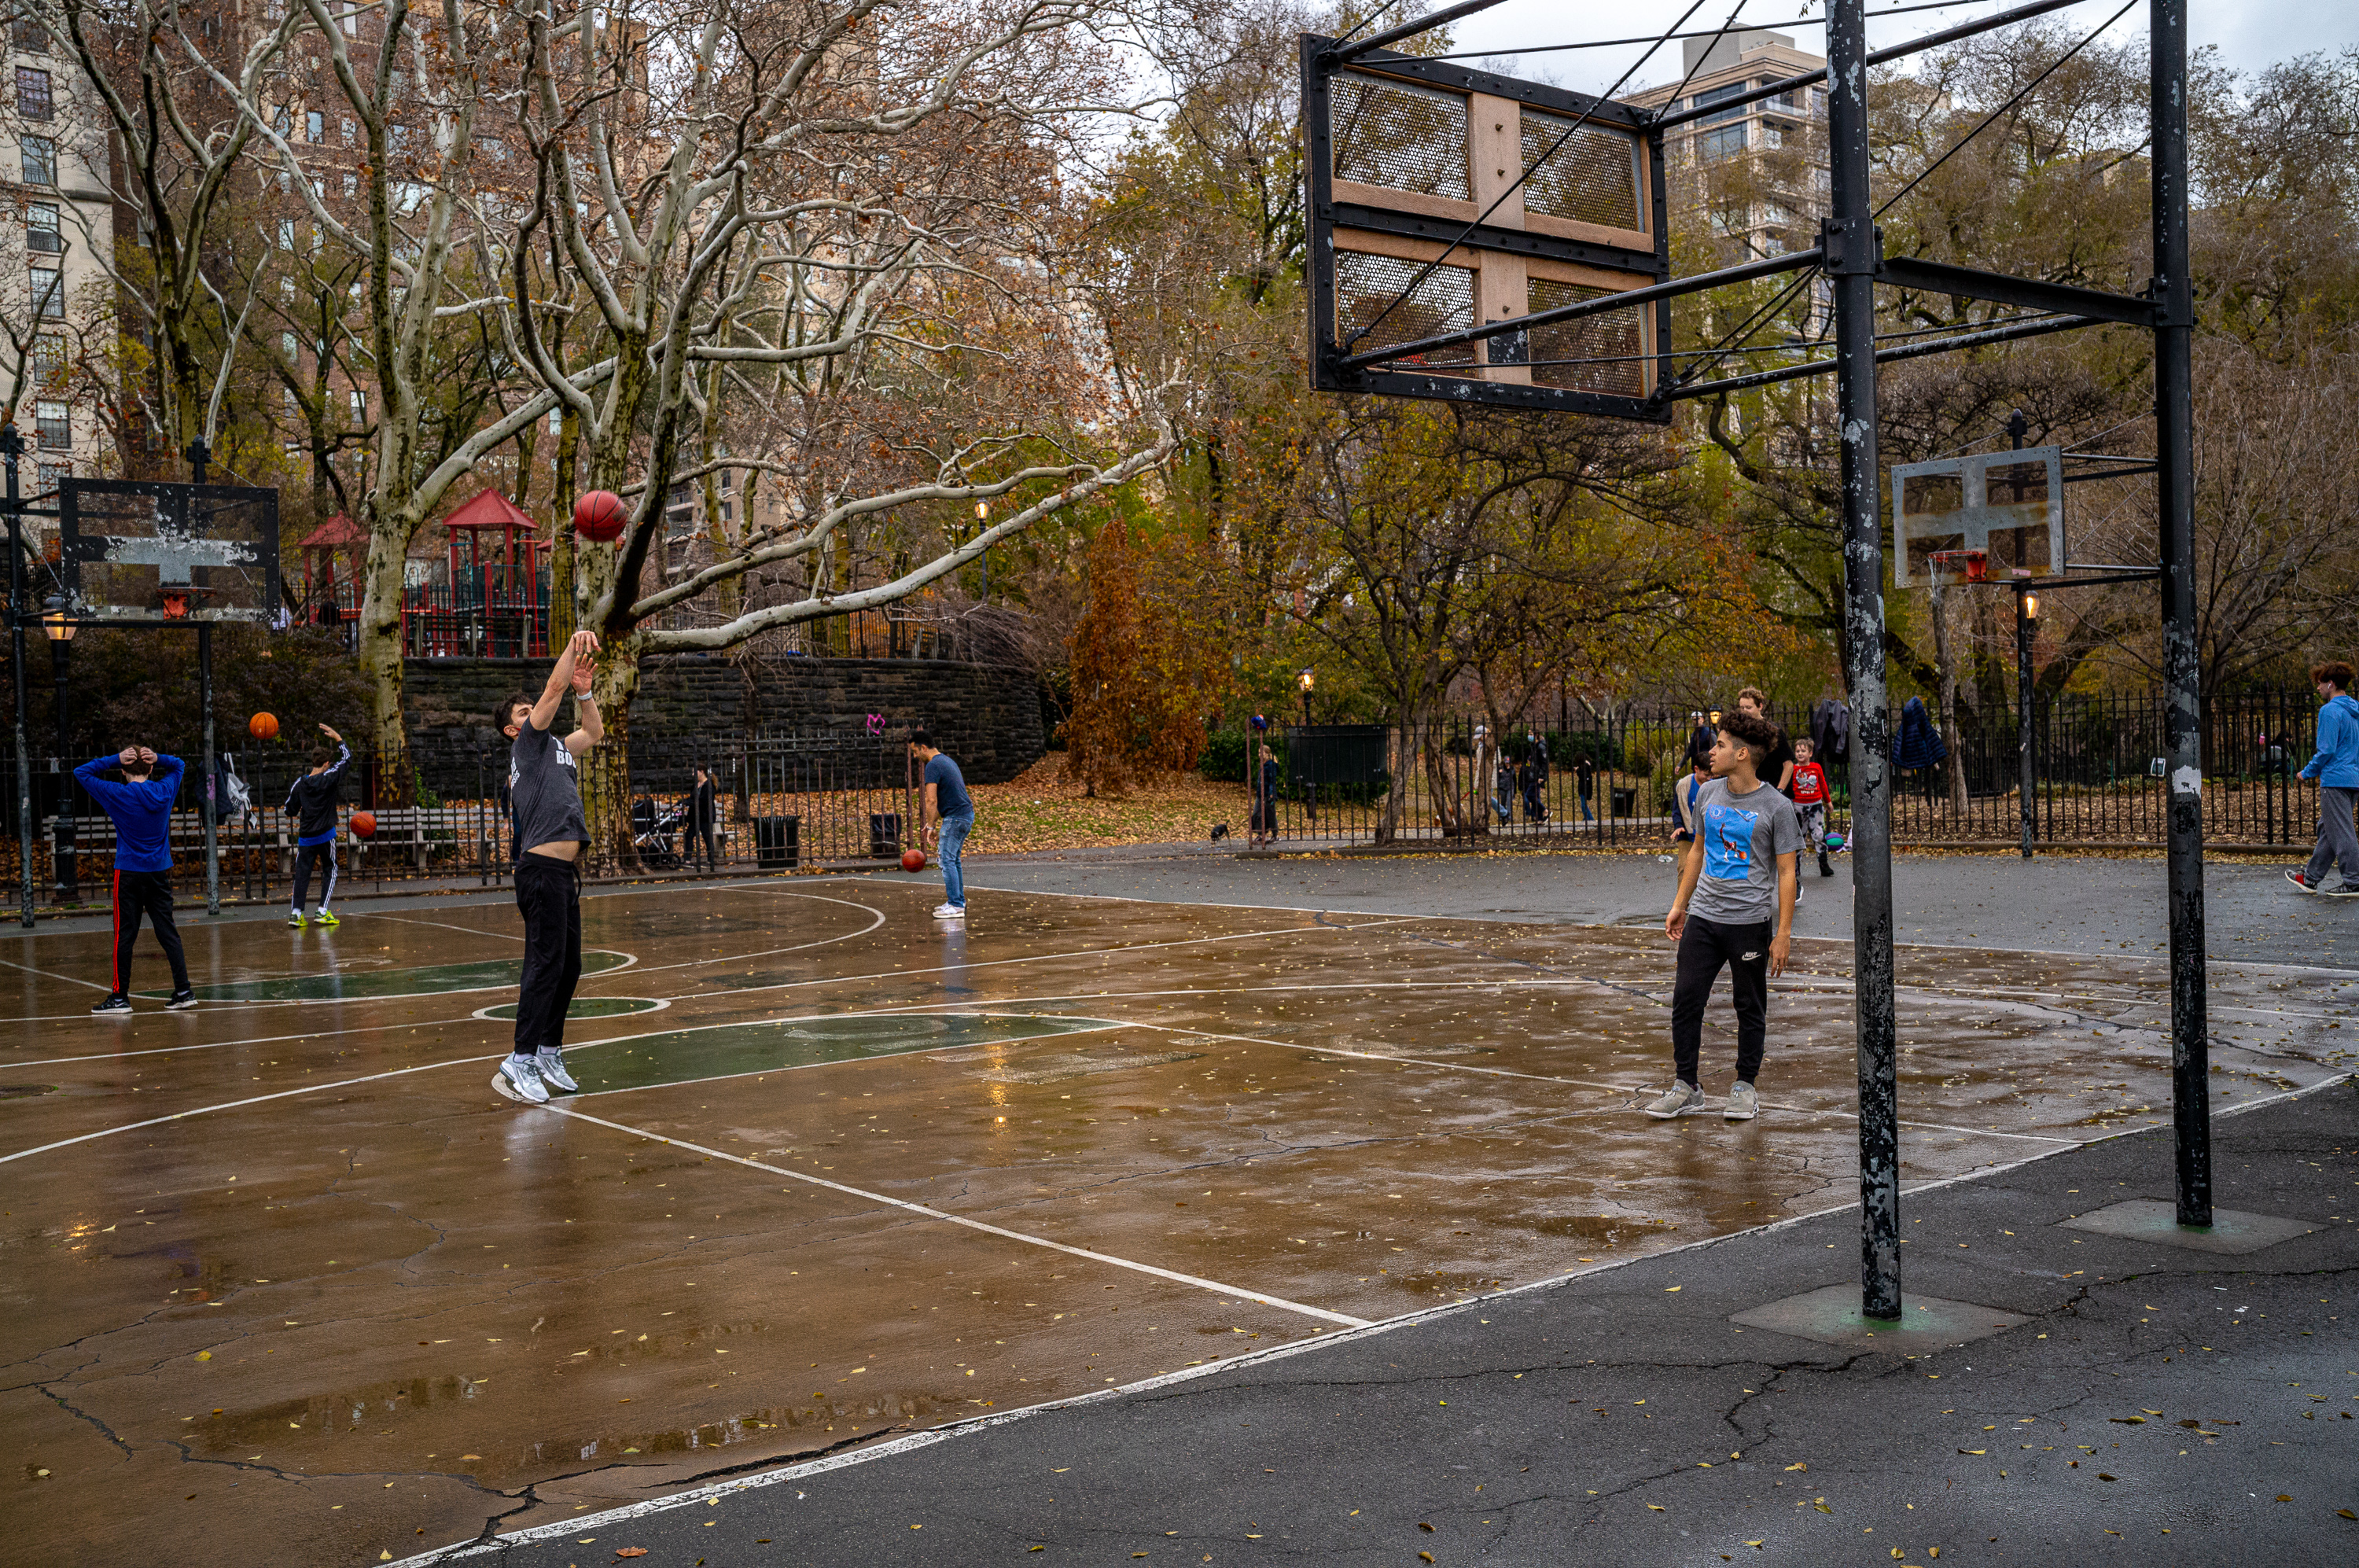
1/320th sec @ f/8 ISO 1600, M-DNG
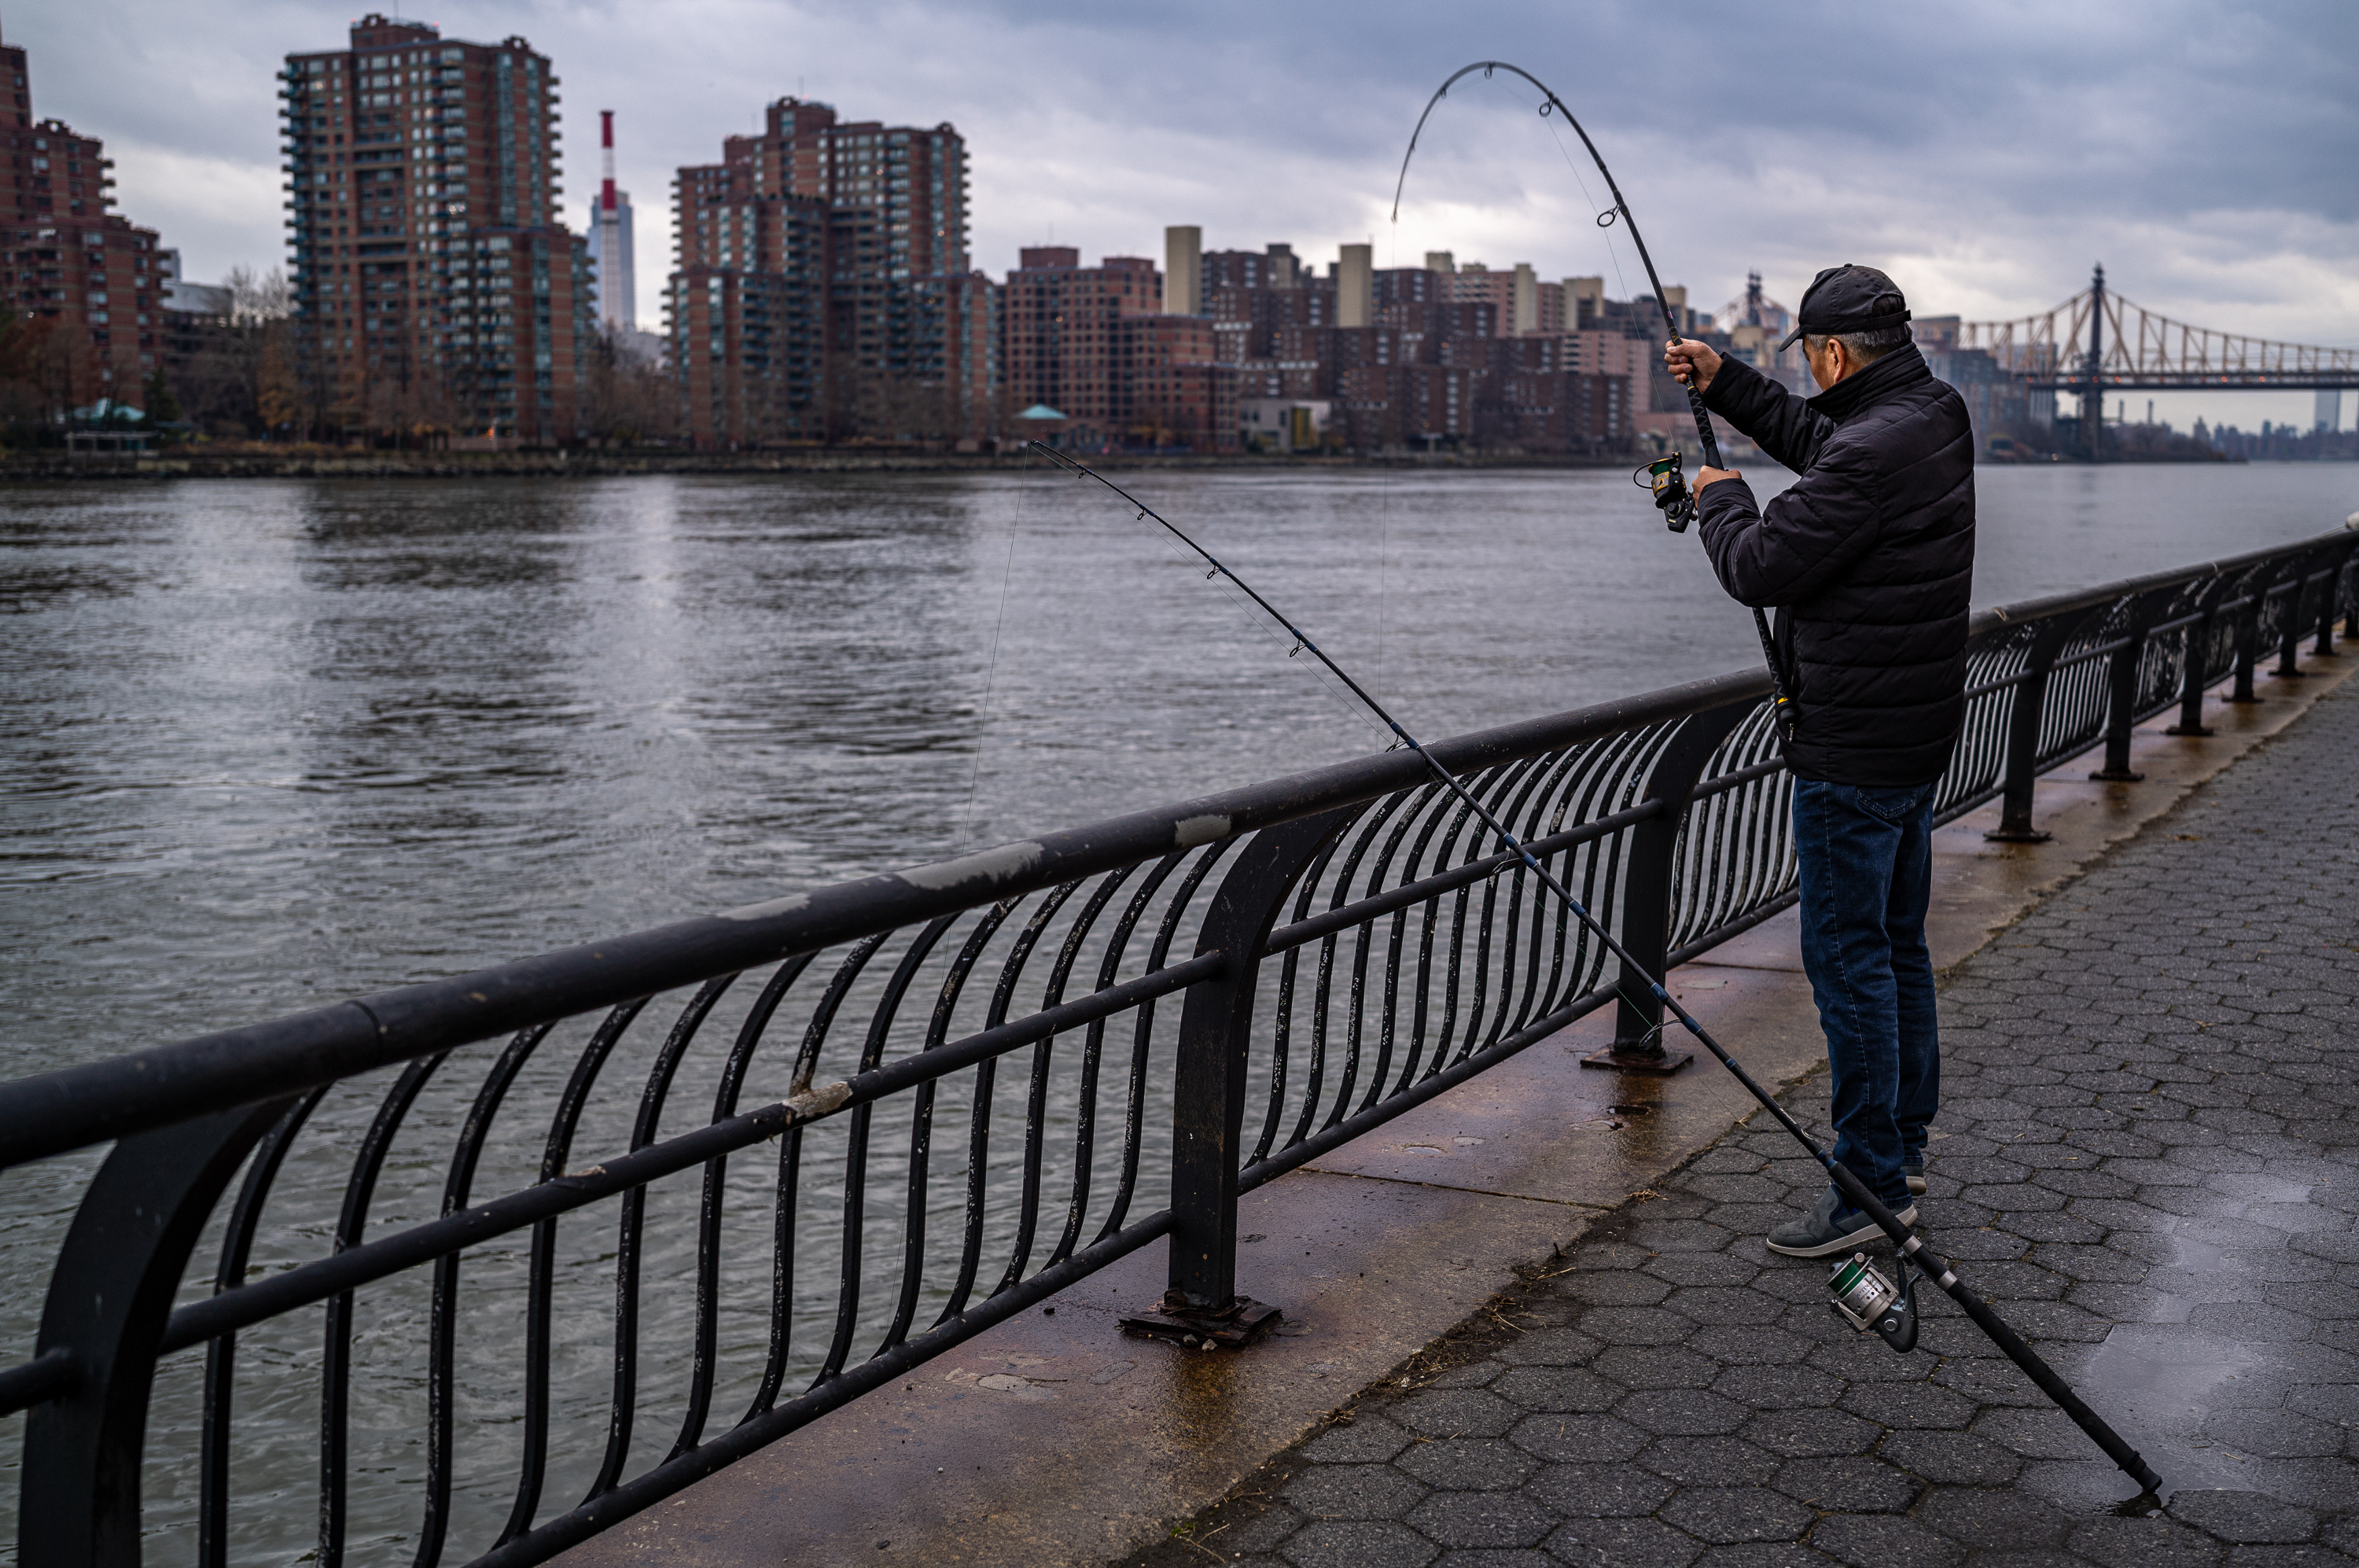
The walkway extends all the way down the bank of the East River, running alongside the FDR. So, we walked and talked while I managed to squeeze off a few shots. Not expecting any prizewinning shots, I switched over to M-DNG so I could see how the camera behaved at the lower resolution in daylight and overcast conditions.
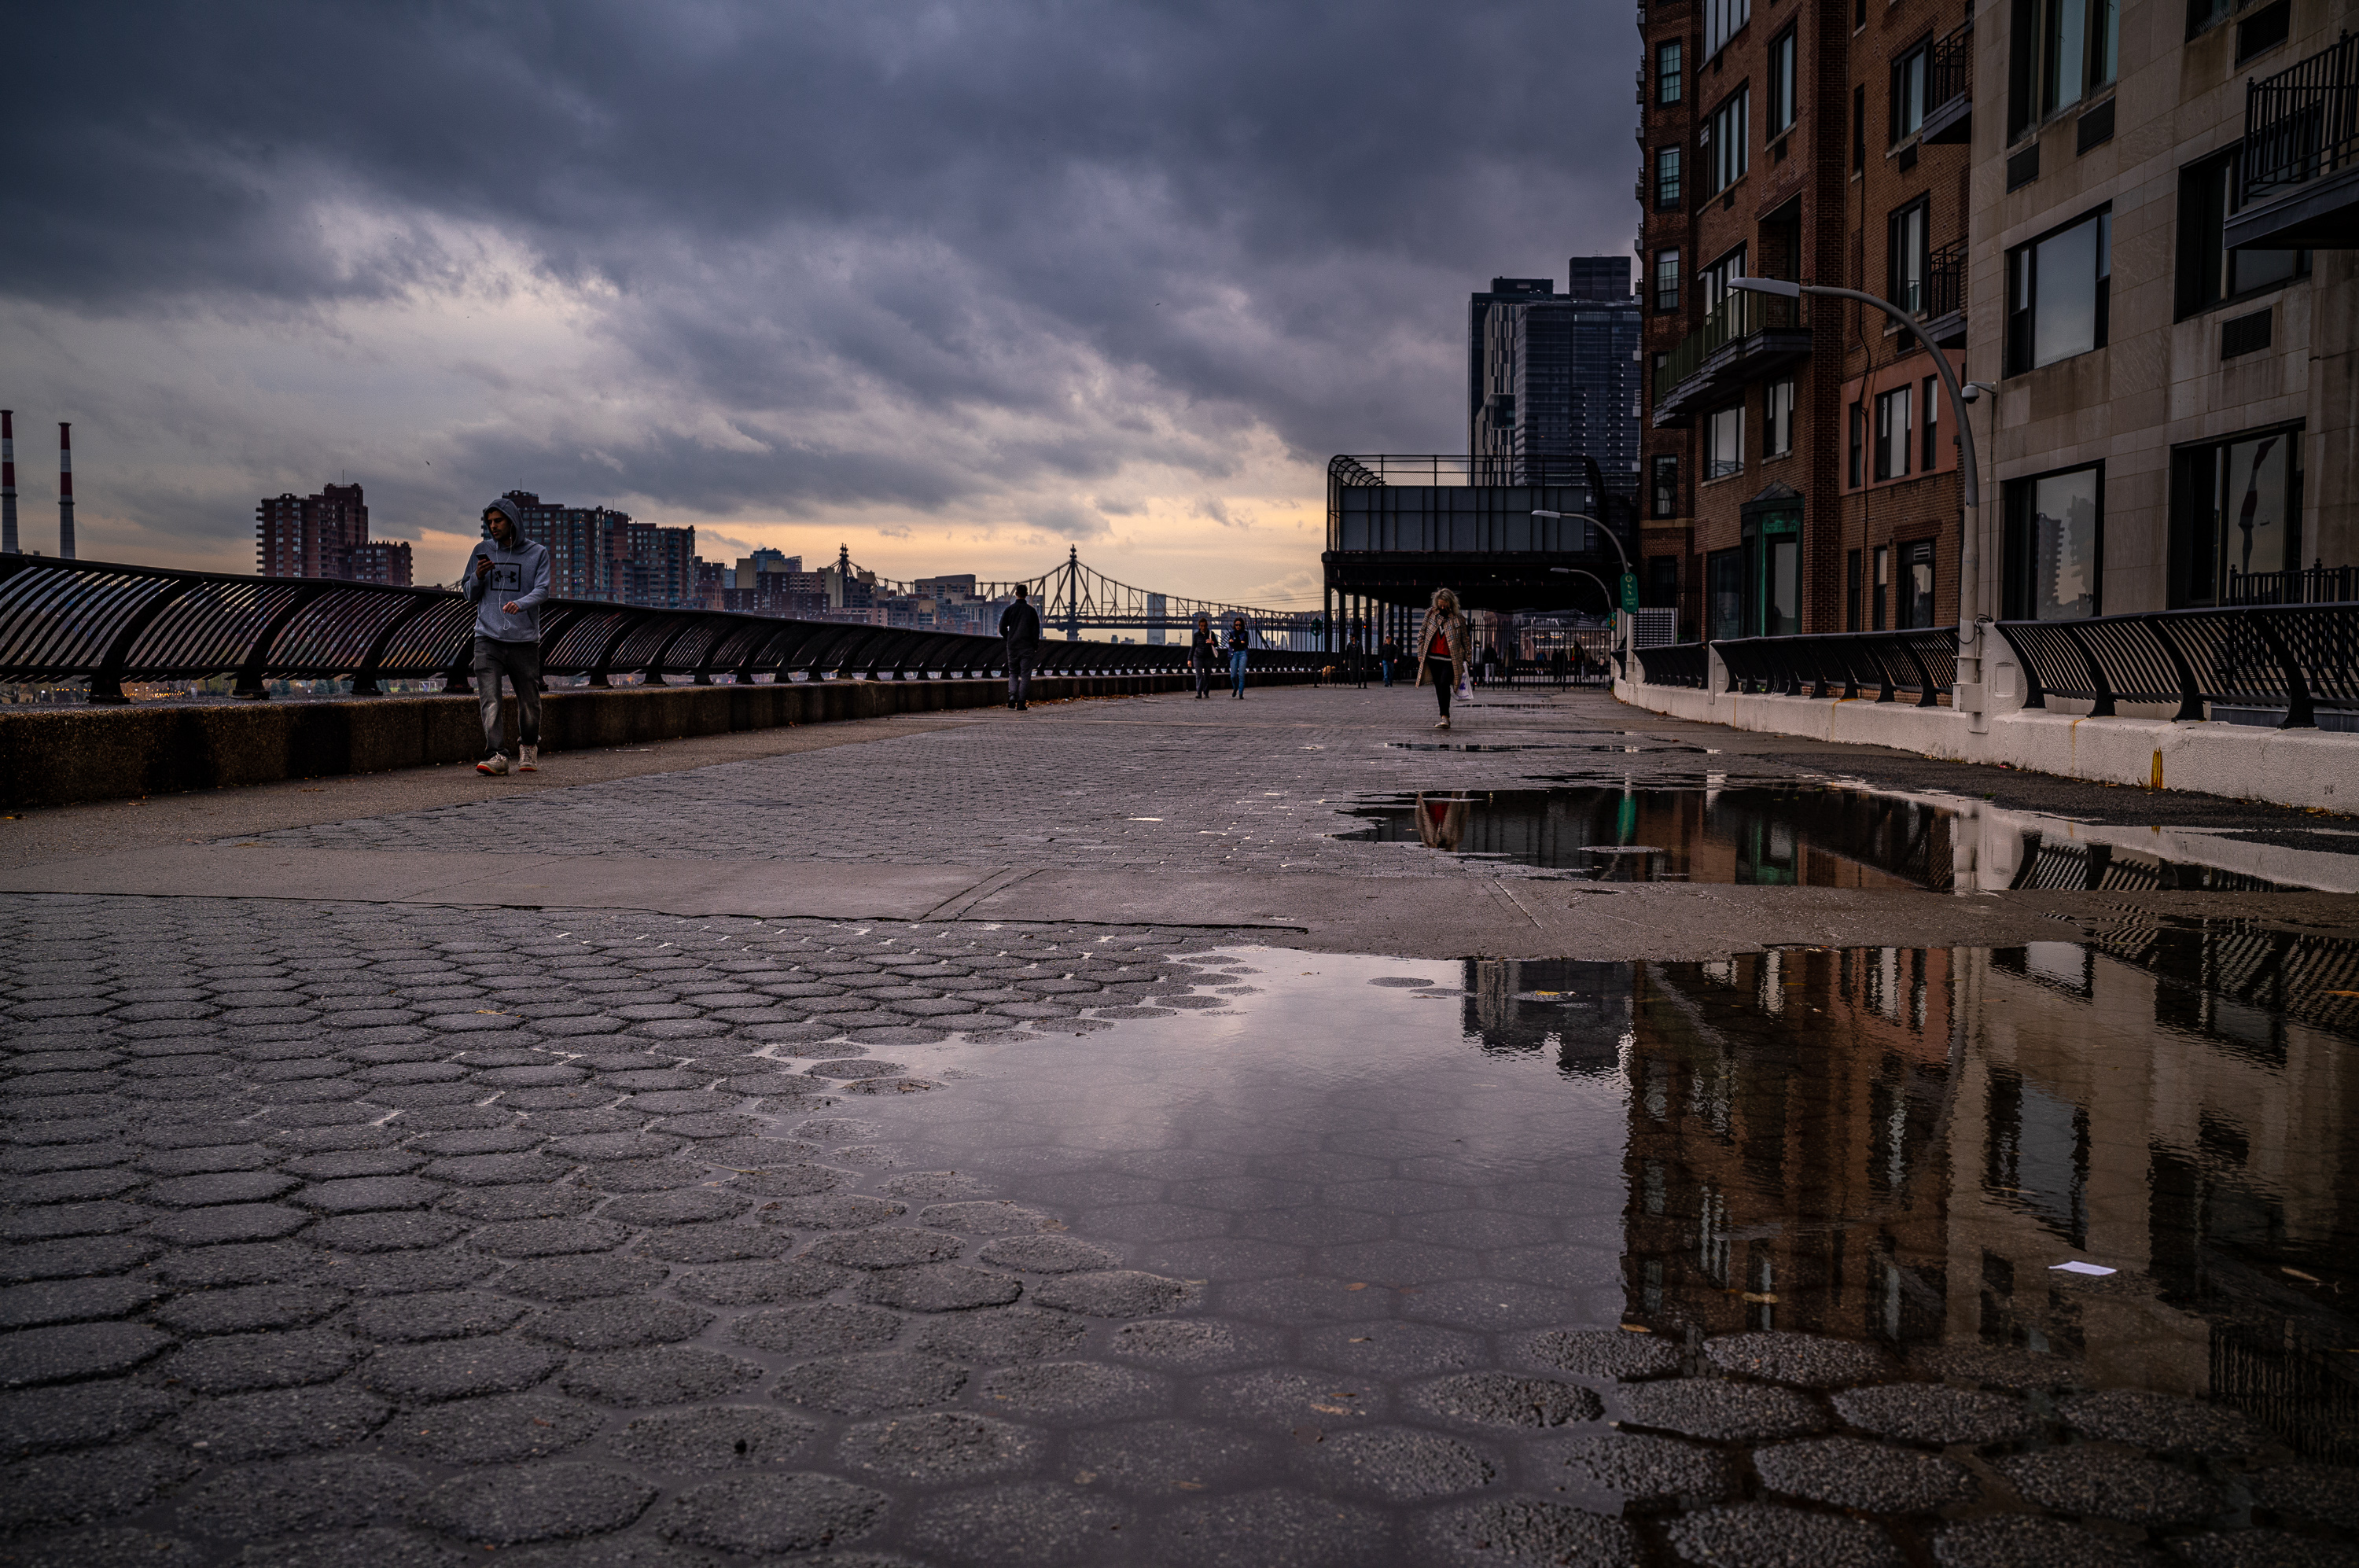
1/320th sec @ f/6.8 ISO 200, M-DNG
1/320th sec @ f/2 ISO 80, M-DNG
1/640th sec @ f/2 ISO 64, M-DNG
We cut over towards Lexington Ave at 71st street, then looped back uptown towards where we started. Day quickly gave way to night, albeit with little fanfare or color. Nothing you can do about a gloomy day. But just at nightfall, I was treated to some decent blue hour conditions. The M-DNG setting worked well for this situation, but not any better than L-DNG might have, reinforcing my lessons from the previous night at Smalls.
1/320th sec @ f/5.6 ISO 6400, M-DNG
1/320th sec @ f/2 ISO 1000, M-DNG
Making the most of a sunny day
My fortunes changed the last day with a break in the otherwise dreary weather. I promptly changed my flight to a later departure, checked out of my hotel and left my bags at the bell desk. I finally had a real opportunity to put the camera to work, capturing the bold, vibrant color palette only a sunny winter day could provide. That low angle, soft-yet-hard light can be pure magic.
1/320th sec @ f/4 ISO 80
My plan: grab a bagel, hop a train to the trendy DUMBO neighborhood in Brooklyn, walk across the Brooklyn Bridge, through Chinatown and into FiDi. None of those things happened.
1/350th sec @ f/8 ISO 100
See, it was Sunday in NYC. Unofficial Bagel Day. The Pick-a-Bagel oh-so-conveniently located around the corner from my hotel was jammed packed with the ordering line spilling out the door and around the block. Time for plan B. Looking at the transit map on my phone, I tried to find a decent bagel place somewhere along a Brooklyn-bound subway line. I came up with Murray’s Bagels in Greenwich Village. Sure, I had just been to the Village. Twice in as many days, but this was just a stop along the way, right?
1/350th sec @ f/5.6 ISO 100
West Village in great light
Getting off the 2 train at W 14th St, I stepped into a glorious sunny day with crisp blue skies, and everything seemed possible. Bagels were but a block away on 6th Ave, but a small corner park with an interesting white metal structure caught my eye. Just a quick stop, I told myself.
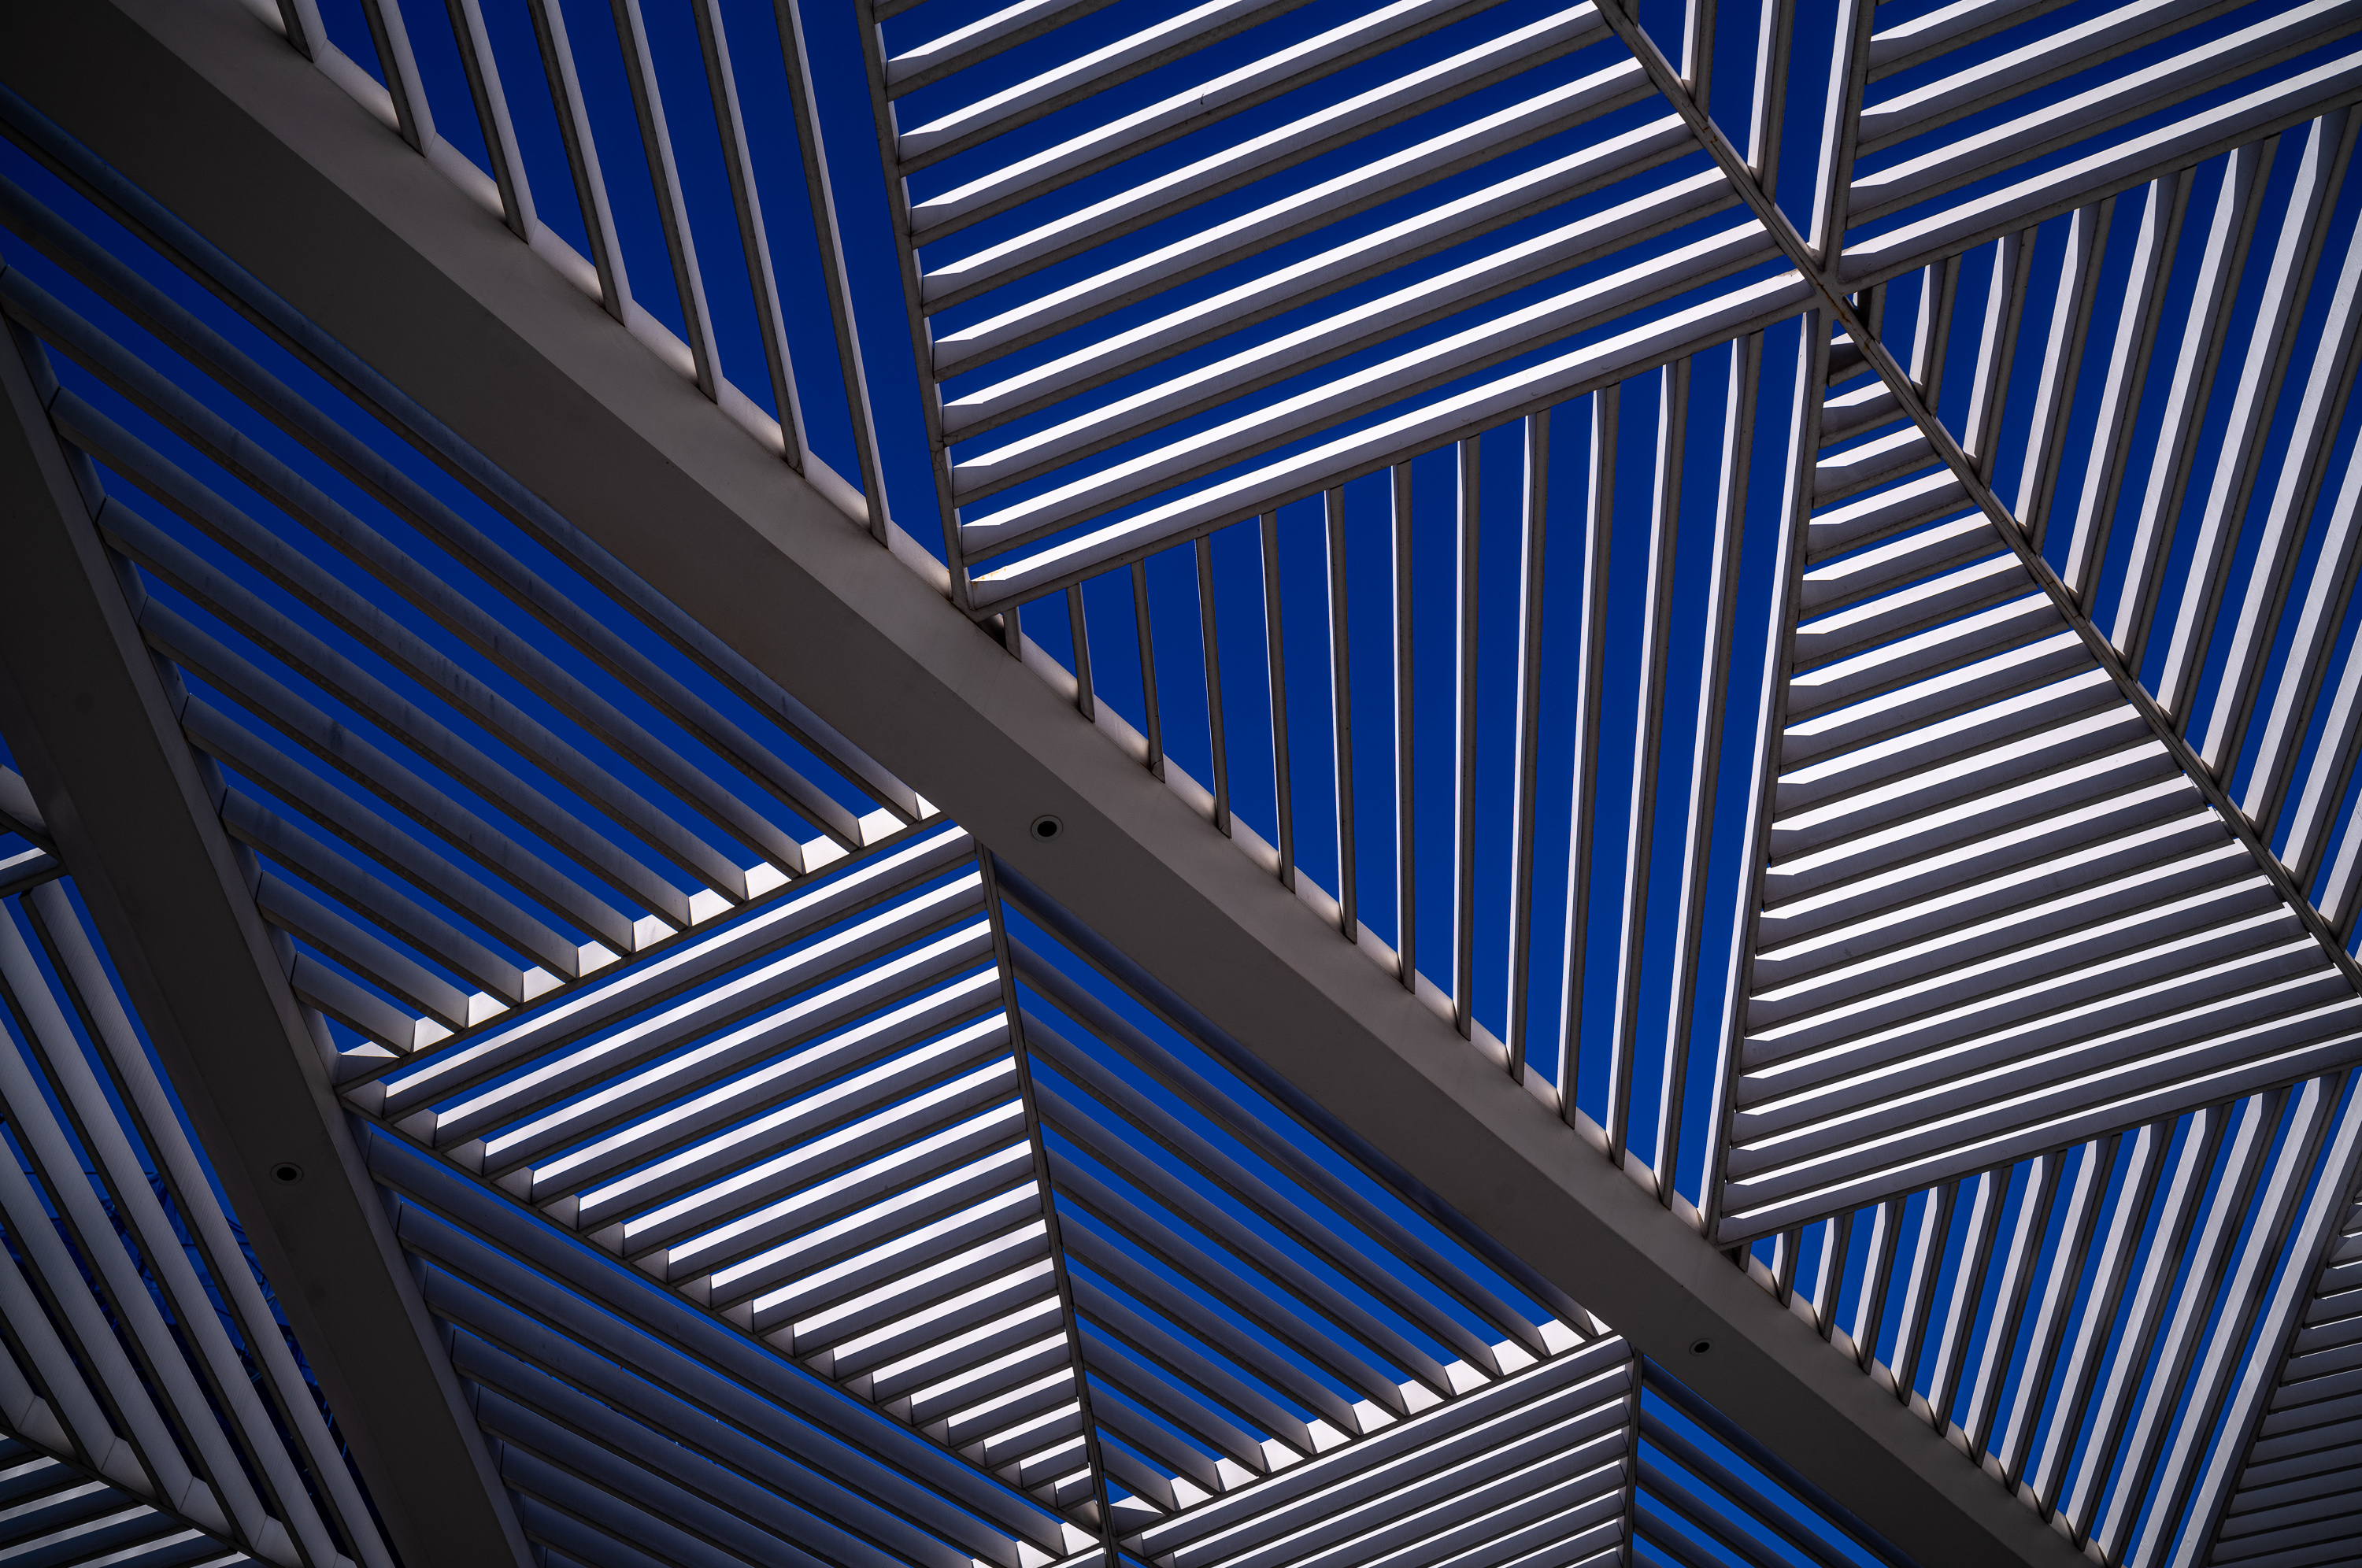
1/1000th sec @ f/8 ISO 64
And once I got to the structure, of course an opportunity presented itself. A skateboarder was running some tricks for a small camera crew. Figuring this would be a perfect chance to try out some high-speed action photography, I switched over to my 24 Elmar, flipped the camera into Live View and positioned myself to capture the jump, making sure to get the sun in frame. If you’re going to go for it, you may as well go all the way. The camera guy gave me a friendly warning that I might get plowed into. I thanked him and prepared to get out of the way quickly if needed.
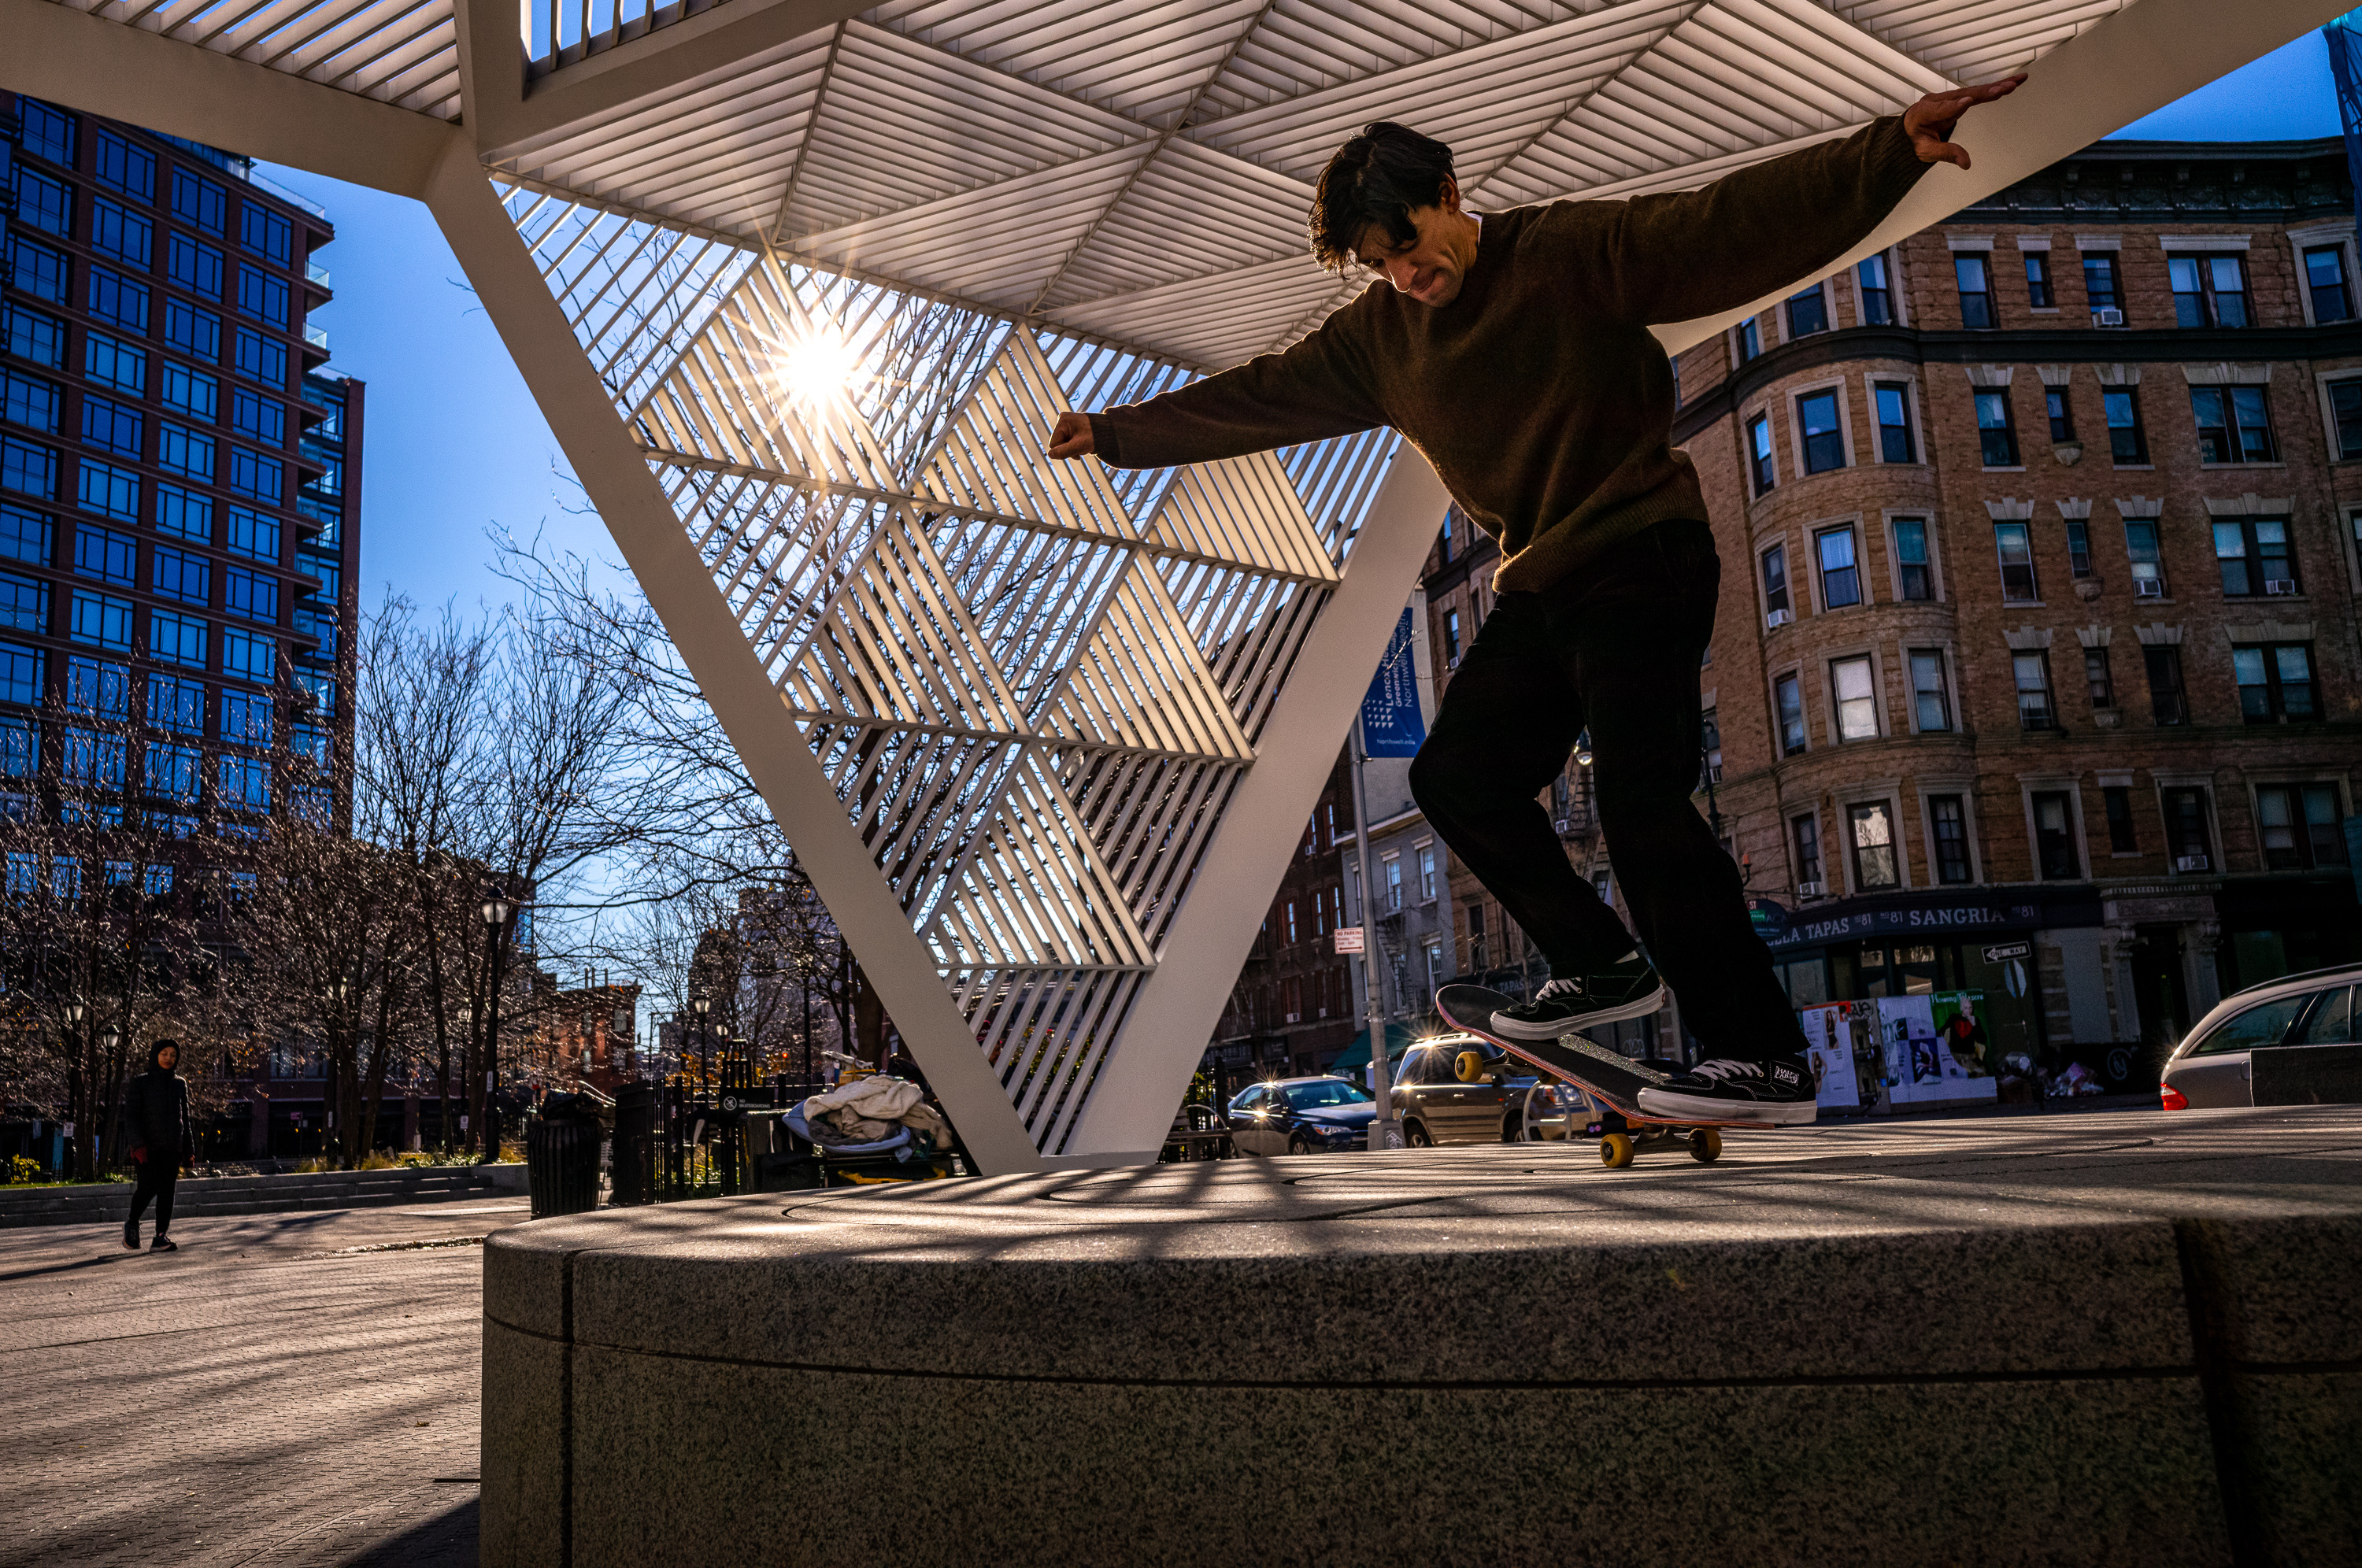
1/3000th sec @ f/5.6 ISO 400
Crouching down, I manually dialed my ISO to 400, set hyperfocal distance on the 24mm at f/5.6 and switched the drive mode to high speed. Without needing to worry about focus due to depth of field or motion blur with a shutter speed of 1/2000th, I just needed to time the shot. As soon as he neared the jump, I leaned on the shutter, firing off a full burst at 4.5 fps. After a couple runs and corresponding burst attempts, I was happy with my results and ready for breakfast.
1/320th sec @ f/5.6 ISO 64
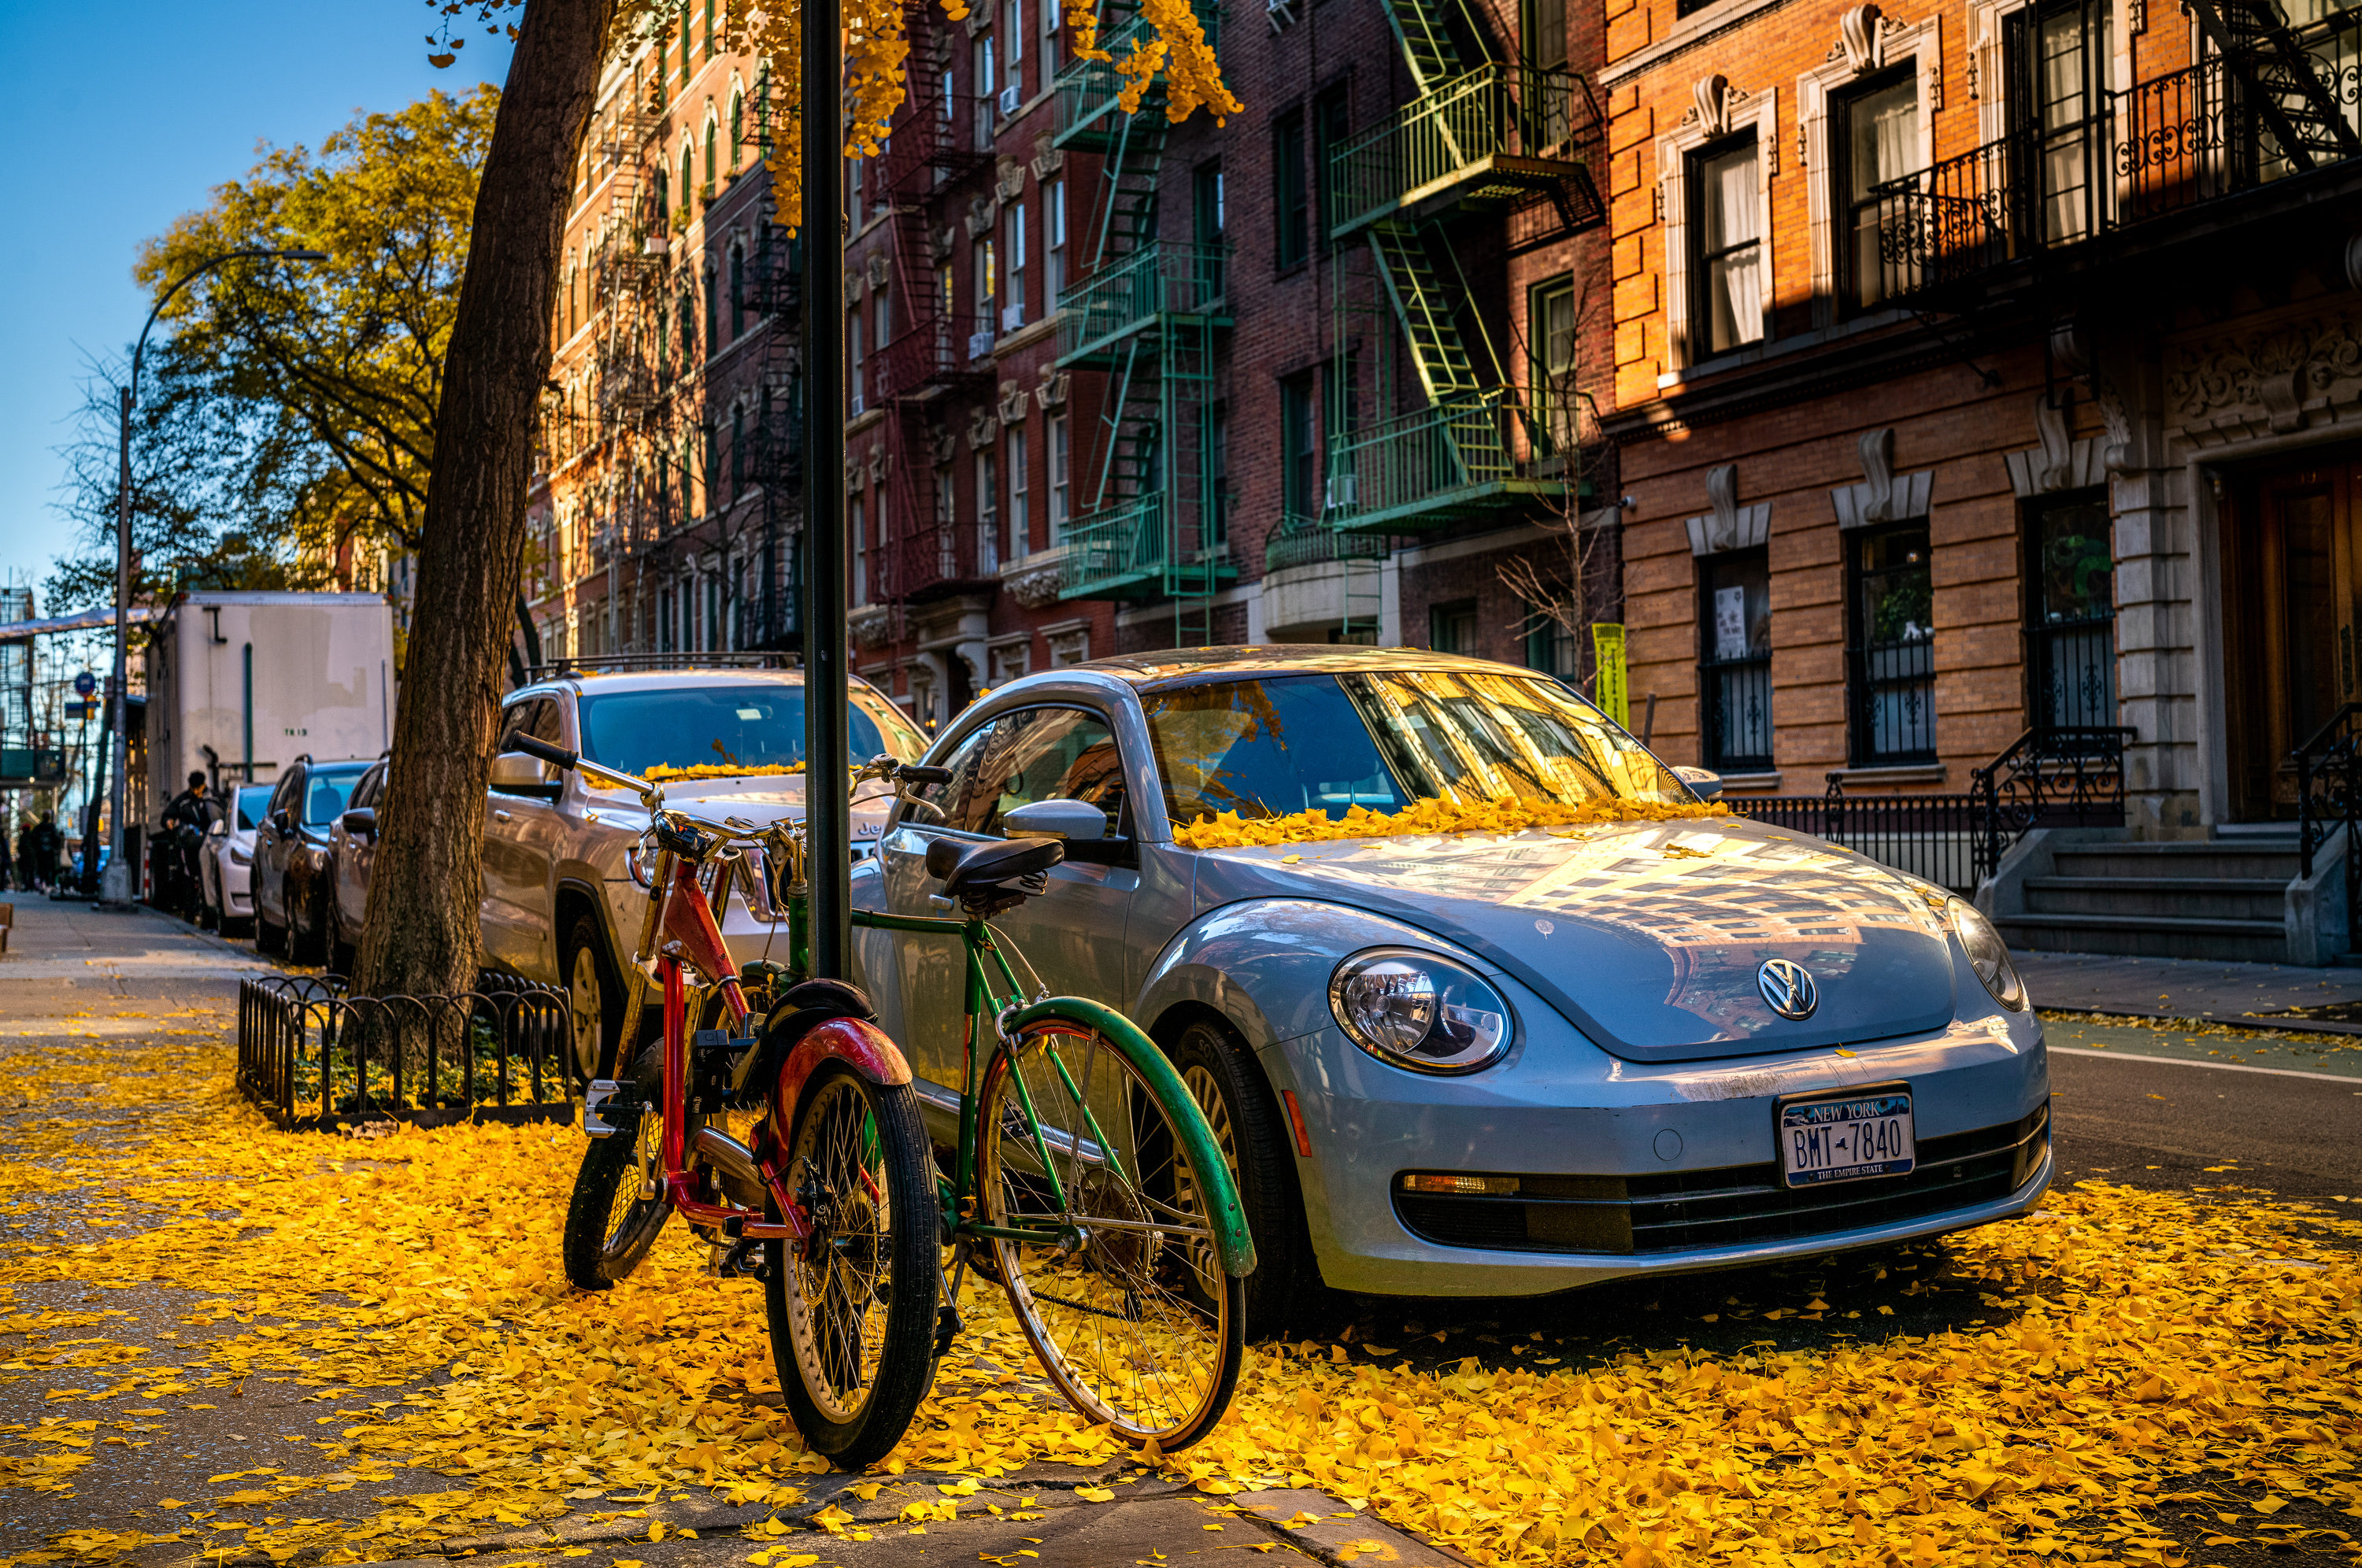
After a much shorter line at Murray’s, I rewarded myself with an amazing bagel sandwich. With my plan back on track, I just had to go back to the train station and head to Brooklyn. But the light! Maybe I could spend just a little more time walking around the quaint side streets of the West Village before that. I’m sure DUMBO would have been fantastic after the 20-minute train ride, but I’m a firm believer in working a scene that’s working.
1/500th sec @ f/2.8 ISO 64
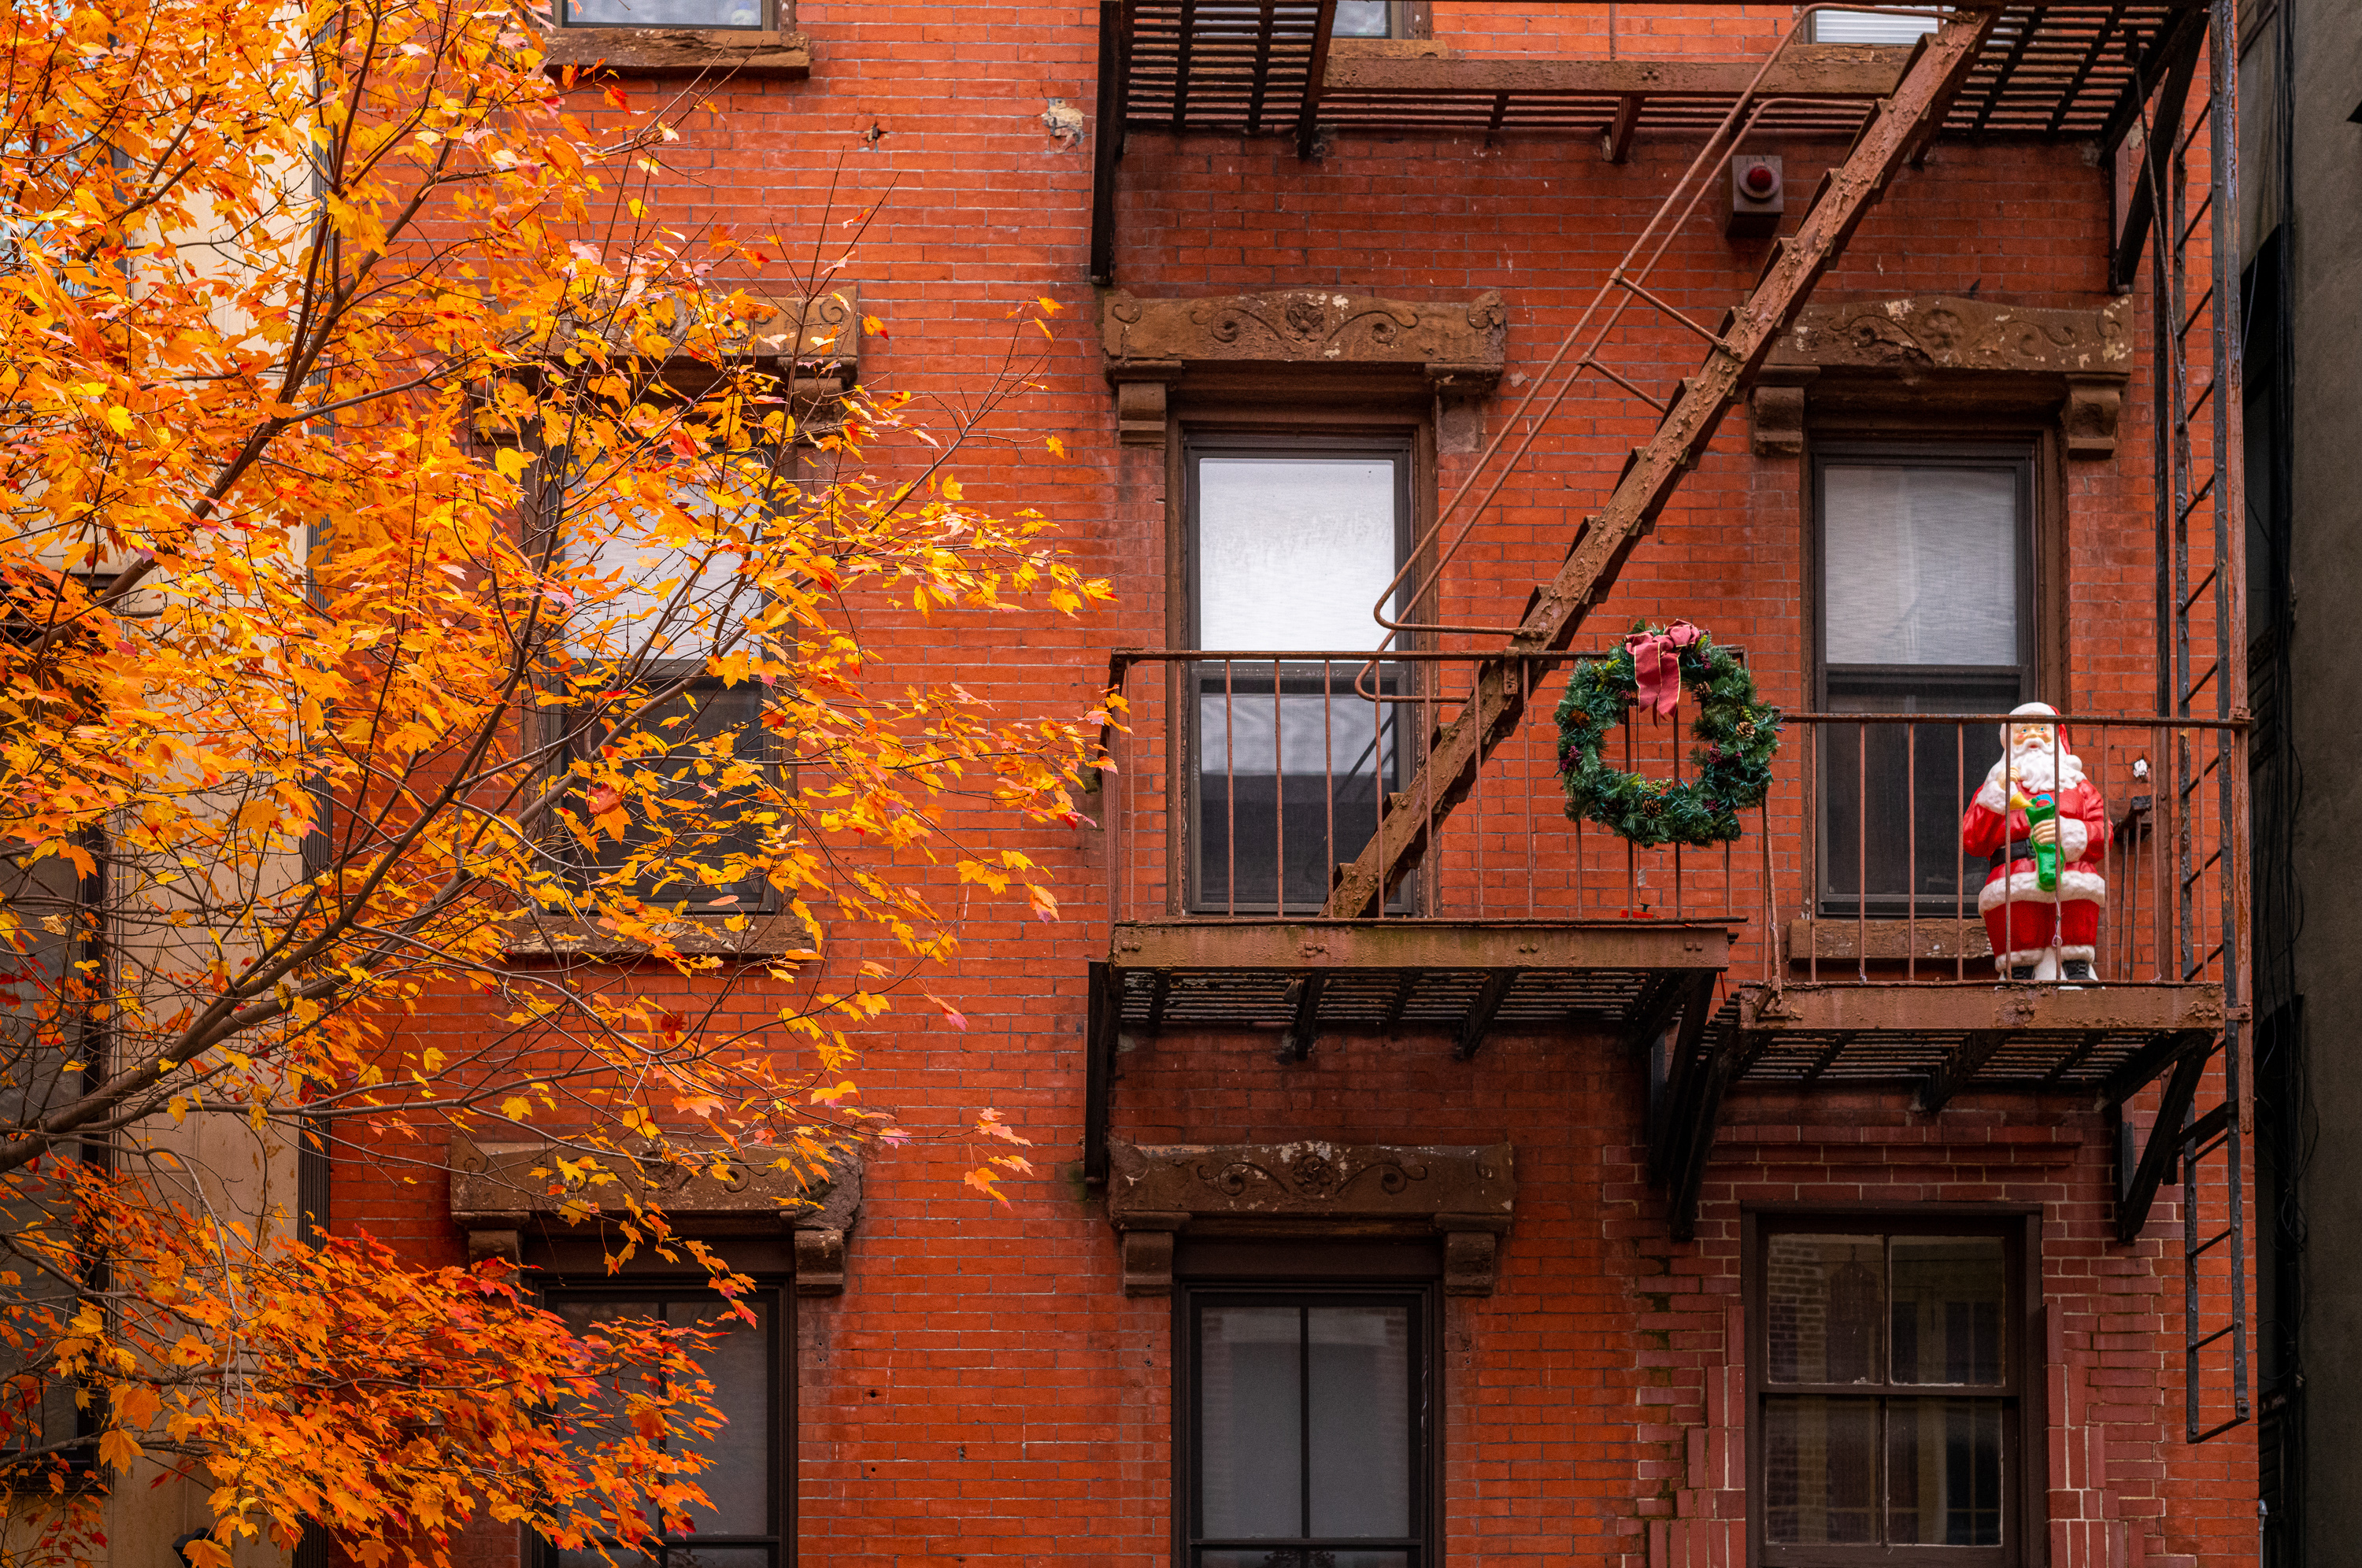
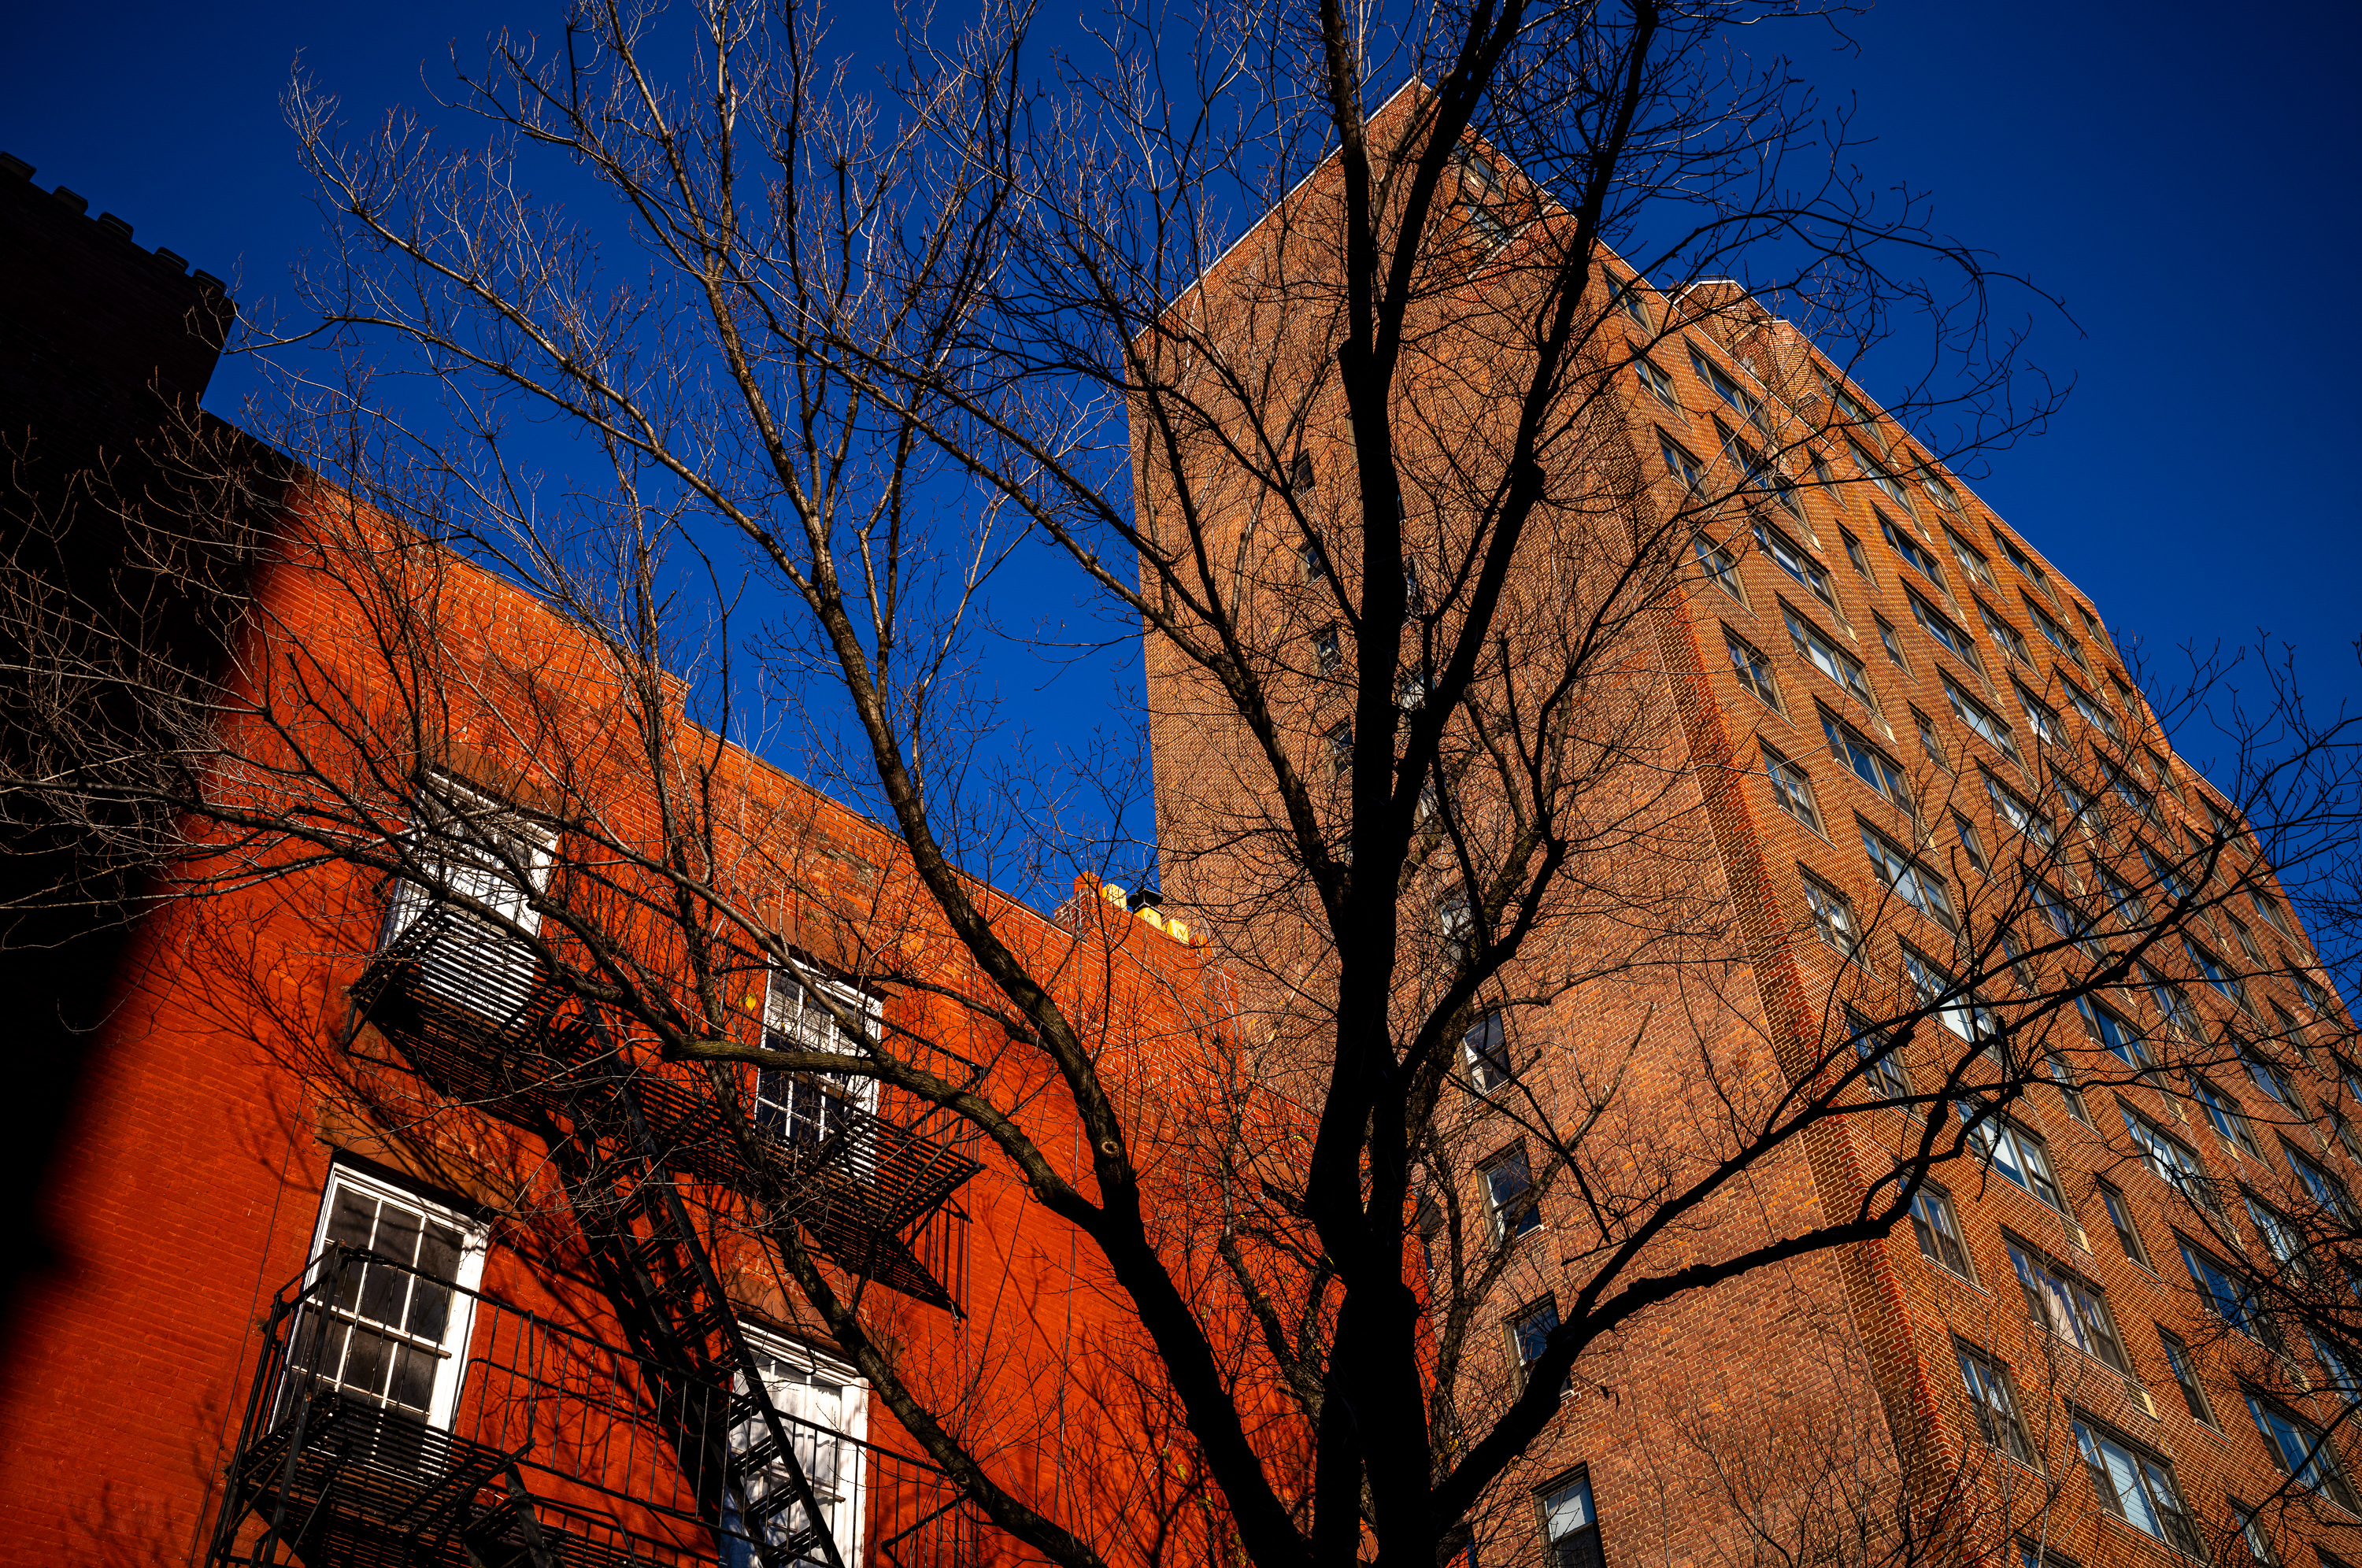
1/320th sec @ f/8 ISO 400
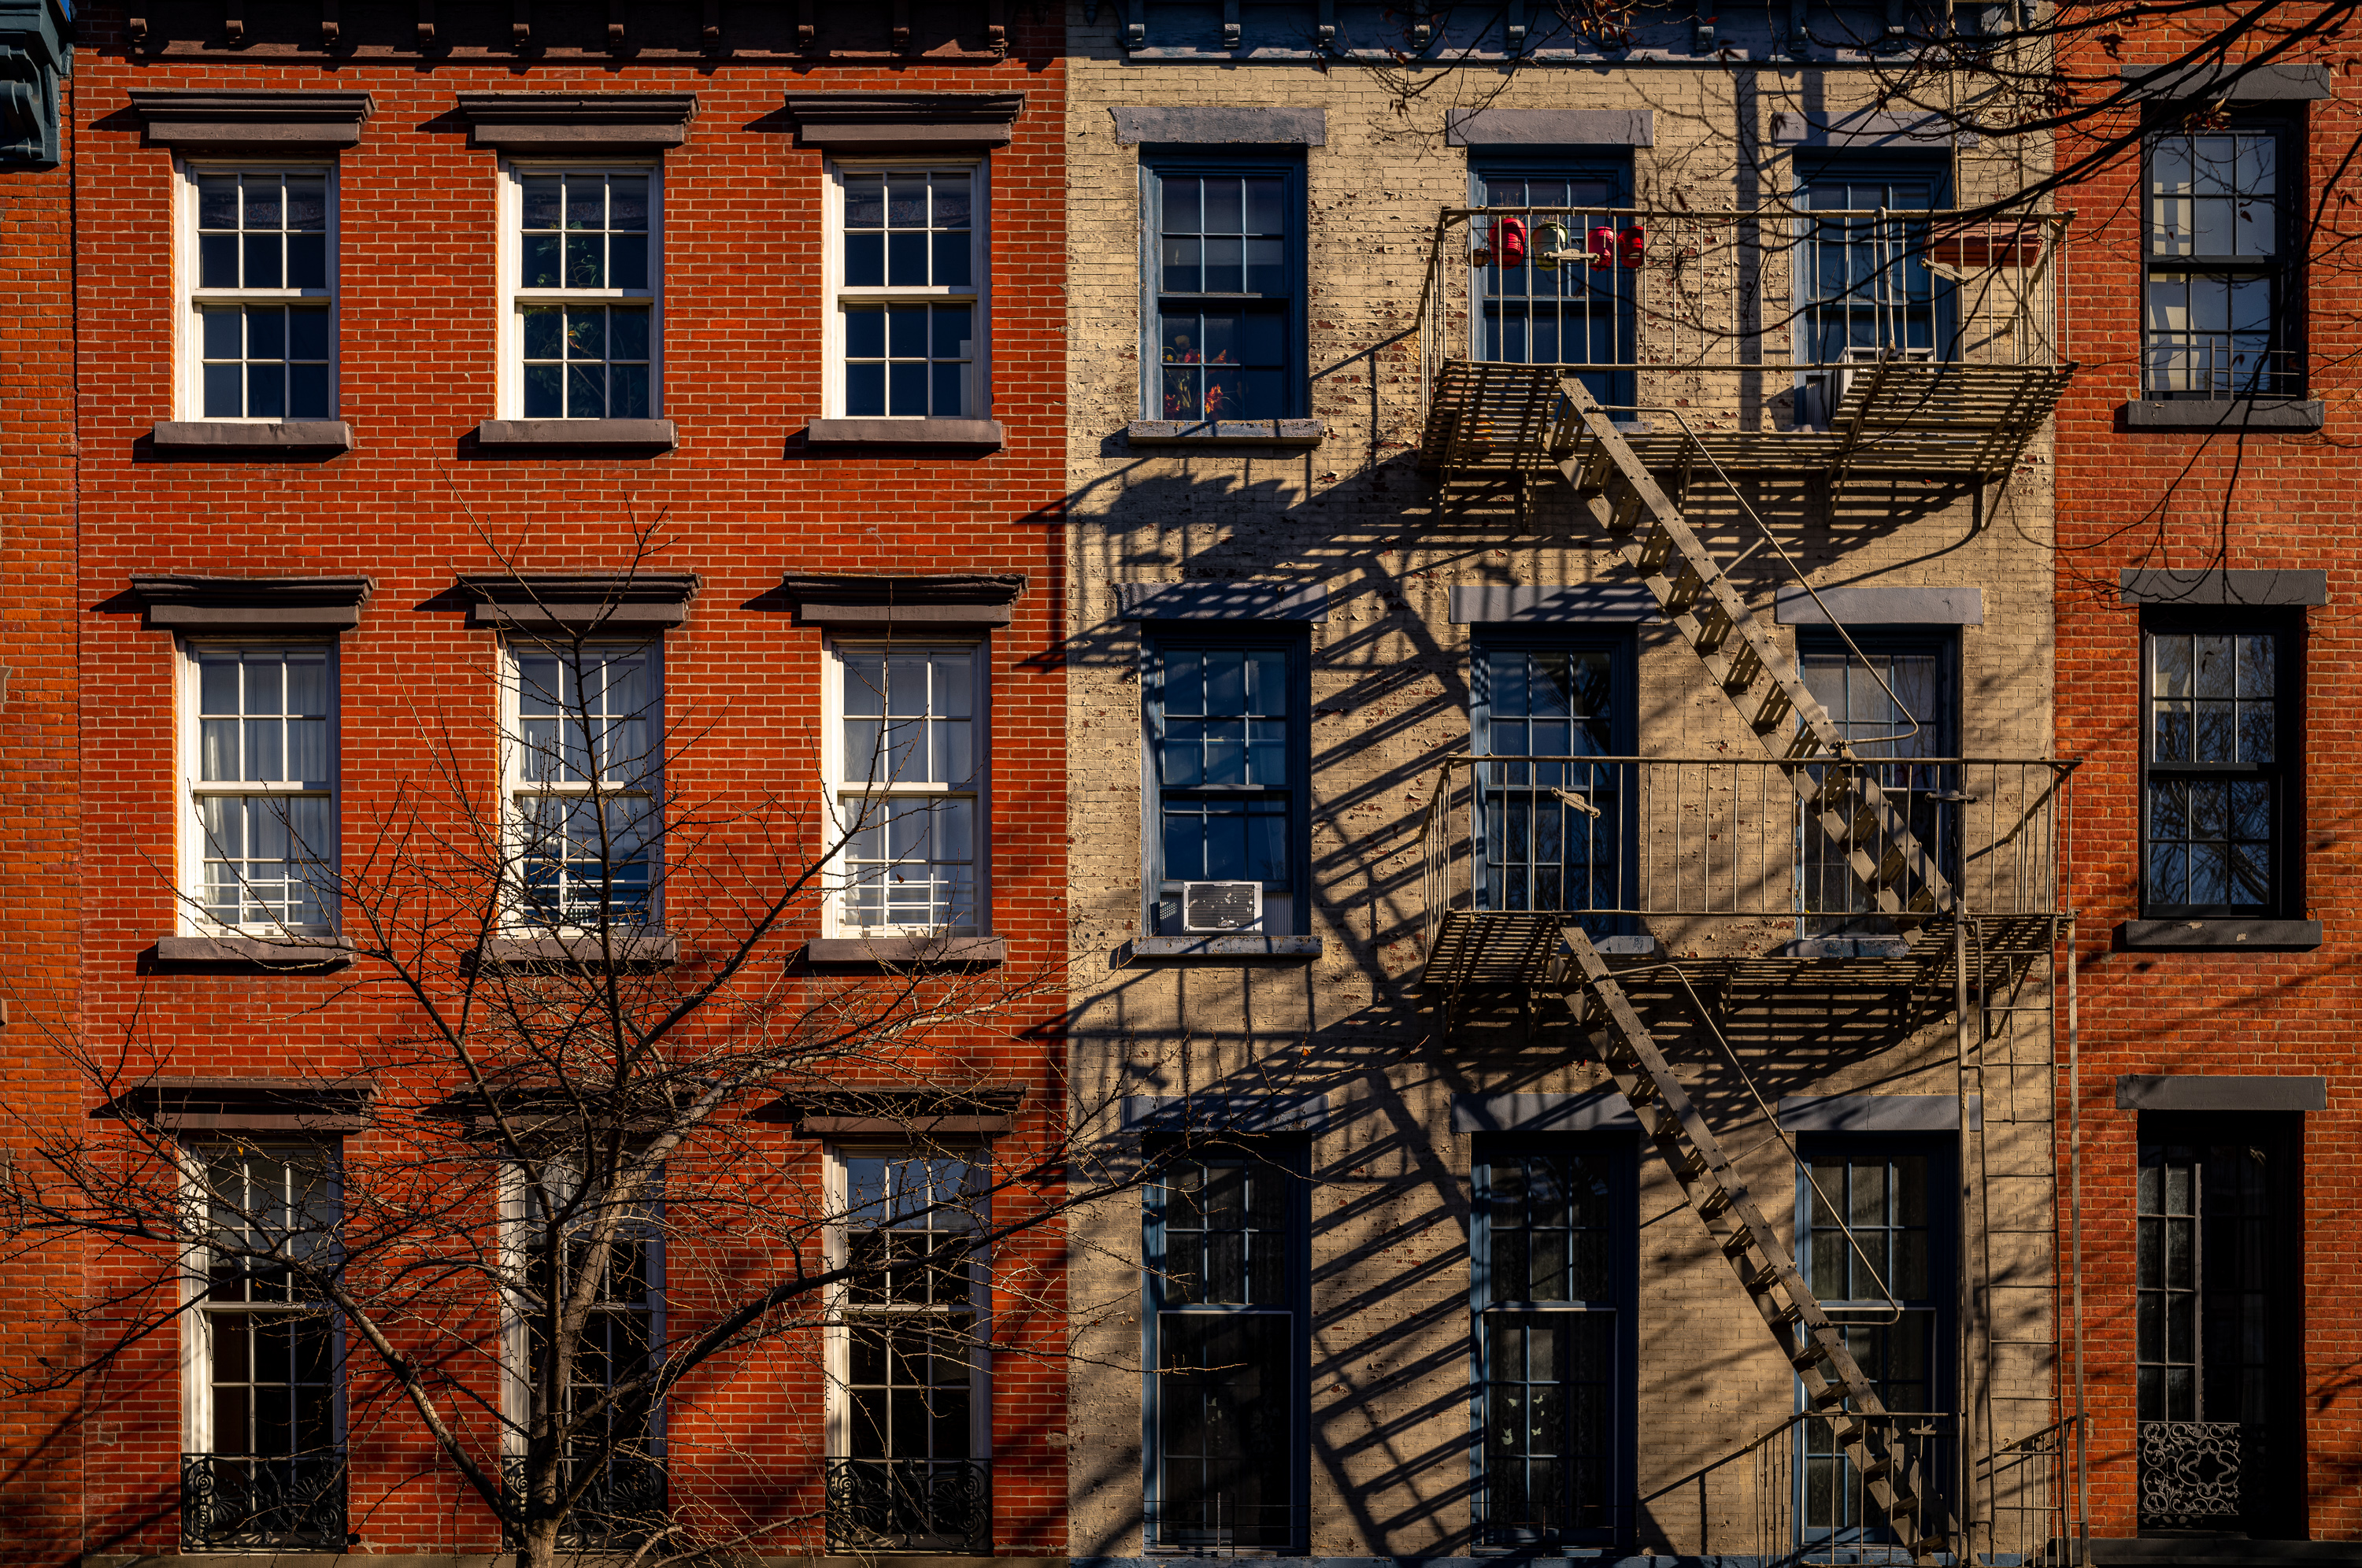
And the Village was getting my photo juices going. Freshly fallen yellow leaves, lovely shadows being cast by exposed fire escapes onto timeless brick facades, Sunday brunchers basking in sun – I didn’t want to leave.
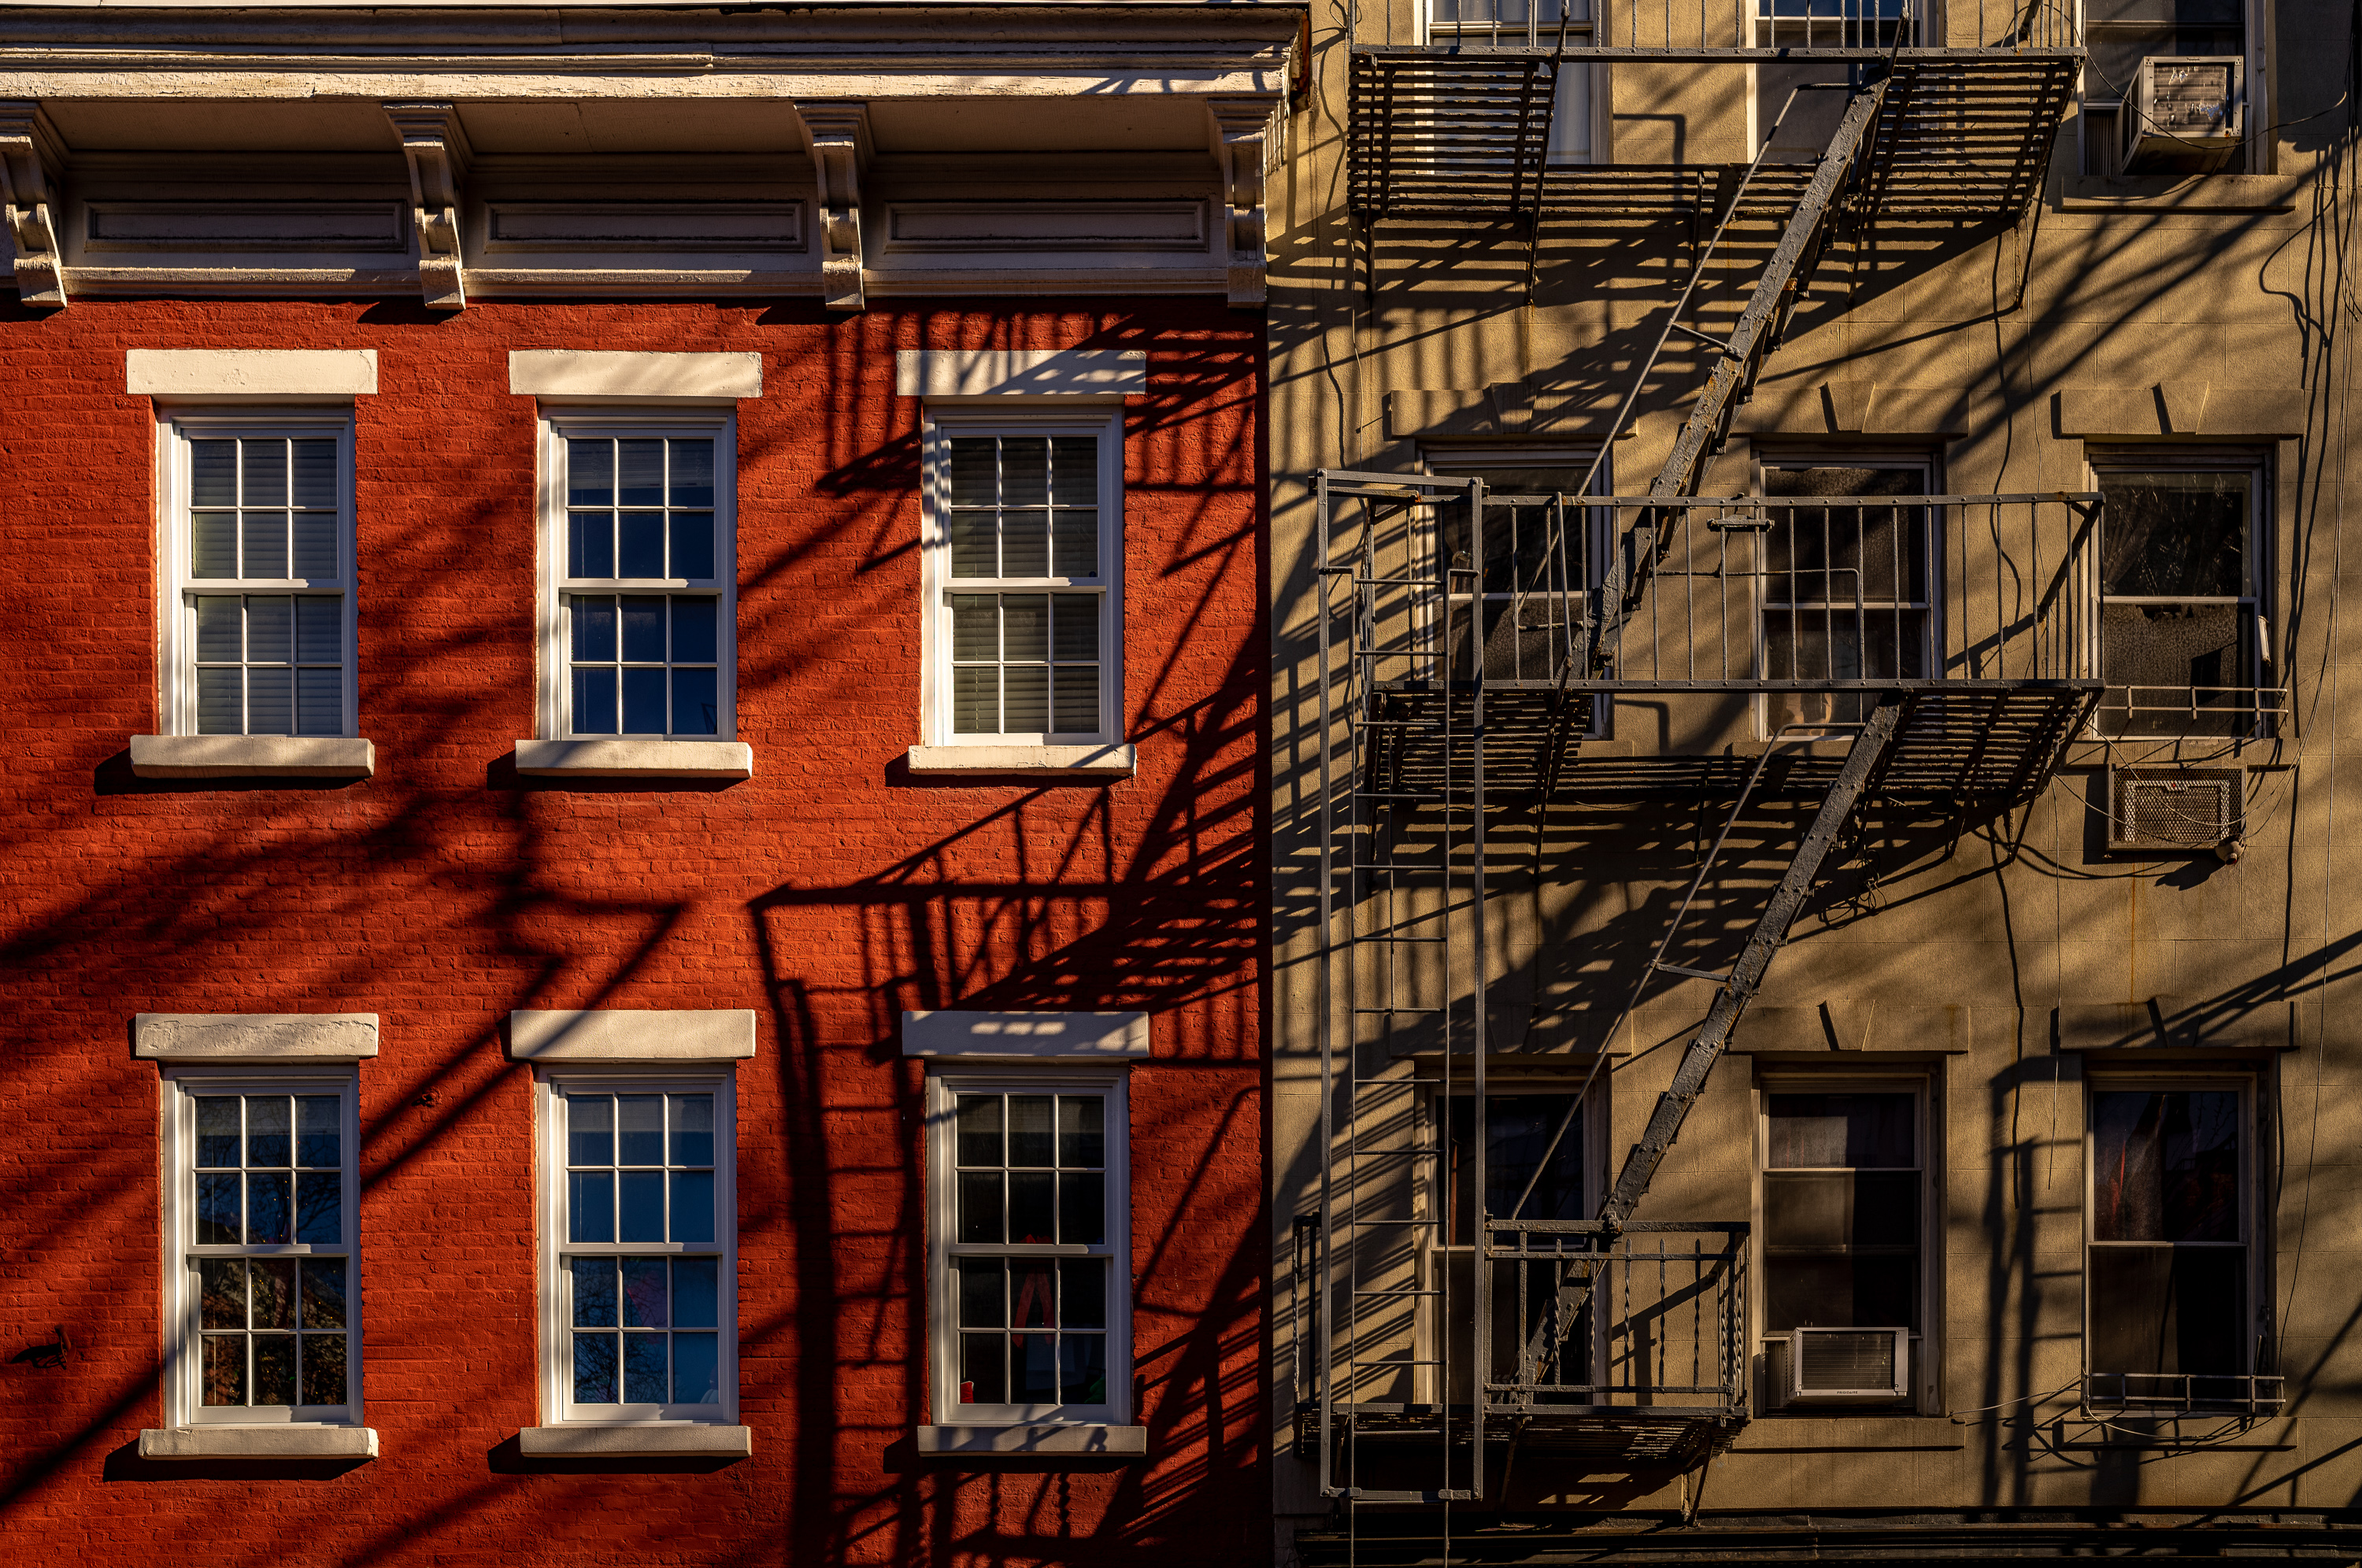
1/640th sec @ f/5.6 ISO 64
Minutes turned to hours and any hope of exploring BK vanished. So, I started formulating Plan C. After a fair amount of wandering around, the south end of the High Line was just a stone’s throw away.

1/320th sec @ f/5.6 ISO 125

1/350th sec @ f/2 ISO 100
Never having been on the High Line but hearing how much other photographers had enjoyed it, this seemed like a no-brainer plan. The sun was already getting low and time was getting short. I picked up my pace heading west into the Meatpacking District, simultaneously trying to cover ground and keep a lookout for pictures.
1/320th sec @ f/8 ISO 160
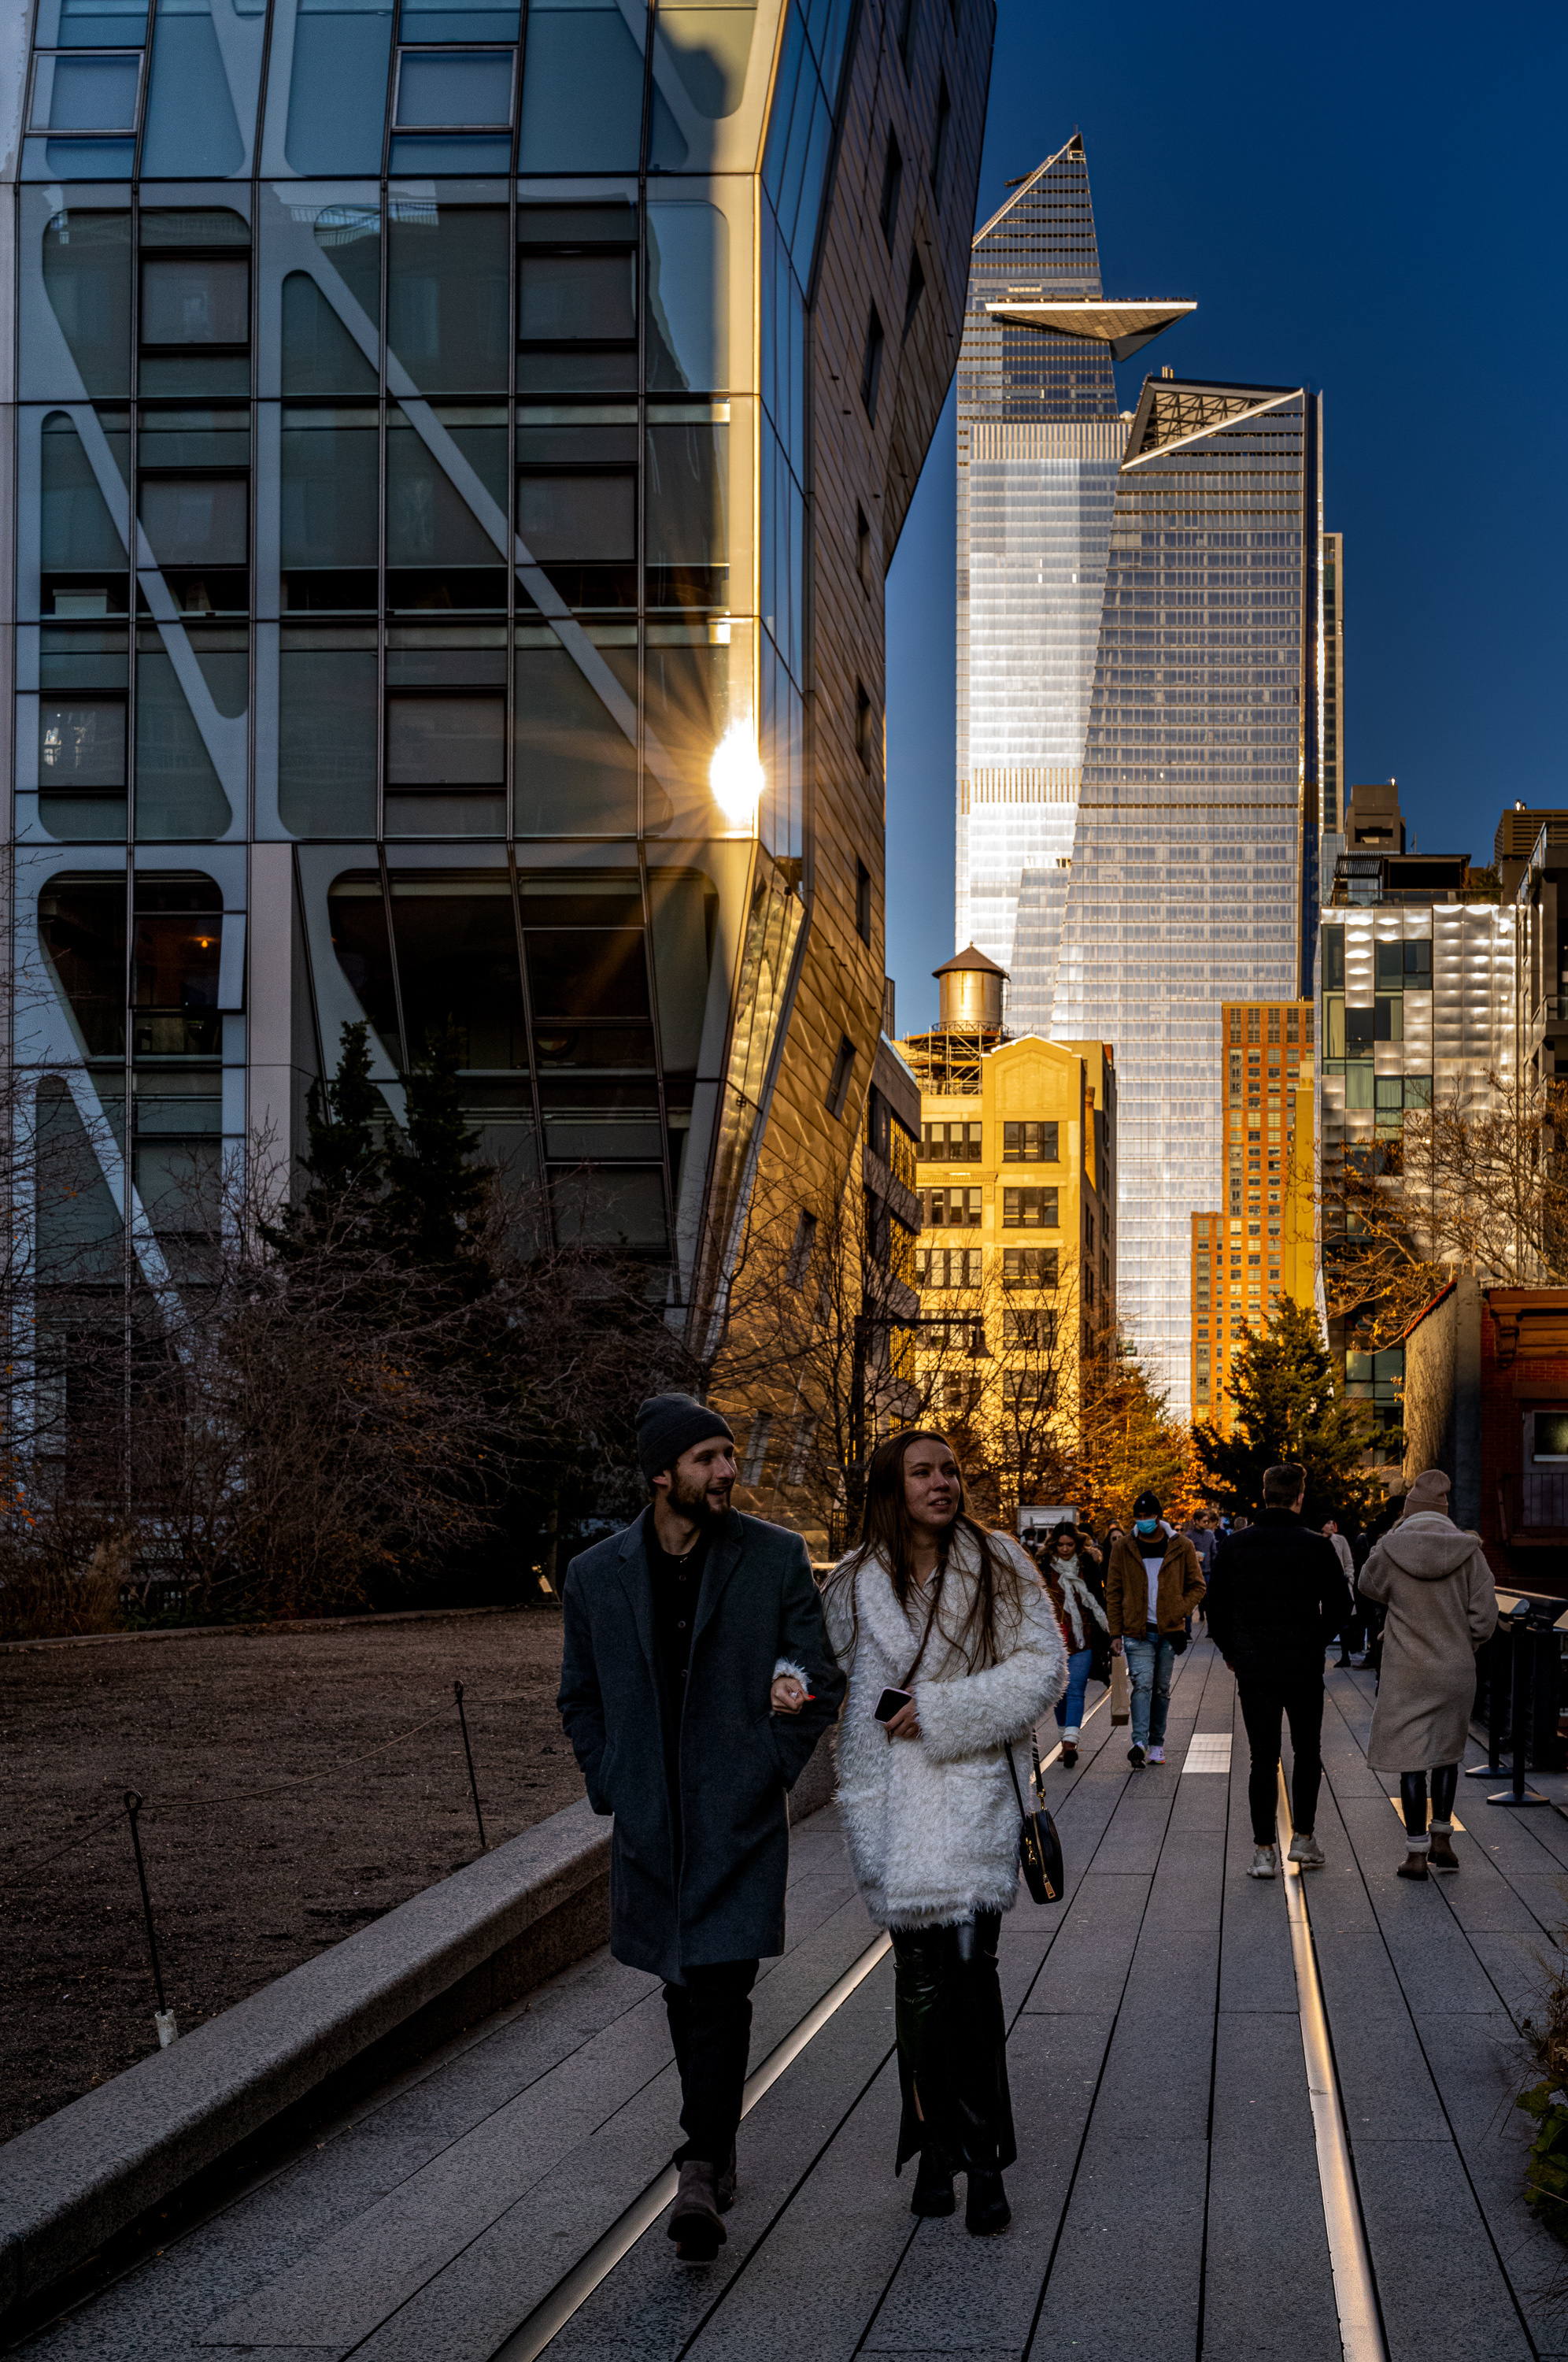
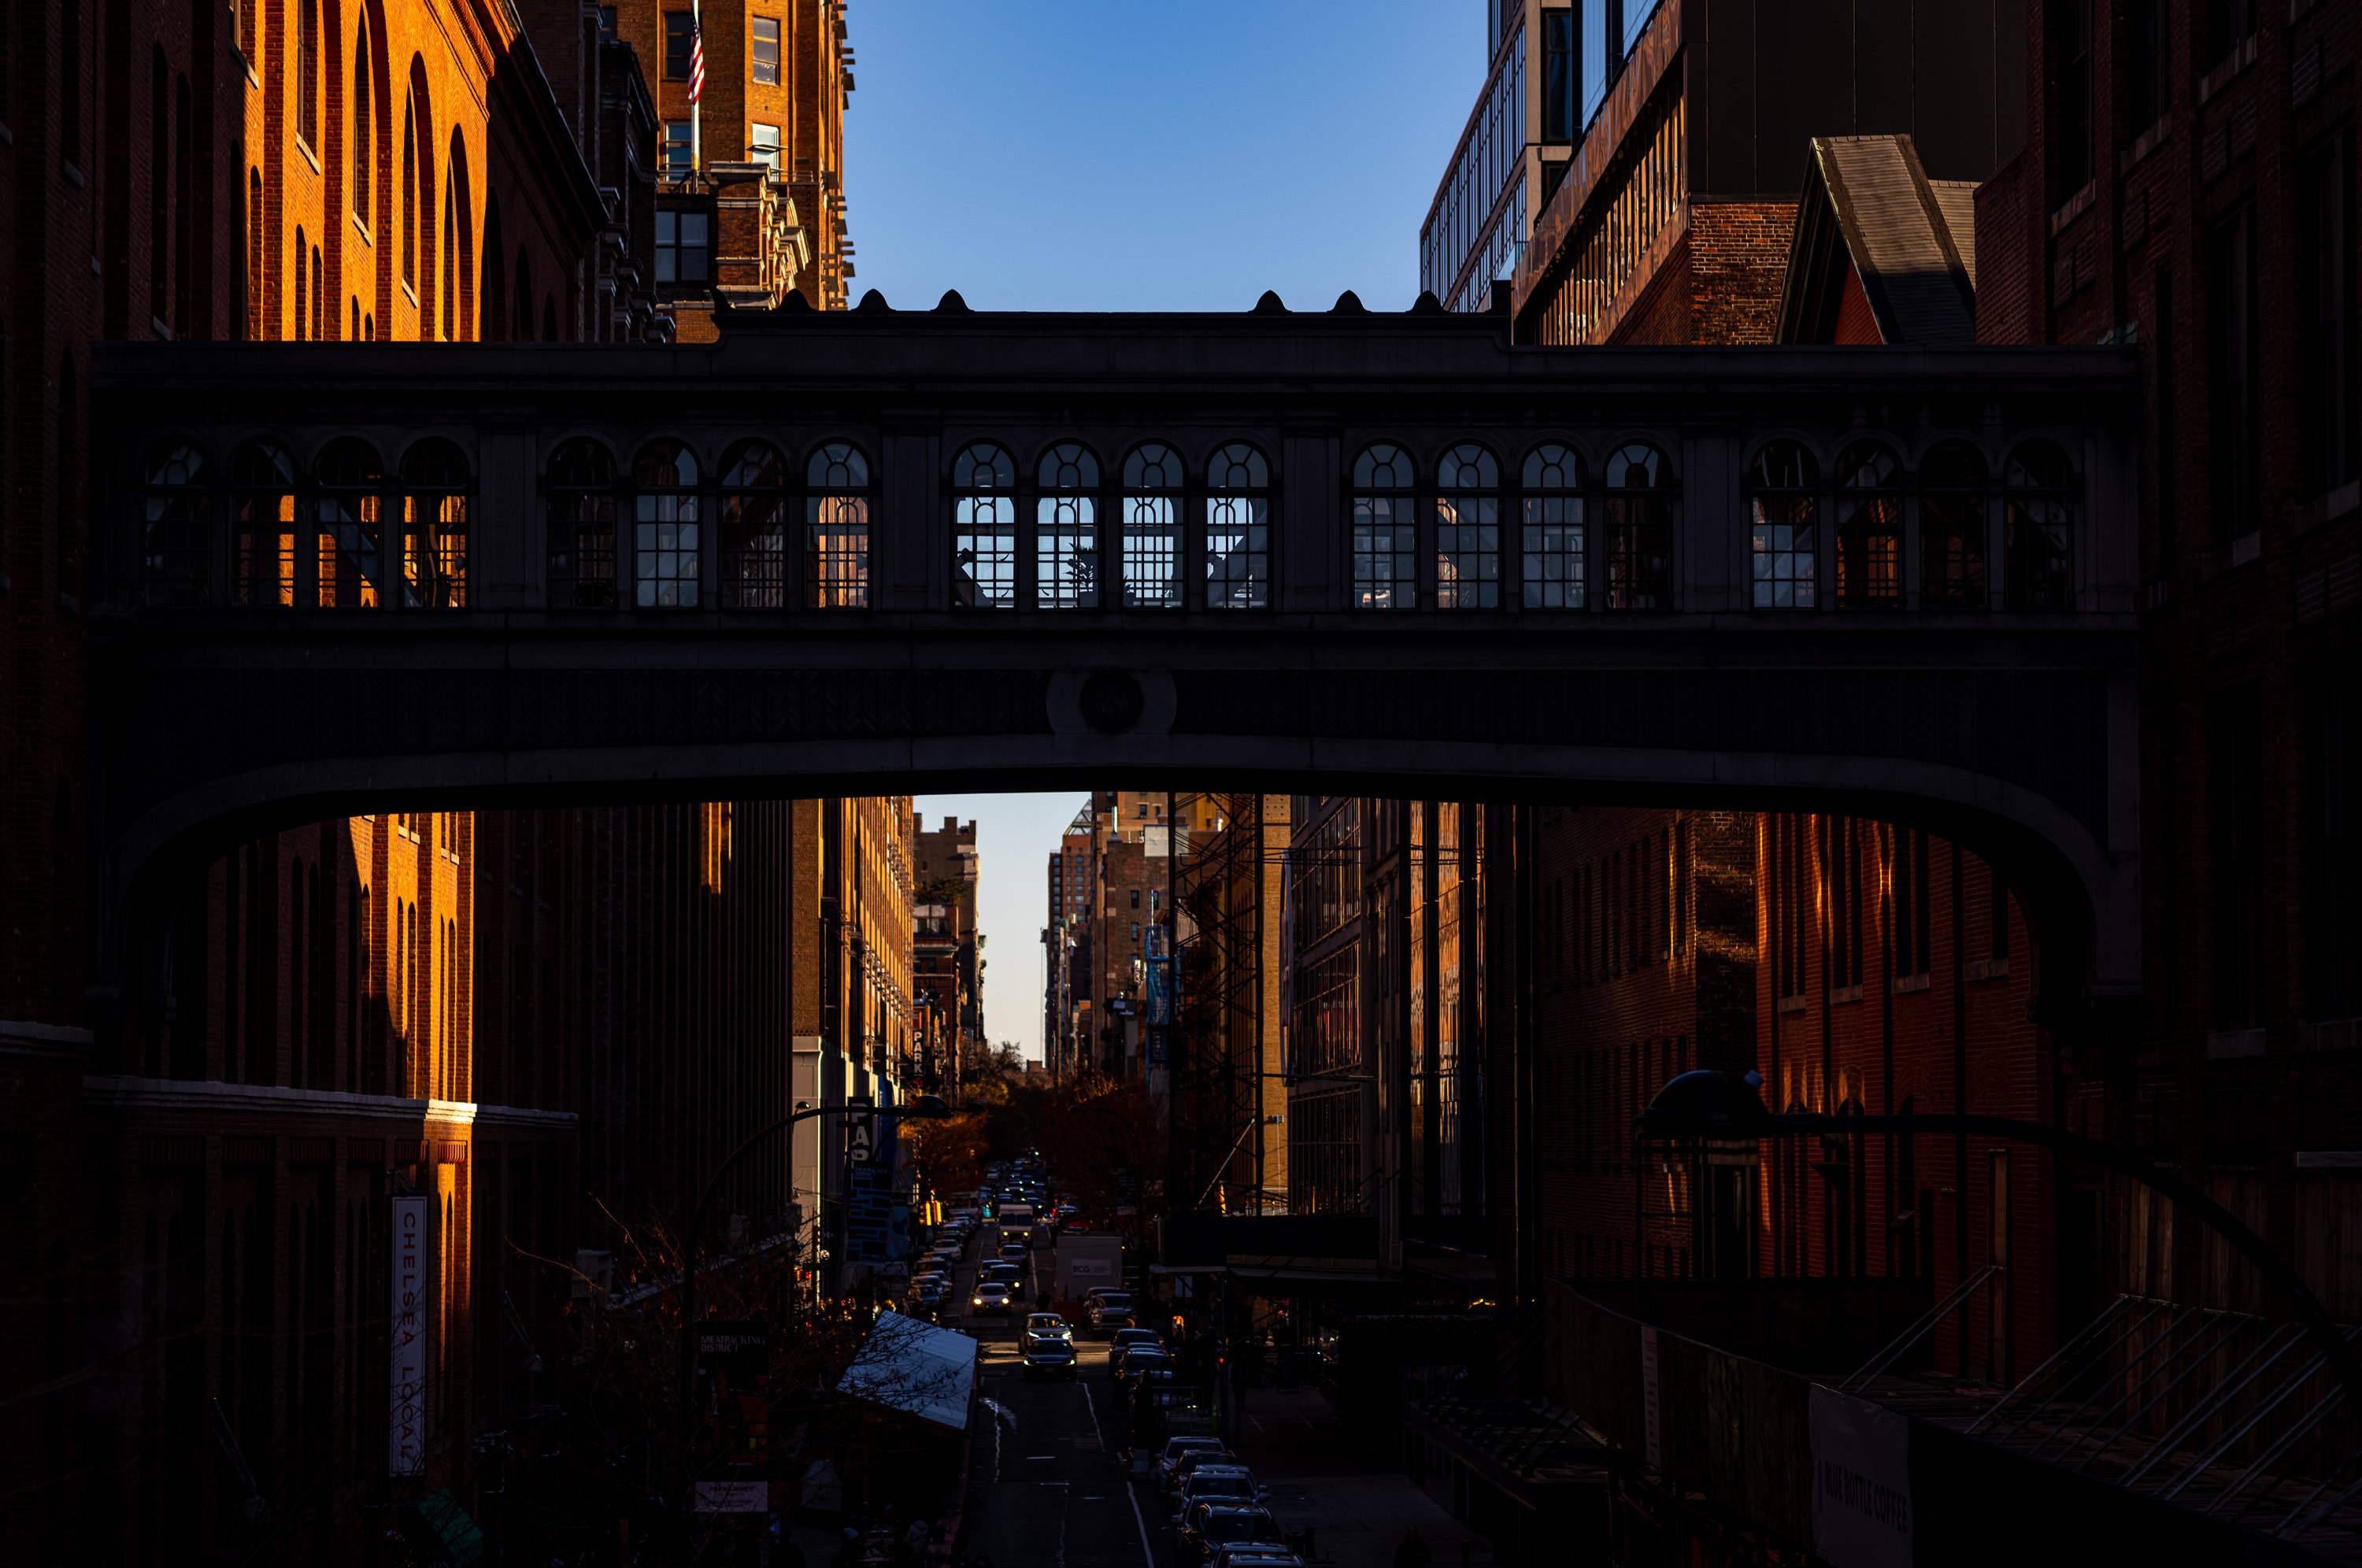
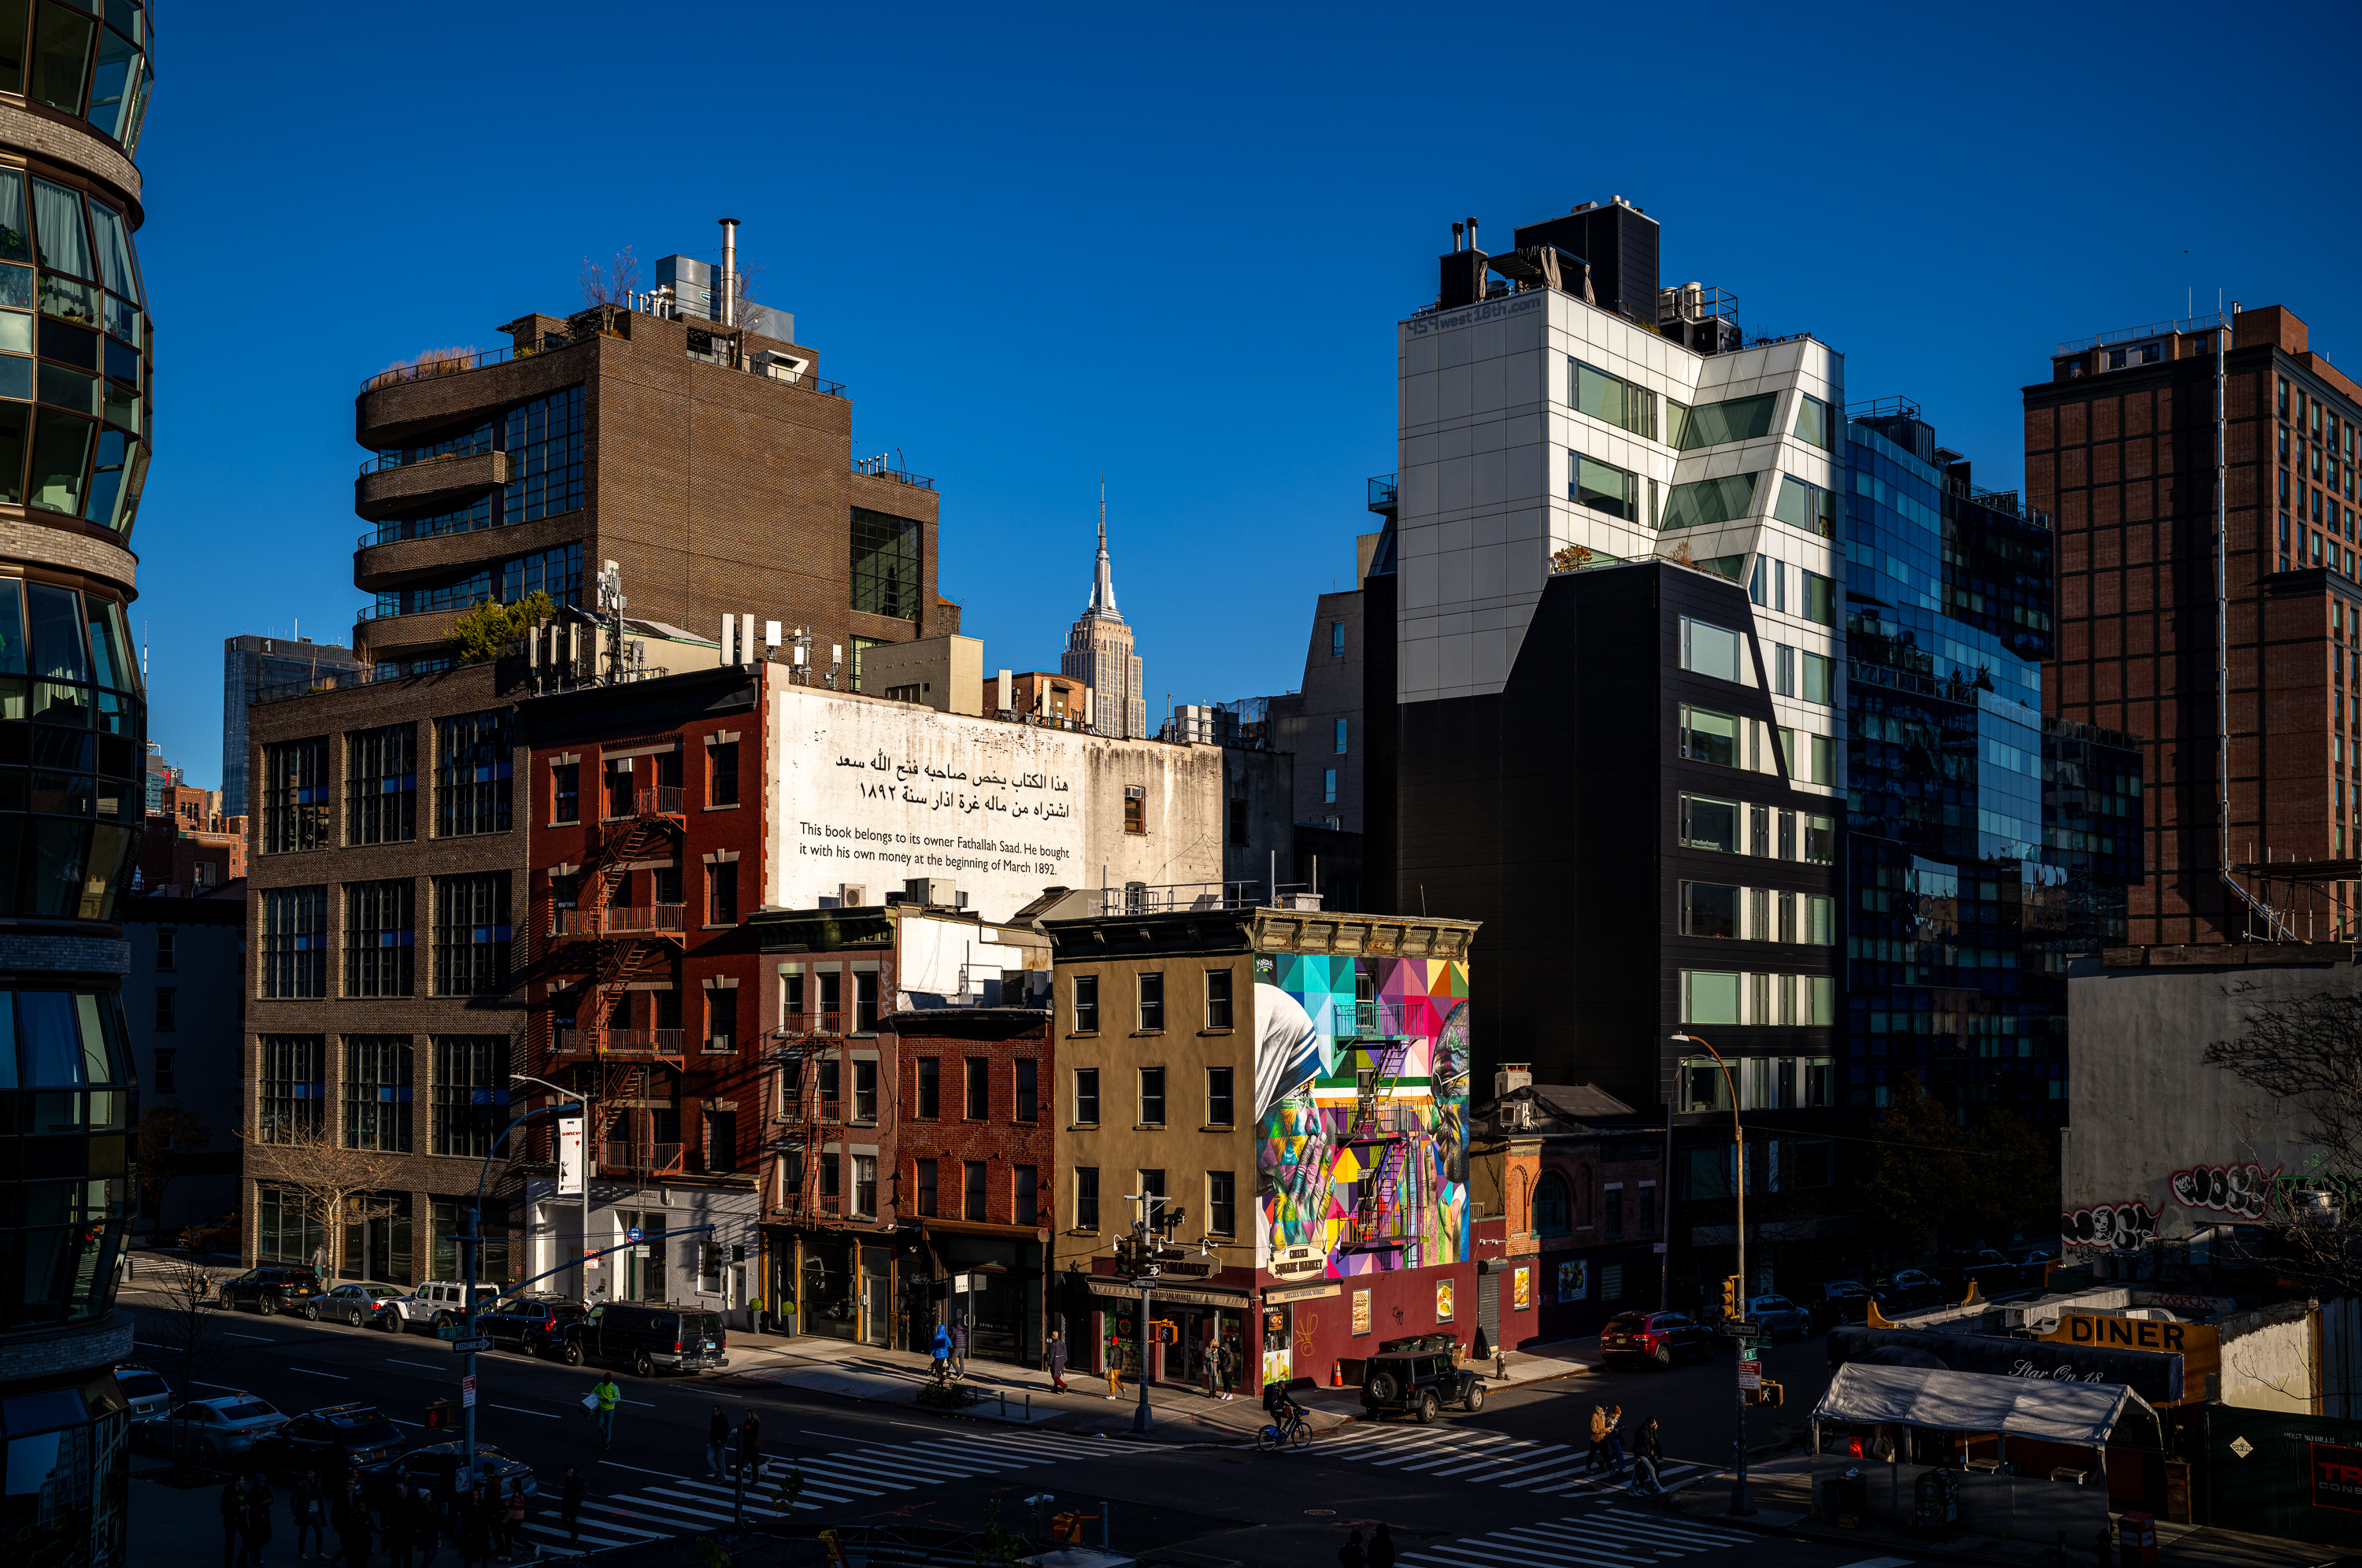
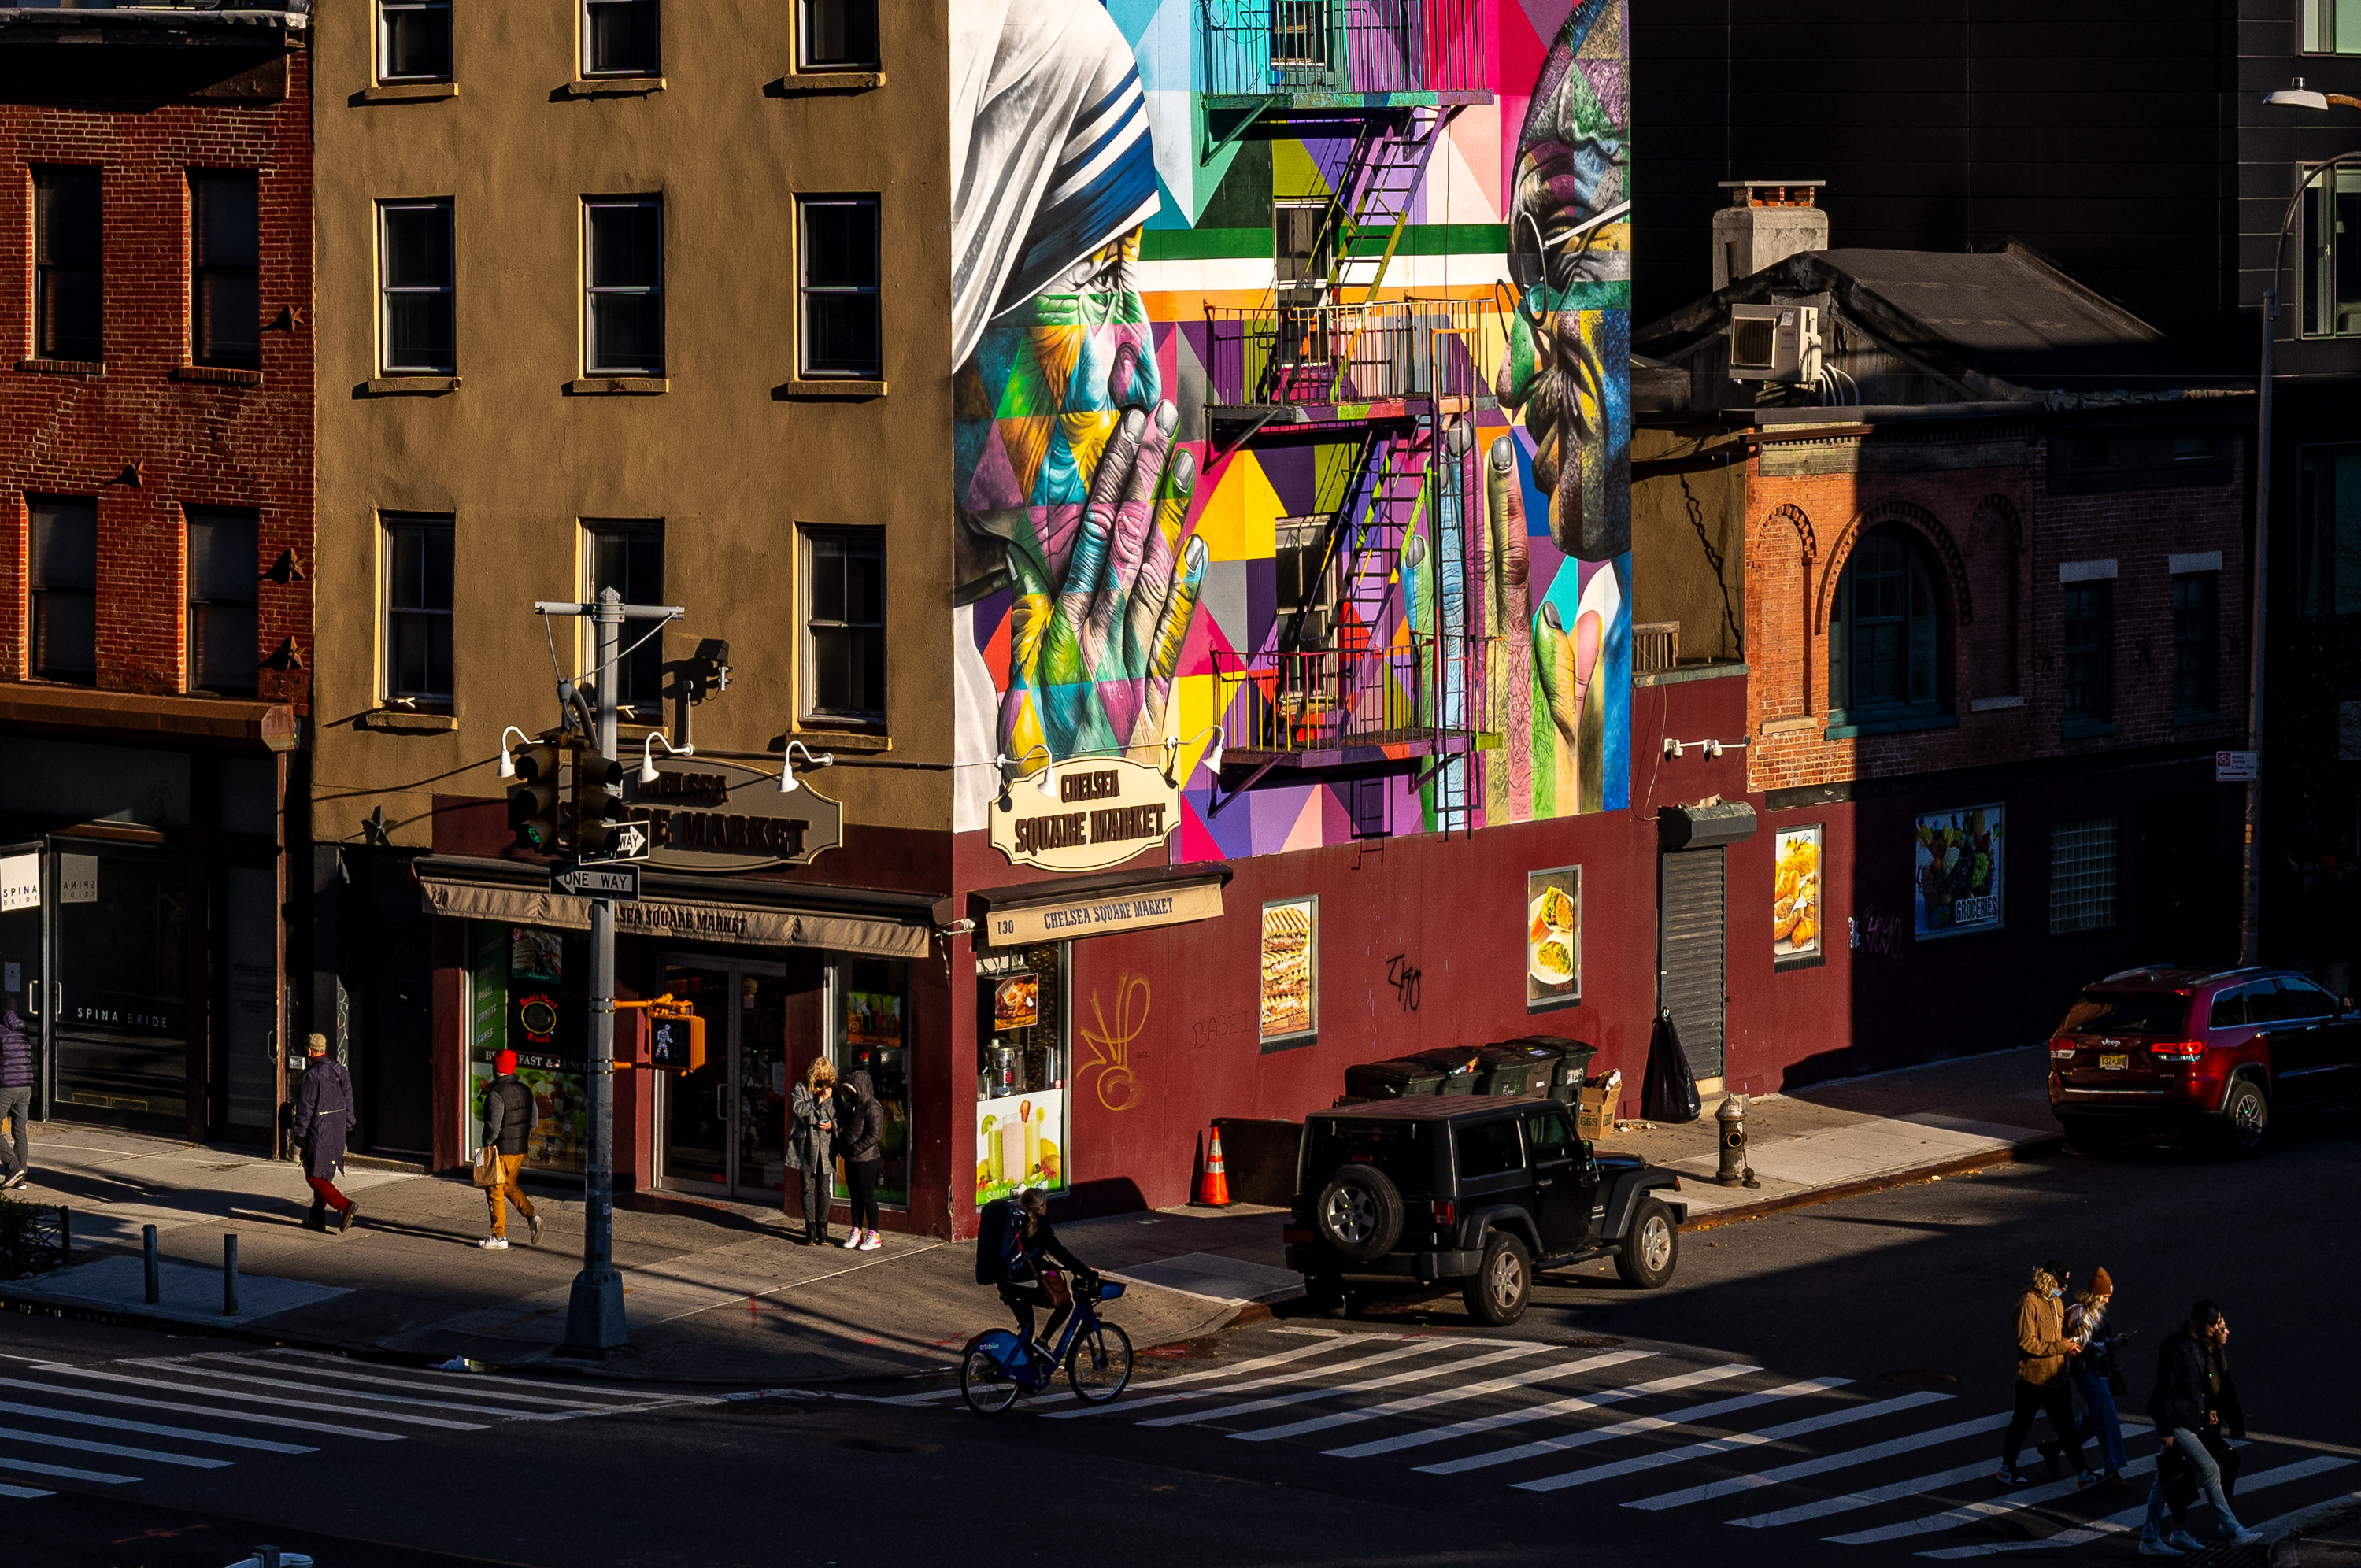
The High Line
Ascending the stairs outside the Whitney Museum of American Art onto the High Line, I was finally able to see what all the fuss was about. And… maybe I was just there the wrong time of day. It was just okay. I took advantage of the change in perspective to grab a few shots looking east into Chelsea and managed at least one street scene, but I just wasn’t feeling it and decided to move on. Dashing down the next set of stairs, I hurried to the nearest subway station. There was still time to hit another spot I hadn’t been to.
1/320th sec @ f/8 ISO 200
1/350th sec @ f/4 ISO 64
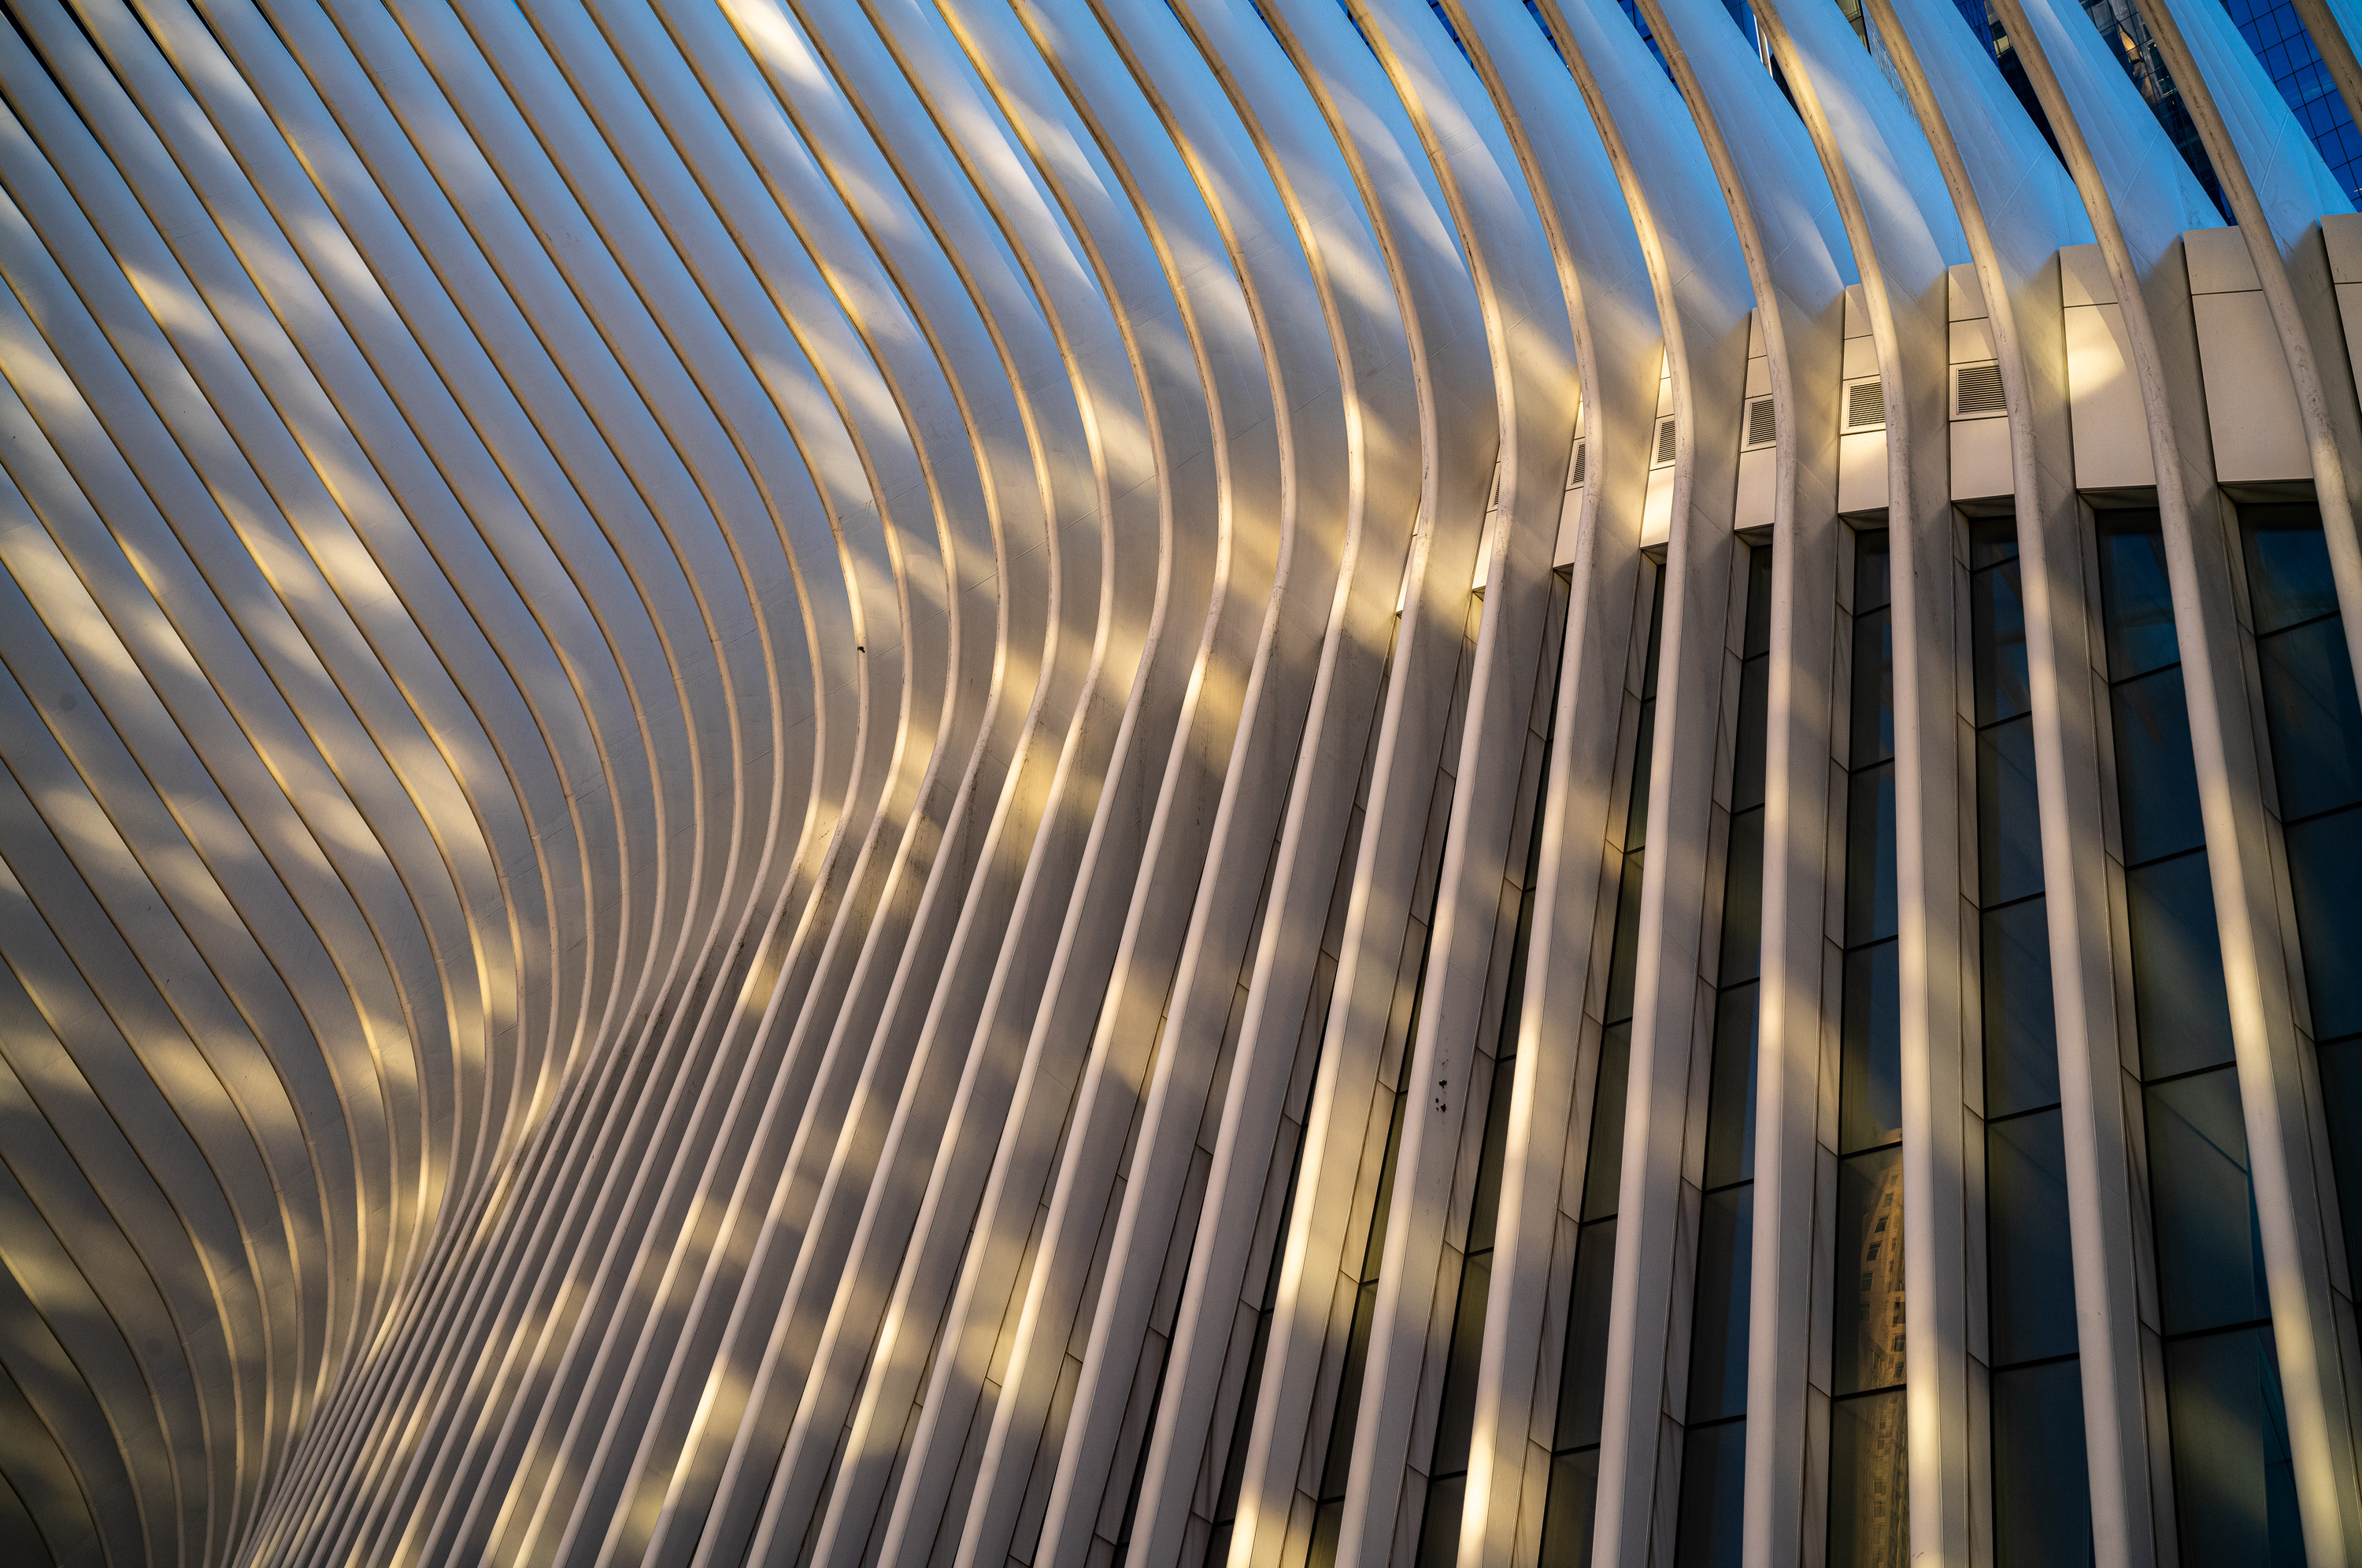
The Oculus
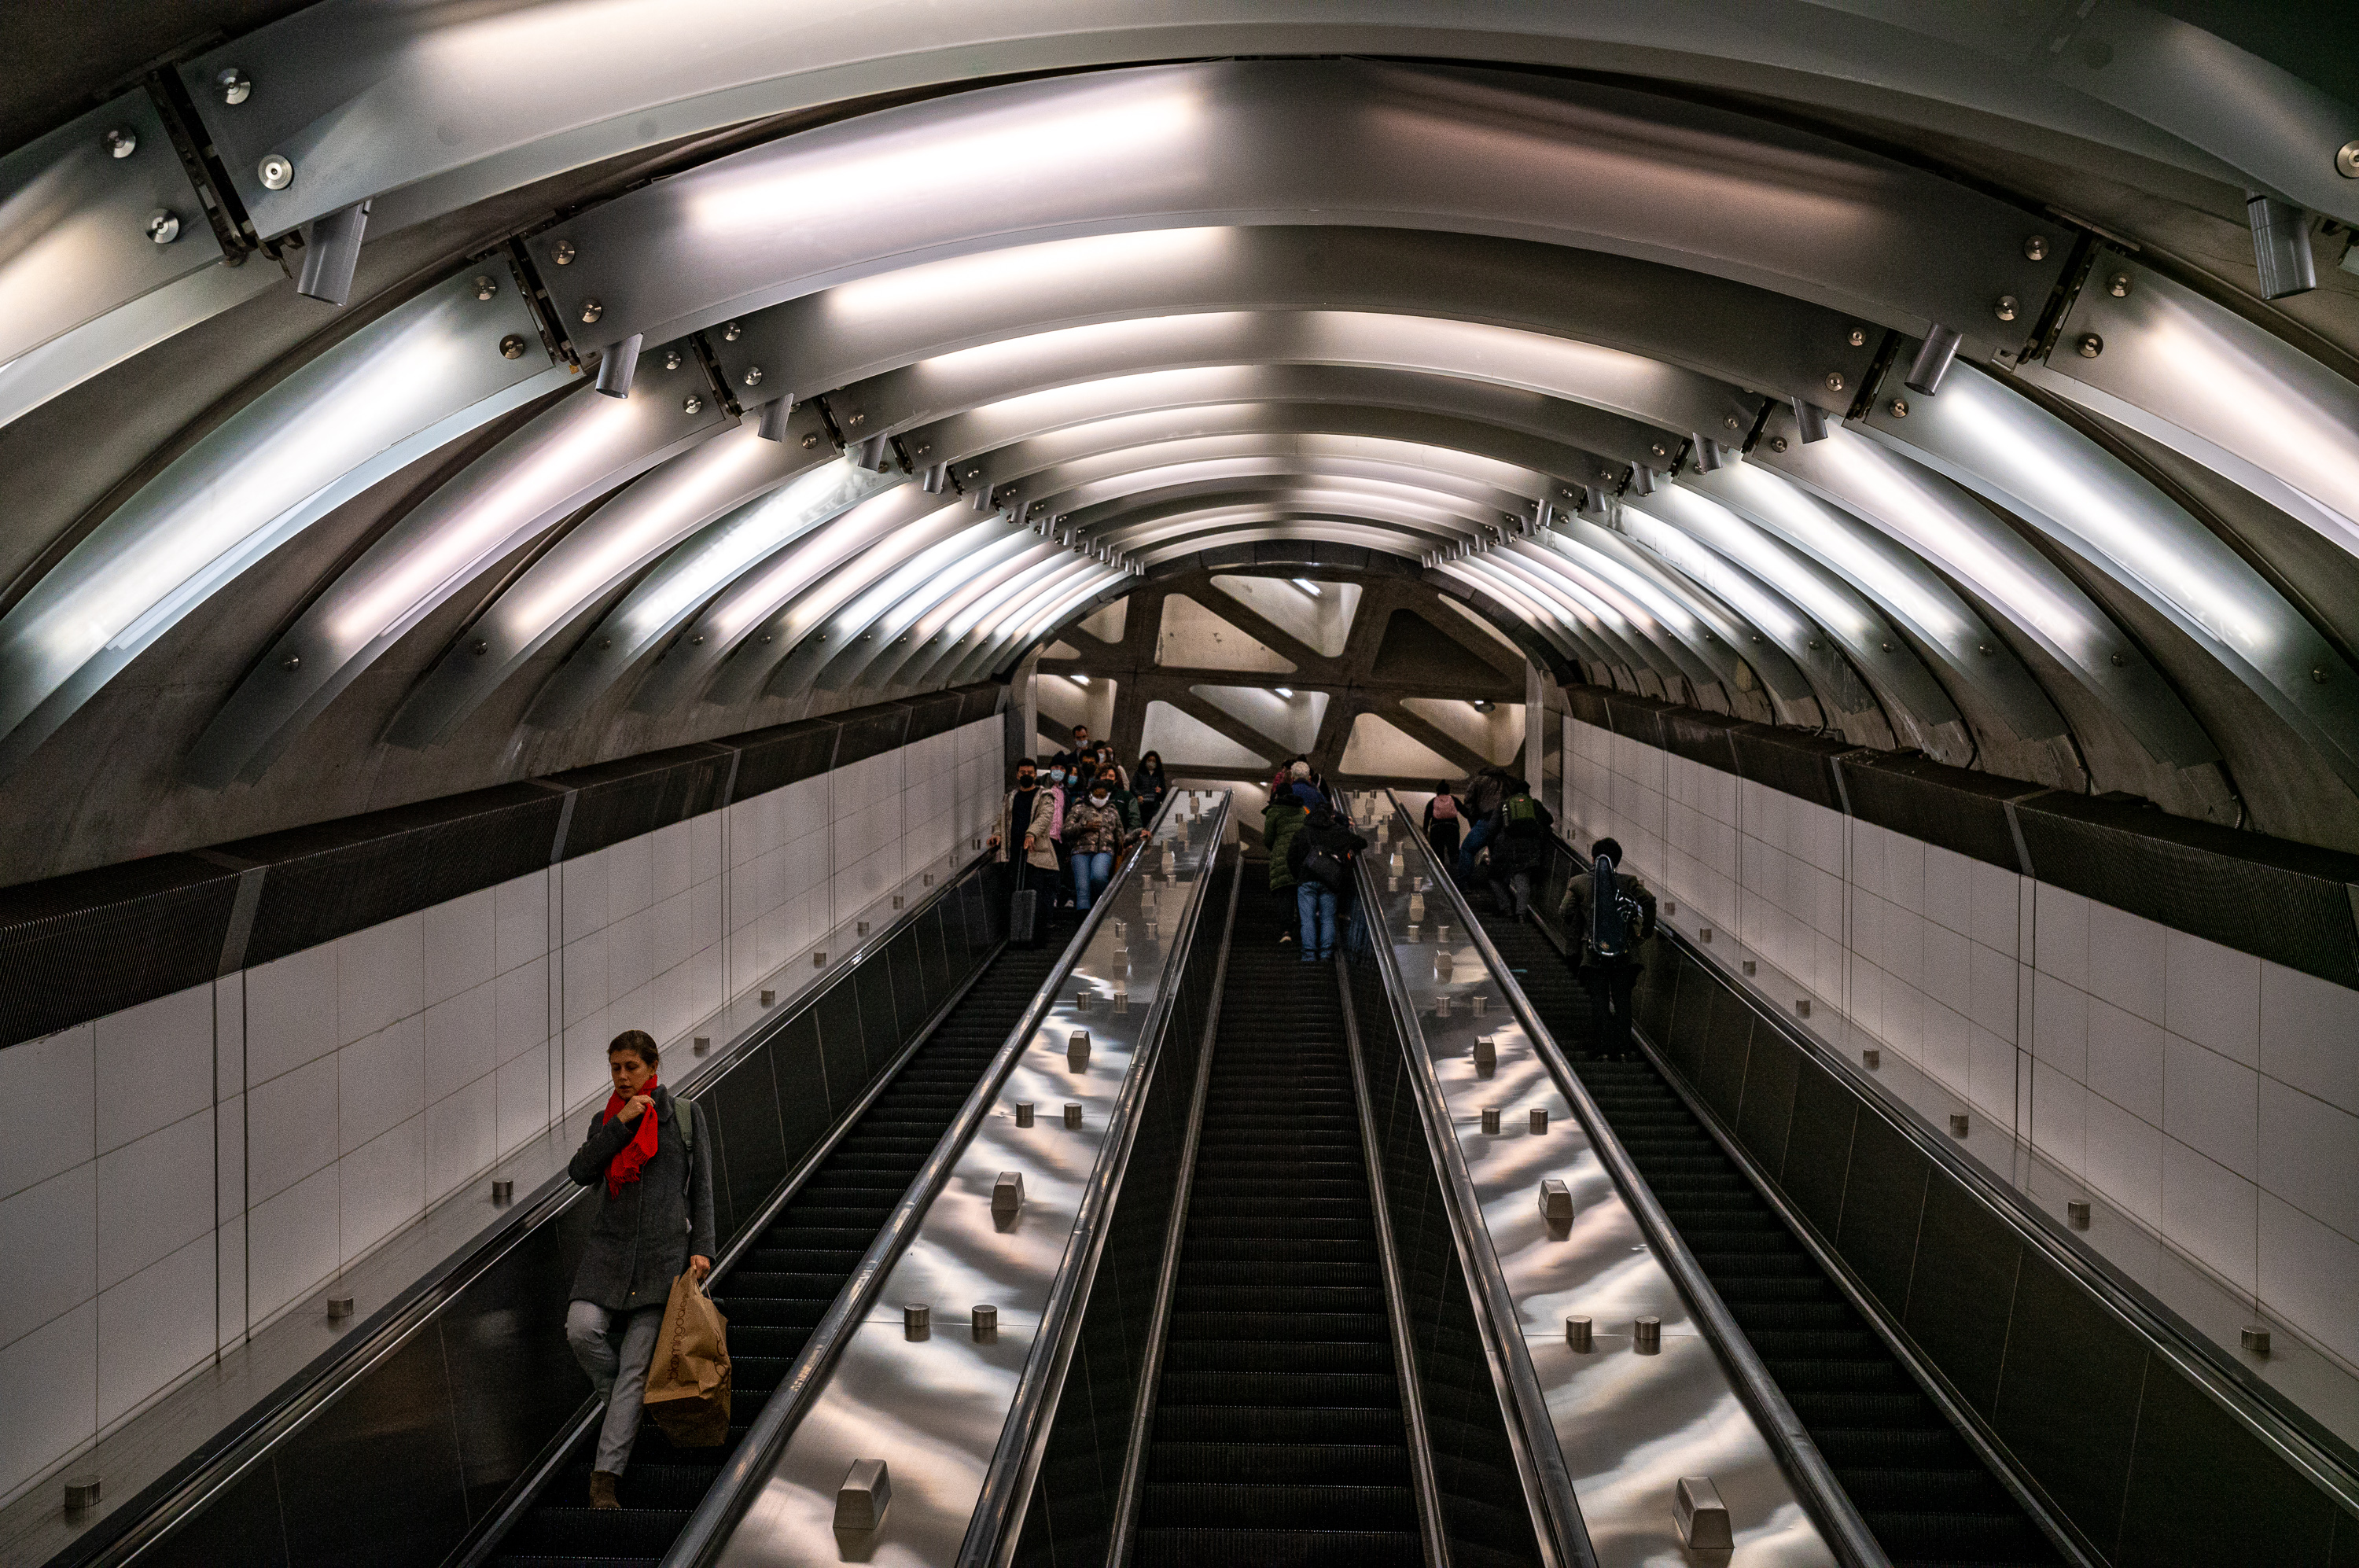
Anxiously checking my watch, both for the rapidly approaching sunset and for my cutoff time to get all the way back to my hotel in Midtown and still make it to the airport for my flight that evening, I took what felt like the slowest local train in the entire subway system. Torturing me further, the train came to a complete stop more than once, and not at a station. With time ticking away, I followed the signs for the Oculus. And while an impressive structure for sure, I should have done my research beforehand so I wouldn’t have been surprised.
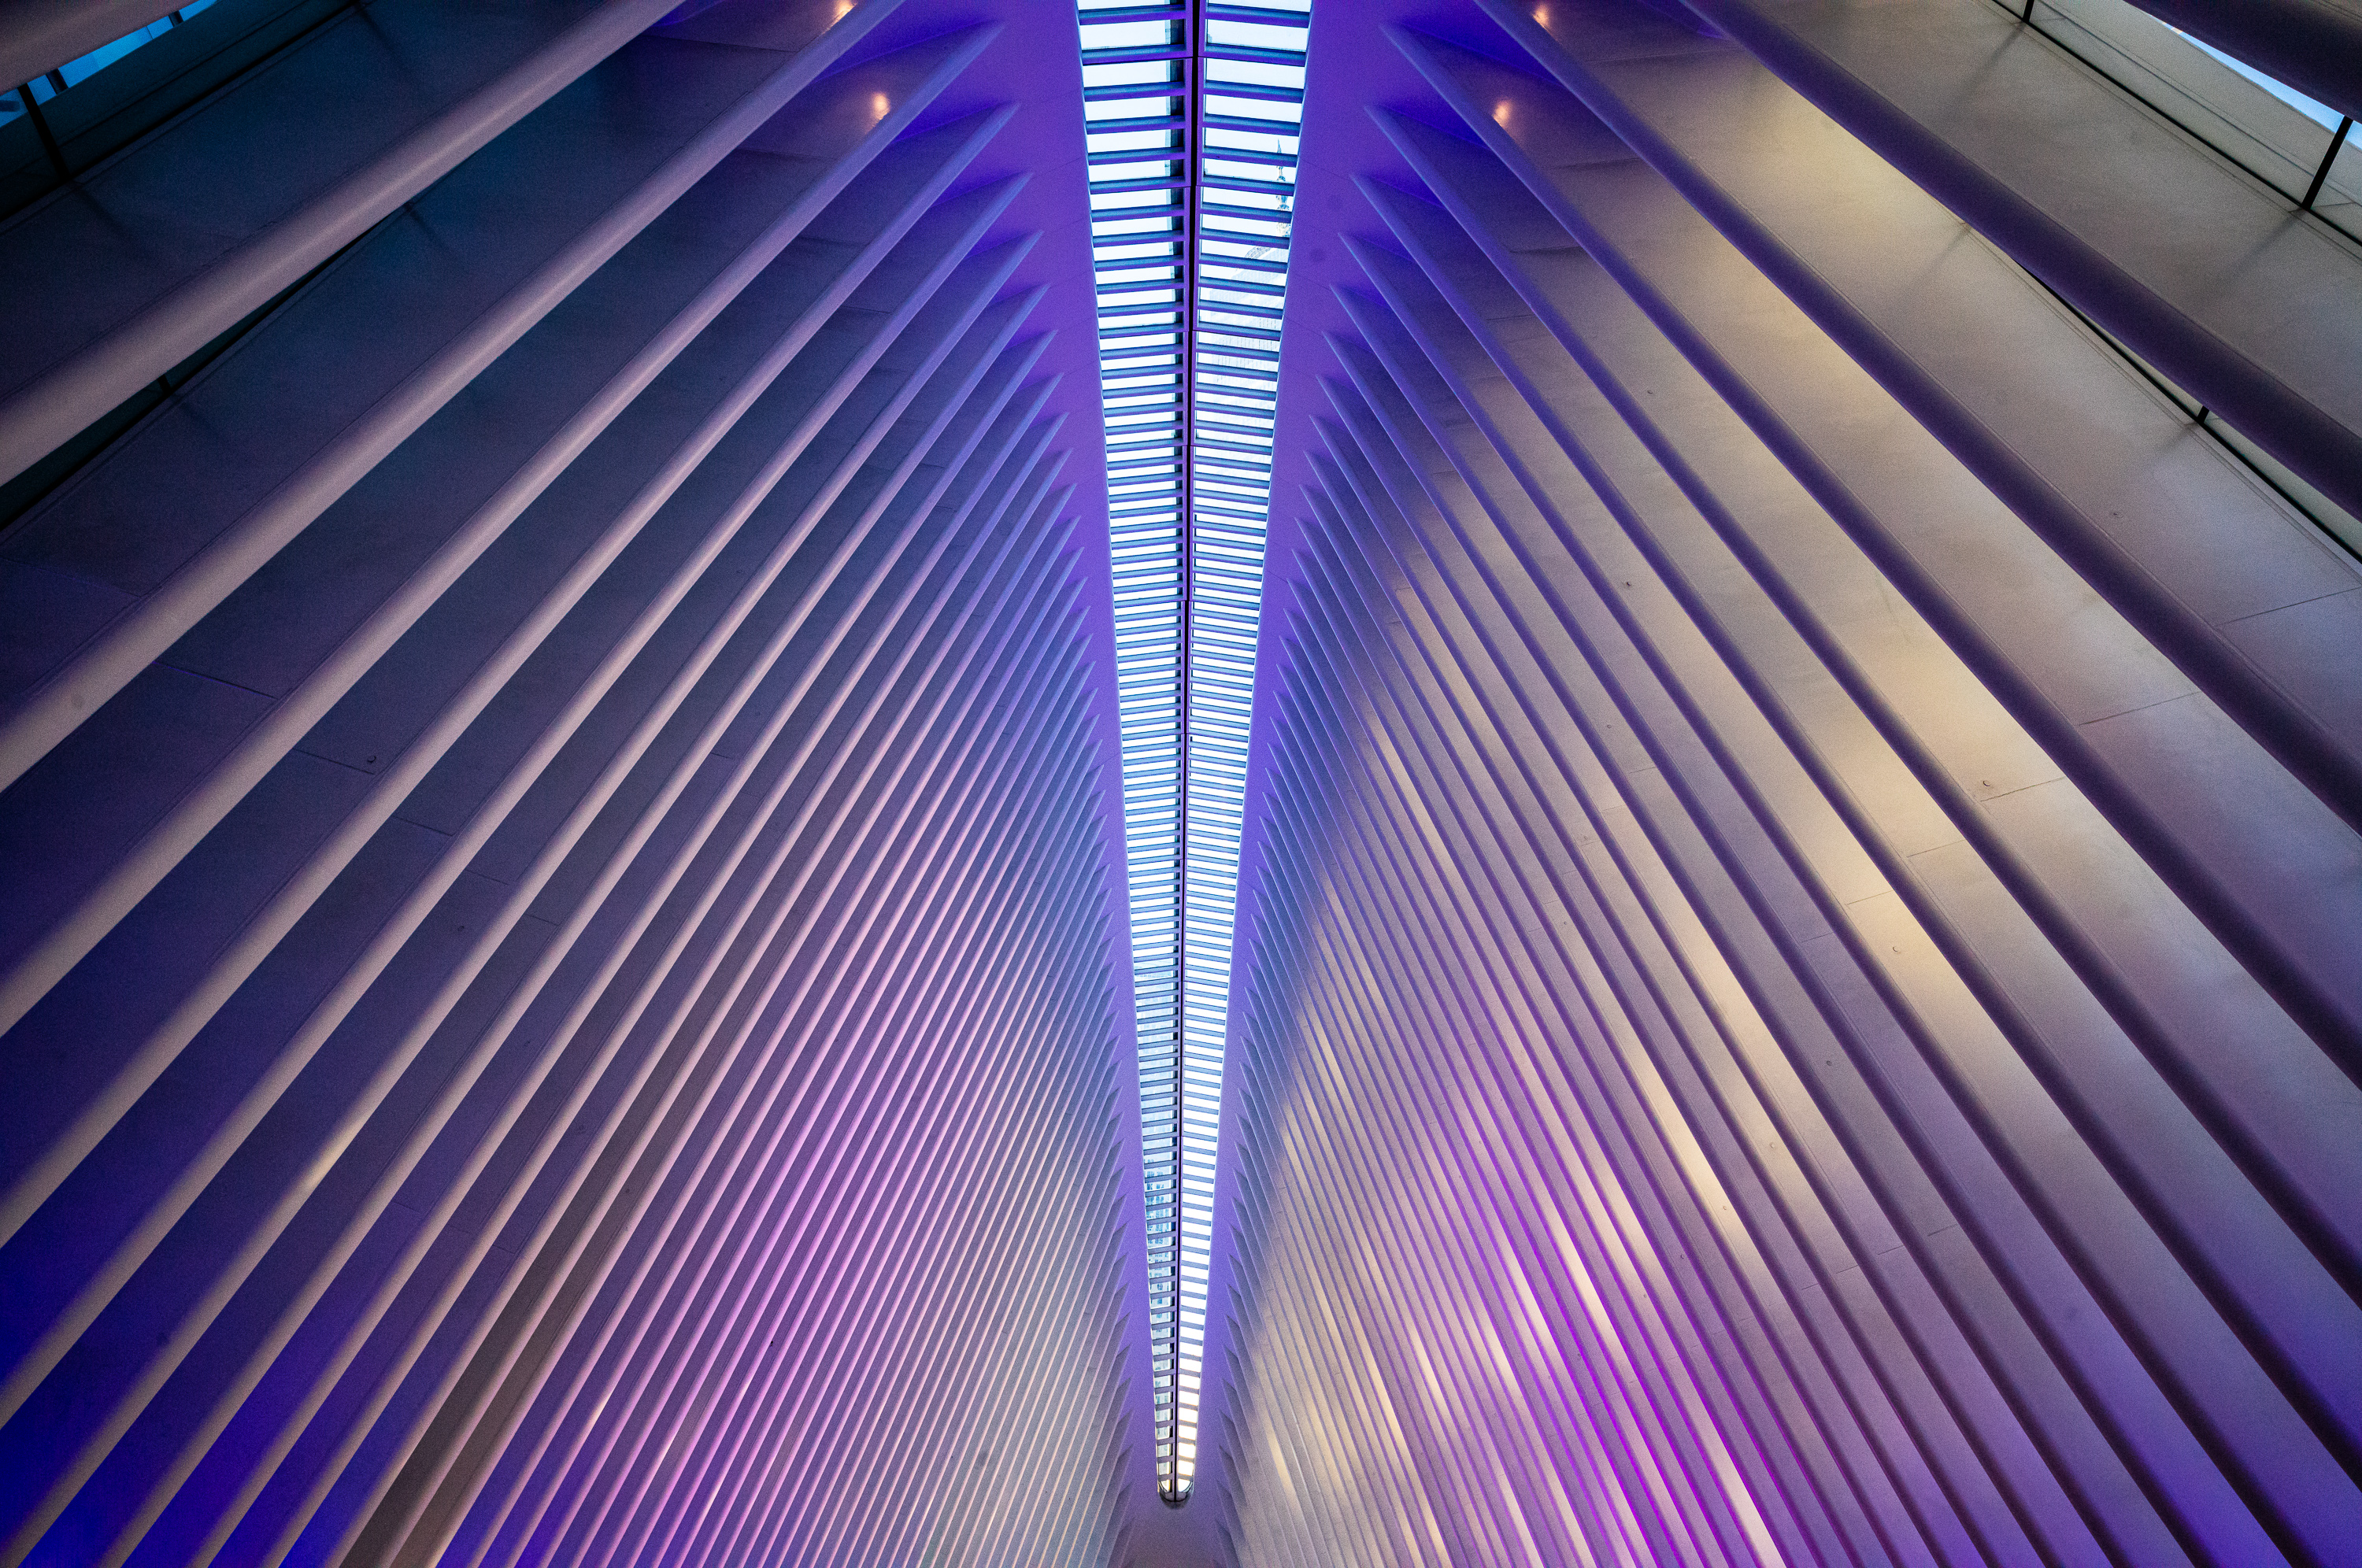
1/320th sec @ f/8 ISO 800
The Oculus is the atrium for an underground shopping mall, complete with holiday mall decorations. Not exactly what I was expecting, but the 18 Super-Elmar again did a fine job of extracting some nice architectural details. A quick lap around the outside and I was back on the train, saying goodbye to NYC and my time with the M11.
1/320th sec @ f/8 ISO 125
Do you really need 60 megapixels?
This question was on my mind quite a lot during testing. I’ve been perfectly content with 24 megapixels for a long time. It’s a sweet spot of file manageability and detail. Easy to handhold and works well with lenses new and old. Sure, the three generations of 37.5 MP Leica S cameras were my landscape workhorses for years, as is the 47 MP SL2 now. And more pixels are usually welcome for that kind of work. But for family, travel and street photography, I’ve found 24 to be just right. Whether grabbing my CL for a family rock climbing and hiking trip, using an M10-P for documentary work or shooting night scenes with the SL2-S, I rarely yearned for more resolution.
Along the way, the 40-megapixel M10-R and M10 Monochrom became the new standard for M photography just as the 47-megapixel SL2, Q2 and Q2 Monochrom took hold on the AF side of the lineup. And, yeah, sometimes that added detail is welcome. But is 60 really necessary? In an M camera no less. With no image stabilization or autofocus, would it even matter?
1/320th sec @ f/5.6 ISO 1000
After testing the M11, I can easily say that no, I don’t need 60 megapixels. But I’d be lying if I said that I don’t want 60 megapixels. With the right lenses, the detail is simply astounding. But I actually discovered three practical reasons for the added pixels besides absolute image quality.
Digital Cropping
The first should be obvious to anyone who’s either used the Q2’s digital zoom or APS-C mode on the SL2. With more pixels, you can crop later in post while still maintaining adequate detail for whatever your final use might be. I’m a big believer of precise framing and getting it right in camera. But sometimes, especially with fixed-focal length M lenses topping out at 135mm, and most users including myself only packing up to a 90mm in the bag, you sometimes can’t get close enough for the shot you want.
1/350th sec @ f/2.8, ISO 64, 1.3x Crop Mode
The M11 actually has two digital crop modes, with settings for 1.3x and 1.8x. Like the Q2, when activated, a white bounding box shows the virtual crop in live view. And same as in the Q2, the crop is merely embedded as metadata. So, while the image appears in Lightroom with the crop applied, it can be adjusted, or even undone to reveal the full frame capture as long as you shoot in L-DNG. When shooting in JPG or even in DNG+JPG, the images will be permanently cropped.
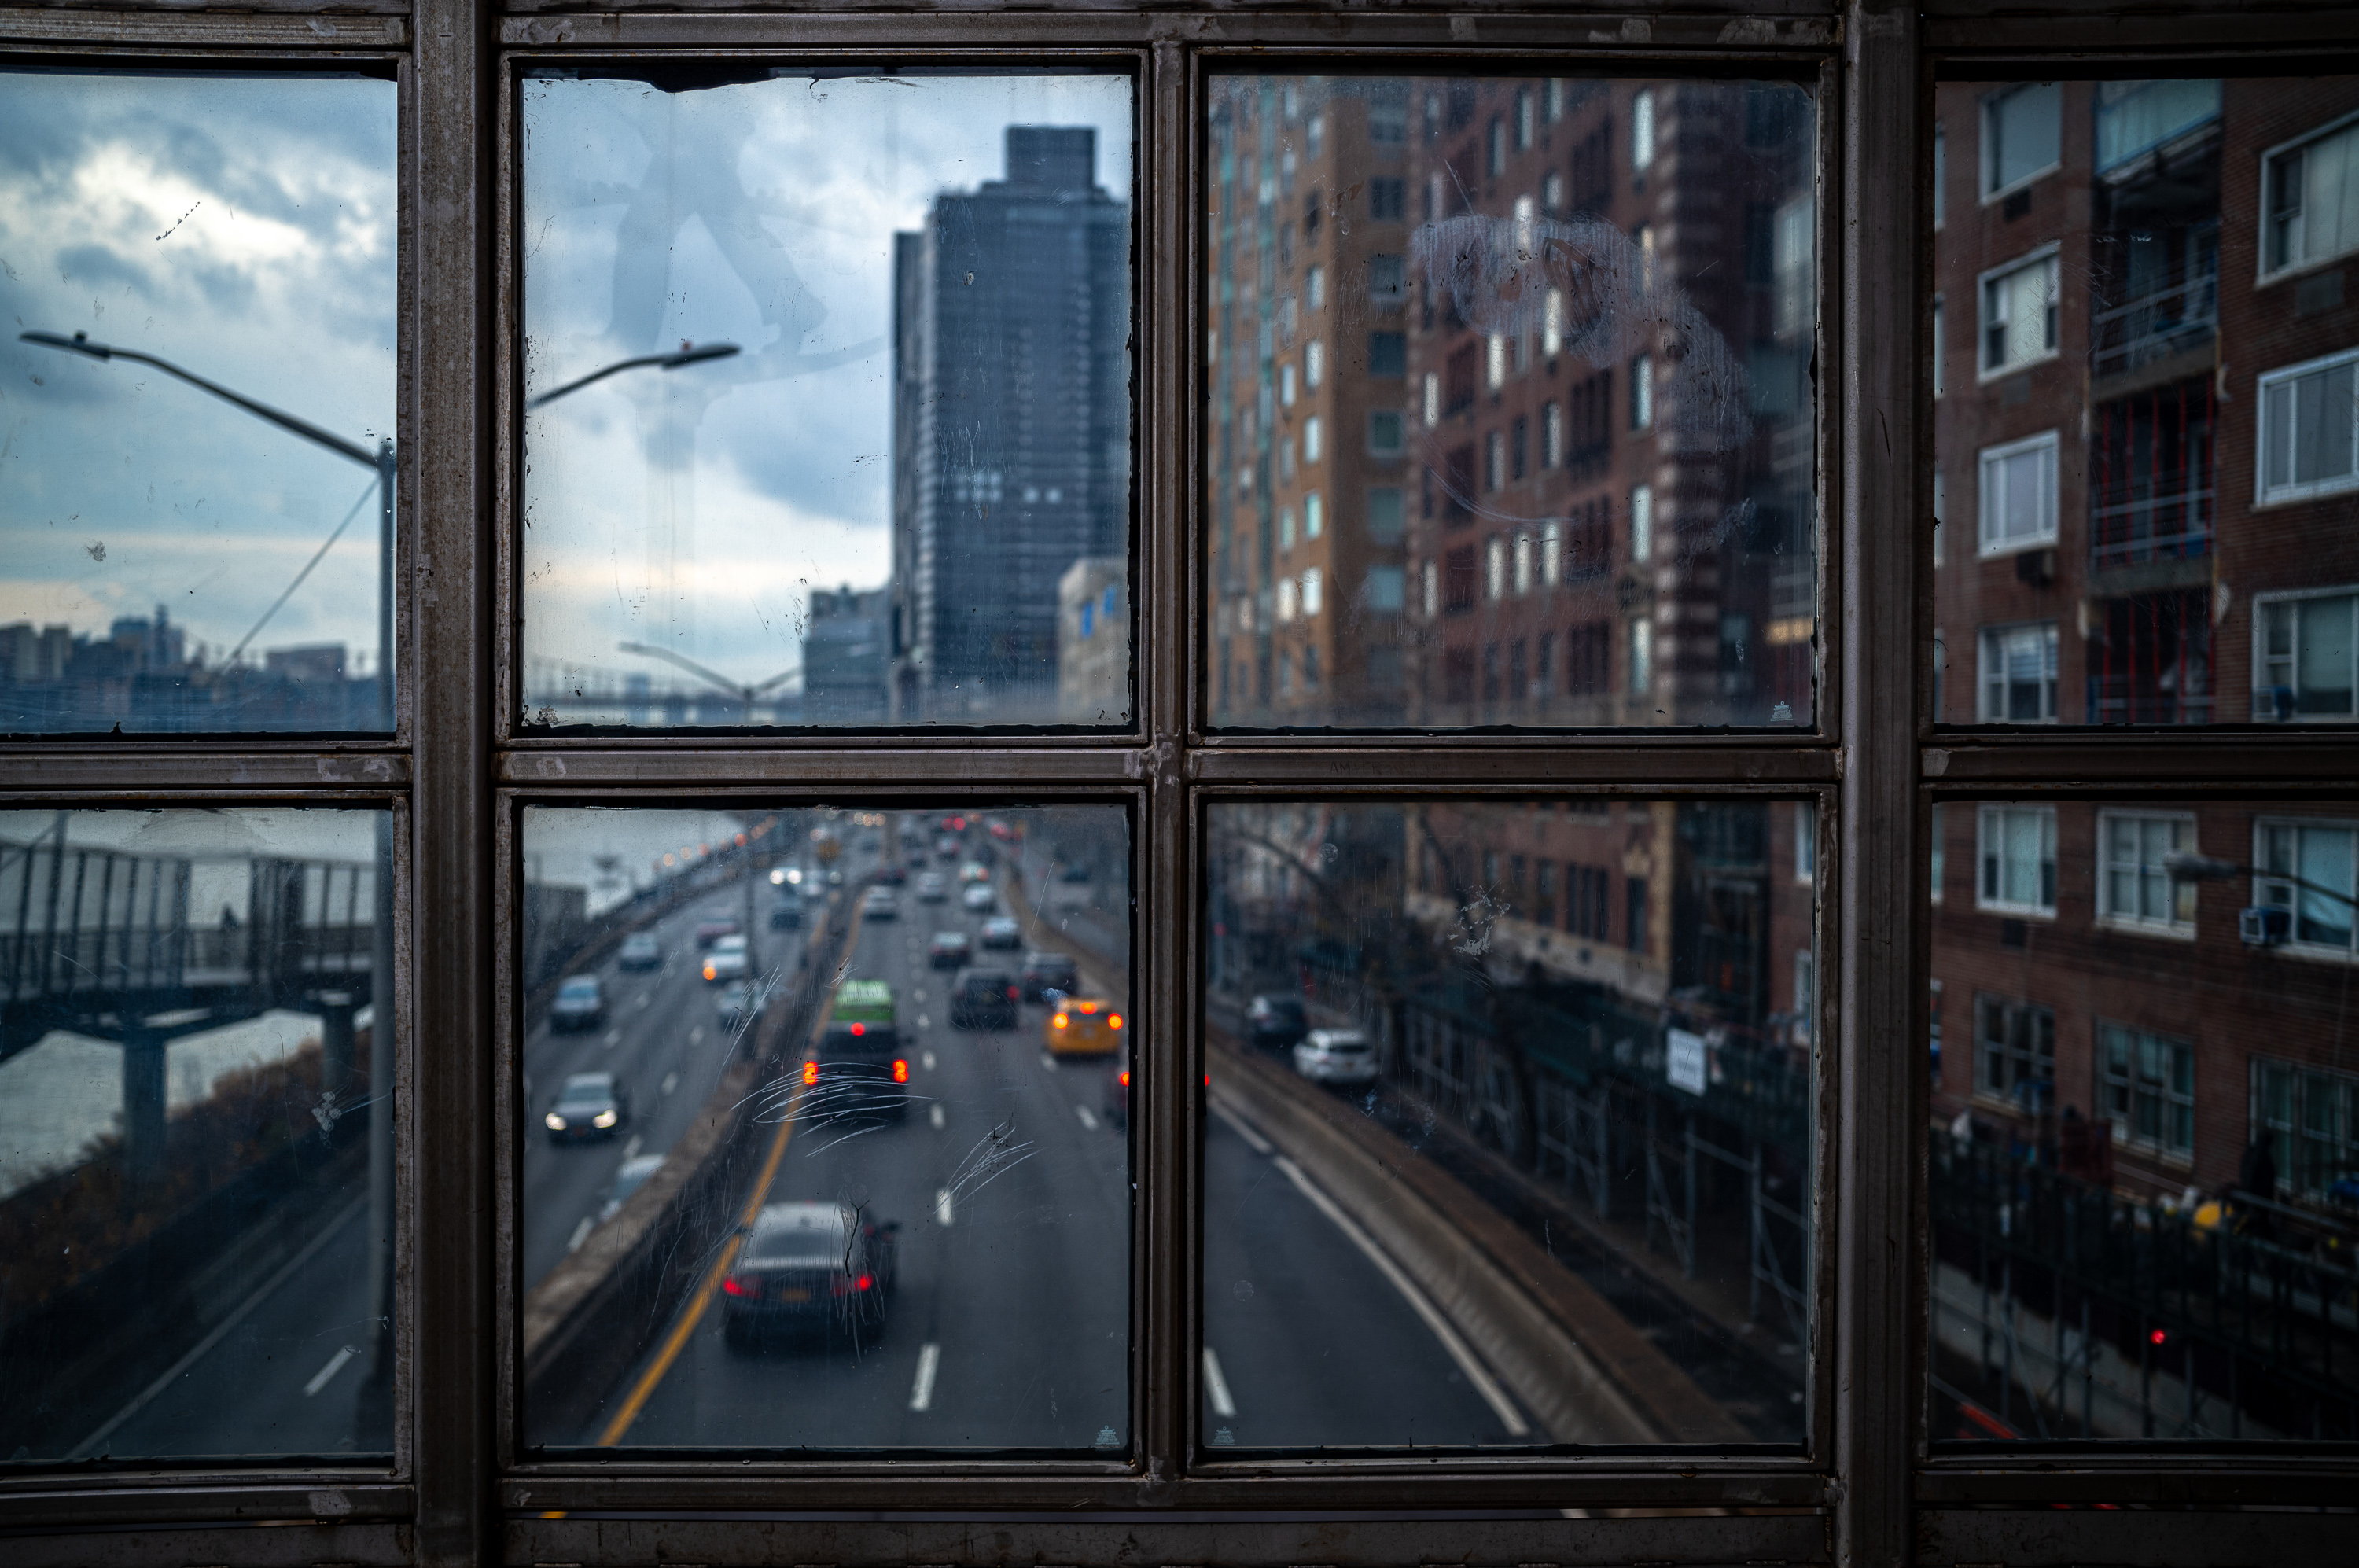
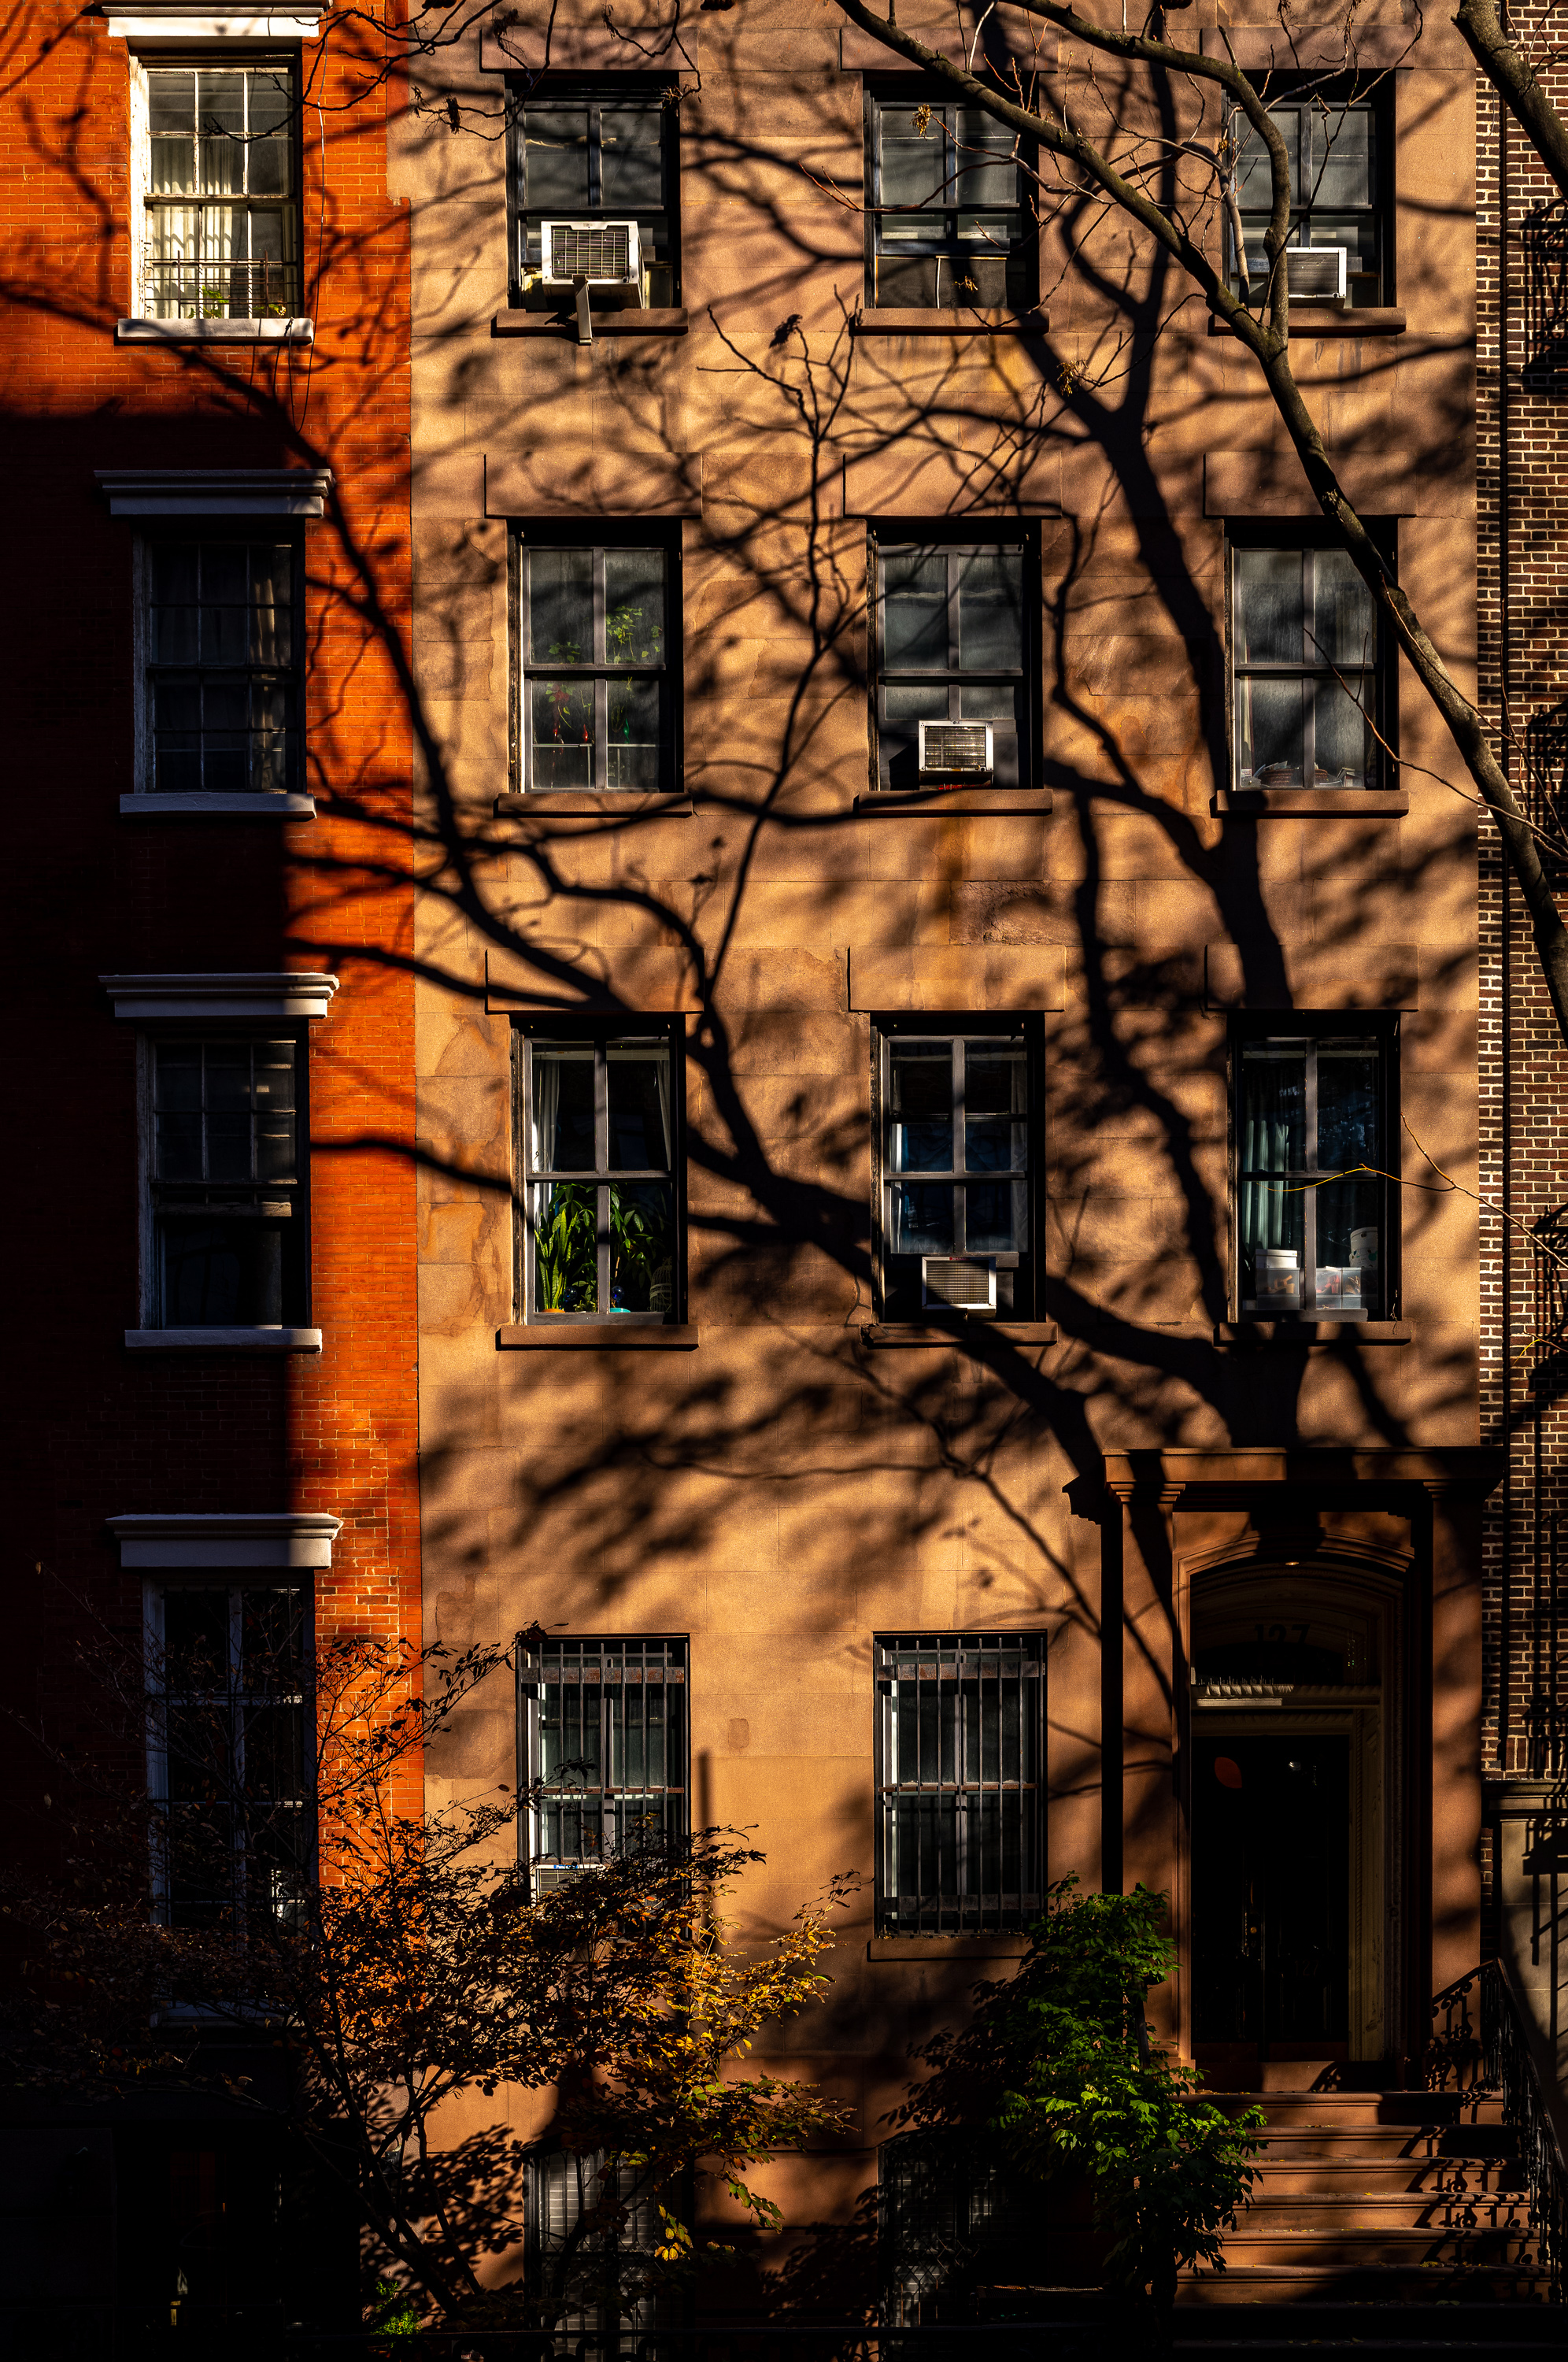
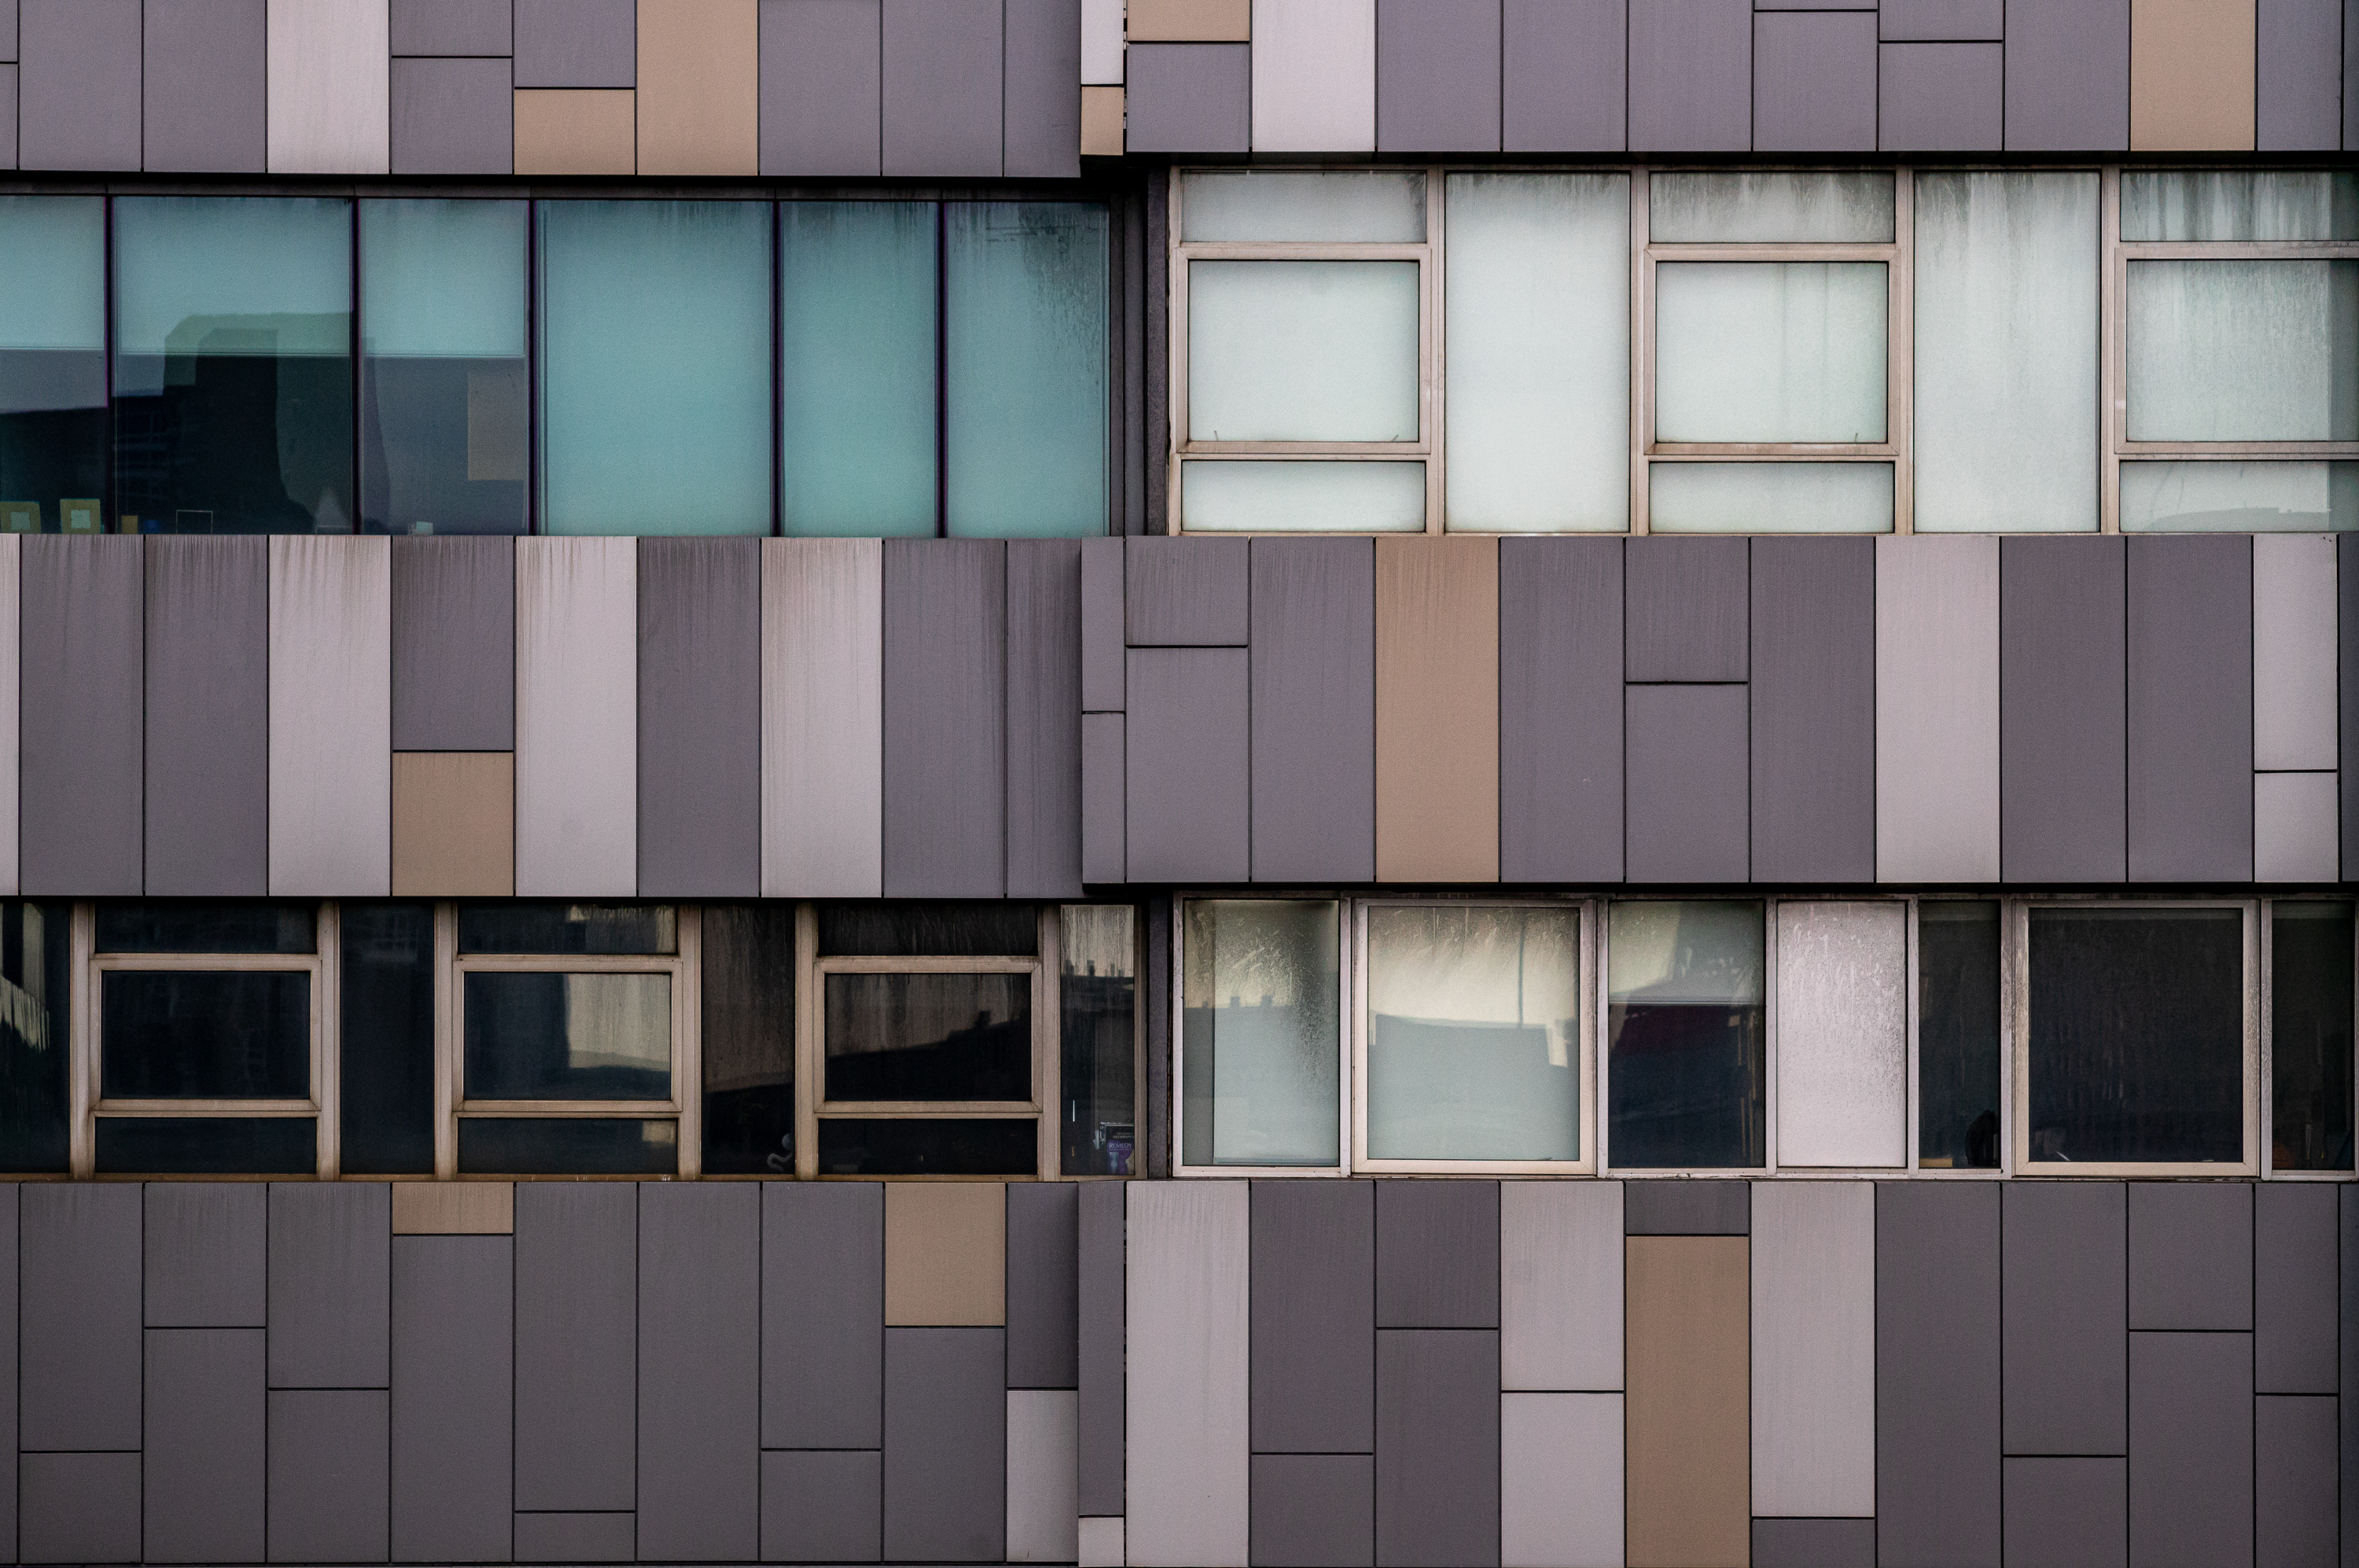
More information for perspective control
I’m a big fan of geometry in pictures, and am often drawn to windows, doors and patterns. But I’m not usually that fond of keystoning, the natural propensity of lines to converge towards a vanishing point when shooting off-perpendicular at a flat subject. An unexpected benefit to the M11’s massive resolution is when editing these types of images. Even after heavy perspective correction and cropping in Lightroom, I’m left with files in excess of 35 megapixels that look absolutely perfect.
If I were starting with far lower resolution, there wouldn’t be much left over for the final product. Maybe more than digital zooming / cropping, this is the biggest highlight for me and how I shoot. Curiously absent on the M11 is the recently-introduced Leica Perspective Control. Since the camera has the necessary in-built level gauge and no shortage of image processing horsepower, my guess is that we will see this feature rolled out in a future firmware update.
1/320th sec @ f/4 ISO 64
Noise reduction
Perhaps initially counterintuitive, I found that the M11 files respond better to noise reduction than ones from any other Leica camera to date. Where I shy away from dialing in more than 10-20 NR in Lightroom due to the destruction of fine detail, L-DNGs from the M11 can easily take up to 30-40 with almost no visible loss of acuity. And the noise is so effectively eliminated in shadow areas that it seems like magic. While I don’t know the exact technical reasons for this behavior, I’m speculating that because of the extremely high resolution and correspondingly tiny pixel size, noise can much more easily be isolated from detail in the debayering process.
Why bother with variable resolution?
As I was out shooting with the M11, I kept wondering when, or even if, I should drop the resolution from the full-on 60 megapixels L-DNG to 36 megapixels M-DNG or 18 megapixels S-DNG. Certainly, the new 60-megapixel BSI sensor is clearly the headlining feature of the M11 so why not take full advantage of all that glorious resolution? And yet, objectively, 36MP is sufficient for most applications. Heck, I’ve been more than satisfied with a solid 24 megapixels, long considered the sweet spot for digital capture.

1/350th sec @ f/8, ISO 250, M-DNG
But more is more. And after considering the possible reasons for shooting at lower resolution settings and evaluating a fair number of real-world images, I’d be inclined to leave the camera set to L-DNG and capture the maximum available quality.
1/320th sec @ f/5.6 ISO 640
File size
Admittedly, the high-res files take up more space, both on your SD card and computer’s drive, but not as much as you might think. Leica’s lossless DNG compression is remarkably efficient. Across the wide variety of images taken during testing, my L-DNG files ranged widely in file size from a mere 48MB to a whopping 90MB, averaging around 60MB. At 36 megapixels in M-DNG, my files varied from 26MB up to 52MB, with the average coming in about 40MB. Interestingly, and perhaps unsurprisingly, pictures taken at higher ISO settings had larger file sizes due to the less compressible fine noise in otherwise contiguous shadow areas. The takeaway though is that a 60MB file size for a 14-bit 60-megapixel image with 15 stops of dynamic range is quite a feat. Kudos to Leica for taming what could have been truly monstrous files.
1/320th sec @ f/2 ISO 400
Low light performance
While in theory, pixel binning to lower resolutions should lead to superior light gathering, increased dynamic range and improved high ISO performance, I didn’t notice any tangible difference in my real-world testing. I don’t evaluate images in a vacuum, nor do I give any thought to what results look like SOOC (straight out of camera). I’ve covered this topic ad nauseum in previous articles and reviews. Suffice it to say, I’m simply concerned with what I can achieve as a finished result. So, yes, all the images in this review have been processed and optimized. Why wouldn’t they be? I would never deliver unfinished photographs to a client or hang them on my wall. All that being said, once post-processed in Lightroom, I found no disadvantage to sticking with maximum resolution under every scenario I encountered in my time with the camera. Every time I switched to M-DNG, I could have easily been using L-DNG or vice versa. Bottom line – pick your resolution based on your intended use case for the final images, not the lighting situation. Of course, if Leica and/or Adobe do further optimization to the pixel-binned M-DNG and S-DNG, this recommendation might change.
1/40th sec @ f/8 ISO 10000 (L-DNG)
Computing power
I’d acknowledge that file handling of such large images could be problematic, but in 2022 this is a lame excuse. My recently-acquired 16-inch MacBook Pro with the fantastic M1 Max processor made light work of the files, as did my previous Dell XPS with an Intel 11th Gen i9 chip. If you’re spending this kind of coin on a high-end photographic tool like the M11, just get yourself a new computer. Apple silicon M1 Pro or M1 Max systems are awesome for photo editing, but so are PCs with the latest Intel and AMD CPUs. Chip manufacturers are now showing 30-40% generational speed gains, so, don’t let limited computing power be a reason to hold yourself back photographically.
1/160th sec @ f/2, ISO 3200
1/1250th sec @ f/2, ISO 64
Why no S-DNG?
During my testing, I never once committed to trying out S-DNG. Sure, I’ve been happy with 24 megapixels for the last decade, but have moved on from sub-20 megapixel cameras long before that. For me, limiting myself to 18 megapixels simply isn’t worth it. Along the same lines, I can’t speak to the quality of the in-camera JPGs, because I never shot any. I’m shooting with a Leica because I want the absolute best image quality. That means DNG only and in the case of the M11, L-DNG. I’m glad I tested out M-DNG and without looking at pixel size in the metadata or zooming in to 100% I couldn’t readily tell one from another. And that’s good news for those wanting the flexibility of variable resolution.
1/250th sec @ f/5.6 ISO 8000
Image Quality
Let’s get right to it, the image quality out of the M11 is simply stunning on every level. Detail, color, nuance. It’s all there. Here’s how it all breaks down. And keep in mind that all the images here and my evaluations of them are based on pre-release beta firmware.
1/350th sec @ f/5.6 ISO 250
ISO Performance
The base sensitivity of ISO 64 is a real ISO 64 and not a PULL as on other cameras. At this setting, the sensor will deliver its full 15-stops of dynamic range to handle even the most demandingly contrasty scenes. Still not enough to cope with shooting into a bright sunrise, a little auto-bracketing goes a long way here. Set the camera to three shots at 2-stop increments and the combined HDR DNG in Lightroom will have a jaw-dropping 19-stops of DR.
1/160th sec @ f/4 ISO 5000
Quality holds tight even as the ISOs climb with ultra-clean results up to ISO 6400. At this setting, I was still able to pull up my exposure +2 stops and still get an amazing image with just a bit of noise reduction. ISO 8000 continues to look awesome but has a tad less malleability. And going even further, ISO 10,000 still impresses with a uniform and tight grain that is all but invisible at any normal output size. ISO 12,500 is solid but with just a tiny bit more noise. Just like the M10-R, I’d say ISO 12,500 is the highest ISO I’d recommend without sacrificing detail due to noise, or excessive noise reduction. Sure, ISO 16,000, ISO 20,000 and even ISO 25,000 are all completely usable but will have some visible noise in the final output. Even though the M11 offers settings up to ISO 50,000, I’d avoid going past ISO 25,000.
1/125th sec @ f/2.8 ISO 8000
As I mentioned earlier, I’m blown away that the M11 at 60 megapixels can match the high ISO performance of the M10-R at 40 megapixels, while also offering a lower base ISO of 64 versus 100 on the M10-R.
Color
With a further refined color filter array mated to the BSI sensor, the M11 captures color beautifully. Even the most saturated reds, blues and yellows are deftly handled with plenty of adjustability in post processing. Nighttime scenes with tricky artificial lighting are as well represented as gorgeous daylight imagery. While editing my test images, I initially struggled a bit with the embedded M11 profile in Lightroom, but once I switched over to the Adobe Color profile, the colors and tones were easy to dial in. Just like other new camera introductions, once Adobe tweaks their camera profiles, I expect we’ll see even further improvements to the already wonderful color reproduction of the M11.
1/320th sec @ f/5.6 ISO 64
1/320th sec @ f/4 ISO 1600, M-DNG
1/160th sec @ f/4 ISO 320
Dynamic Range
Again, the M11 impresses when it comes to dynamic range and file malleability. Like most Leica cameras there is massive amounts of shadow detail, especially at lower ISO settings. But unlike those other cameras, the M11 can extract details from some extremely bright highlights.
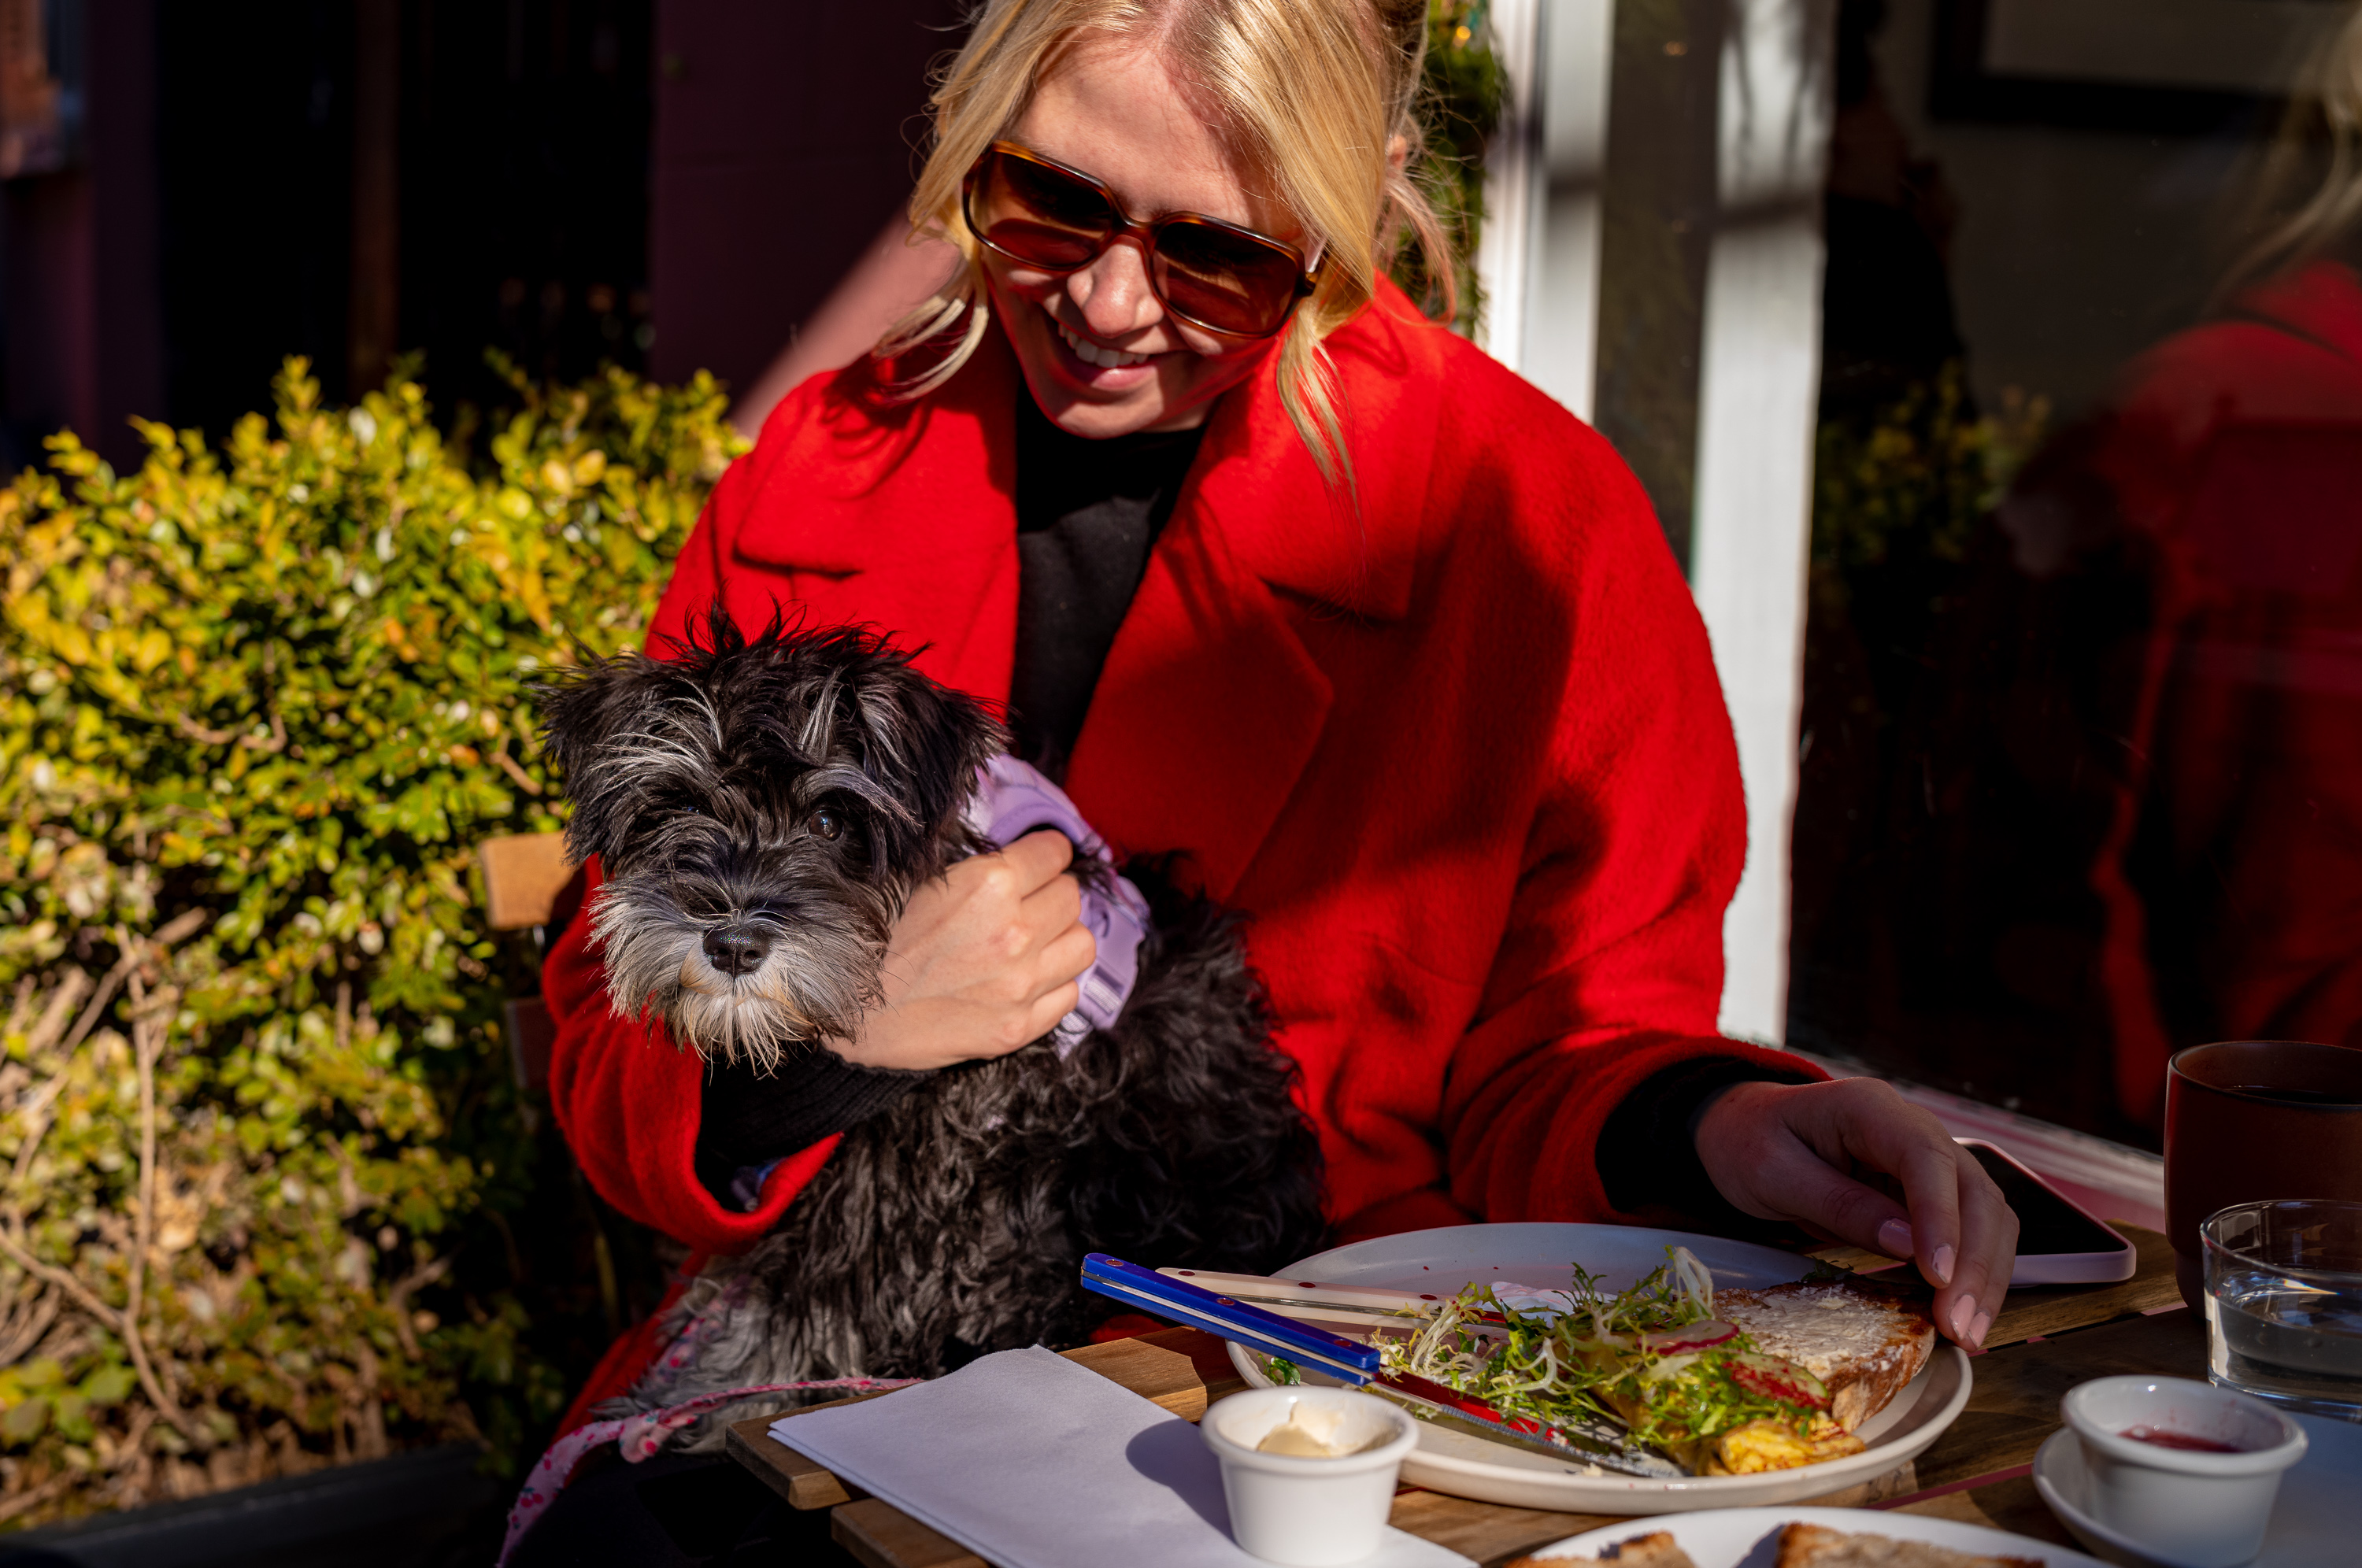
1/350th sec @ f/4, ISO 800, M-DNG
I took some quick snaps of a woman and her dog brunching outside in the West Village. As I walked away and reviewed the images on the LCD, her face was completely blown out by the direct sun. Flashing highlight warnings and all. I wrote these shots off, accepted the wasted opportunity and moved on. Only later in the computer when I pulled the exposure down two stops and saw how much information was in those blown highlights, did I truly appreciate the insane recovery ability of this camera. From LED signage at night in Times Square to near-specular highlights in contrasty daytime conditions, the M11 delivered.

1/320th sec @ f/2.8 ISO 64, -2 exposure in LR to recover highlights
Resolution and Detail
No surprise that the level of detail is off the charts. Paired with some of the highest-performing modern Leica M lenses like the 35 APO-Summicron, 75 Noctilux or 28 Summilux ASPH, to name but a few, the camera reveals minute details and textural nuance invisible to the naked eye. Sharpness across the frame and into the corners is exceptional. Take a look at this picture I snapped off the High Line with the 35 APO. I've also included a 100% crop sized to 3000x2000px below it. And, if you're still hungry for more pixel peeping, here's a full size 60MP export you can download. Go head and view it in Photoshop or print it out for closer evaluation.
1/750th sec @ f/4 ISO 64
1/750th sec @ f/4 ISO 64 (100% crop from previous picture)
I didn’t try any vintage or classic lenses this go-round as I was more focused on extracting every last bit of detail from the new sensor. It will be interesting to see how lower-resolving pre-modern lenses behave on such a high-megapixel sensor. Perhaps that would be an ideal use case for M-DNG, where resolution of the sensor and lenses can be more closely matched.
Besides the choice of what glass to mount on the M11, technique will be essential to take full advantage of the image quality on tap here. After all, the M11 is a manual focus camera. If you don’t nail focus, it doesn’t matter how many pixels you’re packing. Lenses need to be properly calibrated for rangefinder alignment. Thankfully, mine were, except for my historically trusty 90mm Elmarit-M. Wide-open, I couldn’t achieve sharp focus with the rangefinder. So, instead I relied on live view, which negated any mechanical calibration inaccuracies. Magnified to 100% with focus aid turned on, the new live view stabilization and higher res LCD made nailing critical focus a breeze. And while I didn’t have the pleasure of using the Visoflex 2 EVF for my testing, I’m sure that would have been an even better experience, and one that would have made me feel like less of a snapshotting tourist staring at the back of my camera. But it worked in the moment.
1/320th sec @ f/5.6 ISO 200
Accurate focus isn’t the whole story. With such high resolution and small pixels, you also need to pay attention to camera shake. The solution is easy given the M11’s excellent high ISO performance. I employed Auto ISO and set my shutter speed limit to 1/250th with a maximum ISO of 10,000. Nary a blurry picture in all my test shooting across a wide variety of lighting and subjects proves this approach works well. With these parameters, the camera will always give you adequate shutter speed at the lowest possible ISO for best image quality, ratcheting up sensitivity when you need it and dropping it down when you don’t. On the few occasions I wanted to take control of ISO for myself, a simple lift to unlock and a turn of the ISO dial did the trick. Once I got what I needed, I turned back to the red A and snapped it back down to lock in place.
1/200th sec @ f/4 ISO 64
Conclusion
The M11 builds on the successes of the M10 generation in every way that matters. Retaining the wonderful M body design with small refinements like button placement as well as more significant ones like the omission of the bottom plate, the M11 still evokes the iconic M aesthetic while improving where it makes the most sense.
The new 60-megapixel BSI CMOS sensor is a marvel and provides for unrivaled imaging prowess in any lighting situation with medium-format-like dynamic range. An upgraded Maestro III processor makes for a wonderfully responsive and snappy experience all around. The new high-capacity battery and astounding power efficiency deliver all-day battery life, while the USB-C port allows for on-the-go charging, or downloading directly to a computer. 64GB of internal memory has you covered for forgotten or full SD cards, or for backing up critical assignments. And the new 3.68MP OLED Visoflex 2 with electronic stabilization elevates the live view shooting experience. Electronic shutter, excellent high ISO, variable resolution, strong burst performance, upgraded Wi-Fi, Apple MFi certification. The list goes on.
And yet with all the upgrades, the M11 is still an M through and through. Pick the camera up and you immediately understand it. The elegant simplicity and the timeless nature are all there. It begs to have a lens mounted on it and be used, just like a Leica M should. Without a doubt, the M11 is worthy to bear its iconic and legendary name. If the M10 was the quintessential digital M, the Leica M11 is the ultimate digital M.
Fantastic images David! Thanks for sharing your thoughts on the M11 and sharing your shots. Spectacular!
David, I enjoy reading your reviews because they are so thorough, I come back years later and get answers to the subtle nuances difficult to find otherwise. Does the M11 have level adjustment? The original M10 didn’t and I am not seeing any information on this,
I’m struck by how much you used the 35 APO. It’s clearly a match made in Leica nirvana when you have the combination in hand. I presume it’s borderline addictive.
Dear David,
Your article is , as usual, brillant, like you !
You mentioned “Leica M11 with APO-Elmar-M 24mm f/3.8 ASPH” – This lens does not exist. You mind-Elmar-M 24mm f/3.8 ASPH , without APO. it is a detail, just to help you, for being near perfection
On my humble point of view, only 2 Leica M lenses are today catching and reaching 60 MB : Leica M APO 35mm and Leica M APO 50 mm. Rest of the range not. Old lenses M are compatible, but not giving the full power of the image quality we can expect.
If you have a look on files done with M11 and 1,4/ 21mm, you can see colorcast (see files on Leica Website from Oliver vogler – reference pm-64361-M11_f8_1-125sec_ISO64_2.tif ) That means we need a APO 21mm ASPH …. Like it will with the SL range.
Sensor Issue
For sure M11 is not using any more ST Micro sensor.
This new type of sensor – backlighted sensor – degrades very quickly over time, it is bright at first, then its lifespan deteriorates, by the colors we check it each time.
Leica’s choice to go so high in resolution, without having the full range of lenses and to choose an semi/amateur-type sensor, is a radical change in policy. Does “Quality over time” exist ? Fact is that the full range of M lenses does not cover full resolution of sensor. Your Elmarit 90mm will never be able to fill every pixel – for 60 MB, it will cover the surface, without giving the optical resolution for the 60MB. So does Leica has to rethink its whole range of lenses ? … If yes, They have work to do, without the Master, Peter Karbe has retired!
Your article(s) is always appreciate for the quality and the knowledge.
Warm regards
To give you also the chance to be near perfect.. “Resolution for the 60 MB” What does the “MB” stand for? Megabixel?
(XX Mega Pixels) + (XX Bit)s + (XX Blendenstufen) = XX Millions PBB
or in résumé XX MB 60 MB
For M11
60 MP + 14 Bits + 15 Blendenstufen
See in German language
mit einer Auflösung von 14 Bit erfasst und die Dynamik erreicht bis zu 15 Blendenstufen.
with this code, MB instead of MP you give attention to a mix of resolution/Color depth/ Dynamic range . For the M11 you see that the sensor is giving more than 15 for dynamic range, which is new. BR jj
This is not true and not how it works. Thorsten Overgaard describes this in detail.
It’s lens resolving power X camera sensor resolving power. Both are < 1.
When you have more camera sensor MP, you are increasing the image quality, Regardless of lens used.
Obviously, using a lens with higher resolving power will give you better image quality; but it’s not correct to say that 60MP is “too much” for let’s say a classic lens.
Also, the sensor deterioration claim is complete nonsense.
David,
You certainly covered a lot of ground with the M11 in a short period of time! Thanks for the terrific review and beautiful images. As I often do with your reviews, I’ll be coming back time and time again to re-read the information you have provided. As a side note, your images with the 18mm /3.8 APSH lens have put that one on my wish list – I hadn’t really considered buying it before now.
Best regards
nice review. now people can see what this camera is capable of in the right hands.
and it was nice to see some of my old haunts from the 80’s
Thank you very much for the very interesting review, and the absolutely stunning pics !
Hi David,
An extremely comprehensive and very helpful review with a wonderful selection of photos.
Great work!
Thanks also for your many Red Dot Camera Talk two hour videos which for me, based in the Philippines, provides by far the best source of information on Leica cameras.
All the best.
Hi David,
Thank you for the great review. In the article you indicate that the Pixel Binning is accomplished in hardware. Do you know if this results in a shorter sensor scan time? Might make sense to use the S-DNG setting to when using the rolling shutter.
Best,
Eric
Fantastic photos!
What about rolling shutter with electronic shutter? Someone should test at least people crossi g the street with electronic shutter to see how good/bad it is the distortion.
Get thee behind me, Satan! 😉
Thanks for such a comprehensive and persuasive review of the M11. I can afford the camera but can I afford a divorce…?
Anyway, it is a good thing (for me) that even after almost two years of M10M usage I am still so enamoured by it that my M240 has mostly been gathering dust on the shelf.
Any idea on battery life when visoflex is on the M11 the whole time?
David,
Your narrative erased any doubt I may have had about upgrading from an M10 to the M11, and as if I needed confirmation your photos provided further proof that the M11 is an outstanding camera taking the capabilities of the M10 to a whole new level.
I have placed an order, and now I pray for patience while awaiting delivery.
David, did you notice any banding when using the electronic shutter in artificial light. My X-Pro2 is prone to this (my Digital Ms are not, obviously). It’s a problem that I wasn’t aware of until I just about ruined a shoot in a seemingly routine location with fluorescent lighting.
Thank you David for another excellent in-depth review. Josh and you are the go-to experts on anything Leica. As an M7, M10 and Q2M owner I can sense an upcoming inanition of my wallet 😉 although at the expense of the M10.
One thing puzzles me though. I guess it’s fair to say that the 60MP sensor is probably (based on specs and pixel pitch) a Sony sensor also used in the A7RIV and in Fuji’s X-T4 and GFX100 (although ‘cut’ to different sizes). Obviously, Leica customized the micro-lenses and filters and has a different processor and processing algorithms, but Sony also offers triple raw resolution in its A7RIV. I assume that also works with pixel binning as there’s no sign of using only part of the sensor for the lower res settings (otherwise there would be a crop factor). However, Sony doesn’t mention increased high ISO-performance for lower res settings. What does Leica do differently with this sensor and pixel binning? Just very curious…
Hey guys… is there any explanations why the old visoflex does not work on the new M11, but the new visoflex works on the M10? i dont understand, why leica is forcing me to buy the new visoflex, when i already have one.
It would be nice if the unedited DNG files for the great photos were available for download. Otherwise no one can make their own picture of the quality of the shots. JPGs are unfortunately not suitable to qualitatively judge e.g. the dynamic range or the sharpness
amazing review! do you have the M11 presets for Lightroom?
There are so many photography YouTubers – some with enormous subs numbers – who are can produce professional looking videos, yet who have no discernible artistic ability when it comes to actually making pictures. As a result, so much of what I see doesn’t rise above the level of casual snapshots. The Dunning-Kruger effect demonstrated for all.
But I have to say, David, looking at your work is incredibly refreshing. Not only is this about as thorough a technical review of the M11 as one could hope for, the photos are stunning. Seeing so many beautiful shots in this review is not just refreshing, it’s inspirational. I love NYC and it gives me some great ideas for my next trip. Thanks.
Wonderful review as always, David. Just one observation from other reviews and tests – the noise handling of the M11 in high iso seems clearly worse than M10-R. https://www.youtube.com/watch?v=3-z5LuOOnBU&t=1033s
Great review and astonishing images! Most reviews i have read have terrible, flat images. I have never seen a review with so many great images. Best Regards
Forgot to ask, have you done a similarly comprehensive Q2 Review, I would be interested in reading? Best Regards
The M11 does an incredible job at capturing light and makes you feel like you’re creating a scene rather than just snapping a shot. Along with the nearly $4,500 Leica Summilux-M 50mm f/1.4 lens that Leica provided me, the colors and light that the M11 produced felt like the closest replication to what my eyes saw.
Nice photos; nice M. But…”ultimate”? I do not think that word means what you think it means. I’m confident that Leica will make another.
Cool! The photos are undoubtedly excellent, perfectly capturing the atmosphere. You might want to try processing them further using some AI tools. Here’s a website with a good selection: https://topaigenerators.com/. Looking forward to your new achievements. Good luck!
I purchased this camera in silver in December 2022 and returned it to the store the following February.
Unfortunately for me, this camera did not live up to my expectations and was extremely disappointing.
The biggest problem is the color, this horrible magenta color that irritates my eyes! On a gray, overcast winter day, this camera makes the snow look pink. I understand that you can turn the sliders in each photo and get the right color in the photo, but why do I need a camera like this?
The cheapening of the camera design (lack of the usual metering mechanism, cheaper aluminum, lack of a bottom plate) and even the packaging shows that the new owners of the company began to value profit more than product quality.
The M10 generation will go down in history as the last true M…
EVERY new M generation has comments like this! I laugh because I read similar comments when the M10 came out… “It’s not like the M9, or even M240,” “I returned mine,” blah blah blah.
If you don’t know how to set WB, then you can get magenta looking greys. This is user error, not camera error. Or if you are looking for SOOC JPEGs to post on Instagram, this is not the camera for you.
Aluminium top plate is not a decision to cut cost. I prefer the lighter weight. If you want brass, get the silver for the same price!
Packaging is just as great as the M240 and M10 – no idea what you are talking about here.
You are writing complete nonsense. M11 has a very bad white balance, even manual temperature setting does not solve the purple color issue. This is a Leica error and defect. Any Leica camera (m8 – m10) is better in color.
In the Leica M11 review, a comparison can be made with the Hydrogen Executor’s innovative technology, which offers a unique approach to image processing, enhancing the photographer’s ability to capture stunning visuals with unparalleled clarity.
The article does not mention the word AWB, white balance, even once. The main problem with the M11 is color. Lots of purple, bad auto white balance in daylight. In general, the M11 is the worst camera in color out of all the digital Leica cameras. Therefore, there should be only one piece of advice – buy a monochrome camera M11M to work with the excellent Leica lenses, but not the M11.